manuals.online logo
Brands
  1. Home
  2. •
  3. Brands
  4. •
  5. Zennio
  6. •
  7. Controllers
  8. •
  9. Zennio ZoningBOX 6 Guide

Zennio ZoningBOX 6 Guide

© Zennio Avance y Tecnología S.L. Edition 7 Further information www.zennio.com Page 1/2
ZoningBOX 6
Ducted Air Zoning Actuator for up to 6 Zones
ZCL-ZB6 TECHNICAL DOCUMENTATION
FEATURES
•6 outputs for 12 or 24 V motorised grilles*
•Zoning module allowing the control of up to 12 zones and up to 2
zone groups
•Manual control through buttons and status indicator LED
•230 V supply required for feeding of the 4 outputs
•Total data saving on power failure
•Integrated KNX BCU (TP1-256)
•Dimensions 67 x 90 x 79 mm (4.5 DIN units)
•DIN rail mounting according to IEC 60715 TH35, with fixing clamp
•CE, UKCA directives compliant (marks on the right side)
* Before connectingthe deviceto the facility, it must beassuredthat the switch
position agrees with the grille’s voltage.
1. 230 V input
2. Power supply LED
3. Grille control button
4. Grille status LED
5. Grille outputs
6. 12/24 V switch*
7. Programming/Test button
8. Programming/Test LED
9. KNX connector
10. Fixing clamp
3
4
6*
9
7
1
5
2
8
10
Figure 1: ZoningBOX 6
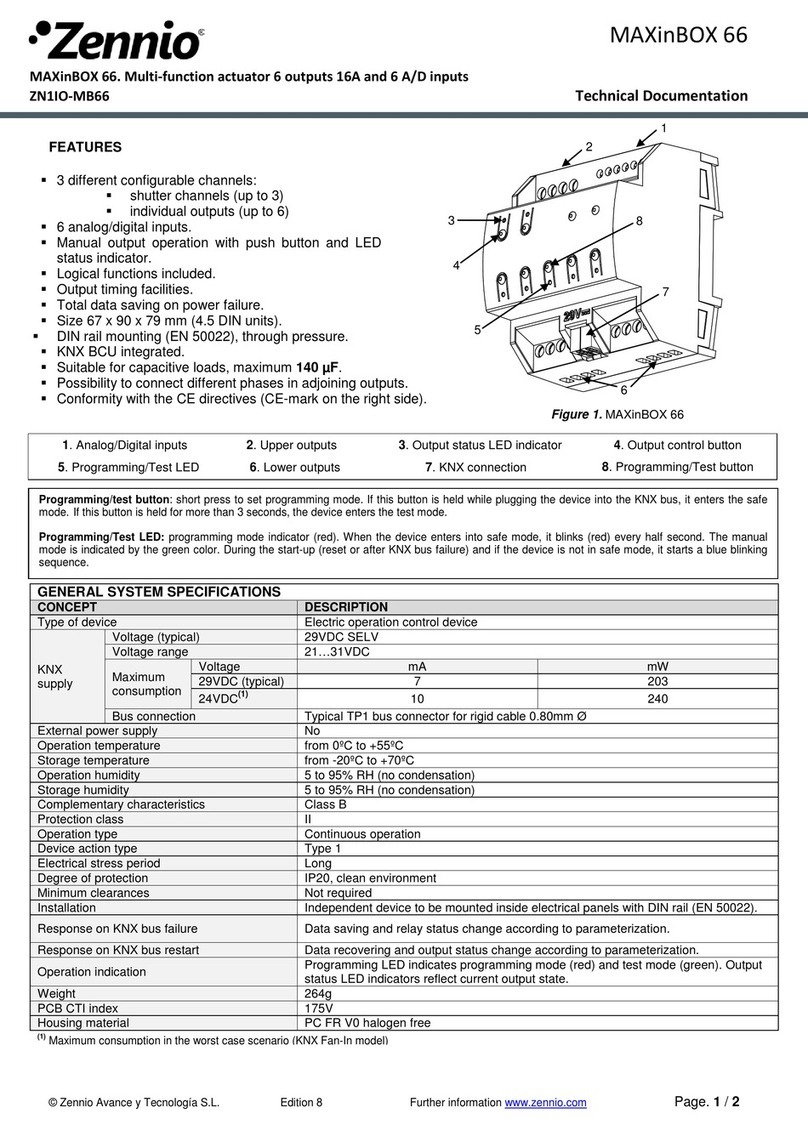
Programming/Test button: short press to set programming mode. If this button is held while plugging the device into the KNX bus, it enters the safe
mode. If this button is held for more than 3 seconds, the device enters the test mode.
Programming/Test LED: programming mode indicator (red). When the device enters the safe mode, it blinks (red) every half second. The manual mode
is indicated by the green color. During the start-up (reset or after KNX bus failure) and if the device is not in safe mode, it emits a red flash.
GENERAL SPECIFICATIONS
CONCEPT
DESCRIPTION
Type of device
Electric operation control device
KNX supply
Voltage (typical)
29 VDC SELV
Voltage range
21-31 VDC
Maximum
consumption
Voltage
mA
mW
29 VDC (typical)
6
174
24 VDC¹
10
240
Connection type
Typical TP1 bus connector for 0.8 mm Ø rigid cable
External power supply
230 VAC 50/60 Hz
Operation temperature
-5 .. +45 °C
Storage temperature
-20 .. +55 °C
Operation humidity
5 .. 95%
Storage humidity
5 .. 95%
Complementary characteristics
Class B
Protection class
II
Operation type
Continuous operation
Device action type
Type 1
Electrical stress period
Long
Degree of protection
IP20, clean environment
Installation
Independentdevice to be mounted inside electrical panels with DIN rail (IEC
60715)
Minimum clearances
Not required
Response on KNX bus failure
Data saving according to parameterization
Response on KNX bus restart
Data recovery according to parameterization
Operation indicator
Programming LED indicates programming mode (red) and test mode
(green). Power indicator LED (green) represents correct feeding. Each
output LED indicates its status (fixed = open grille/dumper; off = closed
grilled/dumper; flashing = error, see Fig. 2)
Weight
201 g
PCB CTI index
175 V
Housing material
PC FR V0 halogen free
¹ Maximum consumption in the worst-case scenario (KNX Fan-In model).
© Zennio Avance y Tecnología S.L. Edition 7 Further information www.zennio.com Page 2/2
SAFETY INSTRUCTIONS ANDADDITIONAL NOTES
•Installation should only be performed by qualified professionals according to the laws and regulations applicable in each country.
•Do not connect the mains voltage nor any other external voltage to any point of the KNX bus; it would represent a risk for the entire
KNX system. The facility must have enough insulation between the mains (or auxiliary) voltage and the KNX bus or the wires of other
accessories, in case of being installed.
•The facility must be equipped with a device that ensures the omnipolar sectioning. Installation of a 10 A mini-circuit-breaker is
recommended. To prevent accidents, it must remain open in case of manipulation of the device.
•The device has a short-circuit protection fuse that, in case of activation, should only be rearmed or replaced by the Zennio technical
service.
•This device contains a security short-circuit proof transformer.
•Once the device is installed (in the panel or box), it must not be accessible from outside.
•Keep the device away from water (condensation over the device included) and do not cover it with clothes, paper or any other material
while in use.
•The WEEE logo means that this device contains electronic parts and it must be properly disposed of by following the instructions at
https://www.zennio.com/en/legal/weee-regulation.
OUTPUTS SPECIFICATIONS AND CONNECTIONS
CONCEPT
DESCRIPTION
Number of outputs
6
Output type / Voltage
Solid state switching device / 12 or
24 VDC (selected by switch)
Maximum values
per output
Quantity of grilles²
2
Current (RMS)
750 mA
Short-circuit protection
YES
Overload protection
YES
Connection method
Screw terminal block (0.5 Nm max.)
Cable cross-section
0.5-2.5 mm² (IEC) / 26-12 AWG(UL)
²This value could be more restrictive depending on the current consumed by the grille.
EXTERNAL POWER SUPPLY SPECIFICATIONS AND CONNECTIONS
CONCEPT
DESCRIPTION
Power supply
protection fuse
Voltage
250 V
Current
4 A
Response type
F (Fast acting)
Connection method
Screw terminal block (0.5 Nm max.)
Cable cross-section
1.5-4 mm² (IEC) / 26-10 AWG (UL)
WIRINGDIAGRAMS
Figure 2: Error notification through
grille status LED
Notes:
•The simultaneous connection of a grille to several outputs nor the connection of 12 VDC and 24 VDC grilles at the same
time is not allowed.
•In case of connecting two grilles to an output, those must have similar consumption characteristics.
•The polarity of the connection must be checked. This can be done, under the Test On mode, through the grille control
buttons: the first press should imply an attempt to open the grille, while the second press should cause an attempt to close
it. Once the device is parameterized, switched-on LEDs should correspond to open grilles.
•After connecting a grille, a synchronisation must be provoked (for example, disconnecting and connecting the KNX bus).
•Compatibility of grilles must be checked following the next steps for a complete verification:
1. The grille must be connected to an enabled output, without other grilles in that output, (Please be careful to ensure the
polarity is respected).
2. The device must be fed with auxiliary power and then connected to the KNX bus.
3. The grilles connected to outputs try a sequential opening movement. In positional mode, a maximum time of 25.5 s to
complete the opening movement is allowed. In open/close mode, the maximum time is 3.5 s to complete the opening
movement.
4. Next, the grilles connected to outputs try a sequential closing movement. If the grille does not complete the closing
movement, it is not suitable for ZoningBOX.
230 VAC
50/60 Hz
Grille
Grille
Grille
Two grilles per output
connection schematic
One grille per output
connection schematic
Attaching ZoningBOX 6 to DIN rail:
Removing ZoningBOX 6 from DIN rail:
Connectionerror M x
OverloadM x
Power supply failure
LxLxL1 L2 L3 L4 L5 L6
0,5
1,0
1,5
2,0
2,5
3,0
3,5
Description:
LED On
LED Off
Lx: Grille xLED
Time (s)
Time (s)
Description:
Lx: LED output x
LED Off
LED On

Other manuals for ZoningBOX 6

2

This manual suits for next models

1

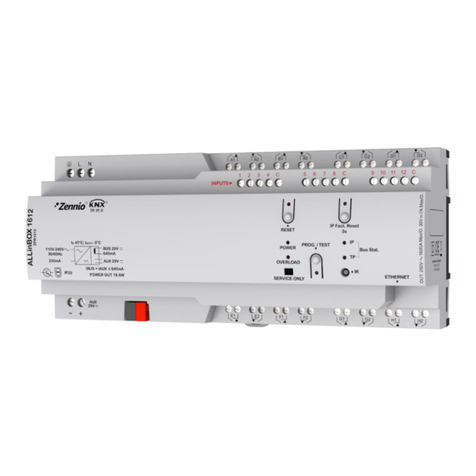
Other Zennio Controllers manuals

Zennio HeatingBOX 24V 4X User manual

Zennio

Zennio HeatingBOX 24V 4X User manual

Zennio Tecla 55 User manual

Zennio

Zennio Tecla 55 User manual

Zennio MAXinBOX SHUTTER 8CH v3 Guide

Zennio

Zennio MAXinBOX SHUTTER 8CH v3 Guide

Zennio ZCL-FC010F Guide

Zennio

Zennio ZCL-FC010F Guide

Zennio FANinBOX 230V 1CH Guide

Zennio

Zennio FANinBOX 230V 1CH Guide

Zennio MAXinBOX FC 0-10V FAN User manual

Zennio

Zennio MAXinBOX FC 0-10V FAN User manual

Zennio ALLinBOX 1612 Guide

Zennio

Zennio ALLinBOX 1612 Guide

Zennio MAXinBOX 66 Guide

Zennio

Zennio MAXinBOX 66 Guide

Zennio MAXinBOX 16 Plus Guide

Zennio

Zennio MAXinBOX 16 Plus Guide

Zennio FANinBOX 230V 1CH Guide

Zennio

Zennio FANinBOX 230V 1CH Guide

Zennio ZCL-MCC User manual

Zennio

Zennio ZCL-MCC User manual

Zennio ZIO-IB24 User manual

Zennio

Zennio ZIO-IB24 User manual

Zennio MAXinBOX User manual

Zennio

Zennio MAXinBOX User manual

Zennio MINiBOX 20 User manual

Zennio

Zennio MINiBOX 20 User manual

Zennio ZoningBOX 6 Guide

Zennio

Zennio ZoningBOX 6 Guide

Zennio MAXinBOX 66 User manual

Zennio

Zennio MAXinBOX 66 User manual

Zennio MAXinBOX 66 v2 Guide

Zennio

Zennio MAXinBOX 66 v2 Guide

Zennio MINiBOX 0-10V X3 User manual

Zennio

Zennio MINiBOX 0-10V X3 User manual

Zennio MAXinBOX SHUTTER 4CH User manual

Zennio

Zennio MAXinBOX SHUTTER 4CH User manual

Zennio IRSC Plus User manual

Zennio

Zennio IRSC Plus User manual

Zennio MAXinBOX 24 v2 Guide

Zennio

Zennio MAXinBOX 24 v2 Guide

Zennio MAXinBOX 66 User manual

Zennio

Zennio MAXinBOX 66 User manual

Zennio ZN1VI-TPZAS User manual

Zennio

Zennio ZN1VI-TPZAS User manual

Zennio LUMENTO X3 Guide

Zennio

Zennio LUMENTO X3 Guide

Popular Controllers manuals by other brands

Linear Technology LTC3210 quick start guide

Linear Technology

Linear Technology LTC3210 quick start guide

Omron E5CN-HT instruction manual

Omron

Omron E5CN-HT instruction manual

Sunlover SL3 instructions

Sunlover

Sunlover SL3 instructions

SICK Flexi Classic series operating instructions

SICK

SICK Flexi Classic series operating instructions

Onbon OVP-M1X user manual

Onbon

Onbon OVP-M1X user manual

Joy-it MaKey quick start guide

Joy-it

Joy-it MaKey quick start guide

Sealey ECS350 instructions

Sealey

Sealey ECS350 instructions

SIZZIX eclips2 user guide

SIZZIX

SIZZIX eclips2 user guide

SEW-Eurodrive MOVIDYN manual

SEW-Eurodrive

SEW-Eurodrive MOVIDYN manual

GOWIN DK-VIDEO-GW2A18-PG484 Application guide

GOWIN

GOWIN DK-VIDEO-GW2A18-PG484 Application guide

Emerson Fisher SR5 instruction manual

Emerson

Emerson Fisher SR5 instruction manual

Carel uPC Technical leaflet

Carel

Carel uPC Technical leaflet

Mangrove Jack's 71140 instructions

Mangrove Jack's

Mangrove Jack's 71140 instructions

Milton Roy LMI Liquitron DP5000 Series instruction sheet

Milton Roy

Milton Roy LMI Liquitron DP5000 Series instruction sheet

Fortinet FortiManager 4000E quick start guide

Fortinet

Fortinet FortiManager 4000E quick start guide

intech 21 OPLC-2100 Operation manual

intech 21

intech 21 OPLC-2100 Operation manual

AlfaRadio AlfaSpid MD-01 manual

AlfaRadio

AlfaRadio AlfaSpid MD-01 manual

Intermatic EM1400 SERIES installation guide

Intermatic

Intermatic EM1400 SERIES installation guide

manuals.online logo
manuals.online logoBrands
  • About & Mission
  • Contact us
  • Privacy Policy
  • Terms and Conditions

Copyright 2025 Manuals.Online. All Rights Reserved.