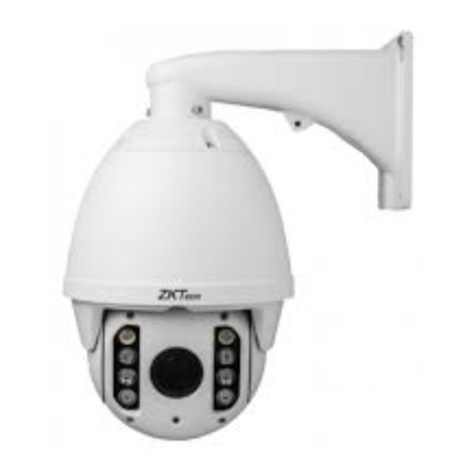
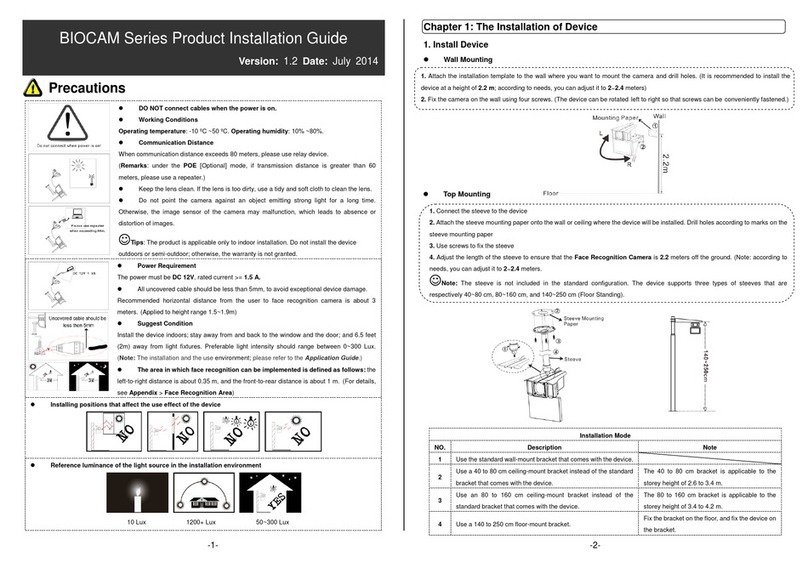
ZKTeco 8000 Series User manual

1
USER MANUAL
Network Camera
Version: 1.0
Date: 2018.09

Statement
The user manual is for reference only. Detailed information is subject to the actual products.
The product and description in this document are subject to change at any time without prior notice.
Screenshots included in the manual are extracted from other machines and are for reference only.
Should you have any questions, or if you need the latest firmware and additional information, please contact
with the after-sales service department.
Precautions
The following describes proper use of the device and precautions against risks as well as measures that need
to be strictly followed to avoid property damage.
Please use the cameras in an environment where the temperature and humidity are within the recommended
range. Check if the power supply works normally before operation.
Do not hit or drop the product.
Do not install the product at a dusty or moist location, or a place covered by strong electromagnetic radiation.
Do not allow liquid leaking into the device. When you do not use the product, please place a dust cover on
the image sensor.
Do not disassemble the product without authorization.

I
Contents
1 Login Interface .......................................................................................................................................................................1
2 Live Videos...............................................................................................................................................................................3
2.1 Full-screen Preview .................................................................................................................................................3
2.2 Electronic Zoom-in..................................................................................................................................................3
2.3 PTZ control .................................................................................................................................................................4
3 Playback....................................................................................................................................................................................6
4 File Management ..................................................................................................................................................................7
4.1 Search...........................................................................................................................................................................7
4.2 Preview Capture .......................................................................................................................................................7
4.3 Playback Capture .....................................................................................................................................................8
4.4 Playback Backup.......................................................................................................................................................8
4.5 File Capture ................................................................................................................................................................8
4.6 Preview Videos..........................................................................................................................................................8
4.7 SD Card Link Capture..............................................................................................................................................8
4.8 Backup Video Play....................................................................................................................................................8
5 Setup..........................................................................................................................................................................................9
5.1 Device Info..................................................................................................................................................................9
5.2 QR Code.................................................................................................................................................................... 10
5.3 PTZ Settings ............................................................................................................................................................ 10
5.4 Time Settings.......................................................................................................................................................... 11
5.5 Audio Settings........................................................................................................................................................ 12
5.6 Display Settings..................................................................................................................................................... 12
5.7 Streams ..................................................................................................................................................................... 13
5.8 ROI Settings............................................................................................................................................................. 14
5.9 Video Parameters.................................................................................................................................................. 15
5.10 Motion Detection ............................................................................................................................................... 16
5.11 Video Tampering ................................................................................................................................................ 18
5.12 Privacy Zones ....................................................................................................................................................... 19
5.13 Target Count ........................................................................................................................................................ 19
5.14 Object Left / Lost................................................................................................................................................. 21
II
5.15 Area Detection..................................................................................................................................................... 22
5.16 Line Crossing........................................................................................................................................................ 24
5.17 Video Plan.............................................................................................................................................................. 25
5.18 Network Settings ................................................................................................................................................ 26
5.19 Management Platform ..................................................................................................................................... 27
5.20 Multicast Configuration ................................................................................................................................... 27
5.21 DDNS Settings ..................................................................................................................................................... 28
5.22 UPnP Settings ...................................................................................................................................................... 29
5.23 Email Settings ...................................................................................................................................................... 29
5.24 Alarm Input........................................................................................................................................................... 30
5.25 Alarm Output ....................................................................................................................................................... 31
5.26 Exception............................................................................................................................................................... 32
5.27 User Management.............................................................................................................................................. 32
5.28 System Update .................................................................................................................................................... 33
5.29 Auto Reboot ......................................................................................................................................................... 34
5.30 Storage Management....................................................................................................................................... 34
5.31 Restore.................................................................................................................................................................... 35
5.32 Local Settings....................................................................................................................................................... 35
5.33 Developer.............................................................................................................................................................. 36
6. Log.......................................................................................................................................................................................... 37
7 Alarm....................................................................................................................................................................................... 38
8 Exit ........................................................................................................................................................................................... 38

1
1 Login Interface
Input the IP address of the front-end device in the IE browser (the default IP address is 192.168.1.188) to access the
login interface as shown in the following picture:
When using the IP camera for the first time, you must install the Active X in advance. Click on the “Download Plugin”
on the upper left corner of the login interface as shown in the figure below to download and install Active X; the
system will then pop up an installation control message. Click on "Run" and install ActiveX according to prompts.

2
After installing Active X, click on “Login”, then the system will prompt a message asking whether or not to change
the password, as shown in the following figure:
User Name: admin (default setting).
Password: 123456 (default setting); users may modify the password according to the instructions.
Plugin Type: IE plugin or Flash plugin. If you use IE browser, please select IE Plugin. If you use other browsers, select
Flash plugin. (Note: Select Flash plugin without installing Active X).
Language: English and simplified Chinese.
Note: If a user forgets his/her password, one may click on , then the following window will pop
up. The default user name is “admin”. Click on “Next” to restore the password to factory settings according to the
prompt.

3
2 Live Videos
After logging in, you will enter the live video interface, as shown in the following figure.
Note: You have to insert a TF card first to access the full function display interface; otherwise, the system will
only show you the simplified version.
2.1 Full-screen Preview
Click on the full-screen icon in the lower right corner to get a full-screen preview. Or, you may
right-click to access (and exit) the full screen display on the preview interface
2.2 Electronic Zoom-in
You may zoom in the preview image by scrolling the mouse wheel, as shown in the following figure:

4
2.3 PTZ control
PTZ Control: To use eight directional keys to change the image orientation or click on the “AUTO” button to allow
auto-rotation.
Zoom In/ Out: To adjust the extent of zooming in or out.
Focus: To adjust the size of focus.
Iris: To adjust the size of aperture.
Speed: To use the slider to regulate the PTZ speed.
Brightness: To adjust the brightness of the screen.
Contrast: To adjust the contrast of the screen.
The arrow is used to restore factory settings.
Set a Pre-set Point: Set a pre-set point by using directional keys on the PTZ control to rotate the camera to the
desired location, then select a pre-set value from the pre-set point drop-down list, and then press the button.
Call a Pre-set Point: Call a pre-set point by selecting a pre-set number to be called from the pre-set point
drop-down list, and then press the button.
Voice Intercom: To enable or disable voice intercom.
Capture: To take screenshots. Click on the icon, the system will pop up a storage path automatically.
Full Screen: To display full-screen video preview.
Capture
Voice Intercom
Full Screen
Record

5
Record: To allow or disallow previewing records.
Note: X indicates the function is off or disabled.

6
3 Playback
Click on “Playback” to access the playback interface; click on the icon , select the date and time of
videos to be retrieved, then click on the icon , the system will then search for the corresponding videos
automatically, as shown in the following figure:
Start: Start the playback.
Stop: Stop the playback.
Slow: Slow down the playback speed (1/2, 1/4, 1/8, 1/16 times).
Fast: Speed up the playback speed (2, 4, 8, 16 times).
Snapshot: Take snapshots in a playback channel.
Backup: Back up videos in a playback channel.
Frame Play: Play by single frame.
Full Screen: Play videos back in full screen.
Voice: Adjust the volume of playback audio.
Double-click on the slider to play the video, or you may click the “Start” button to start playing the videos back.

7
4 File Management
Note: You have to insert a TF card first to access the full function display interface; otherwise, the system will
only show you the simplified version.
4.1 Search
Input a concrete time, and click on the button, the lower part of the screen will display the
searched images and videos. You may double-click on the searched results to access files you need.
Note: You may modify the storage paths of the selected videos or images. A short description will
be given below. For more details, please go to Setup Local Settings.
4.2 Preview Capture
To review captured images from video preview; you may search for and double click to obtain images you need.

8
4.3 Playback Capture
To review captured images from video playback; you may search for and double click to obtain images you need.
4.4 Playback Backup
To retrieve video files; you may search for and view videos files.
4.5 File Capture
To review captured images from the file management interface; you may search for and double click to obtain the
images you need.
4.6 Preview Videos
To preview videos recorded; you may search for and double click to access the videosyou need.
4.7 SD Card Link Capture
To review snapshots from a SD card; you may search for and double click to access the videos you need.
4.8 Backup Video Play
Start: Click on the button to play a selected backup video.
Stop: Click on the button to stop playing the video.
Slow: Click on the button to slowly play the video back.
Fast: Click on the button to fast-forward the video.
Frame: Click on the button to play the video by frame.
Capture: Click on the button to take a snapshot of the display during playback.
Voice: Click on the button to turn sound on or off during playback.

9
5 Setup
Note: You have to insert a TF card first to access the full function display interface; otherwise, the system will
only show you the simplified version.
5.1 Device Info
Below is the Device Information interface of the IP camera:
Device Name: Edit the camera name.
Device Type: Display the device type.
Serial No: Display the product serial number.
Firmware Version: Display information about the firmware version.
Hardware Version: Display the version number of the hardware.
Format: Select between PAL and NTSC image scanning system.
After completing all parameters settings, click on “Save”, then the settings will take effectimmediately.

10
5.2 QR Code
The display interface of QR code of the IP camera is shown as below. IOS users may scan the IOS APP QR code to
access the Antarview Pro downloading interface; Android users may scan the Android APP QR code to access the
Antarview Pro downloading interface. Clients who use Antarview Pro mobile may directly scan the Device ID QR
code to log in.
Note: The QR icon correspond to the device ID will display only after enabling the relevant agreement on
platform management interface. Users may use QR codes to download our mobile application: Antarview Pro.
5.3 PTZ Settings
Below is the PTZ Settings interface of the IP camera:
Protocol: multiple protocols available.
Address: 0-255 address codes available.

11
Baud Rate: diverse baud available.
Operation Method: Connect the IP high speed dome at the A/B port; set a protocol and baud; then control
the high-speed dome on the IPC preview interface.
After completing all parameters settings, click on “Save”, then the settings will take effect immediately.
5.4 Time Settings
Below is the Time Settings interface of the IP camera:
Device Time: Set and display the current time of the camera.
Time Zone:Different time zones are available.
GMT: Fine-tune the time.
NTP Enable: Click to enable or disable NTP.
Server Address: Input the IP address of the NTP server.
Interval: Input the interval of time.
After completing all parameters settings, click on “Save”, then the settings will take effect immediately.

12
5.5 Audio Settings
Below is the Audio Settings interface of the IP camera:
Audio Source: Select the audio input mode between LineIn and MicIn.
Input Volume: Set the input volume which ranges from 0 to 100; the default settings is 50.
Output Volume: Set the output volume which ranges from 0 to 100; the default settings is 50.
After completing all parameters settings, click on “Save”, then the settings will take effect immediately.
5.6 Display Settings
Below is the Display Settings interface of the IP camera:
Name: Modify the appointed channel name.
Main Stream OSD: Modify the appointed font of the OSD in main stream preview channel.
Sub Stream OSD: Modify the appointed font of the OSD in sub stream preview channel.

13
Third Stream OSD: Modify the appointed font of the OSD in third stream preview channel.
Multi OSD: Add a multi-user-defined OSD, which you may choose whether to display.
Time Format: Select different time format for the appointed channel.
Date Format: Select different date format for the appointed channel.
Brightness: Adjust the brightness for the appointed channel.
Contrast: Adjust the contrast for the appointed channel.
Saturation: Adjust the saturation for the appointed channel.
Hue: Adjust the hue for the appointed channel.
Cyclotron Arrow: Restore the settings of bright, contrast, saturation and hue to the default parameters.
Name: Set the location of the title for the appointed channel.
Date: Set the location of the date for the appointed channel.
Multi OSD: Set the position of multi OSD.
OSD Color: Set the color of the OSD font.
OSD Font: Select OSD font.
After completing all parameters settings, click on “Save”, then the settings will take effectimmediately.
5.7 Streams
Below is the Streams setting interface of the IP camera:
Stream Type: Main stream/ sub-stream/ third stream.
Video Stream: Complex stream/ video stream.
Resolution: Several resolutions available (Note: Based on the defaulted resolution of different products).
Frame Rate: Select different frame rates from the drop-down list; the default settings is “Full Frame”.

14
Video Encode: H.264/ H.265/ MJPEG.
Encode level: Main profile/ baseline/ high profile.
I frame Interval: Set the interval size of I frame.
Bitrate Type: Constant/ variable.
Bitrate: Set different bitrates for different channels. (Note: Based on the defaulted resolution of different
products)
After completing all parameters settings, click on “Save”, then the settings will take effectimmediately.
5.8 ROI Settings
Below is the ROI Settings interface of the IP camera:
ROI Settings: On the preview window, hold the left mouse button and drag to set the ROI area. There are a
total of four ROI areas available. Click on to set the corresponding ROI region coding level; the
higher level the coding, the stronger the ROI region encoding.
After completing all parameters settings, click on “Save”, then the settings will take effectimmediately.

15
5.9 Video Parameters
Below is the Video Parameters interface of the IP camera:
Day/Night Mode: Outside Trigger/ Auto/ Color/ Black White. The default setting of non-infrared IP cameras is
“Auto”, and the default setting of infrared IP cameras is “Outside Trigger”. Users may set the Day/Night mode
as needed according to the type of the IP camera and the actual application environment.
Switching Time: Day & Night switch delay time which ranges from 0-30s; the default setting is 3s.
Day-Night: ranges from 0 to 255. Users may set the value as needed; the default setting is 20.
Night-Day: ranges from 0 to 255. Users may set the value as needed; the default setting is 35.
Color Mode: Normal/ Bright/ Nature; the default setting is “Normal”.
Mirror: Off Horizontal Mirror/ Vertical Mirror/ 180° Rotation/90° Rotation/270° Rotation; the default setting is
“Off”.
WDR Mode: Off/ BLC/ WDR; the default setting is “Off”.
3DNR: Off/ Low/ Mid/ Mid-High/ High; the default setting is “Low”.
Sharpness: ranges from 0 to 255; the default setting is 128.
Defogging: Off/ Low/ Mid/ High; the default setting is “Off”.
Slow Shutter: Off/On; the default setting is “Off”.
White Balance: Users may set the value of white balance. “Auto white balance” is suitable for normal light
environment. Users may adjust the white balance mode from the drop-down list.
Exposure Control Mode: Auto/ manual; the default setting is “Auto”.
AE algorithms: Shutter first/ gain first; the default setting is “Shutter first”.
AGC: AGC can be set when the camera is automatically exposed. You may select from Low/ Mid-Low/ Mid/

16
Mid-High/ High; the default settings is “Mid-High”. The larger the “Auto Gain” value, the better the sensitivity
under low illumination, and the more obvious the noise will be.
Shutter: You may set manual exposure; the value ranges from 1/25(30) to 1/10000.
Aperture: Depending on the type of IPC lens, the aperture can be divided into manual aperture and auto
aperture (Note: based on the defaulted aperture of different products); and the lens can be divided into
manual focus and vari-focus.
Gamma: A total of four modules: CURVE_1_6, CURVE_1_8, CURVE_2_0, CsURVE_2_2; the default setting is
CURVE_2_0.
Power Frequency: There are three options: off, 50 Hz, 60 Hz; the default setting is “off”.
Light board control mode: There are three LED board control modes: off, manual, auto; the default setting is
“auto”.
Off mode: The IR LED will not be turned on.
Manual mode: The brightness of the LED board can be adjusted by manually changing the related
parameters, and the value ranges from 1 to 100. The larger the parameter value, the brighter the IR LED.
Auto mode: The brightness of the LED board can be adjusted automatically.
Brightness: The brightness of the LED board can be set when the LED board control is under “Manual” mode.
The value ranges from 1 to 100.
After completing all parameters settings, click on “Save”, then the settings will take effectimmediately.
5.10 Motion Detection
Below is the Motion Detection setting interface of the IP camera:
Other manuals for 8000 Series
4
Table of contents
Other ZKTeco Security Camera manuals

ZKTeco
ZKTeco LPRC200-4G User manual

ZKTeco
ZKTeco biocam series User manual

ZKTeco
ZKTeco MD532 User manual

ZKTeco
ZKTeco FC700 User manual

ZKTeco
ZKTeco ZKSD4 Series User manual

ZKTeco
ZKTeco C4FS Series User manual

ZKTeco
ZKTeco C9AP Series User manual

ZKTeco
ZKTeco FC700 Instruction sheet

ZKTeco
ZKTeco LPRC300 User manual

ZKTeco
ZKTeco 8000 Series User manual