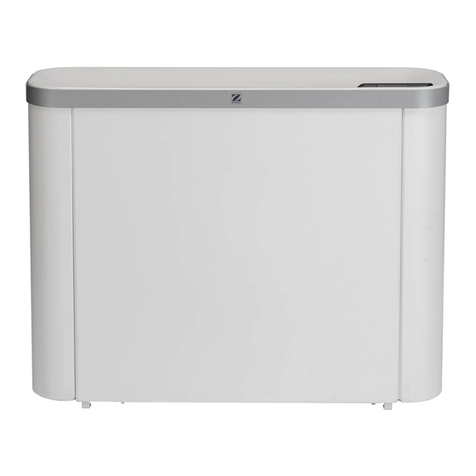
Zodiac CAE User manual

Air dehumidifier for indoor swimming pools
Réf. : N.D.006.A.(1 - Ver. 02-2010
CAE
Installation instructions

1
1. Installation...............................................................................................................2
1.1 General.............................................................................................................................2
1.1.1 Precautions................................................................................................................................2
1.1.2 General terms of delivery...........................................................................................................2
1.1.3 Storage and transport conditions...............................................................................................3
1.1.4 Field of application.....................................................................................................................3
1.1.5 Operating principle.....................................................................................................................3
1.2 Description........................................................................................................................3
1.2.1 Technical specifications.............................................................................................................3
1.2.2 Operating conditions..................................................................................................................3
1.3 Installation ........................................................................................................................4
1.3.1 Electrical regulations for swimming pools..................................................................................4
1.3.2 Installation requirements............................................................................................................5
1.3.3 Connection to surrounding air....................................................................................................5
1.3.4 Connection through a dividing wall............................................................................................6
1.3.5 Connection to a duct network ....................................................................................................6
1.3.6 Connection of condensation drainage .......................................................................................7
1.3.7 Electric connections...................................................................................................................7
1.3.8 Connecting the options ............................................................................................................11
1.4 Commissioning...............................................................................................................12
1.4.1 Different command panel set ups............................................................................................12
1.4.2 Starting the appliance..............................................................................................................12
1.4.3 Checks.....................................................................................................................................13
1.4.4 Adjusting the duct network.......................................................................................................13
1.4.5 Commissioning the options......................................................................................................13
2. Troubleshooting....................................................................................................15
2.1 Status and faults in the ECP 600 settings ......................................................................15
2.2 Troubleshooting procedures...........................................................................................16
3. Maintenance..........................................................................................................19
3.1 Maintenance instructions................................................................................................19
3.1.1 Monthly checks ........................................................................................................................19
3.1.2 Quarterly checks......................................................................................................................19
3.1.3 Annual checks..........................................................................................................................19
3.2 Spare parts.....................................................................................................................20
3.3 Recycling the product.....................................................................................................20
3.4 EC compliance certificate...............................................................................................20
Available in the appendices at the end of the manual:
- Electric diagram
- Dimensions

2
1. Installation
1.1 General
Read this manual carefully before installing, maintaining or repairing this appliance!
The symbol indicates important information that must be taken into account in order to
avoid the risk of injury and/or damage to the appliance.
The symbol indicates useful information.
1.1.1 Precautions
1.1.2 General terms of delivery
Any equipment, even CARRIAGE and PACKING FREE, travels at the recipient’s risk. The recipient
must indicate any reserves in writing on the carrier's delivery bill in the case of damage caused during
transport (confirmation to be sent to the carrier within 48 hours by registered mail and
Acknowledgement of Receipt).
Contents:
+ + +
With condenser option: joints x2 + half union Ø50 connector to glue x2
With hot water battery option: Ø20/22 bush to solder x2+ joint x2
Supplied parts:
Hygro Control +anti-vibration studs x4 +
half union Ø32 connector to glue and PVC fitting 1” + joint + belt
The appliance must be transported upright on its pallet, in its original packaging.
If the appliance has been overturned make written reserves in writing to the transporter.
Removing or shunting any of the safety or remote control parts will automatically
void the guarantee; the same will apply for the replacement of parts by non-
original parts.
Do not discharge R407C fluid into the atmosphere: R407C is a fluorinated
greenhouse effect gas, covered by the Kyoto Protocol, with a Global Warming
Potential (GWP) = 1653 - (Directive EC 842/2006).
According to French decree no. 2007-737 of 7th May 2007, if the appliance has
more than 2 kg of refrigerant gas (refer to manufacturer specifications), the cooling
circuit must be checked for leakage at least once a year.
This operation must be carried out by a certified cooling appliance specialist.
Before working on the appliance, ensure that it is disconnected from the power
supply.
This device must be installed and serviced by certified professionals approved in
the electrical, hydraulic and cooling domains.
EN

3
1.1.3 Storage and transport conditions
1.1.4 Field of application
1.1.5 Operating principle
1.2 Description
1.2.1 Technical specifications
Appliance Dehumidifying
capacity* Power
consumed* Power restored on
the ambient air* Available
pressure** Air flow-
rate
without option L/h W W mmCE m³/h
CAE 508 8 2710 6500 15 2040
CAE 510 10 4040 9695 19 2720
CAE 513 13.5 5430 13030 23 3400
* under the following nominal conditions: air 30°C - humidity 70%.
**pressure available without hot water battery, refer to the battery load losses (see §1.3.8.1)
class: I
refrigerant gas: R407C
refrigerant charge: see product information plate
1.2.2 Operating conditions
operating range: 10°C to 40°C (temperature in the swimming pool hall)
optimum operating conditions: between 25 °C and 30 °C
Hygro Control on request
Exclusive use: dehumidifying swimming pool halls.
Not to be used for any other purpose.
Install in a dry, ventilated technical room, protected from frost and damp, and not
used to store pool maintenance products.
The appliance must be transported upright on its pallet.
Condensation
Air
+35°C
40%RH
Air
+28°C
65% RH
Compressor
Expansion valve

4
1.3 Installation
1.3.1 Electrical regulations for swimming pools
Refer to the current regulations for your country.
French standard C15.100 Section 702 - U.T.E:
In volumes 0 and 1, only protection using Very Low Voltage (article 411.1) with a nominal voltage not
exceeding 12 V AC or 30V DC is allowed. The protection must be installed outside volumes 0, 1 and 2
(the appliance has a protection index of at least IP X5).
In volume 2 (see figures 702A and 702B), the appliances must be:
- either class II for lighting,
- or class I protected by a 30 mA or less ground fault circuit breaker,
- or powered by a separation transformer in compliance to paragraph 413.5.1
The appliance has a protection index of at least IP X2.
h: unknown variable
V: volume
Figure 702 B: dimensions of volumes for
above-ground pools
Figure 702 A: volume sizes for in-ground
pools and foot baths
EN

5
1.3.2 Installation requirements
1.3.3 Connection to surrounding air
Leave sufficient space to install a blower plenum* on top of the unit in order to orient the air flow, if
possible towards the bay windows opening on the exterior.
*unit distributing air to the blowing system
1) Install the appliance on a level base, to avoid any overflows from the condensation
tray,
2) Easy access to the appliance for maintenance and connections, leave
1 meter of free space around the CAE.
3) Place nothing in front of or on the blowing and suction grates,
4) Anti-vibration studs (supplied) must be installed under the appliance,
5) For a swimming pool building with a high ceiling or visible roof frame:
- destratification of the upper layers of the room = one or several fans with PVC
blades or an air extractor with fresh air intake.
Warning! 230 V AC appliances = must be outside volume 1 (see §1.3.1),
6) Building requirements: swimming pool building = very damp room
During building make sure that:
- the materials used are compatible with a swimming pool environment,
- the walls are sufficiently waterproofed and insulated to avoid condensation forming in
the room when relative humidity reaches 60 to 70%.
Light structure buildings (verandas, shelters...): there is no risk of deterioration of the
structure, even in case of dew as they are designed to support this (even with a relative
humidity of 70%)
7) Risk of stratification:
- height of the room < 4 to 5 meters: mechanical ventilator unit or extractor,
- height of the room > 7 to 8 meters: ceiling fans with large blades,
8) Ventilation, renewal of air,
- private pools: highly recommended
- public pools: compulsory
The air can be renewed by:
- a simple mechanical ventilation unit,
- a wall or roof extractor with fresh air intakes.
This ventilation ensures the hygienic renewal of air, the removal of any chloramines
present in the air, and the elimination of excessively hot air, whilst contributing to the
dehumidification of the room.
* minimum distance
CAE 508-510-513
extractor grate
double deflector
grate
Hygro Control
fresh air intake
air renewal
system (see §1.3.2)
condensation
drainage
air flow box
suction
blowing
Pool

6
1.3.4 Connection through a dividing wall
Plan 610 x 410 mm spaces in the wall between the technical room and the pool hall.
In the wall on the pool side, seal the standard grate frame on the bottom (without any equipotential
connection to the sound trap) and the double deflector grate on the top (without any equipotential
connection with the blower elbow).
On the technical room side connect the made to measure metalwork (sound trap, blower elbow) to the
system and fit a foam joint for water tightness and to block any vibrations.
* minimum distance rear view of the CAE (through the wall)
CAE 508-510-513
suction
blowing
sound trap
blower elbow
double deflector grate
Dimensions in mm, indications of values for installation using accessories for a CAE with mini-duct
network (see Zodiac Pool Care Europe catalogue).
1.3.5 Connection to a duct network
Install the appliance in a technical room that is protected from freezing.
Connect the intake and blower duct (or standard parts) respecting the air circulation direction:
- intake: behind the system (standard 825 x 405 mm frame)
to the right of the system (standard 559 x 465 mm frame)
to the left of the system (standard 559 x 465 mm frame)
- hot dry air blower: from the top, from the front or from the rear of the upper box on the system
(standard 405 x 350 mm frame).
Minimum cross section for blower and intake ducts
Appliance Unit CAE 508 CAE 510 CAE 513
Rectangular duct mm 400 x 400 500 x 500 500 x 500
Circular duct mm 400 500 500
Cross section for a maximum length of 20 meters, air speed: 5 to 6 meters/second
Average load losses by air flow direction change, 90° elbow or by T = 1 mm EC
To ensure the correct operation of the system, the duct network must be sized
according to the air flow delivered by the appliance (see table below).
For very long or complicated networks please contact us.
The blower grates must be fitted with registers for better air distribution.
Plan a water drainage point at the low point for possible projection of water in the
ducts.
Swimming
pool hall
Pool
Technical
room
EN

7
1.3.6 Connection of condensation drainage
The drainage is gravitational using Ø32 piping (not supplied) fitted with a
siphon system with a purge cap.
Condensation drainage, from the front face the drainage is:
on the right if drainage from the rear, but can be switched to the left,
to do this:
- unscrew joint from joint ,
- unscrew joint from elbow .
- reassemble on the other side making sure it is watertight (adjust
the length of the flexible tube to avoid pinching it).
on the side opposite the drainage if it is lateral.
For placing the condensation drainage: see mark “A Ø26/34“
§ “dimensions” in the appendix.
1.3.7 Electric connections
1.3.7.1 Voltage and protection
The electrical supply must be provided through a protection and circuit breaking device (not
supplied) complying with the standards and regulations in force in the country where it is installed (in
France standard NF C 15100).
Electrical protection: 30 mA ground fault circuit breaker (at the head of the line).
Acceptable voltage variation tolerance: ± 10% (during operation),
Electric cables must be fixed.
Prior to any operation, check that the voltage on the identification plate of the
appliance corresponds to the mains voltage available on site.
Pool
*minimum distance
CAE 508-510-513
suction grid
blowing grids + connector box
Hygro Control
fresh air intake
air renewal system (see §1.3.2)
duct exhaust
suction
blowing
Technical room
Swimming
pool
hall
To the drain

8
1.3.7.2 Cable sizes
Supply cable size: for cables of a maximum length of 20 metres (calculation basis: 5A/mm²), this
must be checked and adapted depending on installation conditions.
Option Voltage Nominal
power
consumption
Maximum
power
consumption Cable size
Unit A A mm² Unit
CAE 508
Single-
phase
without option or hot
water battery 230V-50Hz- 13.1 27 3 x 6 3G6
Extra heating 4.5 kW 230V-50Hz- 32.7 48.5 3 x 10 3G10
CAE 508
three-
phase
without option or hot
water battery 400V-50Hz- 5.3 8 5 x 2.5 5G2.5
Extra heating 9 kW 400V-50Hz- 18.5 22.5 5 x 6 5G6
CAE 510
three-
phase
without option or hot
water battery 400V-50Hz- 8.5 14.5 5 x 4 5G4
Extra heating 9 kW 400V-50Hz- 21.5 29 5 x 6 5G6
Extra heating 18 kW 400V-50Hz- 34.5 43.5 5 x 10 5G10
CAE 513
three-
phase
without option or hot
water battery 400V-50Hz- 11 17 5 x 4 5G4
Extra heating 9 kW 400V-50Hz- 24 31.5 5 x 10 5G10
Extra heating 18 kW 400V-50Hz- 37 46 5 x 10 5G10
1.3.7.3 Connections
1.3.7.4 Hygro Control connection
- for installation location: see §1.3.3 and refer to § 1.3.1,
- correctly influenced by the swimming pool room air,
- connect to terminals on the electric box.
Hygro Control = digital display hygro-thermostat = display and setting of pool hall
temperature* and humidity
The appliance must be earthed.
Risk of electrical shock inside the device. Only a qualified and experienced
technician must install the device cables.
If the power cable is damaged it must be replaced by a qualified technician or by a
Zodiac Pool Care Europe service station.
Mains supply
Regulation
(Hygro Control)
Circulator
connection or control
of heat source
Connection of
auxiliary pump
or filter clock
shunt
Mains supply
230Vac-50Hz-
for remote fault
warning light
Hot water
battery
option
Water
condenseur
option
: contact (230Vac -50Hz - 5A maximum)
EN

9
Technical specifications
Admissible room temperature °C 0-55
Admissible humidity level % 0-90
Voltage V AC 12
Maximum voltage V AC 24
Protection index IP 20
Dimensions: width / height / depth mm 120 x 70 x 28
Hysteresis Humidity % 4
temperature °C 1
Display
Hygro Control display Hygro-thermostat Hygrostat Thermostat
On standby
Active
By default: display of the temperature and/or desired relative humidity.
Display of the ambient temperature and/or humidity by pressing once, °Cand/or
%RHblink. To exit, press , or wait 10 seconds.
*Only if your appliance is fitted with the hot water battery option, or extra electric
heating.
- The numbering of the terminals must be respected,
- Do not put these cables into the same duct as other 230 V or 400 V to avoid any
risk of interference of the signals,
- Obstruct the place where the cable emerges from the wall or seal it by using materials
other than silicone and silicone-based materials, in order to avoid any arrival of air
exterior to the room through the duct or dividing wall.
Mains supply 12Vac-50Hz- between terminals 4 and 5.
Cable 5 x 1 mm²,
maximum length: 30
meters
“on/off”
General CAE terminals
Temperature* and humidity programming
or hygro-thermostat settings
Value settings
Temperature display* Relative Humidity
Degrees fahrenheit
Degrees Celsius
Requesting
dehumidification
Requesting heating

10
Starting up and stopping the appliance
Press for 5 seconds.
Locking/unlocking the keyboard
To lock and unlock the keyboard:
- Hygro Control must be active,
- press and simultaneously for 3 seconds,
- the message is displayed or is removed.
Adjusting the reference values
- Hygro Control must be active,
- press for 3 seconds, the modifiable value blinks,
- use or to set the value,
- press to validate,
- and then to exit.
Value range minimum maximum Comfort setting
Humidity 55% 70% 65%
Temperature 5 °C 32 °C 28°C
Test mode / Manual override
To force the appliance to operate for 30 minutes, even if the pool hall conditions do not trigger the
request:
- Hygro Control must be active,
- press on for 3 seconds, a value blinks,
- press again for 10 seconds,
- all the digits light , or and the appliance starts up.
Parameter setting in hygro-thermostat or hygrostat mode
- Hygro Control must be on standby,
- press and for 3 seconds : (hygro-thermostat mode),
- press or to select the function: (hygrostat mode),
(thermostat mode)
- validate by pressing .
Hygro Control shipped with the setting for hygro-thermostat mode for appliances with the
heating option for hygrostat mode for devices without the heating option.
This setting must be changed if a heating option is added or removed.
To quit this mode, press the button for 5 seconds.
If the keyboard is not used for 30 seconds, the setting will be abandoned and the last
(non validated) setting will not be taken into account.
EN

11
1.3.8 Connecting the options
1.3.8.1 Hot water battery
Primary 90/70°C Unit CAE 508 CAE 510 CAE 513
Power kW 23 35 41
Water flow rate m³/h 1 1.6 1.9
Water load loss mCE 1.25 1.9 2.5
Air load loss Pa 30 50 72
Primary 45/40°C Unit CAE 508 CAE 510 CAE 513
Power kW 5.9 9.8 11.6
Water flow rate m³/h 1.03 1.7 2.01
Water load loss mCE 1.54 2.3 3.12
Air load loss Pa 28.5 47.3 67.7
1.3.8.2 Titanium water condenser
Water temperature input to the hot water battery: 45 °C minimum, 90°C maximum.
Maximum pressure water battery circuit: 3 bars
Power returned to the air at 27°C input to the hot water battery.
Connection to the primary circuit: before any valves or pumps.
CAE 508-510-513
hot water battery (connections
using Ø20/27, male fitting)
suction
blowing
CAE 508-510-513
water condenser
main water heating
system
water treatment
pump
filter
by-pass
suction
blowing
water circulation
Average flow rate of water
in the condenser: 6 to 8m³/h
(depending on the device)
condenser inlet and outlet:
PVC Ø50
Automatic purge
Circulator
Check valve or
solenoid valve
Shut-off valve

12
1.4 Commissioning
1.4.1 Different command panel set ups
CAE without options or with heating option
CAE with heating and condenser option
1.4.2 Starting the appliance
Power on the appliance (by switching on the general terminal board),
Only for three-phased CAE: when the dehumidifier is switched on, check the status of the phase
controller (KA4). If it is off, cut off the power supply and invert two phases directly on the appliance
connection terminal board.
This operation must be only be carried out by a qualified professional.
Activate the switches depending on needs and options(s):
Trigger(s) / switches IG ID ICE/ICB ICC
Dehumidifier X X
Dehumidifier + air heating* X X X
Dehumidifier + water condenser X X X
Dehumidifier + air heating* + water condenser X X X X
*extra heating or hot water battery option
To start up a CAE with options see also §1.4.5.
Set the humidity and temperature on the Hygro Control so that it triggers dehumidifying and / or air
heating (optional), see §1.3.7.4).
The phase order controller protects the compressor.
It’s forbidden to invert phases:
- on the power contactor (KM1 and/or KM2)
- on the compressor
- on the ventilator
- on the thermal protection
- on the phase order controller
If the indicator remains switched off after this operation check for the presence of the
three phases on the phase order controller KA4.
Main switch
Dehumidification switch
Heater switch Ventilation (green)
Dehumidification (green)
heating (green)
Fault (red)
Main switch (orange)
Main switch
Dehumidifier switch
Heater switch
Fault (red)
heating (green)
Ventilation (green)
Dehumidifier (green)
Main switch (orange)
Water condenser switch
Water condenser (green)
EN

13
1.4.3 Checks
In the Hygro Control comfort model (see §1.3.7.4)
check that hot air is coming out of the blower grates,
check that the appliance is draining condensation,
1.4.4 Adjusting the duct network
Set the air flow by adjusting the grate dampers (recommended speed ≈1metre/second) identically on
all the blower grates.
1.4.5 Commissioning the options
The heating options are operational from 4°C surrounding air temperature.
1.4.5.1 Extra heating
follow the procedure described in §1.4.2,
starting up Hygro Control and adjust the thermostat to between 26 and 28°C (maximum 30°C), in
general choose an air temperature 1 to 2°C higher than the pool water temperature,
check that with the “VI/VP” switch on “VI”, and no dehumidification or defrosting cycles in progress:
- the fan stops operating, after post-ventilation of 3 minutes when the reference room temperature
on the pool room thermostat is lowered,
- in the event of abnormal overheating, the appliance shuts down the heating option automatically,
by shutting off the heating elements and keeping the ventilation operational (for as long as a
heating request is active).
This safety device has two levels of triggering:
1) by “THS” safety thermostat if the T°C is > 65°C (it is automatically
reset),
2) if the temperature continues to increase, the second positive
“THSM” safety thermostat puts the appliance into safety mode.
=> reset it manually (with power off), after having checked that the
appliance air flow is correct (with the “VI/VP” switch on “VP”), that the
grates are not obstructed, that the filter is not clogged, and the fan is
not defective.
1.4.5.2 Hot water battery
Supply the battery with hot water at 45 °C minimum from the heat source (boiler, heat pump,
geothermal energy, solar heating), installation must be carried out by a qualified technician, using a
circulator (not supplied) which will be powered by terminals C-C on the electrical terminal board.
connection to a ZPCE double circuit gas boiler: connect the terminals 3-6 of the terminal board, to
terminals 3-6 of the boiler terminal board,
follow the procedure described in §1.4.2,
adjust the thermostat between to 26 and 28°C (maximum 30°C), in general set the air temperature
1 to 2°C higher than the pool water temperature,
If your pool has a cover (shutter or bubble sheet type, etc.), you can lower the room
temperature (by adjusting the thermostat to about 20°C) when it is in place and raise the
pool hall temperature before removing the cover.
Terminals 3-6 can also ensure a heat source control function (see §1.3.7.3)
Insulate the hot water battery hot water pipes between the heat source and the appliance
(for the purpose of limiting calorie loss).
if your pool has a cover (shutter or bubble sheet type, etc.), you can lower the room
temperature when it is in place (by adjusting the thermostat to about 20°C) and raise the
pool hall temperature before removing the cover.
When the “ECP 600” regulator is switched on ventilation is active for 5 minutes.
This also occurs if the appliance is powered on and the “on/off” switch of the
Hygro Control delivered with the appliance is used.

14
a post-ventilation runs for 3 minutes when the reference temperature is reduced on the thermostat
located in the pool hall (with the “VI/VP” switch on “VI”, without any dehumidification or defrosting
cycles in progress): check that the circulator stops.
1.4.5.3 Titanium water condenser
connect the intake and output to the filter using a by-pass, according to
the markings on the appliance (before the pool water treatment system),
see §1.3.8.2,
Adjusting the by-pass for the water condenser :
- open valve half way
- open valves and completely
plan to shunt the filter clock from the S-S terminals on the CAE electrical terminal board,
in the case of a hydraulic connection with pump that is independent of the filtering system, plan to
power this pump using the P-P terminals on the CAE terminal board (maximum power: 60W with
230V AC, otherwise relay the power supply from an extra electric contactor),
starting up:
- follow the procedure describe in §1.4.2,
- set the “TH” digital display thermostat fitted inside the electrical box:
- press “SET” to display the current reference value (factory preset at
27°C, thus the thermostat output will be activated when the pool room
temperature will rises above 29°C and deactivated if the temperature
drops below 27°C): the “out 1” LED blinks (hysteresis = 2°C),
- press or (possible range values: 25°C minimum and 45°C
maximum),
- press “SET”, or do not operate for 15 seconds, to confirm.
check that the filter pump starts when the adjustment of this digital display
thermostat is reduced to below the surrounding temperature.
check that the « VCA » indicator lights when the thermostat reference value
is lowered. By default, check that the filter pump is operational and sufficiently irrigates the water
condenser (see by-pass adjustment).
when the water condenser option is operational (VCA indicator on), check that the « EV » solenoid
valve is powered from terminals E and V (230V ac) on the appliance terminal board.
If this is not the case adjust the by-pass so that there is a sufficient flow of water in the condenser to
activate the flow controller fitted at the output of the water condenser (this safety device is connected
between terminals I and D, see the electric wiring diagram in the appendix).
Warning - low temperature: if the dehumidifier hot water battery is not supplied by a
boiler, but by an aero-thermal or a geothermal system, the heating circuit water will be at
a maximum temperature of 45-40°C. The power of the battery will then be considerably
lower (3 to 4 times less) than the nominal power given for water at 90-70°C. If the power
of the battery is lower than the heating needs of the room, plan for additional heating by
radiator, heated floor or fan convector.
EN

15
2. Troubleshooting
2.1 Status and faults in the ECP 600 settings
Terminals Description
N - R mains-supply 230Vac-50Hz to the ECP600 regulator
20 - 21 output from compressor supply 230 Vac -50Hz
30 - 31 230Vac-50Hz output (only used with water condenser option) and protected by the
ECP600 fuse
22 - 23 ventilator 230Vac-50Hz output
25 - 24 output for circulator hot water battery option 230Vac-50Hz or contactor coil for extra
heating
26 - 27 output alarm report 230Vac-50Hz
28 - 29 output contact “NO” (without polarity) control of heat source hot water battery option
11 – 12 - 13 Input control sensor type PTC (inlet or defrost)
4 - 5 power supply 12Vac-50Hz
7 input 6Vac-50Hz given by the hygrostat function (request active if 6Vac-50Hz
between 7 and 4)
2 input 6Vac-50Hz given by the thermostat function (request active if 6Vac-50Hz
between 2 and 4)
8 input 12Vac-50Hz fan heat fault (fault active if 0Vac-50Hz between 8 and 4, “défaut
thermique ventilateur” led lit)
9 input 12Vac-50Hz faults BP and/or HP, and/or phase order (CAE three-phase) (fault
active if 0Vac-50Hz between 9 and 4, “défaut pressostat HP ou BP” led lit)
10 input 12Vac-50Hz compressor heat fault (fault active if 0Vac-50Hz between 10 and
4, “défaut thermique compresseur” led lit)
Led lit continuously Meaning
“compresseur”
= compressor the compressor is operational (blinking = temporisation in process)
“EPROM” ECP600 regulator out of order
“défaut thermique
ventilateur”
= fan heat fault Triggering of the auxiliary contact Q1.1 on the Q1 thermal relay
“défaut pressostat
HP ou BP”
= high or low
pressure switch fault
triggering HP and/or LP switch and/or phase order relay KA4 (only on CAE
three-phase)
- HP : check that the ventilator is operational, that the air filter is clean and
the belt is tight enough,
- LP: insufficient gas, call a specialist,
- KA4: check for the presence of the 3 phases, if so, see §1.4.2.
“défaut thermique
compresseur”
= compressor heat
fault
Triggering of auxiliary contact Q2.1 on the Q2 thermal relay
“déclenchement
alarme”
= Triggering of the
alarm
- HP and/or LP switch triggered more than 3 times in one hour
- order phase relay KA4 triggered (only on CAE three-phase)

16
Led lit continuously Meaning
“défaut hors
température”
= temperature range
fault
-temperature < than 10°C or > than 40°C (compressor stopped),
-restart sensor is out of order.
-In all cases, if the ventilator is active before the triggering of this fault, it is
maintained for 3 minutes before stopping.
-If the returns to within its operating range:
-there is a 30 seconds delay before the fault is cleared,
-there is a 3 minute delay before restarting the compressor and the fan (if a
dehumidification request is still active)
“cycle de dégivrage”
= defrosting cycle
-cooling circuit temperature < than -5°C or > than 40°C,
-a defrosting cycle is in progress (temperature is >-5°C). The compressor is
stopped and ventilation is maintained,
-the defrosting sensor is out of order.
The defrosting cycle stops when the temperature of the sensor goes over
2.2°C. If the sensor is out of range (<-5°C or >40°C) during the active
defrosting cycle, this LED remains on for 3 minutes with the ventilation
operating, before it stops.
In all cases, if the ventilator is active before the triggering of this fault,
ventilation is maintained for 3 minutes before stopping.
If the sensor returns within its operating range:
-there is a delay of 30 seconds before the fault is cleared,
-there is a 3 minute delay before the compressor and fan restart (if a
dehumidification request is still active)
Others Description
“VI/VP switch” “intermittent ventilation” (standard setting)
or “permanent ventilation” (to permanently circulate the pool hall air)
Using VI, a post-ventilation is active for 3 minutes.
The ventilation is active when:
- dehumidification is triggered,
- a defrosting cycle is started,
- pool hall air heating is triggered,
- active for at least 5 minutes in one hour without any of these
triggers.
On VP, the compressor starts after a delay of 3 minutes.
“Connecteur module
de prog.”
= programming
module connector
ECP 600 programming connector or implementation of a diagnosis module
by the technical support department
ECP 600 250Vac T=10A 6,3x32 fuse
2.2 Troubleshooting procedures
Checks to make before any operation:
- correct electrical supply (voltage and cable size)
- all cables are correctly connected
- Hygro Control operational
- appliance has triggered dehumidification but not heating
See faults
table
§2.1
The appliance does not work.
No fault displayed on the
ECP 600, green light on
The compressor is working
but not the ventilation
No LED lit on ECP
600
Display of a fault on
ECP 600
The ventilation is working
but not the compressor
EN

17
Voltage between terminals 30-31 on
ECP 600 is 230V
A
C
No LED lit on ECP 600
yes
no
Test fuses F1 and F2,
and the power supply
The voltage between terminals 4-5
on the ECP 600 is 12 V ac?
Replace the ECP 600
no
yes
Check the Hygro Control and its wiring
yes
Shunt terminals 1, 5 and 7,
does the appliance start? no
no
Replace C1
The compressor is working
but not the ventilation
Voltage between terminals 22-
23 on ECP 600?
yes
Capacitor C1? no
Connection between
the ventilator and the
ECP 600?
Replace the
ECP 600
yes
yes
Replace the
ventilator motor
Re-connect
no

18
yes
Redo the connections
between the contactor
and the compressor
yes
yes
Is the compressor indicator
on the ECP 600 lit?
Set the VI/VP switch
on the ECP 600 to
VI
Voltage between 20-21
on ECP 600? (±230V~)
Replace
ECP 600
no
no
Is the appliance being
ventilated all the time?
yes
Voltage on the
compressor terminals
(±230V~ or ±400V~)?
yes
Replace the
contactor
no
no
Re-connect the Hygro
Control and check that
it is operational
Wait for the
end of the
cycle
Voltage between A1
and A2 on
compressor
contactor
(
±230V~
)
?
no
yes
Call a certified ZPCE
station to check the
compressor
no
Is the appliance in a defrost cycle
(indicator lit on ECP 600)?
Re-connect
terminals 20-21 and
A
1-
A
2
Voltage on contactor
power terminals
(±230V~ or
±400V~)?
no
yes
Is the contactor
primed?
yes
no
The ventilation is working but not the compressor.
EN

19
3. Maintenance
3.1 Maintenance instructions
3.1.1 Monthly checks
Check for clogging in the filter:
- wash the filter with warm soapy water,
- rinse it abundantly and dry it,
- replace it if necessary.
Check visually that the condensation is drained.
3.1.2 Quarterly checks
Check the tightness of the centrifuge fan belt: push the belt down between the two pulleys, it
should yield about 1 cm.
3.1.3 Annual checks
check that the electric cable connections, contactors and fuses are correctly tightened,
Loose cables may cause overheating of terminals,
check that each command relay, power switch and electronic protection device is operational,
check the adjustment and operation of the Hygro Control and the water condenser thermostat if
necessary clean the dust inside it using a jet of air,
clean the whole unit with a slightly damp cloth,
check the cleanliness of the condensation drainage tray and tube,
check the condition of the insulating foam on the technical compartment
check the movement of the centrifuge ventilator blades (the bearings are greased permanently and
need no maintenance),
check that the batteries are clean. If necessary clean them using a hard silk brush, a vacuum
cleaner or a jet of compressed air. Rinse using cold water under pressure taking care to avoid
splashing water on the ventilator motor.
Be aware of the following:
On the three-phase CAE, via the phase controller (KA4), any modification of the order of
phases on the distribution network or on the existing electrical installation is detected.
The appliance then goes into fault mode (“alarm triggered” led lit), see § 2.1.
The appliance must have a filter fitted when operating.
Appliance powered off and decommissioned!
A general servicing of the appliance is strongly recommended to check the proper
operation of the appliance, maintain its performance, to avoid certain faults and preserve
the building in good condition.
Table of contents
Other Zodiac Dehumidifier manuals

Zodiac
Zodiac SIROCCO2 User manual

Zodiac
Zodiac Sirocco User manual

Zodiac
Zodiac DF2 User manual

Zodiac
Zodiac DF2 User manual

Zodiac
Zodiac WD002088 Guide

Zodiac
Zodiac DT850E User manual

Zodiac
Zodiac SIROCCO 110 User manual

Zodiac
Zodiac SIROCCO 2 2M User manual

Zodiac
Zodiac SIROCCO2 User manual

Zodiac
Zodiac DT 850 User manual
Popular Dehumidifier manuals by other brands

Mitsubishi Electric
Mitsubishi Electric MJ-E152AK-H instruction manual

HSC
HSC DH 26 User and Maintenance Book

SMC Networks
SMC Networks IDG1-C06 Series Operation manual

AERMEC
AERMEC DMK20 user manual

Healthy Climate Solutions
Healthy Climate Solutions HCWHD4-080 owner's manual

Trotec
Trotec TTK 24 E operating manual