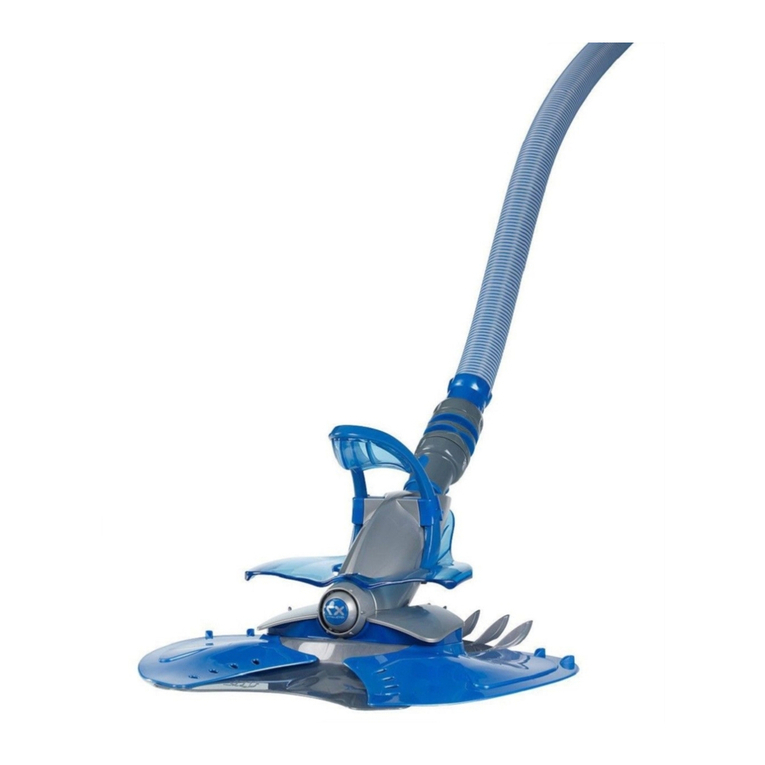
Zodiac Super G+ User manual

19
________________________________ page 20
______________________ page 22
____________________________ page 23
Connection ____________________________________ page 24
• Connecting to the skimmer or one of the skimmers __ page 24
• Connecting to the vacuum point __________________ page 25
(overall view of installation) ______________________ page 26
________________ page 27
____________________________page 28
Cleaning the leaf trap ________________________ page 28
Replacing a worn diaphragm ________________ page 29
______________________ page 30
________________________________ page 32
GUARANTEE
PROBLEM SOLVING
2
1
MAINTENANCE
TESTING THE FLOW RATE
INSTALLATION
RECOMMENDATIONS
PARTS LIST
CONTENTS

20
- weir adapter,
- pool pulse,
- automatic flow control valve,
- 2 hose weights,
- 1 deflector wheel,
- the SUPER G+ cleaner,
The items included in the package and needed to install your
SUPER G+ are listed below :
Congratulations ! You have just acquired the
ZODIAC SUPER G+, the most efficient
automatic pool cleaner.
Zodiac, mastering the elements.
Renowned worldwide for the quality and reliability
of its products in the aeronautical and marine sectors, Zodiac has now
brought its expertise to swimming pools, to bring you a full
range of pools, automatic pool cleaners and water treatment
systems. Backed by Baracuda technology, expertise and
experience, Zodiac brings you the reassurance of top quality
equipment in terms of both design and performance.
A real guarantee of efficiency and peace of mind!
4
4
3210
0123
65
56
6 5 4 3 2 1 00
01 2 3 4 5 6

21
- one hose protective mesh,
- 1 hose connector,
Female side
Male side (smallest diameter)
(Female side)
*(Male side = smallest diameter)
(Male side)*
- 12 sections of dual-
color long-life hoses,
each of 1m,
- leaf trap,
A

22
ASSEMBLY
This cleaner is delivered fully assembled. Lastly, fit the remaining
deflector wheel with the aid of the hose connector, as shown
in the diagram opposite !.
ADVICE
During the season, you are advised to leave your SUPER G+ in the
pool.
If you wish to remove it while bathing, remove the hose, but do not
roll it up.
Never expose the hose to direct sunlight.
FITTING THE HOSE
Your SUPER G+ hose is made up of 12 x 1 m sections.
cThe ideal hose length for your pool is the greatest distance your
SUPER G+ will reach from the point of connection plus one hose
section, i.e. the skimmer or vacuum point, to the furthest lower
corner of your pool ".
cAfter calculating the correct overall length, assemble your hose by
fitting the sections together.
Male side
Weir adapter
!
"

23
Connect the hose to the automatic pool cleaner #.
cA hose weight is provided to reduce the buoyant effect of the hose.
The buoyancy of the hose tends to lift the SUPER G+ especially in
deeper water. Ensure the disc sets flat on the pool surface by
adjusting the hose weight about 2m
from the automatic
pool cleaner.
INSTALLATION
IMPORTANT
You can connect your SUPER G+ to a (or the) skimmer
point, or to the vacuum point. You are strongly advised to
connect it to a skimmer point for maximum clea-ning
efficiency.
$
#
2 m
Make sure the skimmer, pump basket and filter are clean.
Adjust the inlet jets so that they point towards the bottom of the
pool.
Close the main drain on the bottom of your pool.
Turn on the pool drain.
Fill the SUPER G+ hose with water using the flow from the
inlet jets ensuring that the hose remains beneath the surface of the
water during and after these procedures $.
5
4
3
2
1

2424
CONNECTION
%
cCheck that the skimmer, filter and pre-filter of your pool pump are clean.
cDirect the inlet jets for your pool downwards.
cClose the main drain of your pool and all the other suction routes
not being used (skimmers or vacuum point).
cStart up your pool pump.
cFill the SUPER G+ hose with water flowing from the inlet jets, and
keep this hose under water throughout the remaining operations %
IMPORTANT : You can connect your SUPER G+
hose to the skimmer or one of the skimmers, or to the vacuum
point. We strongly recommend that you connect it to one of
the skimmers to achieve more efficient cleaning.
CONNECTING TO THE SKIMMER OR ONE OF THE
SKIMMERS:
WARNING: The last sections must be connected together
under water so that there is absolutely no risk of air entering
the system and draining the pump.
cUse the weir adapter to fit the automatic flow control valve in one
of the skimmers.
IMPORTANT : The automatic flow adjustment valve is pre-set in the
factory to number 3, the most suitable position for European pools. For
an optimal performance from your cleaner, we recommend that you do
not move the valve from this position. Secondly, always check that the
valve’s dark grey flap is not held in the open position by the red lever –
otherwise your cleaner cannot function.
cConnect the 1m hose section A onto the control valve, after having
filled it with water to remove any air, and pull the protective mesh.
cConnect the leaf trap to the other end of the hose section A.
WARNING: Make sure that the arrow marked on the leaf
trap points correctly to the vacuum point, and not towards
your cleaner.
cCheck that there is no air in the hose assembly, then connect it to
the skimmer by joining the last hose section A to the leaf trap &.
A
A
&

25
CONNECTING TO THE VACUUM POINT:
WARNING: The last sections must be connected together
under water so that there is absolutely no risk of air entering
the system and draining the pump.
cUse the weir adapter to fit the automatic flow control valve onto
the vacuum point.
IMPORTANT : The automatic flow adjustment valve is pre-set in the
factory to number 3, the most suitable position for European pools. For
an optimal performance from your cleaner, we recommend that you do
not move the valve from this position. Secondly, always check that the
valve’s dark grey flap is not held in the open position by the red lever –
otherwise your cleaner cannot function.
cConnect the 1m hose section A to the automatic control valve,
after removing any air by filling it with water.
cConnect the leaf trap to the other end of the hose section A,
after also having filled this with water.
WARNING: Make sure that the arrow marked on the leaf
trap points correctly to the vacuum point, and not towards
your cleaner.
Check that there is no air in the hose assembly, then connect it to the
vacuum point by joining the last hose section A to the leaf trap. '.
NOTE: You can connect your SUPER G+ to the vacuum
point without using the automatic flow control valve (see
diagram below), and can then control the flow rate by
partially opening the skimmer(s) (.
You must then use the flow tester supplied in the pack to
check that you have the correct suction flow rate in your
pool for your SUPER G+ to work properly (see page 27).
A
A
(
AA
'

26
Female side
Male side
Male side
Female side
SUPER G+ INSTALLATION SHOWING HOW
TO CONNECT TO A VACUUM POINT
Example with the connection to the vaccuum point ).
)

27
FLOW TEST
You can always check the flow rate, particularly if you
have doubts about the suction power of your pump.
“Ideal” : The red flap valve is on level 4
the flow rate is ideal for running your SUPER G+. Remove the
tester and connect the appliance to the hose.
”Min” : The red flap valve is below level 4
increase the flow by closing the valve or flap of the skimmer or
skimmers until the tester indicator moves into the ideal zone.
Remove the tester and connect the appliance to the hose.
“Max” : The red flap valve is above level 4
reduce the flow by opening the valve or flap of the skimmer or
skimmers until the tester indicator moves into the ideal zone.
Remove the tester and connect the appliance to the hose.
N.B. : all these operations must be carried out under water
so that the pump does not take in air.
Remove the SUPER G+ from the hose and replace
with the pool pulse !.
Note the zone indicated on the tester :
11
1
2
11
6 5 443 2 1 0
0 1 2 3 445 6
3210
0123
65
56
0
0
4
4
3210
0123
6554 3 2 1 0
0 1 2 3 4 5566
0
0
4
4
6 5 4 33221100
01122334 5 6
65
56
0
0
6 5 4 3 2 1 00
01 2 3 4 5 6
!

28
Cleaning the leaf trap
How to remove the transparent container:
cStop the pump before opening the ZODIAC leaf trap.
cWithout taking off the hose sections, hold the ZODIAC leaf trap
lid in one hand.
cUsing your other hand, hold the handle of the ZODIAC leaf trap
and turn the container until you hear a click. Pull the transparent
container downwards .
ENSURE THAT THE LID CONNECTED TO THE HOSES
IS NOT PULLED ABOVE THE WATER, OTHERWISE
AIR WILL ENTER THE FILTRATION SYSTEM.
cTake the transparent container out of the water. Hold the container
above the water level and let the water run out through the drain hole.
How to remove the debris:
cMove away from the pool and tip out the debris.
cTake out the basket, then clean it and the transparent container
cRemove all the debris caught in the drain hole and the sieve of the
basket .
cRinse the basket and the transparent container, and re-insert the basket.
cCheck that the basket is in the right way round - the word "TOP"
should appear uppermost.
THE LEAF TRAP WILL NOT RE-CLOSE IF THE BASKET
IS INSERTED UPSIDE DOWN.
Refitting:
cRefill the transparent container with water before attaching it to
the lid.
cAlign the fixing points for the lid and the container, push the lid
downwards and turn the container anticlockwise .
cCheck that the leaf trap is closed properly before restarting the
pump.
14
13
12
1
MAINTENANCE
12
13
14

29
The efficiency of your SUPER G+ largely relies on one part fitted
inside the appliance, called the “diaphragm”. This diaphragm, a
system exclusive to ZODIAC, is likely to wear out after three to
five years intensive use of the appliance.
It should then be replaced. When this occurs, contact your usual
retailer who will carry out this simple procedure .
15
WEAR AND REPLACEMENT OF
THE SUPER G+ DIAPHRAGM
15

30
PROBLEM SOLVING
The SUPER G+ will not work :
cuse the pool pulse to check the flow (see page 27).
If the flow rate is too low:
cmake sure the main sump valve is properly closed ;
cmake sure the filter and skimmer baskets are quite clean ;
cmake sure the hose and automatic control valve are correctly
connected.
IMPORTANT : The automatic flow adjustment valve is pre-set in the
factory to number 3, the most suitable position for European pools. For
an optimal performance from your cleaner, we recommend that you do
not move the valve from this position. Secondly, always check that the
valve’s dark grey flap is not held in the open position by the red lever –
otherwise your cleaner cannot function.
If the flow rate is correct :
cmake sure the automatic pool cleaner suction point is not blocked
by debris ;
cis the diaphragm (see page 29) of the automatic pool cleaner
damaged ?
The SUPER G+ does not clean all parts of the pool :
c to ensure that the entire pool is cleaned the filtration system
operating time can be reduced. For example, 6 hours filtration in 3
two hour sessions will give better coverage of the pool than a single
6 hour filtering session.
cis the hose long enough ? Add sections if necessary ;
chave you set the inlet jets so that they point towards the bottom
of the pool ?
cis the hose in perfect condition ? (see storage advice, page 22).
The SUPER G+ travels round the pool and rarely goes to
the centre :
cTest the flow (see page 27). If the flow is correct, remove the top
disc and run the cleaner with the main disc only .
16
3
2
1
2 m
Main
disc
Top disc
16

31
The SUPER G+ will not stay on the bottom of the
pool :
cmake sure the hose weight is correctly installed on the hose
2 metres from the automatic pool cleaner (see page 23) ;
cif your pool is more than 2 metres deep, fit a second hose
weight 2 metres from the appliance ;
ctest and increase flow rate if necessary (see page 27).
The SUPER G+ jams against the steps :
cconnect the hose to the vacuum point furthest from the
steps ;
cshorten the hose to prevent it coming to rest on the steps.
cadjust waterflow to direct the hoses away from the step area.
The SUPER G+ moves very slowly and air bubbles
appear in the flow :
ccheck the system is sucking in air: between the appliance
and hose, between each of the hose sections, between the
hose and the valve, between the valve and the skimmer.
The SUPER G+ climbs above the water :
creduce the flow rate (see page 27).
cadd an additional hose weight just above the deflector wheel.
The SUPER G+ jams on the main drain :
cclose the main sump.
8
7
6
5
16
4

33
32
CONDITIONS
All our technical experience and concern for quality have been used
in the manufacture of ZODIAC automatic pool cleaners. All our
cleaners are subject to quality control tests and are guaranteed
against manufacturing defects.
If, in spite of all the care and know-how used in the manufacture of
our products, you were to have need of the guarantee, please be
aware that it only applies to the free replacement of faulty parts.
Our models are regularly updated and improved to make the most of
technological advances. It is understood that these improvements
cannot be added to previous models within the context of our
guarantee.
THE GUARANTEE DOES NOT COVER THE FOLLOWING:
•
accidents, crushing, deterioration and breakage due to impacts
or causes unrelated to, or independent of, the fault found.
•in the event of the cleaner being worked on or tampered with by a
third party not known to our workshops or by a repair technician
not approved by us, or if modifications have been carried out
without our written agreement.
•in the event that the cleaner has been damaged as a result of
incorrect usage on the part of the customer or usage that does not
comply with the instructions provided with the cleaner in its
packaging. .
•in the event that the appliance, its components or sections of hose
have been subjected to prolonged exposure to the sun.
•in the event that the cleaner, its components or sections of hose
have been damaged as a result of a chemical imbalance in the pool
water.
Any claims under guarantee should be addressed to your retailer.
PERIOD OF GUARANTEE
The period of the guarantee is fixed at 3 YEARS for the SUPER G+,
from the date of invoicing the first user.
The diaphragm, the result of BARACUDA patented
technology, benefits from an unconditional guarantee of
3 years.
Under no circumstances can repairs or replacements made as part of
the guarantee prolong the appliance's guarantee period.
OBJECT OF THE GUARANTEE
During the guarantee period defined above, any part recognised as
faulty will be mended or exchanged by the manufacturer with a new
part or in correct operating condition. This guarantee covers all faults
relating to conformity existing at the time the article is delivered.
In the event of a return to the workshop, return transport costs will
be the responsibility of the user, but labour costs remain the
responsibility of the retailer.
The immobilisation and the prevention of possession of an appliance
in the event of any necessary repairs cannot give rise to
compensation. In all circumstances, the legal guarantee of the seller
continues to be applied in accordance with article 4 of decree n° 78-
464 of 24 March 1978.
The legal guarantee of article 1641 of the civil code is applied.
THIS GUARANTEE APPLIES PENDING STATUTORY PROVISIONS
COMING INTO FORCE THAT HAVE NOT AS YET BEEN
PUBLISHED AT THE TIME OF THESE CONDITIONS GOING TO
PRESS.
TRANSPORT DAMAGE
Appliances always travel at the risk and peril of the user. It is up to
the user, before taking delivery of the appliance, to check that it is in
perfect condition.
Under no circumstances can we be held responsible for transport
damage.
GARANTEE
For further information please contact your dealer or write to us at:
ZODIAC (UK)
Unit 36, The Derwent Business Centre,
Clarke Street, Derby - DE1 2 BU - ENGLAND
ZODIAC POOL CARE EUROPE
Z.I. Est - 34 rue Francine Fromont - 69120 VAULX-EN-VELIN - FRANCE
www.zodiac-poolcare.com
Other manuals for Super G+
1
Table of contents
Other Zodiac Swimming Pool Vacuum manuals

Zodiac
Zodiac VOYAGER RE 4600 iQ User manual

Zodiac
Zodiac Vortex 3.2 User manual

Zodiac
Zodiac Nature 2 Express User manual

Zodiac
Zodiac MX8 User manual

Zodiac
Zodiac X7 QUATTRO User manual

Zodiac
Zodiac G2 User manual

Zodiac
Zodiac VOYAGER RE 4100 User manual

Zodiac
Zodiac V3 4WD User manual

Zodiac
Zodiac R3 User manual

Zodiac
Zodiac G2 User manual

Zodiac
Zodiac B3 User manual

Zodiac
Zodiac V1 User manual

Zodiac
Zodiac CYBERNAUT NT User manual

Zodiac
Zodiac Super G+ User manual

Zodiac
Zodiac MX8 User manual

Zodiac
Zodiac MX6 Elite User manual

Zodiac
Zodiac Zippy User manual

Zodiac
Zodiac T5 Duo User manual

Zodiac
Zodiac Manta II User manual

Zodiac
Zodiac RV 5500 iQ User manual