1JE:
Jf1
i5t
~Jj
Operation Instruction
§I
~
CONTENT
1,
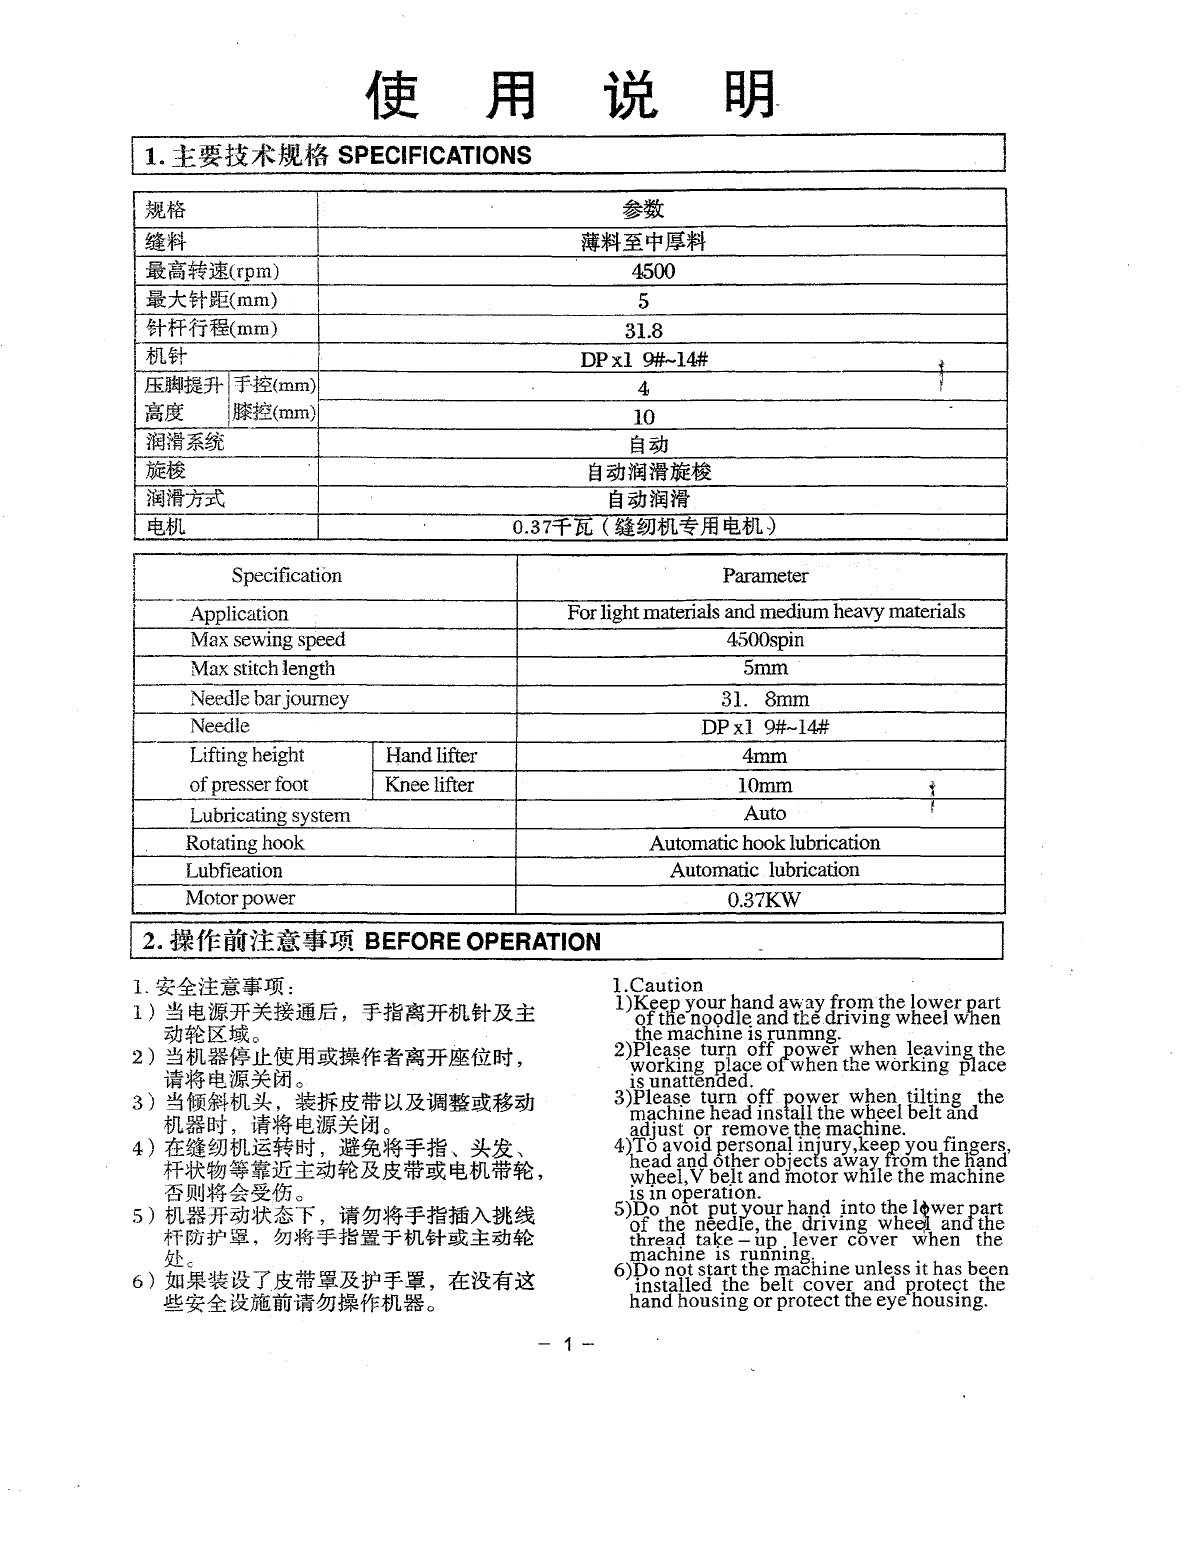
.:E~t!=*;E_.W,;ft
SPECIFICATIONS·········..
·················
o···.····...···.·····.o··......,.."......
·j
2,.
~f!=§tr1tf£$::I~m:
BEFORE OPERArlON····································o····o·······.,····..·····
·i
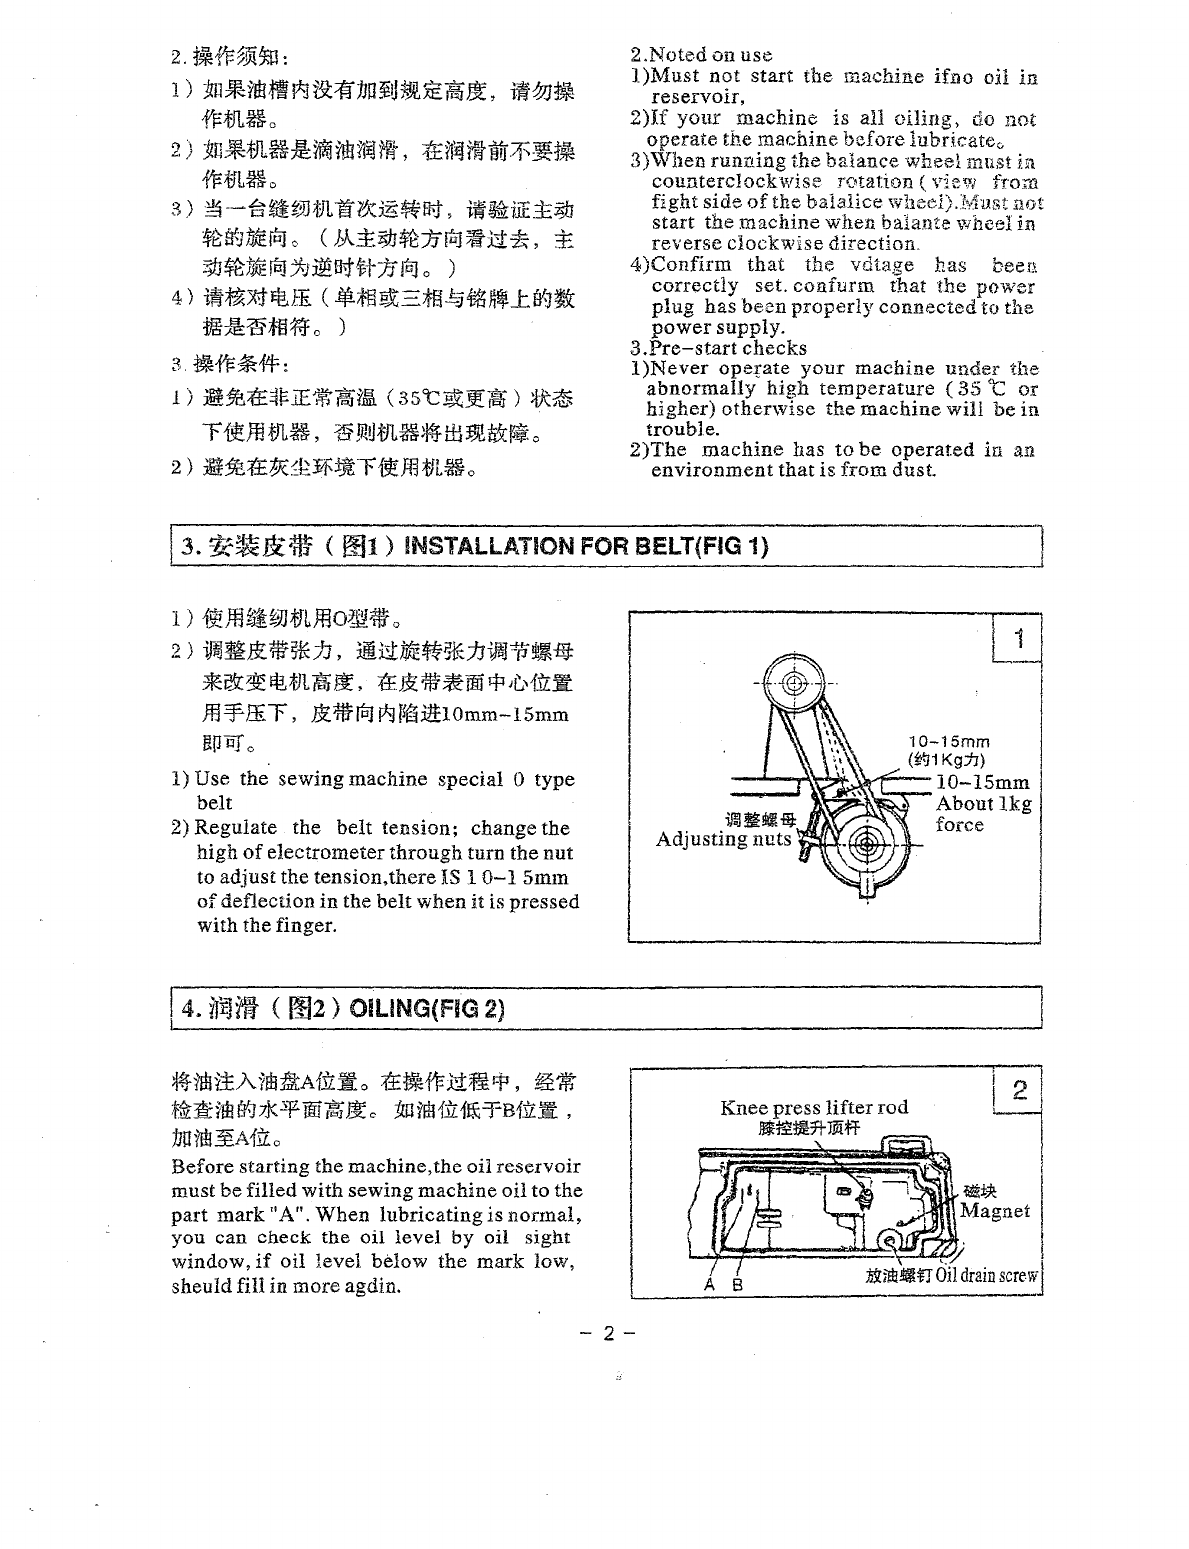
3,
5te~~$
Installation for
belt
································································o···········2
4.,
ii~Jj~
Oiling
•........
o
••••••••••••••••••••••••••.••••••••••••••••••••••
o
•••••••••••••••••••••••••••••••••••••
2
5
.:rh·~·ll·~~·r<:<t=.-:a
'T}-,,
.,;t··
t'
;:·,,·1·
..,
l!rl
~fl·J
i~
d~
1.11..
.1
.1
....
S1
Ua
10D
01
vl
111g
• • • •• •
••
••
•
••
•.
•.
••
• • • ••• • • • • • •• •
·-
• • • •• • • • • •• • • • •• • •• • • • • •• • • •
•••••••
3
6
...
Ml~~jfi17~a·'~1;~~
To
adjust the oil feed to rotating hook ··············································3
7
...
1til*a9iJ~ftt
Oil purnp supply adjustment
...............
o.
..............
oo
......................
o••····3
8.,.
:iElt81!]~fJl.ilf.I'criodical
r.:::Jeaning
·····································································3
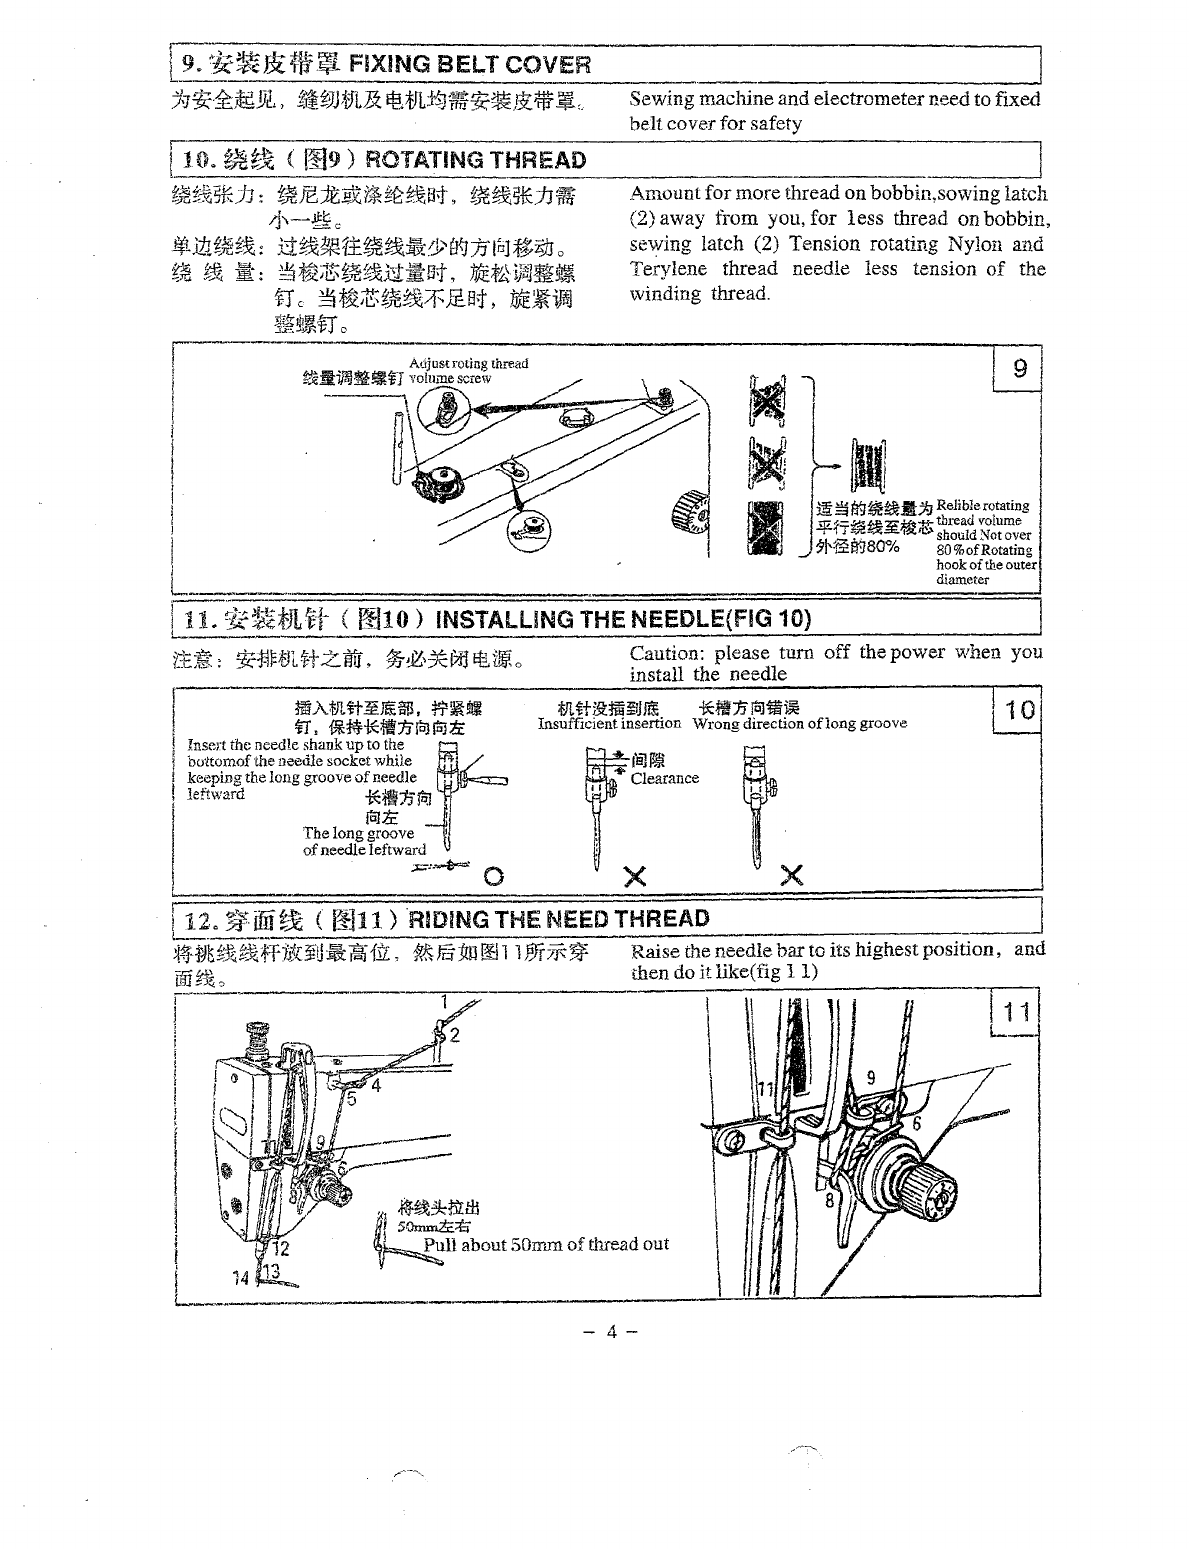
9.~
~~!Ji$.'jgifl
Fixing belt
cover···"·········
•o
••
• • •
••
•••
••
• •
•••
•
••••
•
•••
• •
••••
• •
•••••
• •
••
•
•••••
••••••
•
••
•
·4
"'
0
.,
i~
~
·Rotating thread ··· ··· ··•····· ·········
··
·············· ··········,········•····•·················o • • •
4.
1
i,
7}':2-~~fLti-
InstaUingtheneedle
............
,.
....
,,
......................................................
4
12.,
:§.f
[§1
~
Itiding theneed thread ····
·"
······
··
·········•·············
"·
···························
~
··
.,
····4
i
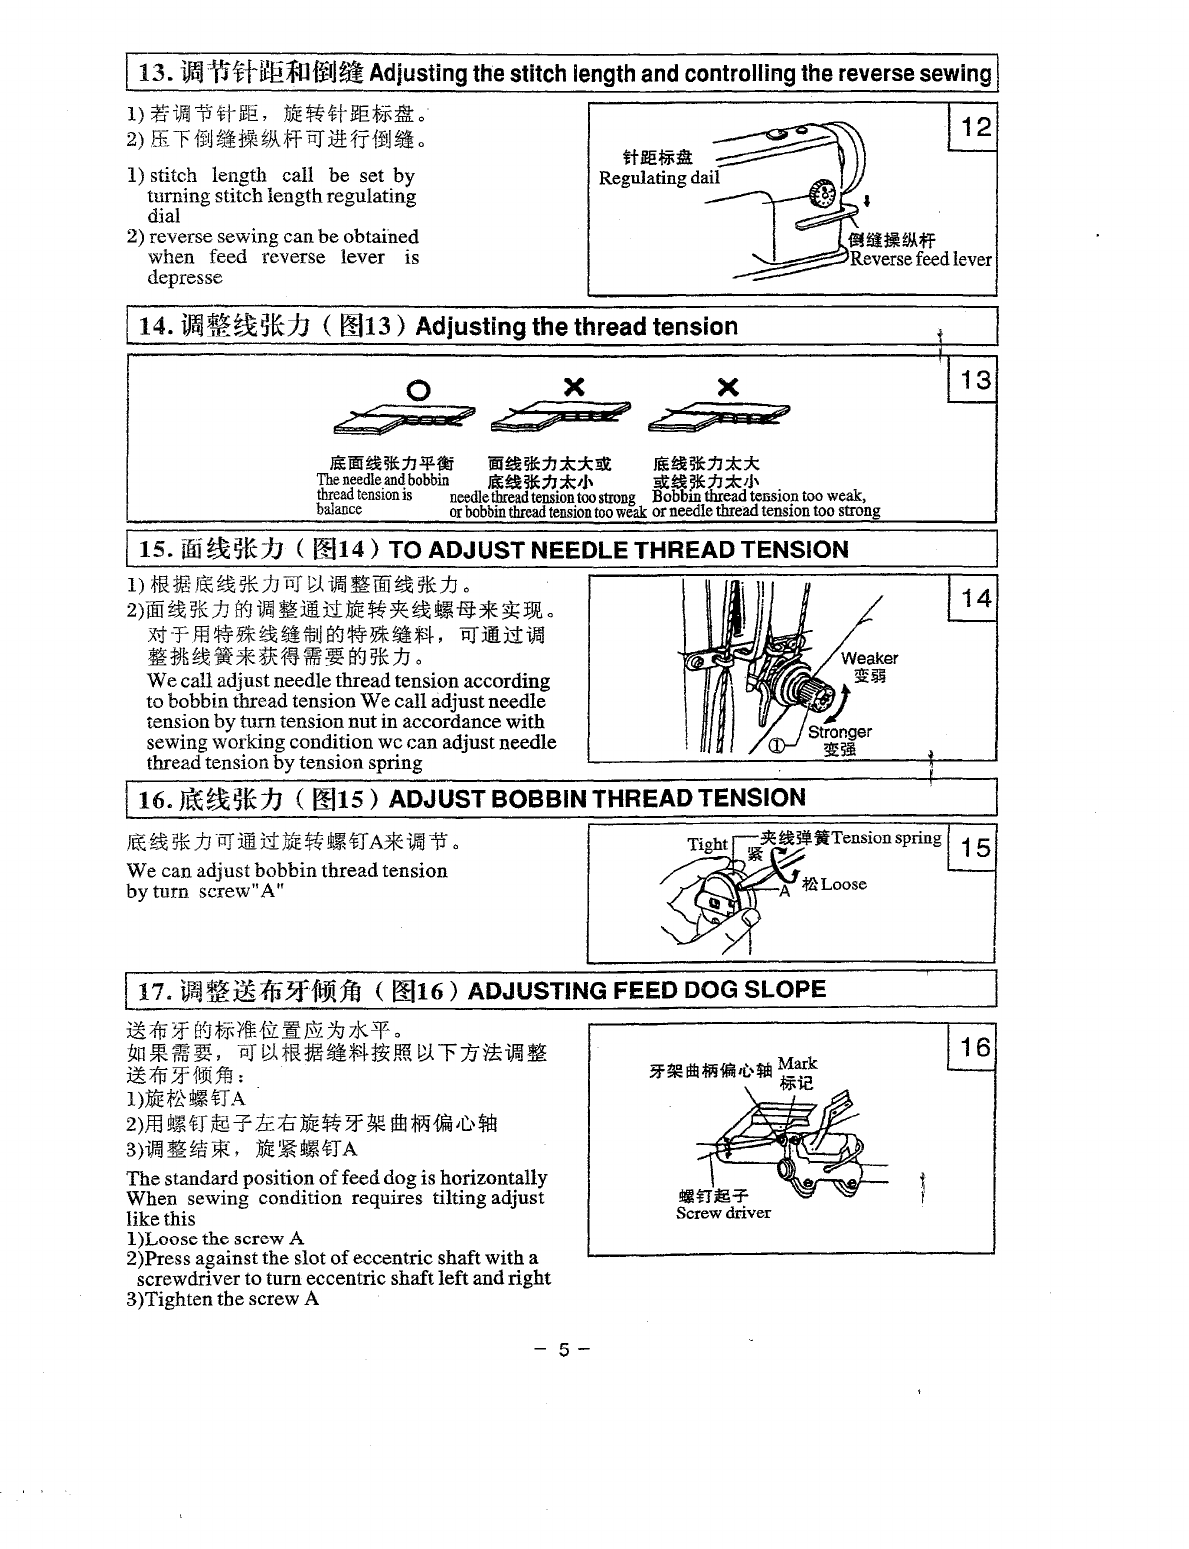
3..,
i~:PttgE~Q'fi!j~
Adjusting the stitch length
and
control11ng
the
reverse
sewing··················
5
",
1
-'
••
;~?S!?1r.~flJL-r-,
A.rt'
. h h d .
'"t
_
',%or:;J
xili~
JIA.J
,~
......Jusnng t c t
rea
tension······························································
5
·j
5,.
im~B-h::'h
To
adjust
need.1e
thread tension
...•..........•....
··.··········•·····························
5
16,
J~~~~1J
Adjust
bobbin thread
tension·····
...
·•·•••·••···•·
..
·••·••••···••···•
......
•·••••··••••···••
5
17
...
iJ~~~;fji
3f{&m-m
Adjusting feed dog
slope······················
..
··················
..
···············
5
i
8,
tt:f.&~.§_
14=1¥-J~~
Fixing the throat
plate······························································
6
i 9
...
i]j
JJ
tf.J~~J:i~1~
Operatingand fixing
of
trimmer
··
··
···
····
·-~
·
··
··
··
··
·
······
····
··
···
··
······· 6
20-.
~~~:f'Li&:f.&atliJ!Jf.l
Using the waste materia1
guide····
...........
:
.........
···········•o···········7
21,.
~'E~1!f:lf1£~
Changing
other
parts································································
7
~1t:f:*$*
Parts
Book
1
..
*Jt~=giH*A.rm
bed
components······························································B-9
2..
...t~~t*'f~~~$14=
Arm shaftvertical shaftneedle bar and thread take-up······
·1
0-11
3
..
f~3F~~H}~~f4=
Needlebarand thread tension components
...........................
12-13
4"'
ttHE!iJI.IT.i"~~14:
Stitch length regulating mechanism
................................
~···14-
i 5
5,
ffiJWJ~iH!f:
Presserfoot
p<rrts
.................................................................
·16-17
6,
i;JJJJ1~$1J$14Knife
controlmechanism··················································18-19
7..
jj!j~$itf:
Lubrication
mechanism·························································
·20-21
8,
iftt&
...
llft1!.f:
Oil reservoir and accessories
................................................
22-23
From the library of: Superior Sewing Machine & Supply LLC