1:
Instructions
For
Operation
BEFOREOPERATION
I.illtil!
~
*:bn
i1fl
~:lf'fm:rf
:$
o
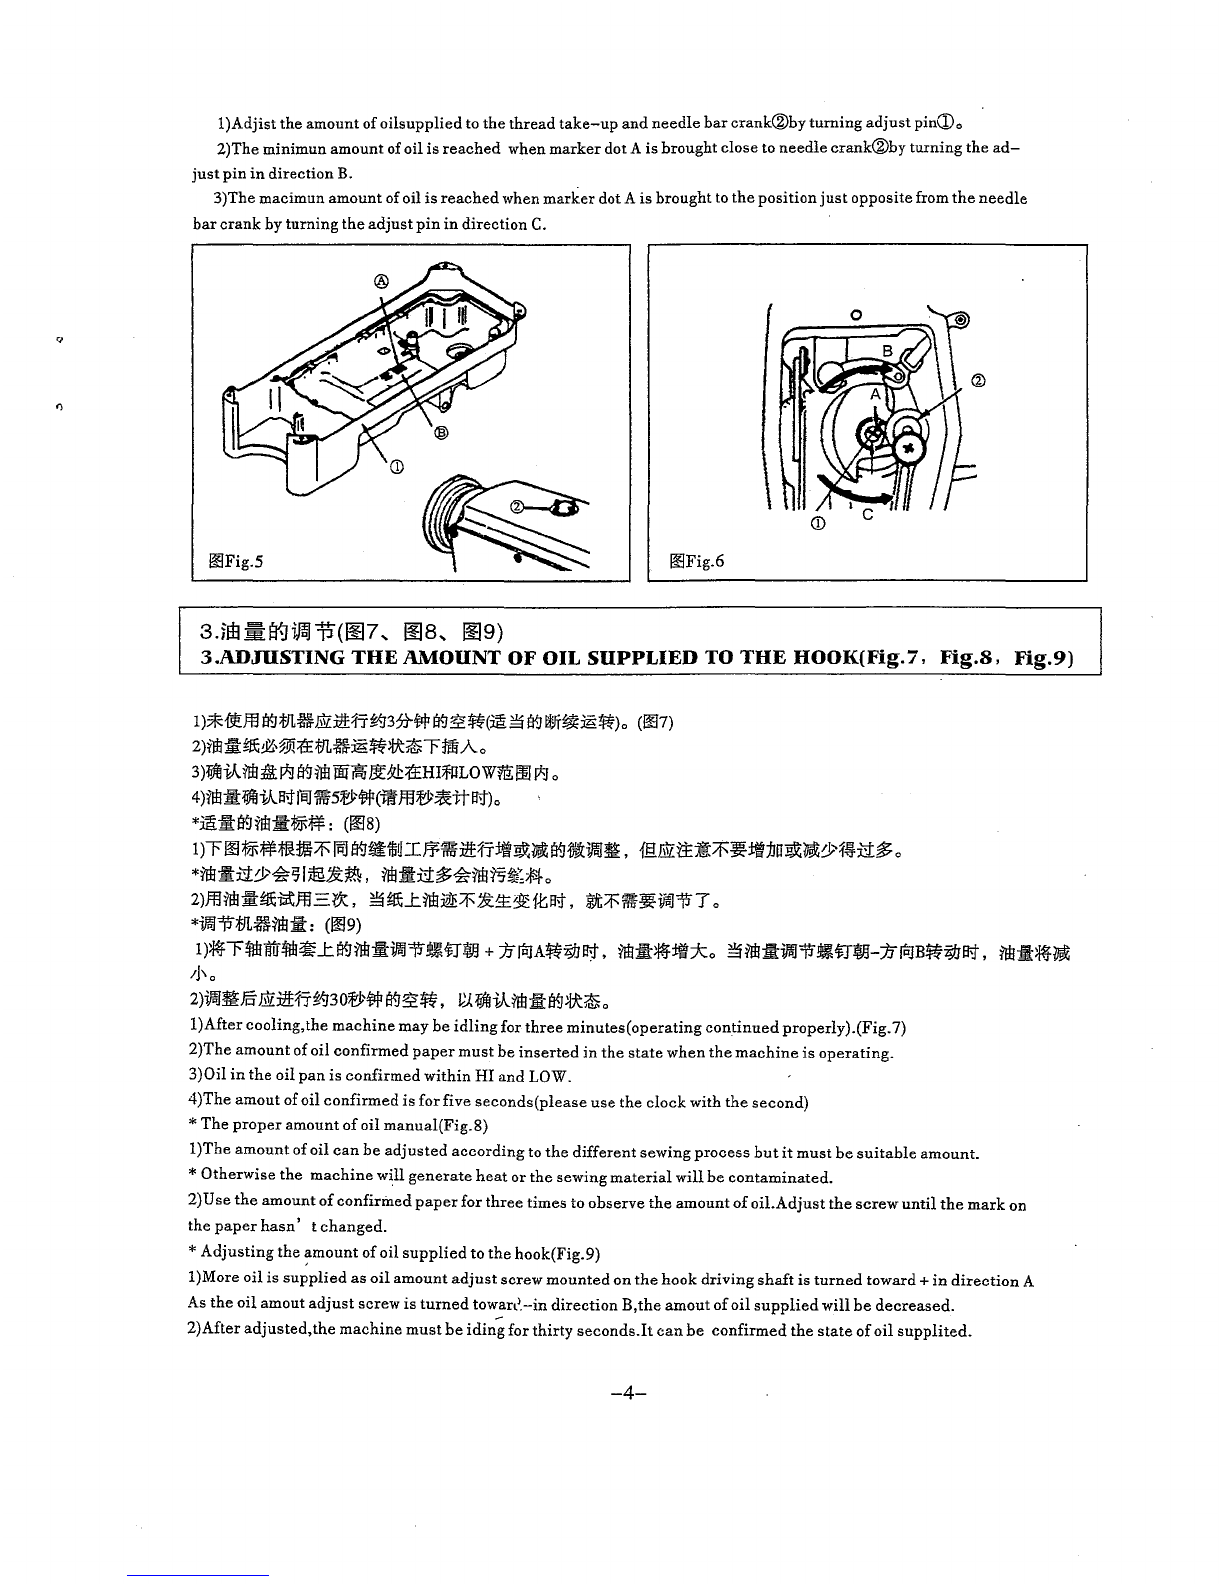
2.tJL~~~ll'.J-,
.M....t.tffi7'HJ!tl~~[fl]E\I1;J~!Jt#:/J[fl],
tt~'
:lf'~~{f!J~o
3.1±~-
r.J
<P,
:;r:;~-m.m:k.R.
-t~1'1!7J!JtJL&:w!ffi
o
4.li}i'JiA.
101!
7#JtJLtjMJ._t.P.Jft~
l'f!ff.l)t;f§
f:IT.~~
.iE
1i}ij
0
l.N
ever
operate
the
machine
unless
its
oil
pan
has
been
filled
with oil.
2.After
setting
up
the
maching,check
the
direction
of
motor
rotation.
to
check
it,
turn
the
handwheel
by
hand
to
bring
the
needle
down,
and
turn
the
power
switch
ON
while
observing
the
handwheel.(The
hand
wheel
should
turn
counterclockwise
as
observed
from
the
handwhee1
side.)
3.Do
not
use
a
lager
motor
pulley
for
the
first
cme
mouth.
4.Confirm
that
the
voltage
and
phase
(single
Jr
3-phase)are
correct
by
checking
them
against
the
ratings
showm
on
the
motor
namaeplate.
OPERATION
PRECAUTIONS
l.*:im
1'1!~7f3CE.JGtJL:H:iE~llt,
itii.P~'f-;li)(:¥Utt-a':rFl'!l5o
2.tJL~~~!Jt,
iJ!f0J~'f-~{$.A:f}6~;fHP~~o
3.tJL*lllll~liUIF-=:114&:wat,
-JE~-13J1lj)fJt:fJL7f3Co
4.:f*fl:::f;\!g:7HIL~Ilt,
~'m-ImE!Yflt7N.o
s.m~~~WHEil,
tt~/Gfti'fffW.Aa9*E.lG=¥-l~U.iZ.fffiii*W$ur_t~
"V"
%&:'~if,
~~!ffi;f!li'f!~:fJLc
6./l'*.fflW~7k~il!l7*:fffl-!f.f5fiJ:J~HJ!GtJL~~i'lil
o
LKeep
your
hands
away from
the
needle
when you
turn
the
power
switch
ON
or
while
the
machine
is
operating.
2.Do
not
put
your
fingers
into
the
thread
take-up
cover
while
the
machine
is
operating.
3.Be
sure
to
turn
the
power
switch
OFF
before
tilting
the
machine
head
or
removing
the
V
belt.
4.
When
an
operation
leaves
from
the
machine,
make
sure
to
turn
off
the
power.
5.During
operator,be
careful
not
to allow your
or
any
other
person's
head
or
heads
to come
close
to
the
hand
wheel,
vbelt,bobbin
winder
or motor or motor.Also,do
n<·t
place
anything
close
to
them.Doing
so may
be
dangerous.
6.Don't
clean
the
face
of
machine
head
with
thinner.
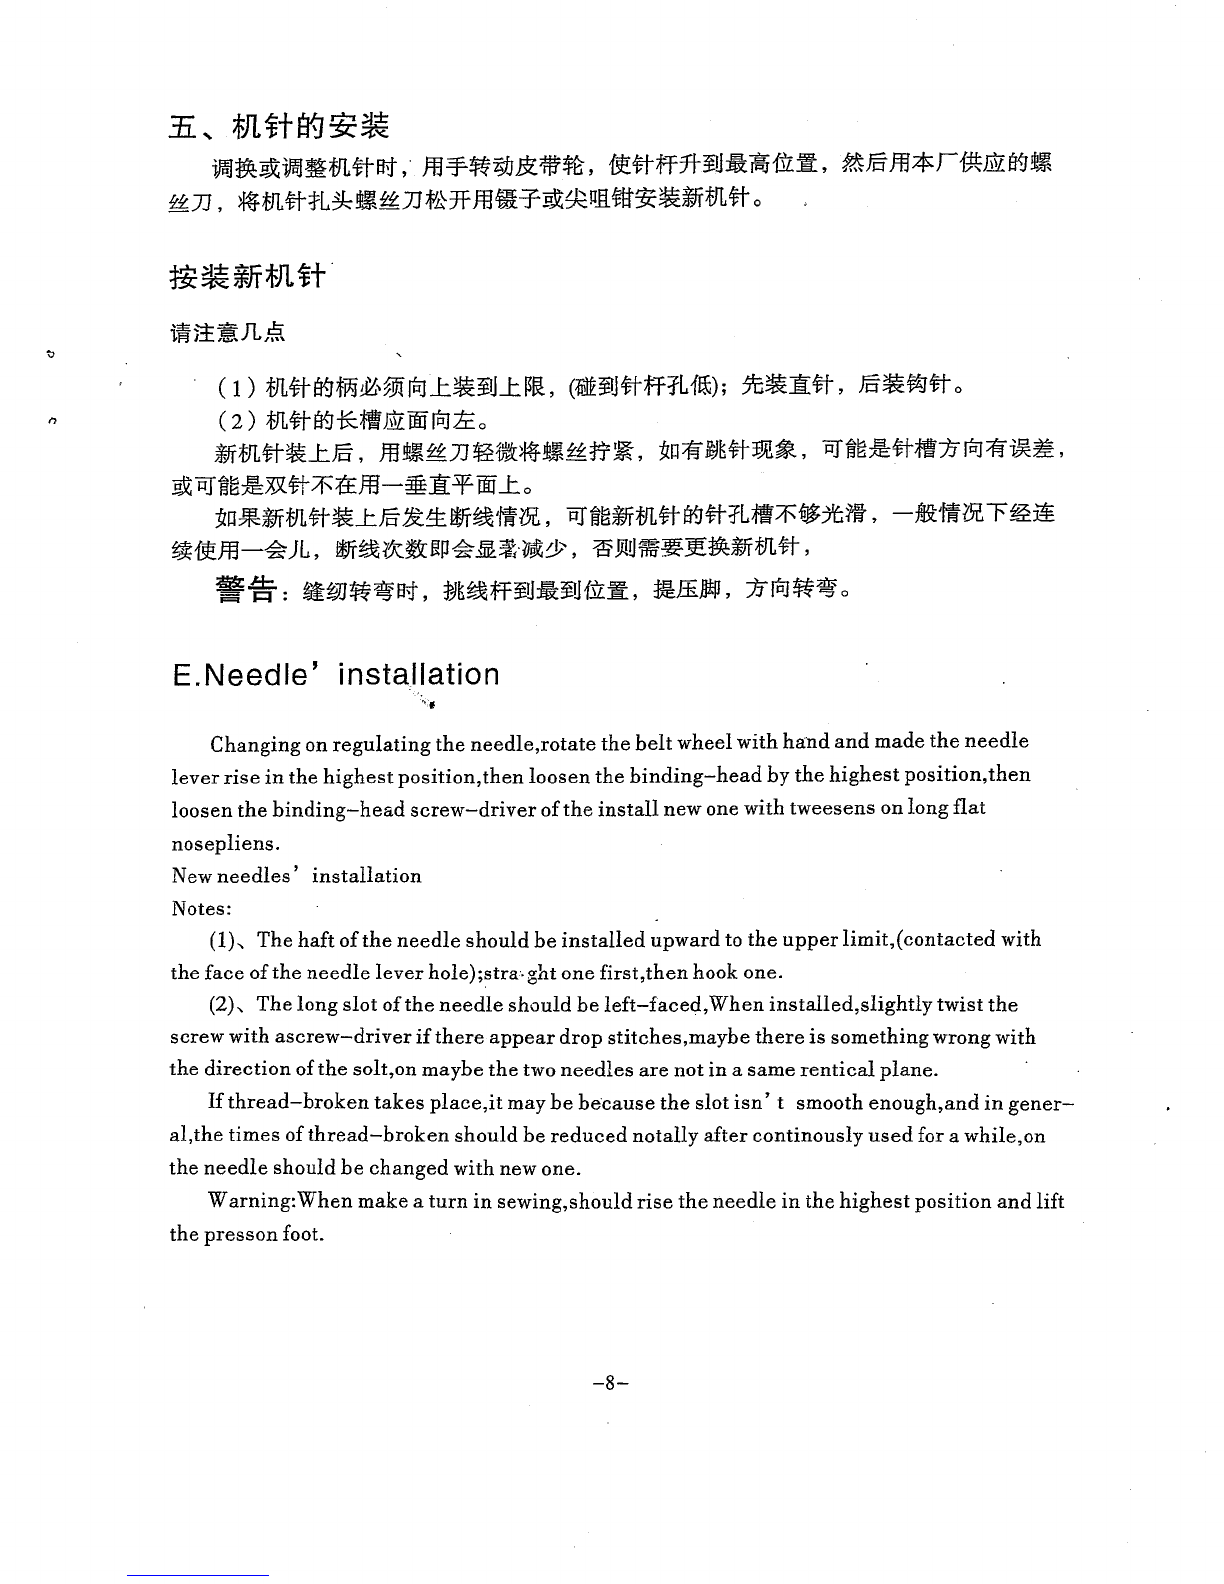
1.*Jlwi¥-J~~(I~l1
...
~2
...
~3
...
~4)
l.INSTALLATION{Fig.l,
Fig.2,
Fig.3,
Fig.4)
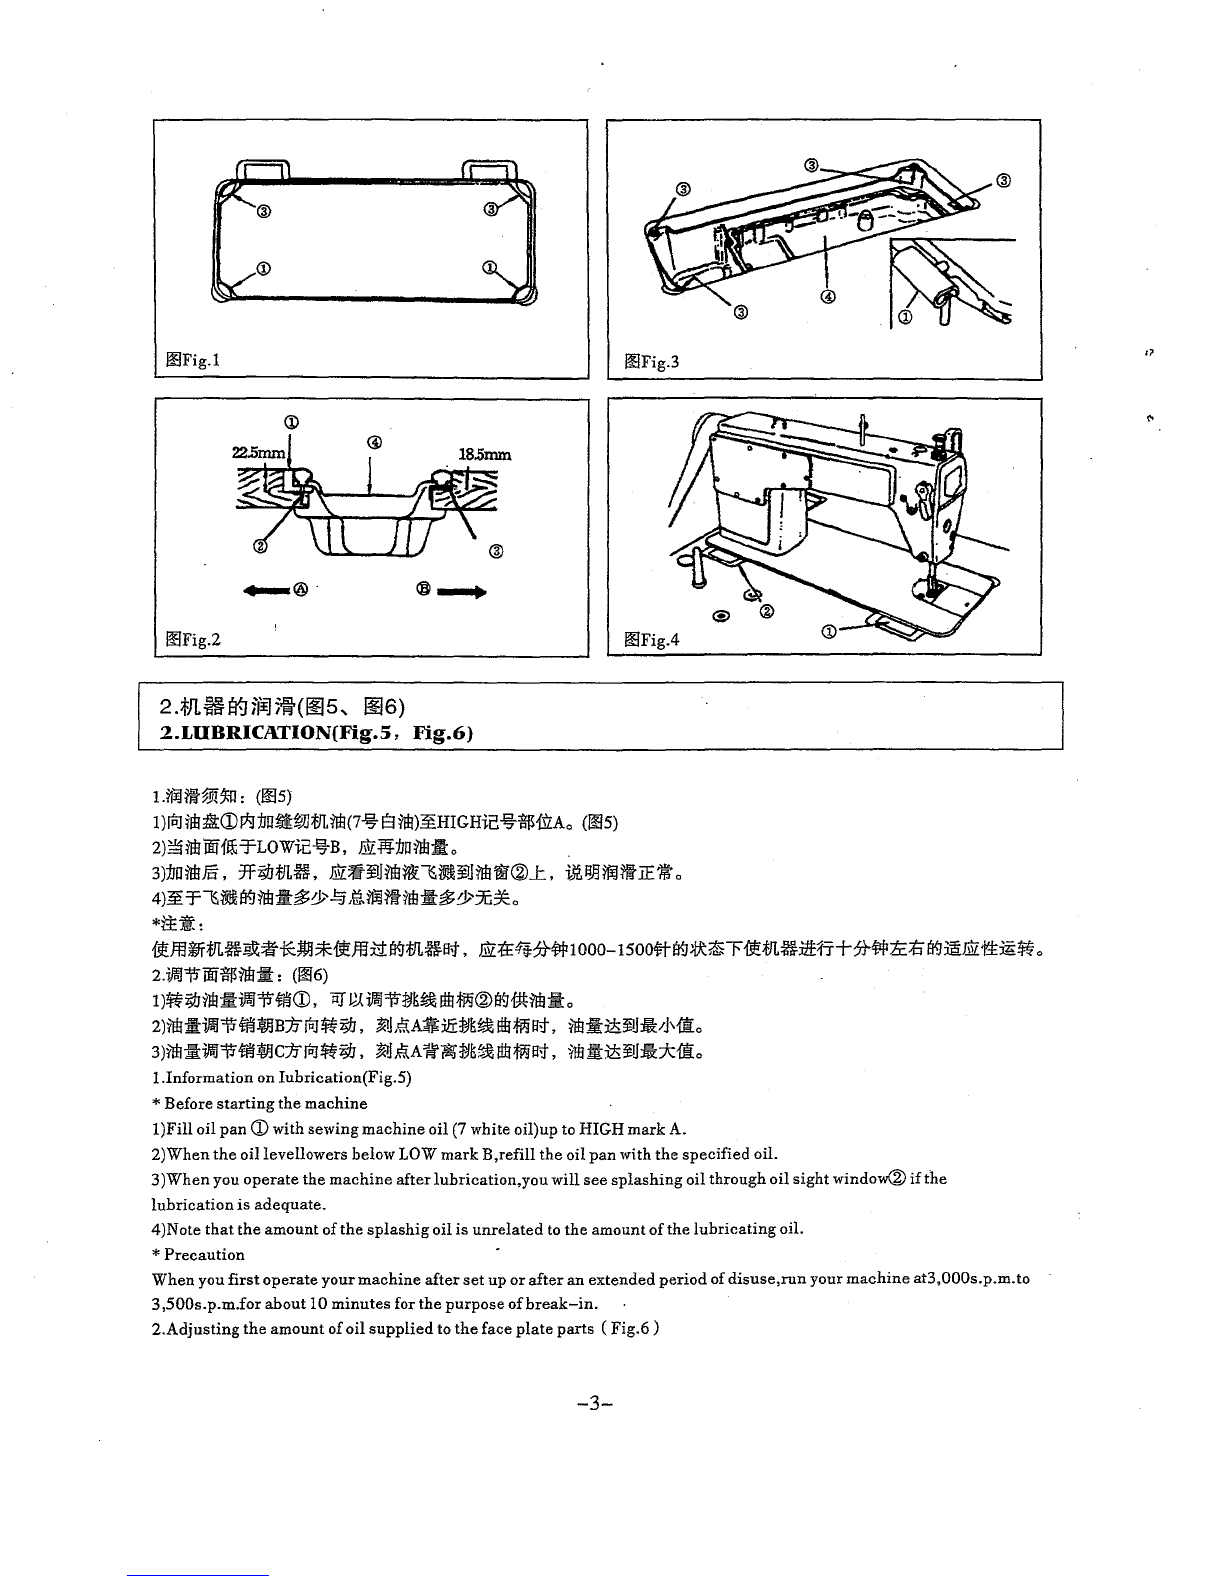
*¥cl!fiil:3'<~:
1)
¥!llfiil:Ellm!tEI
fti:t
[!!];ft\\i!mJ§
c
2)
:imOO.P.Jr1.K,
*tWJ7JjJ:!!fiil:j:J*CD.ffl¥J:!!:&:J.i~®~JEtEA-:IiL(tllt*fl:fl:::f-)ft),
~WJ.Rilfl:&:J*1/J®.ffl¥i:!!fiil:J*~®
l§J
JEtEB-)ft(ffl
:tlL~:ii*~*.g--)ft),
~)§
jfl
irll
fiil:@;/i)(:tf;¢
..t.
c (f!i1
1!12)
3)
)j1J.tJL~:li:m~CD;Ii)(:.AJE:i:f1fl'Lri3,
.!:Ji:t:t&astJL~:li:m~J*®ff!W(~,
~~tJL~~J
lmRt¥1
J:i9t!L~J*1/J®
..
L
(1!13
1!14)
"
Installing
the
oil
pan
1
)The
oil
pan
should
rest
on
the
four
corners
of
the
machine
table
groove.
2)Fix
two
rubber
seats
CDon
side
A(
operator's
side
)using
nails®as
illustrated
above.Fix
two
cushion
seats®
on
side
B(hinged
side)using
nails®.
Then
place
oil
pan@on
the
fixed
seats.(Fig.l
,Fig.2)
3)Fix
hingeCDinto
the
opening
in
the
machine
bed,
and
fit
the
machine
head
to
table
rubber
hinge\])before
placing
the
machine
head
on
cushions®on
the
four corners.(:<ig.3,Fig.4)
-2-