TABLE OF CONTENTS
ForeWord····································
..
···············································································1
1.
Brief lntroducion to The MOd8J·································•••·····•·········••··········•••·············••··· 2
2.
Main
TeChnical
Specifications···················································································· 2
3.
Mdachine Installation and Operation Preparation····················...
·····································
3
1.
Machine
installation·································································································3
(1)Unpacklng machine
head·······················································································
4
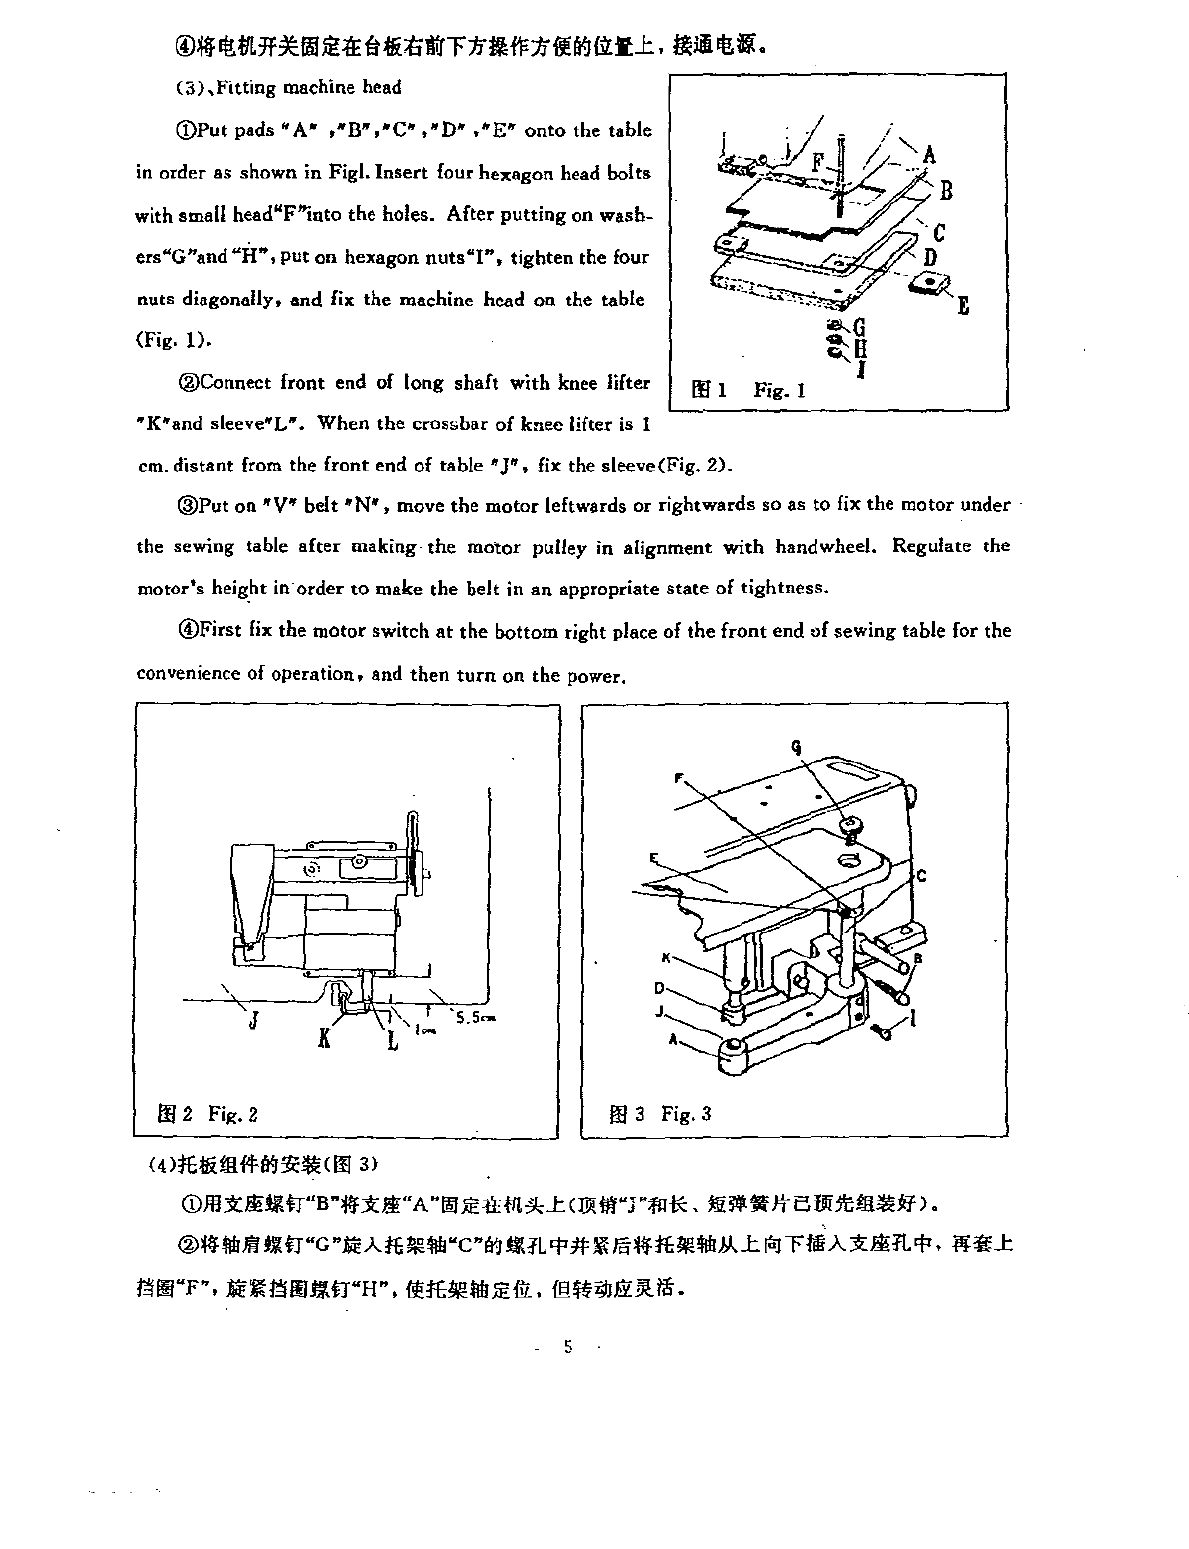
(2)Fitting machine
franme·····························································································4
(3)Fitting
machine
head·························································································
..·· 5
(4)Fitting
Work
plate components
.................................................................................
6
2.
Operation preparation
.............................................................................................
6
(1)Cieaning·······································
........................................................................
6
(2)lnspection·····················································..
··································"··········
..
·····
6
{3)Lubrication··············
............
,
.................................................................................
7
4. Opeation the Machine--·.......·.....·........·........·........····.....·.....·..·.....·.....·.....·..·............·7
1.
Rotating direction and sewing speed
of
main
shaft···--···
..............................................
7
2. Needle selection--..·..·
..
·..·..·.....··....·.....·...........·...........·..·--·.....·
..
··----·
..
··....·.....·····8
3.
Specifications--.....·.....·..·........·.....·.....·...
··
...·..·.....·.....·--·........·...........·...........·...·8
4. Needle replacemet--.....·..·.....·..·
..
·...........·.....·........·.....·
....................
·...........·..·
----8
5.
Threading········......
·································
...·········...···············......
························
·9
6. Feeding and
pulling
out
of
sewn materials
..................................................................
g
7.
Skip
stitch device··........·........··....·.....····
..
·.....·.....·..·.....··.......··....·.....····
..
·........··
10
8. Regulating feed dogs height··.....·
....
·.....·........·..·............·..·..·.....·.....·.....·......···...·
10
5. Adjustment
of
the Machine··
..
·..·..·.....·.....·
..
····........··.......·.....·..·..·...........·.....·.....·...·
11
1. Regulation
of
stitch length··--
................................................................................
11
2. Adjustmen
of
blindstitch sewing penetration--
.............................................................
12
3.
Regulation
of
the pressure
of
material retainer·...........·
..........................................
--12
4. Position regulation
of
needle and needle plate
........................................................
:--·13
(1)The front and the rear
of
position··---
......................................................................
13
(2)The positioning
of
location·····--·--··--......................................................................
14
(3)The
left
limit
position
of
the needle
...........................................................................
14
From the library of: Superior Sewing Machine & Supply LLC