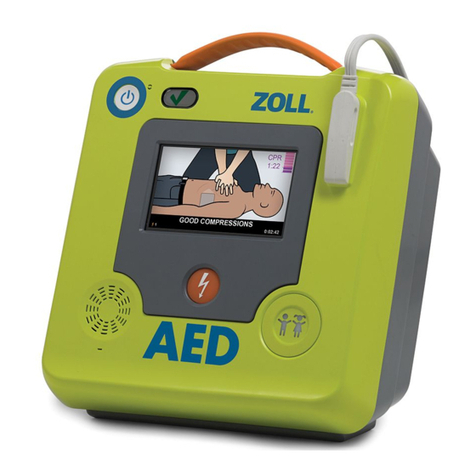
ZOLL AED 3 User manual

BLS Service Manual
9650-000761-01 Rev. A

The issue date for the ZOLL AED 3 BLS Service Manual (REF 9650-000761-01 Rev. A) is
July, 2018.
Copyright © 2018 ZOLL Medical Corporation. All rights reserved. CPR-D-padz, Pedi-padz,
PlusTrac, Program Management Onboard, RescueNet, Stat-padz, ZOLL, and ZOLL AED 3 are
trademarks or registered trademarks of ZOLL Medical Corporation in the United States and/or
other countries.
0123
ZOLL Medical Corporation
269 Mill Road
Chelmsford, MA USA
01824-4105
ZOLL International Holding B.V.
Newtonweg 18
6662 PV ELST
The Netherlands

9650-000761-01 Rev. A ZOLL AED 3 Service Manual i
Table of Contents
Preface .....................................................................................1
Conventions .................................................................................... 2
Safety Considerations ....................................................................... 2
Chapter 1 Maintenance ................................................................3
Self Tests ....................................................................................... 3
Self Test Functions ....................................................................... 4
Automatic Self-Test Transfer ......................................................... 4
Cleaning the AED ............................................................................. 5
Manual Maintenance Tests ................................................................ 6
Physical Inspection Test ................................................................ 6
Test Equipment ........................................................................... 7
Power Supply Test (Optional) ........................................................ 8
Equipment Needed ................................................................... 8
Set Up .................................................................................... 8
Pediatric Mode Test .....................................................................10
Equipment Needed ..................................................................10
Set Up ...................................................................................10
Energy Test ...............................................................................11
Equipment Needed ..................................................................11
Set Up ...................................................................................11
Wi-Fi Test ..................................................................................14
Equipment Needed ..................................................................14
Set Up ...................................................................................14
USB Test ...................................................................................16
Audio Recording Test (ZOLL AED 3 BLS models only) .......................17
Equipment Needed ..................................................................17
Set Up ...................................................................................17
Chapter 2 Troubleshooting .........................................................19
Troubleshooting the AED ..................................................................19
Chapter 3 Functional Description ................................................21
High Voltage Circuit Section .............................................................21
Low Voltage Analog Circuit Section ....................................................21
Digital Section ................................................................................22
Isolation 22
Readiness Indicator Board ............................................................23
USB Connection ..........................................................................23
Other External Connections ..........................................................23
ii ZOLL AED 3 Service Manual 9650-000761-01 Rev. A
Safety Function ..............................................................................23
Safety on High Voltage Capacitor Charge .......................................23
Safety on Discharge ....................................................................24
Safety on Digital Circuits ..............................................................24
Power Supply .................................................................................25
Appendix Hardware/System Architecture .....................................27
Overview .......................................................................................27
ZOLL AED 3 Hardware/System Architecture ....................................28
Checklist .................................................................................29

9650-00761-01 Rev. A ZOLL AED 3 BLS Service Manual 1
Preface
The ZOLL AED 3TM defibrillator is an Automated External Defibrillator (AED) that
can be used for both adult and child victims of sudden cardiac arrest. The
defibrillator incorporates a sequence of audio and visual prompts to help
rescuers follow established AHA/ERC/ILCOR Guidelines for use of AEDs.
The ZOLL AED 3 BLS Service Manual is to be used primarily by the ZOLL®
Technical Service Department in conjunction with the ZOLL AED 3 Operator’s
Manual and the ZOLL AED 3 Administrator’s Guide. The ZOLL AED 3 defibrillator
does not require preventative maintenance due to its automatic self tests.
However, this manual provides optional maintenance tests you can perform
periodically according to local protocols.
This manual contains the following sections:
Preface—Contains safety warnings and an overview of the manual’s contents.
Review this section thoroughly before attempting to use or service the
ZOLL AED 3.
Chapter 1—Maintenance provides the recommended procedures for
evaluating the condition and performance of the ZOLL AED 3 defibrillator.
Chapter 2—Troubleshooting describes possible problems and solutions and
lists the error log messages that indicate the AED requires technical service.
Chapter 3—Functional Description provides technical descriptions of the
ZOLL AED 3 defibrillator modules.
Appendix—Hardware/System Architecture contains a diagram of the
ZOLL AED 3 hardware/system.

2 ZOLL AED 3 BLS Service Manual 9650-00761-01 Rev. A
Checklist—Located on the back page of this manual and used to record the
results of the maintenance tests in Chapter 1.
Conventions
Throughout this document, text prompts and voice prompts are indicated by
capital italicized letters, such as CALL FOR HELP.
NOTE Notes contain important additional information on servicing the
defibrillator.
Safety Considerations
Only qualified personnel should service a ZOLL AED 3 defibrillator. Before using
this defibrillator, read the ZOLL AED 3 Operator’s Manual. Before servicing any
equipment, review these safety considerations and read this manual carefully.
Before discharging the defibrillator, warn everyone near the equipment to
STAND CLEAR.
Do not recharge, disassemble, or dispose of the battery in fire. The battery
might explode if mishandled.
WARNING! Warning statements describe conditions or actions that
can result in personal injury or death.
CAUTION Caution statements describe conditions or actions that can result
in damage to the defibrillator.
WARNING! The ZOLL AED 3 defibrillator can generate as much as
2250 volts with sufficient current to cause lethal shocks.

9650-000761-01 Rev. A ZOLL AED 3 Service Manual 3
Chapter 1
Maintenance
The ZOLL AED 3 defibrillator automatically performs functional testing during
periodic self tests. However, this chapter provides optional maintenance tests
you can perform periodically according to local protocols. The following tests and
maintenance instructions are included in this chapter:
•Self Tests
•Cleaning
•Manual Maintenance Tests
Self Tests
The ZOLL AED 3 defibrillator performs the following self tests to verify AED
integrity and its readiness for emergency use:
•Battery Installation
•Power On
•Manual
•Automatic (Daily or Weekly, based on configuration)
•Automatic Monthly
Following successful completion of all self tests, the status indicator displays a
green check ()to show that all tests passed and that the AED is ready to use.
AED Passed
Self Test
AED Failed
Self Test

4 ZOLL AED 3 Service Manual 9650-000761-01 Rev. A
If the status indicator is blank following the completion of any self test, the
ZOLL AED 3 defibrillator is not ready for use and may be defective. Remove the
AED from service and consult the section “Chapter 2 Troubleshooting” on
page 19 to help determine the problem.
Self Test Functions
The following functions are verified during self tests. Table 1 on page 5 lists the
functions that are included in each self test.
•Battery Capacity: Verifies that the battery usage indicator shows
adequate battery capacity remaining.
•Defibrillation Pads Connection: Verifies that the defibrillation pads are
properly preconnected to the device.
•Battery Expiration Verification: Verifies that the battery is within its
install-by date.
•ECG Circuitry: Tests that the ECG signal acquisition and processing
electronics are functional.
•Defibrillator Charge and Discharge Circuitry: Verifies that the device’s
defibrillator electronics are functional and can charge and discharge at
2 joules. The following tests also include a separate 200 joule charge/
discharge test: Battery Installation Self Test, Manual Self Test, Automatic
Monthly Test.
•Microprocessor Hardware/Software: Verifies proper function of the
AED microprocessor electronics and the integrity of its software.
•CPR Circuitry and Sensor: Determines that CPR monitoring and
compression depth detection are functional (if defibrillation pads with CPR
functionality are connected).
•Audio Circuitry: Verifies that voice prompts are working.
Automatic Self-Test Transfer
All ZOLL AED 3 defibrillators come standard with Program Management
OnboardTM intelligent monitoring technology to transfer self-test data. If
configured, the AED can automatically transfer self-test information over Wi-Fi
to the ZOLL PlusTracTM AED program management system or to another AED
program management provider.

9650-000761-01 Rev. A ZOLL AED 3 Service Manual 5
Cleaning the AED
After each use, clean and disinfect the defibrillator with a soft, damp cloth using
either 90% isopropyl alcohol, or soap and water. You can also use a chlorine
bleach and water mixture (30 ml/liter water) to clean the defibrillator (except on
the contacts and connectors).
NOTE Wipe down the defibrillator with water after using any cleaning solution.
Chlorine residue that remains on the LCD screen may cause damage.
DO NOT:
• Immerse any part of the defibrillator in water.
• Use chlorine mixture on contacts or connectors; this will degrade the contacts
over time.
• Use ketones (MEK, acetone, etc.) to clean the defibrillator.
• Use abrasives (e.g., paper towel) on the display window or graphic screen.
• Sterilize the defibrillator.
Table 1. Self Test Functions
Battery
Installation
Self Test
Power On
Self Test Manual
Self Test Automatic
Self Test Automatic
Monthly
Test
Battery Capacity
Defibrillation Pads
Connection
Battery Expiration
ECG Circuitry
Defibrillator Charge
and Discharge Circuitry
(2 Joule Charge/
Discharge Test)
Microprocessor
Hardware/Software
CPR Circuitry and
Sensor (if defibrillation
pads with CPR func-
tionality are connected)
Audio Circuitry
200 Joule Charge/
Discharge Test

6 ZOLL AED 3 Service Manual 9650-000761-01 Rev. A
Manual Maintenance Tests
This section provides instructions for performing a physical inspection of and
maintenance tests on the ZOLL AED 3. The maintenance tests verify that the
AED is working properly and is ready for use. Use the checklist on the back page
of this manual to record the results (pass/fail rating) of these maintenance tests.
Physical Inspection Test
Check the following: Pass/Fail
HOUSING
1. Is the AED clean, undamaged, and free of excessive wear? oo
2. Does the handle work properly? oo
3. Are input connectors clean and undamaged? oo
4. Are there any cracks or loose parts in the housing? oo
5. Does the front panel/display have any damage or cracks? oo
ELECTRODES
6. Is the cable free of cracks, cuts, or exposed or broken wires? oo
7. Are the defibrillation pads connected to the AED and sealed
in their package? Replace defibrillation pads if expired. oo
BATTERY
8. Is the battery correctly seated in the battery well? oo
9. Is the battery housing free of cracks and damage? oo
10. Are the connectors free of damage and excessive wear? oo
11. Is the battery pack within the install by date?
Replace if the install by date has passed. oo
GENERAL
12. Turn on the AED and verify the green check () indicates
ready for use; then turn it off. oo

9650-000761-01 Rev. A ZOLL AED 3 Service Manual 7
Test Equipment
The following is a list of equipment that you need to perform the maintenance
tests in this chapter. You can substitute an equivalent device for a listed device;
however, not all simulators and analyzers will produce the same results. Be sure
to follow the manufacturer's recommendation for conducting the maintenance
tests.
•Fluke Impulse 7000 Defib Analyzer (or equivalent)
•Stopwatch
•ZOLL AED 3 Defib Test Cable Kit (REF 8900-000268)
•Blank USB Flash Drive (minimum 512 MB, USB 1.1 or 2.0 compliant)
•Computer (Wi-Fi capable with ZOLL RescueNet®software loaded and
speakers if testing audio recording)
•ZOLL AED 3 Battery Pack
•Battery Test Fixture (REF 9100-000369-TF) (optional)
•Power Supply 10A
•Digital Multi-Meter (Agilent 34401A or equivalent)
•Wi-Fi Access Point
NOTE If the Battery Test Fixture is not available, the tests in this section can
be conducted with a ZOLL AED 3 Battery Pack.

8 ZOLL AED 3 Service Manual 9650-000761-01 Rev. A
Power Supply Test (Optional)
This test is comprised of two tests: the Off Current test and the On Current test.
In order to perform the Off Current test, two measurements are required: one
with the fixture installed in the device and one for the test fixture. The difference
of the two readings is the Off Current Value.
NOTE If a Power Supply is not available for this test, record N/A for this test
on the Maintenance checklist on the back page of this manual.
Equipment Needed
Battery Test Fixture, Power Supply, Digital Multi-Meter.
Set Up
1. On the Digital Multi-Meter, set the function to DC Amps.
2. Connect the positive lead from the I jack to the positive current post (Amp
meter) on the Battery Test Fixture.
3. Connect the negative lead from the LO jack to the negative current post on
the Battery Test Fixture.
4. Set the Power Supply to 12.0V, then turn it off.
5. Connect the leads from the Battery Test Fixture to the proper polarity of the
Power Supply and install the Battery Test Fixture into the battery well.
Action Expected Result(s) Pass/Fail
1. Turn on the Power Supply. Verify that the AED runs a self test
(approximately one minute) and
then powers off.
Note: AED may issue the messages
CHANGE BATTERY and UNIT FAIL.
Disregard the messages and
continue the test.
oo
2. Verify that the AED is turned off to
perform the Off Current test.
On the Battery Test Fixture, turn
the I Measure switch to the sleep
mode position.
After the measurement is taken,
turn the I Measure switch back to
the off position.
Write down the current
measurement on the Digital
Multi-Meter.
Value #1______________mA
3. Remove the Battery Test Fixture
from the unit.
Turn the I Measure switch to the
sleep mode position.
After the measurement is taken,
turn the I Measure switch back to
the off position.
Write down the current
measurement on the Digital
Multi-Meter.
Value #2______________mA

9650-000761-01 Rev. A ZOLL AED 3 Service Manual 9
Action Expected Result(s) Pass/Fail
4. Subtract Value #2 from Value #1.
This is the device Off Current
Value.
Verify that the value is between
004mA and 0.015mA. oo
5. Press the On/Off button on the
AED to turn it on to perform the
On Current test.
Verify that the AED powers on in
Rescue Mode.
Note: The AED may issue the
CHANGE BATTERY message.
Disregard the message and continue
the test.
oo
6. On the Battery Test Fixture, turn
the I Measure switch to the sleep
mode position.
After the measurement is taken,
turn the I Measure switch back to
the off position.
Observe that the current
measurement on the Digital Multi-
Meter is between 200mA to 440mA.
oo
7. Press the On/Off button on the
AED to turn it off. Verify that the AED issues the
prompt UNIT POWERING OFF.oo

10 ZOLL AED 3 Service Manual 9650-000761-01 Rev. A
Pediatric Mode Test
Equipment Needed
Power Supply, Battery Test Fixture, Defib Test Cable, Fluke Impulse 7000 Defib
Analyzer (or equivalent).
NOTE The test values in the following procedure are based of the default
pediatric energy settings (50, 70, and 85 joules) into a 50 ohm load. If
the Analyzer you are using has a different impedance value, refer to the
table “Delivered Energy at Each Defibrillator Setting into a Range of
Loads” on page 13.
Set Up
Connect the Defib Test Cable to the Defib Analyzer, and set the waveform to
VFIB.
Action Expected Result(s) Pass/Fail
1. Connect the ZOLL AED 3 Defib
Test Cable Kit to the AED, then
press the On/Off button to turn on
the AED.
Verify that the AED issues the
prompts UNIT OK, ADULT PATIENT
SELECTED followed by IF PATIENT IS
A CHILD, PRESS CHILD BUTTON.
oo
2. Press the Child button. Verify that the Child button LED
illuminates, and that the AED issues
the prompt CHILD PATIENT
SELECTED.
oo
3. (First shock energy test. First
pediatric shock energy is 50
joules.)
Verify that the AED issues the
prompt DON'T TOUCH PATIENT
ANALYZING, followed by, SHOCK
ADVISED, DON'T TOUCH PATIENT,
and PRESS FLASHING SHOCK
BUTTON.
oo
4. Press the flashing shock button. Verify that AED prompts SHOCK
DELIVERED.oo
5. Verify that the energy delivered into
analyzer is 43 joules to 58 joules. oo
6. Verify that the AED issues the
prompt START CPR. oo
7. Press the On/Off button to turn off
the AED. Verify that the AED issues the
prompt UNIT POWERING OFF.oo

9650-000761-01 Rev. A ZOLL AED 3 Service Manual 11
Energy Test
Equipment Needed
Power Supply, Battery Test Fixture, ZOLL AED 3 Defib Test Cable Kit, Fluke
Impulse 7000 Defib Analyzer (or equivalent).
NOTE The test values in the following procedure are based of the default adult
energy settings (120, 150, and 200 joules) into a 50 ohm load. If the
Analyzer you are using has a different impedance value, refer to the
table “Delivered Energy at Each Defibrillator Setting into a Range of
Loads” on page 13.
Set Up
This test continues from the previous test. The ZOLL AED 3 Defib Test Cable Kit
is connected to the Defib Analyzer, and the waveform is set to VFIB.
Action Expected Result(s) Pass/Fail
1. Disconnect the ZOLL AED 3
Defib Test Cable Kit from the
AED, then press the On/Off
button to turn on the AED.
Verify that the AED issues the
prompts UNIT OK and PLUG IN
PADS CABLE.
oo
2. Connect the ZOLL AED 3 Defib
Test Cable Kit to the AED. Verify that the AED issues the voice
prompt ADULT PATIENT SELECTED,
followed by IF PATIENT IS A CHILD,
PRESS CHILD BUTTON.
oo
3. (First shock energy test. First
adult shock energy is 120
joules.)
Verify that the AED issues the voice
prompts DON’T TOUCH PATIENT,
ANALYZING, followed by SHOCK
ADVISED, DON’T TOUCH PATIENT,
and PRESS FLASHING SHOCK
BUTTON.
oo
4. Press the flashing shock button. Verify that the AED issues the
prompt SHOCK DELIVERED.oo
5. Verify that the energy delivered into
the analyzer is 100 joules to 135
joules.
oo
6. Verify that the AED issues the
prompt START CPR. oo
7. Hold the CPR sensor (attached
to the ZOLL AED 3 Defib Test
Cable Kit) in the palm of your
hand. Move your hand in front
of you in an up and down
motion of approximately 2
inches at a rate of 100bpm.
(Conduct test for about 20
seconds.)
Verify that the AED displays the CPR
depth compression indicator. oo

12 ZOLL AED 3 Service Manual 9650-000761-01 Rev. A
Action Expected Result(s) Pass/Fail
8. Verify that the AED issues the
prompt STOP CPR after 2 minutes
(default setting).
oo
9. (Second shock energy test.
Second adult shock energy is
150 joules.)
Verify that the AED issues the voice
prompts DON’T TOUCH PATIENT,
ANALYZING, followed by SHOCK
ADVISED, DON’T TOUCH PATIENT,
and PRESS FLASHING SHOCK
BUTTON.
oo
10. Press the flashing shock button. Verify that the AED issues the
prompt SHOCK DELIVERED.oo
11. Verify that the energy delivered into
analyzer is 123 joules to 167 joules. oo
12. Verify that the AED issues the
prompt START CPR; after 2 minutes
(default setting), verify that the AED
issues the prompt STOP CPR.
oo
13. (Third shock energy test. Third
adult shock energy is 200
joules.)
Verify that the AED issues the voice
prompts DON’T TOUCH PATIENT,
ANALYZING, followed by SHOCK
ADVISED, DON’T TOUCH PATIENT,
and PRESS FLASHING SHOCK
BUTTON.
oo
14. Press the flashing shock button. Verify that the AED issues the
prompt SHOCK DELIVERED.oo
15. Verify that the energy delivered into
analyzer is 178 joules to 240 joules. oo
16. Press the On/Off button to turn
off the AED. Verify that the AED issues the
prompt UNIT POWERING OFF. oo

9650-000761-01 Rev. A ZOLL AED 3 Service Manual 13
Table 2. Delivered Energy at Each Defibrillator Setting into a Range of Loads
Load Selected Energy
50 J 70 J 85 J 120 J 150 J 200 J
2537 J 54 J 57 J 86 J 109 J 139 J
5050 J 69 J 80 J 118 J 145 J 209 J
7561 J 82 J 97 J 134 J 166 J 196 J
10060 J 84 J 95 J 142 J 165 J 194 J
12557 J 80 J 91 J 133 J 155 J 178 J
15065 J 91 J 103 J 124 J 145 J 192 J
17560 J 84 J 95 J 116 J 135 J 177 J
Accuracy ±15% ±15% ±15% ±15% ±15% ±15%

14 ZOLL AED 3 Service Manual 9650-000761-01 Rev. A
Wi-Fi Test
Equipment Needed
Battery Test Fixture, Power Supply, Wi-Fi Access Point.
NOTE To test the server connectivity, the AED must be connected to an access
point. For more information, refer to “Setting up your Wireless
Configuration” in the ZOLL AED 3 Administrator's Guide.
Set Up
•Set the Power Supply to 12 volts.
•Connect the Battery Test Fixture to the Power Supply.
Action Expected Result(s) Pass/Fail
1. Press and hold the On/Off button
for more than 5 seconds to turn
on the AED in AED Management
(Non-Rescue) Mode.
Verify that the AED displays the
Select Operating Mode window. oo
2. Press the Device Configuration
icon ().
Verify that the AED displays the
Configuration window. oo
3. Press the Supervisor icon ()
and enter the six-digit passcode
(default passcode is 123456) and
press OK.
Verify that the AED displays the
Advanced Configuration window. oo
4. Press the Device History Wi-Fi
icon ().
Verify that the AED displays the
Wi-Fi Setup Level window. oo
5. Press the Quick Setup button. Verify that the AED displays the
Clinical Archive Quick Setup window. oo
6. Press the Network Search icon
().
Verify that the AED displays the
SEARCHING FOR WIRELESS
NETWORK message and a flashing
IN PROGRESS message.
oo
7. Select your wireless network that
you want to connect to, and press
OK.
Verify that the AED displays the
Clinical Archive Quick Setup window. oo
8. In the Password field, click on the
arrow and enter the network
password (if required), and then
click OK.
Verify that the AED displays the
password in the password field. oo

9650-000761-01 Rev. A ZOLL AED 3 Service Manual 15
Action Expected Result(s) Pass/Fail
9. Press the Test Wi-Fi button. Verify that the AED displays the
TESTING SERVER CONNECTIVITY
message along with the
IN PROGRESS message.
oo
10. Verify that the AED displays the
message TESTING SERVICE
CONNECTIVITY, COMPLETE.
oo
11. Press the OK button, press
Cancel, and then press OK.Verify that the AED displays the
Advanced Configuration window. oo

16 ZOLL AED 3 Service Manual 9650-000761-01 Rev. A
USB Test
Equipment Needed
USB Flash Drive (Blank), Power Supply, Battery Test Fixture, computer
Set Up
This test continues from the previous test. The AED should display the Advanced
Configuration window.
Action Expected Result(s) Pass/Fail
1. Insert the USB Flash Drive into
the USB connector on the back of
the AED.
Verify that the blinking USB device
icon ()appears in the status bar at
the bottom of the display screen. (The
blinking icon switches to steady
status.)
oo
2. Press the Export Files icon
()and select Clinical Archives
(all).
Verify that the green check appears
next to the Clinical Archives (all)
option.
oo
3. Press Save (USB). When the transfer is complete, verify
that the AED displays the message
DATA TRANSFER COMPLETE.
oo
4. Press OK, then press Cancel.
Remove the USB Flash Drive. Verify that the USB icon ()no
longer appears in the status bar at the
bottom of the display screen.
oo
5. Press the On/Off button to turn off
the AED. Verify that the AED issues the prompt
UNIT POWERING OFF.oo
6. Insert USB Flash Drive in the
computer USB port. Open File
Explorer, and select the USB
drive.
Verify that there is at least 1 CRD file
present. (The AED can store up to 2
CRD files.)
oo
Other manuals for AED 3
6
Table of contents
Other ZOLL Medical Equipment manuals

ZOLL
ZOLL Infusion Dynamics Power Infuser M100B-3A User manual

ZOLL
ZOLL Aed Plus Manual

ZOLL
ZOLL M Series Instruction Manual

ZOLL
ZOLL AED PLUS Trainer 2 User manual

ZOLL
ZOLL AED PLUS Trainer2 Manual

ZOLL
ZOLL M Series User manual

ZOLL
ZOLL AED 3 User manual

ZOLL
ZOLL M Series User manual

ZOLL
ZOLL M Series User manual

ZOLL
ZOLL Thermogard HQ Surface User manual