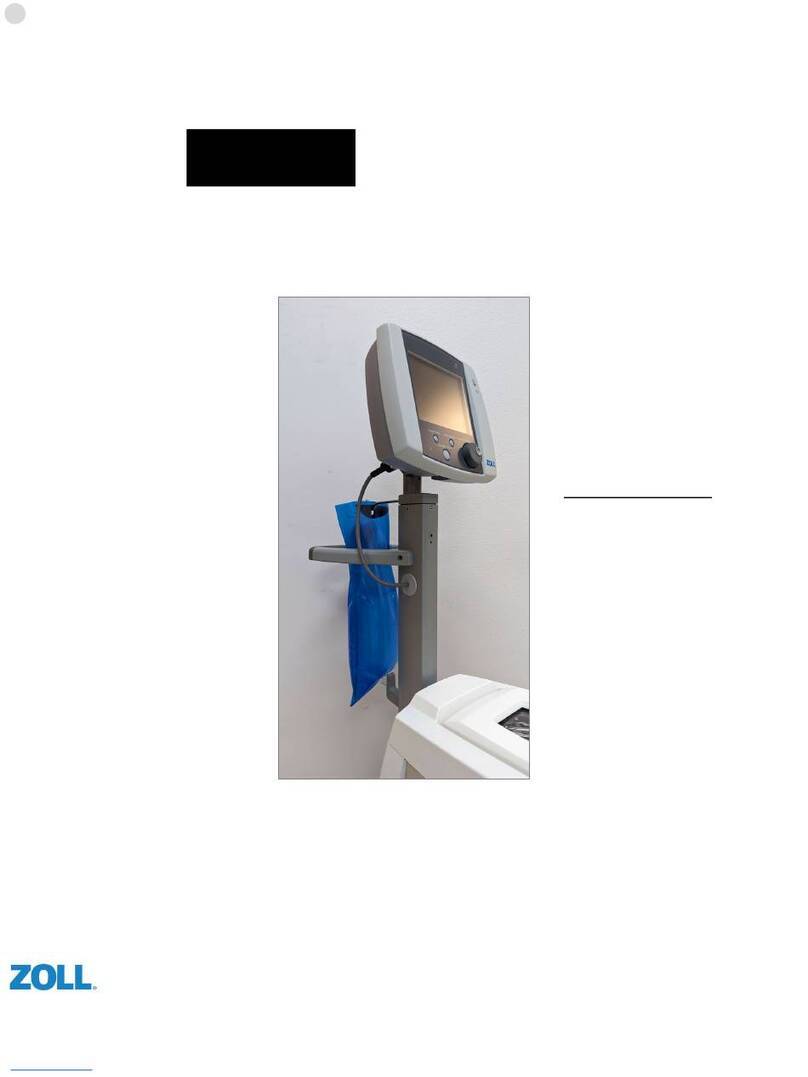
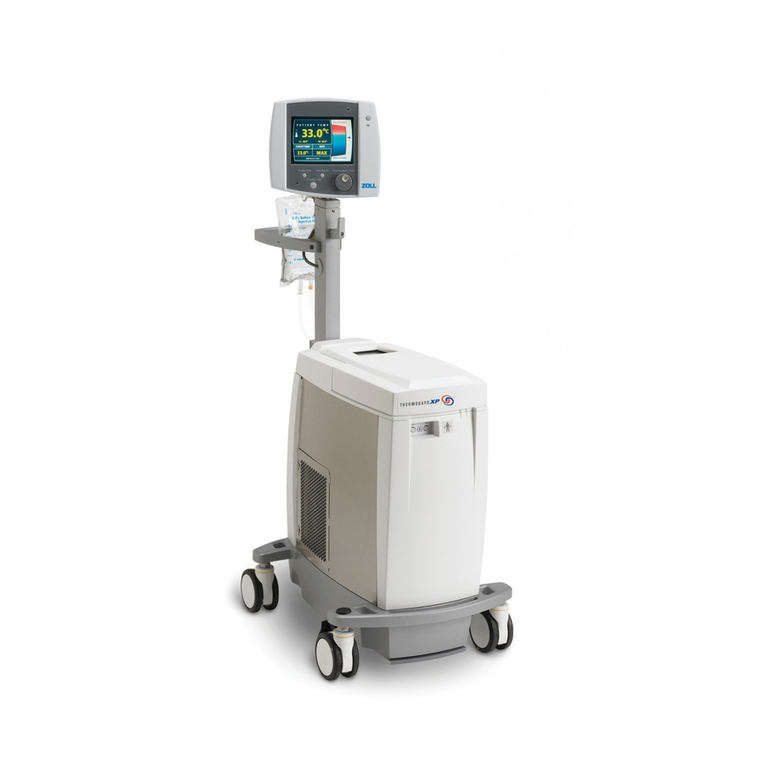
ZOLL Cool Line CL-2295AE/8700-0781-40 User manual

ZOLL Circulation, Inc.
2000 Ringwood Avenue
San Jose CA 95131 USA
+1.408.541.2140 (main)
+1.408.541.1030 (fax)
Patent: www.zoll.com/patents
b`=obm
EMERGO EUROPE
Prinsessegracht 20
2514 AP The Hague
The Netherlands
106517-001 Rev 9
C
0344
1/131
Cool Line®Intravascular Heat Exchange Catheter Kit - Instructions for Use CL-2295AE/8700-0781-40 & CL-2295CO/8700-0781-14
Mode d’emploi du cathéter d’échange thermique intravasculaire Cool Line®CL-2295AE/8700-0781-40 et CL-2295CO/8700-0781-14
Cool Line®intravaskuläres Wärmeaustauschkatheter-Kit – Gebrauchsanweisung CL-2295AE/8700-0781-40
& CL-2295CO/8700-0781-14
Instrucciones de uso del kit de catéter intravascular de intercambio térmico Cool Line®CL-2295AE/8700-0781-40
y CL-2295CO/8700-0781-14
Instruções de uso do kit de cateter intravascular trocador de calor Cool Line®CL-2295AE/8700-0781-40 e CL-2295CO/8700-0781-14
Instruções de utilização do kit de cateter de permuta de calor intravascular Cool Line®CL-2295AE/8700-0781-40
e CL-2295CO/8700-0781-14
Istruzioni per l'uso del kit del catetere intravascolare per scambio termico Cool Line®CL-2295AE/8700-0781-40
e CL-2295CO/8700-0781-14
Gebruiksaanwijzing voor Cool Line®intravasculaire warmtewisselingskatheterkit CL-2295AE/8700-0781-40 en CL-2295CO/8700-0781-14
Zestaw cewnika wewnątrznaczyniowego z wymiennikiem ciepła Cool Line®— Instrukcja użycia CL-2295AE/8700-0781-40
i CL-2295CO/8700-0781-14
Souprava katétru pro intravaskulární výměnu tepla Cool Line®– návod k použití CL-2295AE/8700-0781-40 a CL-2295CO/8700-0781-14
Komplet katetera za intravaskularnu izmjenu topline Cool Line®- Upute za uporabu - modeli CL-2295AE/8700-0781-40
i CL-2295CO/8700-0781-14
Cool Line®intravaszkuláris hőcserélőkatéter-készlet – használati utasítás CL-2295AE/8700-0781-40 és CL-2295CO/8700-0781-14
Руководство по эксплуатации набора внутрисосудистого теплообменного катетера Cool Line®моделей CL-2295AE/8700-0781-40
иCL-2295CO/8700-0781-14
Bruksanvisning till Cool Line®intravaskulär värmeväxlande kateter, sats CL-2295AE/8700-0781-40 och CL-2295CO/8700-0781-14
Suonensisäisen Cool Line®-lämmönvaihtokatetrin välinesarja, käyttöohjeet CL-2295AE/8700-0781-40 ja CL-2295CO/8700-0781-14
Brugsanvisning til sæt med Cool Line®intravaskulært varmeudvekslingskateter 2295AE/8700-0781-40 og CL-2295CO/8700-0781-14
Intravaskulinio šilumąperduodančio kateterio „Cool Line®“ rinkinio naudojimo instrukcijos CL-2295AE/8700-0781-40
ir CL-2295CO/8700-0781-14
Cool Line®intravaskulārāsiltumapmaiņas katetra komplekts – lietošanas instrukcija modeļiem CL-2295AE/8700-0781-40
un CL-2295CO/8700-0781-14
Κιτ ενδοαγγειακού καθετήρα ανταλλαγής θερμότητας Cool Line®- Οδηγίες χρήσης CL-2295AE/8700-0781-40
& CL-2295CO/8700-0781-14
Cool Line®血管内热交换导管套件使用说明 CL-2295AE/8700-0781-40 和CL-2295CO/8700-0781-14
Bruksanvisning for Cool Line®katetersett for intravaskulær varmeveksling CL-2295AE/8700-0781-40 og CL-2295CO/8700-0781-14

2/131
English (en) ......................................................................................................................3
Français (fr) ......................................................................................................................8
Deutsch (de) ...................................................................................................................15
Español (es) ...................................................................................................................22
Português (ptbr) ..............................................................................................................28
Português (pt) .................................................................................................................34
Italiano (it) .......................................................................................................................40
Nederlands (nl) ...............................................................................................................46
Polski (pl) ........................................................................................................................53
Čeština (cs) ....................................................................................................................59
Hrvatski (hr) ....................................................................................................................65
Magyar (hu) ....................................................................................................................71
Русский (ru) ....................................................................................................................77
Svenska (sv) ...................................................................................................................84
Suomi (fi) ........................................................................................................................90
Dansk (da) ......................................................................................................................96
Lietuviškai (lt) ................................................................................................................102
Latviski (lv) ....................................................................................................................108
Ελληνικά (el) .................................................................................................................114
简体中文 (cn)............................................................................................................121
Norsk (no) .....................................................................................................................126

3/131
båÖäáëÜ=EÉåF
jçÇÉä=`iJOOVR^bLUTMMJMTUNJQM=C=`iJOOVR`lLUTMMJMTUNJNQ
Cool Line®Intravascular Heat Exchange Catheter Kit includes:
kçíÉ=J=háí=ÅçãéçåÉåíë=Äó=ãçÇÉä
Each base model is available either with a standard supporting insertion
kit (AE) or without the standard supporting insertion kit (CO). The com-
ponents common to both kits are labeled AE(CO) in the table above.
The additional components found only in the standard kit are labeled
AE.
aÉîáÅÉ=ÇÉëÅêáéíáçå
The Cool Line intravascular heat exchange catheter is a sterile, single
use flexible 9.3 F catheter designed for placement in the central venous
circulation from an insertion site in the jugular, subclavian, or femoral
veins. The catheter is to be connected to a ZOLL®single use disposable
Start-Up Kit and the Coolgard 3000®/Thermogard XP®console (both
supplied separately). A dilator and guidewire are required for the percu-
taneous insertion of the catheter.
:
The catheter blood contact surfaces (tip, balloon, and shaft) are treated
with an anti-thrombotic Applause heparin coating.
píÉêáäáíó
Ethylene oxide sterilized. The catheter is supplied sterile for single use
only and should not be resterilized. The package should be inspected
prior to use to ensure that the sterility barrier has not been compro-
mised.
píçê~ÖÉ
Store in a cool, dry place.
fåíÉåÇÉÇ=ìëÉ
The Cool Line catheter in combination with the Coolgard 3000 or
Thermogard XP System permits circulation of temperature controlled
saline through a heat exchanger to cool/rewarm the patient’s blood in
patients for whom the risks of a central line are warranted. Maximum
use period: 7 days.
`çåíê~áåÇáÅ~íáçåë
1. The risks of the catheter are essentially those of a central line. The
catheter should not be used in patients for whom central line
placement is not indicated.
2. Bleeding diathesis.
3. Active sepsis.
4. Infection or active bleeding at the site of catheter insertion.
5. Patients with no vascular access, or a vascular system that will not
accommodate a catheter.
6. Patients for whom the required temperature monitoring cannot
be established.
7. Hypothermia is contraindicated in patients who have
hematological diseases that will be made worse with hypothermia
(e.g., any disease that produces cryoglobulinemia, any
hemoglobinopathy in which hemolytic anemia can be precipitated
by cold including Sickle Cell Disease or Thalassemia).
8. Not intended for pediatric or neonatal use.
t~êåáåÖë=~åÇ=éêÉÅ~ìíáçåë
Central venous catheterization should only be performed by well-
trained personnel well-versed in anatomical landmarks and safe tech-
nique. Personnel should also have knowledge of potential complica-
tions.
páåÖäÉ=ìëÉ=çåäóK Product designed for single use only. Do not resterilize
or reuse. Do not reinsert, once removed from the patient. Do not alter
the catheter in any way.
Potential risks with re-use of a single use device include but are not lim-
ited to:
• Potentially life threatening infection
• Toxic shock due to degradation of materials
• Increased risk of thrombosis
• Reduced heat exchange power
• Device failures
1. The catheter should be positioned so that the distal tip of the
catheter is in the superior vena cava above its junction with the
right atrium and parallel to the vessel wall. X-ray examination
should be used to ensure that the catheter is not in the right
atrium or ventricle. The distal tip of the catheter should be posi-
tioned at a level above either the azygos vein or the carina of the
trachea, whichever is better visualized.
2. Possible complications with central venous catheters include: atrial
or ventricular perforation, cardiac tamponade, air embolism,
catheter embolism, thoracic duct laceration, bacteremia,
septicemia, thrombosis, inadvertent arterial puncture, hematoma
formation, hemorrhage, nerve damage and dysrhythmias.
nì~åíáíó aÉëÅêáéíáçå
1 AE(CO)
Cool Line intravascular heat exchange catheter
9.3 French x 22 cm
Triple infusion Luer
Extension line clamps
Radiopaque shaft
Applause heparin coated
1 AE(CO) Guidewire 0.032" (0.81 mm) x 65 cm
1 AE(CO) Vessel dilator 10 F x 0.038"
(3.4 mm x 1.0 mm)
1 AE(CO) Detachable suture tab & clip
1 AE 18 ga x 2½" (1.3 mm x 63 mm) Radiopaque
OTN catheter
1 AE 5 cc Syringe & 22 ga x 1½" (0.7 mm x 38 mm)
Needle
1 AE Fenestrated drape
1 AE 18 ga x 2¾" (1.3 mm x 70 mm) Needle
6 AE 4" x 4" (10 cm x 10 cm) Gauze sponges
1 AE 000 Silk suture
1 AE No. 11 Surgical blade with long handle
mçêí cäçï=ê~íÉ=ãäLÜê
Proximal port (blue) 1400 ml/hr
Medial port (white) 1200 ml/hr
Guidewire port (brown) 2100 ml/hr
_~ëÉ=jçÇÉä fåëÉêíáçå=páòÉ
CL-2995AE(CO) 9.3 F
t^okfkd
The catheter should be placed via a jugular, subclavian, or
femoral vein approach only. Do not allow the catheter to be
placed into the right atrium or right ventricle. Placement in
the right atrium or right ventricle can result in severe patient
injury or death.

4/131
3. All Luer-Lock connections and covers must be securely tightened
to prevent air embolism or fluid or blood loss.
4. Never use excessive force in moving the catheter or guidewire. If
resistance is encountered, an x-ray should be performed to
identify the reason for the resistance.
5. Passage of the guidewire into the right heart can cause
dysrhythmias, right bundle branch block, vessel wall, atrial or
ventricular perforation.
6. Use only sterile normal saline for catheter priming. It is the
circulating fluid in the catheter.
7. The catheter should be routinely inspected for flow rate, security
of dressing, correct catheter position, and for secure Luer-Lock
connections. Use the centimeter markings to identify if the
catheter position has changed. A potential risk associated with
multi-lumen balloon catheters is a lack of therapy, including
failure to infuse drug therapy through the infusion lumens.
8. Only x-ray examination can ensure that the catheter tip has not
entered the heart or no longer lies parallel to the vessel wall. If the
catheter position has changed, perform an x-ray examination to
confirm the catheter tip position.
9. For blood sampling, temporarily shut off the remaining infusion
ports through which solutions are being infused.
10. Use only a 30 cc or smaller syringe for blood sampling.
11. Alcohol and acetone can weaken the structure of the shaft
material. Care should therefore be taken when infusing drugs
containing alcohol or when using alcohol or acetone when
performing routine catheter care and maintenance. Alcohol
should not be used to declot the catheter.
12. Use only the ZOLL suture tab and clip provided in the kit
to prevent catheter damage.
13. Use of a syringe smaller than 10 ml to irrigate or declot
an occluded catheter may cause intraluminal leakage or catheter
rupture.
14. Do not infuse into the orange IN and OUT Luer-Lock connections,
as this will result in lack of therapy.
15. Fever may have infectious and/or non-infectious causes in
patients. Mitigation of fever as a sign of possible infection
necessitates daily, meticulous assessment for other signs of
infection.
16. Use care when infusing drugs that may be affected by cool
temperatures (as low as 4°C). Mannitol-containing solutions are
temperature-sensitive and must not be delivered through the
catheter except for a rapid push of up to a concentration of 20%
mannitol solution, followed by a saline flush. Higher than a 20%
concentration of mannitol drip or infusion pump delivery of
mannitol must be done via a separate line.
17. Cardiac Tamponade: Placement of indwelling catheters in the
right atrium is a practice that may lead to cardiac perforation and
tamponade. Practitioners placing central venous catheters must be
aware of this potentially fatal complication before advancing the
catheter too far relative to patient size. The actual position of the
tip of the indwelling catheter should be confirmed by x-ray after
insertion. Central venous catheters should not be placed in the
right atrium unless specifically required for special relatively short
term procedures, such as aspiration of air emboli during
neurosurgery. Such procedures are nevertheless risk-prone and
should be closely monitored and controlled.
18. The catheter is coated with heparin. This may induce or aggravate
pre-existing heparin induced thrombocytopenia (HIT).
t^okfkdK=When connecting infusion sets/injection systems to
ZOLL catheters, do not exceed 100 psi/689 kPa.
19. For patients being made hypothermic, the hypothermia itself may
exacerbate some disease states. Care should be taken to properly
monitor patient homeostasis during hypothermia.
• Cardiac rhythm disturbances–both bradycardia and ventricu-
lar tachyarrhythmia.
• Clotting and coagulations function. Patients at risk for distur-
bances of their clotting or coagulation function should be
closely monitored during hypothermia.
• Blood gas and pH analysis. Hypothermia modifies resting pH
and PaCO2. Physicians should be aware of the effect of tem-
perature upon the result.
• Prolonged hypothermia depresses the immune response and
lung function.
20. Avoid manipulating, advancing, and/or withdrawing the coated
guidewire through a metal cannula or needle. Manipulation,
advancement, and/or withdrawal through a metal device may
result in destruction and/or separation of the outer coating,
resulting in the coating material remaining in the vasculature,
which may result in unintended adverse events (see below)
requiring additional intervention.
• Sterile inflammation or granulomas at the access site
• Pulmonary embolism
• Pulmonary infarct
• Myocardial embolism
• Myocardial infarct
• Embolic stroke
• Cerebral infarct
• Tissue necrosis
•Death
t^okfkdW=fåíê~äìãáå~ä=äÉ~â~ÖÉ
fåíê~äìãáå~ä=äÉ~â~ÖÉ=ÄÉíïÉÉå=íÜÉ=ë~äáåÉ=äìãÉåë=~åÇ=áåÑìëáçå=
äìãÉåë=áë=~å=ìåÅçããçå=Äìí=éçíÉåíá~ä=Å~íÜÉíÉê=Ñ~áäìêÉK=få=íÜÉ=
ÉîÉåí=çÑ=ëìÅÜ=~=Ñ~áäìêÉI=ëíÉêáäÉ=ë~äáåÉ=Ñêçã=íÜÉ=ÅççäáåÖ=ÅáêÅìáí=ïáää=
ÄÉ=áåíêçÇìÅÉÇ=áåíç=íÜÉ=é~íáÉåíK=fåíê~äìãáå~ä=äÉ~â~ÖÉ=ïáää=ìëì~ääó=
ÄÉ=~ëëçÅá~íÉÇ=ïáíÜ=~=ÑäìáÇ=äçëë=~ä~êã=ïÜáÅÜ=ïáää=ëíçé=íÜÉ=ëóëíÉãK=
^it^vp=fksbpqfd^qb=cirfa=ibsbi=^i^ojpK=qÜÉ=ÅççäáåÖ=ÅáêÅìáí=
áë=~=ÅäçëÉÇ=äççé=ëóëíÉã=Ó=ìëì~ääó=ÑäìáÇ=äçëë=~ä~êãë=áåÇáÅ~íÉ=~=
ÄêÉ~ÅÜ=ëçãÉïÜÉêÉ=áå=íÜáë=ÅäçëÉÇ=äççéK=táíÜ=~åó=ÑäìáÇ=äçëë=~ä~êãI=
ÅÜÉÅâ=íÜÉ=áåíÉÖêáíó=çÑ=ÄçíÜ=íÜÉ=Å~íÜÉíÉê=~åÇ=íÜÉ=pí~êíJré=háí=EëÉÉ=
ÄÉäçïFK
`ÜÉÅâáåÖ=íÜÉ=áåíÉÖêáíó=çÑ=íÜÉ=Å~íÜÉíÉê
1. Stop operation of the console.
2. Disconnect the Start-Up Kit from the catheter. Properly cap both
the catheter and Start-Up Kit using an aseptic technique.
3. Fill a sterile 10 ml slip tip syringe with sterile saline.
4. Connect the syringe to the IN Luer of the catheter and disconnect
the OUT cap. Infuse the 10 ml of saline–it should flow out the
OUT Luer.
5. Cap the OUT Luer and pull 5 cc of vacuum. Sustain for at least
10 seconds. Approximately 4 ml of saline, but not blood, should
enter the syringe and you should be able to maintain the vacuum.
6. Ease the vacuum and recap the IN Luer.
`ÜÉÅâáåÖ=íÜÉ=áåíÉÖêáíó=çÑ=íÜÉ=pí~êíJré=háí
1. Look for obvious leakage.
2. Remove the tubing from the peristaltic (roller) pump and inspect
for damage (return it to position if not damaged).
3. Check along the tubing from the pump to the patient for sources
of fluid loss.
• Look for damage to the tubing and/or the presence of air
within the tubing.
• Inspect and tighten each Luer fitting as necessary (do not use
instruments to tighten Luer fittings).
•kçíÉK Condensation on the exterior of the tubing is normal.

5/131
4. Similarly, check the tubing that returns to the pump from the
patient. Examine the saline bag to ensure that it has not been
accidentally compromised (for example, the spike may have
damaged the bag wall).
5. Trace the tubing from the saline bag back to the pump.
Additional warnings and cautions are located in the following instruc-
tions.
j~íÉêá~äë=êÉèìáêÉÇ
`~íÜÉíÉê=éêÉé~ê~íáçå=~åÇ=áåëÉêíáçå
kçíÉK=The catheter has a radiopaque marker band to assist in identifica-
tion of the catheter during and after insertion when viewed using x-ray
equipment. The proximal end of the proximal balloon has one marker
band. The tip of the catheter contains barium sulfate to make it radi-
opaque. The proximal port is located 3.5 cm proximal to the proximal
marker band.
rëÉ=ëíÉêáäÉ=íÉÅÜåáèìÉK
`~ìíáçåK=Use femoral vein approach only.
`~ìíáçåK=The IN and OUT Luer-Locks on this catheter are custom-manu-
factured and are intended to connect only with the Start Up Kit listed in
Materials required.
1. Place the patient in a slight Trendelenburg position as tolerated to
reduce the risk of air embolism. If the femoral approach is used,
place the patient in a supine position.
2. Prep and drape the puncture site as required.
3. Carefully remove the catheter from the package, leaving on the
catheter membrane cover.
mêÉé~êáåÖ=íÜÉ=Å~íÜÉíÉê
1. Remove the caps from the IN and OUT Luers. With the catheter
cover in place, fill the syringe (5 cc or larger) with sterile saline and
attach the syringe to the female IN Luer.
t^okfkdK=Never inject positive pressure into the IN Luer with the
OUT Luer cap in place.
2. Gently inject saline through the catheter until it begins to exit
from the OUT Luer.
3. Using a 5 cc or larger syringe, flush the distal, proximal, and
medial infusion Luers with sterile saline. Clamp or attach the
injection caps to the proximal and medial infusion Luers. Leave the
distal Luer uncapped for guidewire passage.
`~ìíáçåK=Always prime the catheter infusion Luers before inserting
the catheter into the patient.
4. Remove the catheter membrane cover. If there is resistance in
removing the membrane cover from the catheter, flush the
membrane cover with sterile saline. Inspect the catheter to ensure
that air has been purged from the heat exchange membrane.
Inspect the catheter for leaks.
`~ìíáçåK=Avoid excessive wiping of the coated catheter. Avoid
wiping the catheter with dry gauze, as this may damage the cath-
eter coating. Avoid using alcohol, antiseptic solutions, or other
solvents to pre-treat the catheter, because this may cause unpre-
dictable changes in the coating, which could affect the device
safety and performance.
t^okfkdK=Do not cut the catheter to alter length.
fåëÉêíáåÖ=íÜÉ=Å~íÜÉíÉê
1. Obtain femoral venous access using standard percutaneous tech-
niques. Access should be maintained with a 0.032" (0.81 mm)
guidewire. See Guidewire Instructions for Use.
t^okfkdK=Do not attempt to reinsert a partially or completely
withdrawn OTN (over the needle) introducer needle from its cath-
eter.
`~ìíáçåK=Do not use a guidewire larger than 0.032" (0.81 mm)
with the catheter.
2. Holding the guidewire in place, remove the introducer catheter.
`~ìíáçåK=Maintain a firm grip on the guidewire at all times.
3. Enlarge the cutaneous puncture site with the cutting edge of the
scalpel positioned away from the guidewire. t^okfkdK=aç=åçí=
Åìí=íÜÉ=ÖìáÇÉïáêÉK Use a vessel dilator to enlarge the site as
required. Do not leave the vessel dilator in place as an indwelling
catheter, to minimize the risk of a possible vessel wall perforation.
4. Thread the tip of the catheter over the guidewire. Maintain a
sufficiently firm grip on the guidewire during catheter insertion.
Grasping the catheter tip near the skin, advance the catheter into
the vein. Continue to advance the catheter over the guidewire,
placing your fingers just proximal to the balloon.
5. Using centimeter marks on the catheter as positioning reference
points, advance the catheter to at least the 18 cm mark, to ensure
the proximal infusion port is in the vessel.
6. Hold the catheter at the desired depth and remove the guidewire.
If resistance is encountered when attempting to remove the
guidewire after catheter placement, the guidewire may be kinked
at the tip of the catheter. If resistance is encountered, withdraw
the catheter relative to the guidewire about 2–3 cm and attempt
to remove the guidewire. If resistance is encountered again,
remove the guidewire and catheter simultaneously.
`~ìíáçåK=Do not apply undue force to the guidewire.
7. Verify that the guidewire is intact upon removal.
8. Check catheter placement by attaching a syringe to the distal
infusion Luer and aspirate until a free flow of venous blood is
observed. Connect the infusion Luers to the appropriate Luer-Lock
line(s) as required. Unused infusion port(s) may be “locked”
through the injection cap(s) using standard hospital protocol. Slide
clamps are provided on the tubing to occlude flow through the
infusion Luers during line and injection cap changes.
`~ìíáçåK=To minimize risk of damage to the tubing from excessive
pressure, the clamp must be opened prior to infusing through the
Luer.
`~ìíáçåK=Do not clamp or occlude IN or OUT lines. This can cause
line blockage and possible failure.
9. Secure and dress the insertion site and catheter temporarily.
10. If subclavian or jugular access is used, verify the catheter tip
position by chest x-ray immediately after placement. The x-ray
examination must show the catheter located in the right side of
the mediastinum in the SVC with the distal end of the catheter
parallel to the vena cava wall. The catheter distal tip must be
positioned at a level above either the azygos vein or the carina of
the trachea, whichever is better visualized. If the catheter tip is
malpositioned, reposition and reverify. If femoral access is used,
x-ray examination must show the catheter located in the IVC with
nì~åíáíó aÉëÅêáéíáçå
1 Cool Line Catheter Kit for percutaneous introduction
1 500 cc bag of sterile normal saline (not provided)
1
Start-Up Kit (provided separately)
•6 ft (183 cm) standard tubing or
• 9 ft (274 cm) extended tubing
1Coolgard 3000 or Thermogard XP console (provided sep-
arately)
1 Catheter Convenience Kit [For (CO) only]
1 YSI-400 temperature probe (not provided)
This manual suits for next models
1
Table of contents
Other ZOLL Medical Equipment manuals
Popular Medical Equipment manuals by other brands

Getinge
Getinge Arjohuntleigh Nimbus 3 Professional Instructions for use

Mettler Electronics
Mettler Electronics Sonicator 730 Maintenance manual

Pressalit Care
Pressalit Care R1100 Mounting instruction

Denas MS
Denas MS DENAS-T operating manual

bort medical
bort medical ActiveColor quick guide

AccuVein
AccuVein AV400 user manual