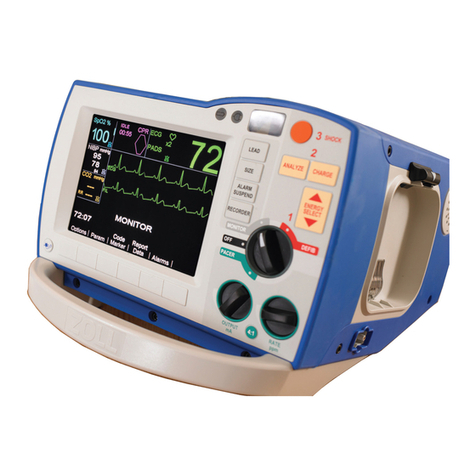
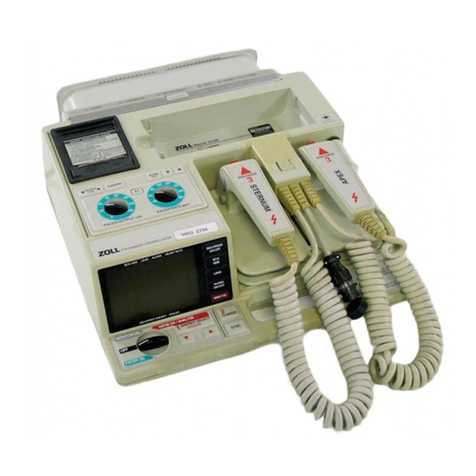
ZOLL R Series User manual

©2010 ZOLL M dical Corporation. All rights r s rv d.
CPR Ind x, On St p, R S ri s, R al CPR H lp, S -Thru CPR, statpadz, and ZOLL ar trad marks
or r gist r d trad marks of ZOLL M dical Corporation in th Unit d Stat s and/or oth r countri s.
All oth r trad marks ar th prop rty of th ir r sp ctiv own rs.
9650-1001-01 R v B
ZOLL M dical Corporation
269 Mill Road
Ch lmsford, MA 01824 USA
(800) 348-9011
+1-978-421-9655
www.zoll.com
ZOLL N th rlands
Authoriz d EU R pr s ntativ
N wtonw g 18
6662 PV ELST
Th N th rlands
+31 (0) 481 366410
www.zoll.nl
R Serie
Quick Reference Guide

R Serie
Quick Reference Guide
This Quick Reference Guide is intended to provide easy access to
most common uses of the ZOLL®R Series.
®The user must read and
completely understand the intended use warnings, cautions, and
instructions in the R Series Operator’s Guide before using the
R Series unit.
TABLE OF CONTENTS
Applying Therapy. . . . . . . . . . . . . . . . . . . . . . . . . . . . . . . . . . . . . . . . . . Page 2
D tails for applying On St p™El ctrod s, ECG Cabl s, and paddl s with th R S ri s
Defibrillation . . . . . . . . . . . . . . . . . . . . . . . . . . . . . . . . . . . . . . . . . . . . . Page 3
St p-by-st p d fibrillation for th R S ri s ALS and BLS/Plus mod ls
CPR . . . . . . . . . . . . . . . . . . . . . . . . . . . . . . . . . . . . . . . . . . . . . . . . . . . . . . Page 5
R al CPR H lp®and S -Thru CPR®t chnology
Pacing / Cardioversion . . . . . . . . . . . . . . . . . . . . . . . . . . . . . . . . . . . . . Page 6
St p-by-st p instructions for Pacing and Cardiov rsion with th R S ri s
Monitoring . . . . . . . . . . . . . . . . . . . . . . . . . . . . . . . . . . . . . . . . . . . . . . . Page 7
SpO2, EtCO2, NIBP monitoring param t rs and Alarm functions on th R S ri s
Managing Data and Cable Connections . . . . . . . . . . . . . . . . . . . . . . Page 9
Printing summary r ports and backing up data to compact flash cards

Pag 3Pag 2
Applying Therapy Adult Defibrillation
R Series BLS/Plus
Pr per Pad r Paddle Placement
OneStep Resuscitation Electrode Anterior / Anterior Placement
Paddle Placement
1. Grasp paddl s on ach sid of unit.
2. Pr ss down on RELEASE latch s with thumbs and r mov th paddl s from th ir hold rs.
3. Apply g l to l ctrod surfac s or g l patch s to pati nt. If using g l, rub l ctrod s
tog th r to spr ad g l.
4. Plac st rnum paddl to th right of st rnum, just b low clavicl .
5. Plac ap x paddl l ft of nippl on ant rior-axillary lin .
6. Pr ss paddl s firmly against pati nt’s skin.
Defibrillation (AED)
1. Apply pads as shown.
2. Turn s l ctor switch to ON.
3. Syst m will b gin to analyz or instruct
START CPR, d p nding upon configuration
chos n.
4. Onc analysis b gins, stand cl ar.
5. If rhythm is shockabl , d fibrillator
will charg and r d SHOCK button
will illuminat .
6. If shock button illuminat s, shout “cl ar” –
onc all ar cl ar, pr ss SHOCK.
7. If no shock advis d, ch ck puls – if no
puls , start CPR imm diat ly.
Defibrillation (Advisory)
1. Apply pads.
2. Turn s l ctor switch to ON.
3. Pr ss MANUAL th n CONFIRM soft k ys.
4. Pr ss ANALYZE to start advisory function
and follow th instructions.
5. If rhythm is shockabl , d fibrillator
will charg and r d SHOCK button
will illuminat .
6. If shock button illuminat s, shout “cl ar” –
onc all ar cl ar, pr ss SHOCK.
7. If no shock advis d, ch ck puls – if no
puls , start CPR imm diat ly.
Defibrillation (Manual)
1. Apply pads.
2. Turn s l ctor switch to ON.
3. Pr ss MANUAL, th n CONFIRM soft k ys. Syst m will switch to ALS mod
(d p nding upon configuration, your d fibrillator may not r quir a s cond k y
pr ss to activat ALS mod ).
4. En rgy s l ct will automatically display th corr ct adult n rgy p r configuration.
5. If d sir d, n rgy may b adjust d up or down.
5. If rhythm app ars shockabl , pr ss CHARGE button.
6. Wh n r d SHOCK button illuminat s, shout “cl ar” and v rify oth rs ar cl ar.
7. Pr ss SHOCK button.
8. Ch ck puls – if no puls , r turn to CPR imm diat ly.
BACKFRONT BACKFRONT
OneStep Resuscitation Electrode
Anterior / Posterior Placement
(Recommended)
Cardioversion Electrode
Anterior / Posterior Placement
(Recommended)

Pag 4 Pag 5
Adult Defibrillation – Pediatric Defibrillation
R Series ALS
Defibrillation (Advisory)
1. Apply pads.
2. Turn s l ctor switch to DEFIB.
3. Th n rgy will b display d as configur d
by your institution.
4. Shout “Cl ar, Analyzing”; stop CPR and
nsur pati nt is motionl ss.
5. Pr ss ANALYZE button.
6. R ad display m ssag . If SHOCK ADVISED is
display d, shout “Cl ar” and v rify oth rs
ar cl ar.
7. Pr ss SHOCK button.
8. If NO SHOCK ADVISED, ch ck for a puls
and if no puls , r sum CPR imm diat ly.
Defibrillation (Manual)
1. Apply pads.
2. Turn s l ctor switch to r d ar a lab l d
DEFIB.
3. En rgy s l ct d will b as configur d by
institution protocol. You may chang s ttings
if d sir d by using th ENERGY SELECT UP
and DOWN arrow k ys.
4. If th rhythm app ars to b shockabl , pr ss
th CHARGE button.
5. Shout “Cl ar” and v rify oth rs ar cl ar.
6. Pr ss SHOCK button.
Pediatric Defibrillati n
Follow th instructions as outlin d abov for your unit with th following xc ptions:
• On St p P diatric pads should b us d on childr n up to ight y ars of ag . For childr n ov r
ight y ars of ag , us adult pads.
• Wh n th On St p P diatric pad is in us , th R S ri s will automatically d cr m nt th n rgy
d liv r d to 50, 70, and 85 J incr m nts wh n th s pads ar conn ct d. Th s l v ls ar
appropriat for childr n from 30 kg or gr at r.
• Wh n using On St p P diatric l ctrod s on childr n und r 30 kg, an n rgy of 1 J p r kilo is
r comm nd d and will n d to b s t manually using th ENERGY SELECT UP and DOWN arrows.
• For all oth r l ctrod s, s l ct th d sir d n rgy manually bas d upon 1 J p r kilogram.
• Do not us AED or Advisory mod in childr n und r ight y ars of ag unl ss On St p P diatric
pads ar attach d or n rgy has b n manually d cr m nt d in advisory mod .
CPR
Real CPR Help
1. Plac ZOLL pads with CPR S nsor (OneStep Complete,
OneStep CPR, or CPR stat•padz®) on pati nt.
2. Th CPR S nsor should b plac d on th st rnum wh r
your hands would normally b plac d for CPR.
3. Plac th h l of your hand on th s nsor and b gin
compr ssions normally.
4. If your compr ssion rat and d pth ar appropriat to AHA/ERC Guid lin s, th h xagon
on th scr n of th R S ri s (CPR Ind x™) will b gin to fill with color and r main fill d.
5. If th d pth of compr ssion is insuffici nt, th m ssag “PRESS HARDER” will b
h ard and th “D pth” will b display d n xt to th CPR Ind x. Wh n compr ssions
ar corr ct, th m ssag “GOOD COMPRESSIONS” will b h ard.
6. If compr ssion rat is too slow, “Rat ” will b display d n xt to th ind x and
a 100 bpm m tronom will b h ard until rat is corr ct.
7. If your R S ri s do s not display a CPR Ind x, your d fibrillator has only basic CPR
f dback and only audibl prompts as outlin d abov will b availabl .
See-Thru CPR
S -Thru CPR is a propri tary algorithm that filt rs th
CPR artifact from th ECG to allow us rs to s a clos
approximation of a pati nt’s organiz d und rlying rhythm
during CPR compr ssions, r ducing int rruptions in CPR. Unfiltered ECG signal during CPR
Using See-Thru CPR:
1. During CPR, vi w th filt r d ECG
(s cond trac ) on display to d t rmin
if an organiz d rhythm app ars to b
d v loping.
2. Paus compr ssions and visually
confirm if rhythm is shockabl or not.
3. If shockabl , pr ss CHARGE, shout
“Cl ar” and v rify oth rs ar cl ar.
4. Pr ss SHOCK button.
5. R sum CPR imm diat ly for 2 minut s
b for stopping CPR to ch ck rhythm.
If non-shockabl , r sum compr ssions.
CPR Idle Timer CPR Index
Rate and Depth Indicators
Signal filtered by See-Thru CPR
Activating See-Thru CPR:
1. Pr ss OPTIONS soft k y.
2. Pr ss TRACES soft k y.
3. Pr ss TRACE 2 soft k y.
4. Pr ss Filt ECG soft k y.
Pag 6 Pag 7
Pacing / Cardiover ion
Pacing
1. Plac On St p Pacing or On St p Compl t Pads on pati nt.
To pac with oth r d fibrillation pads, l ctrod s must b
plac d on th pati nt and th thr or fiv l ad cabl attach d
to th d fibrillator.
2. Turn S l ctor Switch to gr n ar a lab l d PACER.
3. Turn th pac r RATE knob to d sir d rat .
4. Turn th pac r OUTPUT knob clockwis slowly until captur .
5. Slowly d cr as output by turning OUTPUT knob count r-
clockwis until captur disapp ars, th n incr as by 10%.
6. Ch ck puls to v rify m chanical captur .
7. To ch ck pati nt’s und rlying rhythm; pr ss and hold 4:1 button.
Note: When using BLS or Plus models, manual mode must be activated to pace.
Dial settings for
R Series Pacing
Example of paced rhythm
Synchr nized Cardi versi n
1. Apply pads or paddl s to pati nt.
2. Turn s l ctor switch to DEFIB. If using BLS or Plus d vic ,
pr ss MANUAL th n CONFIRM soft k ys inst ad.
3. Pr ss SYNC ON/OFF soft k y.
4. V rify that arrows (i) display ov r R-wav s and display r ads SYNC.
Do not cardiovert if S NC is OFF.
5. Follow Manual D fibrillation instructions and institution protocol
for n rgy s ttings.
Monitoring
End Tidal CO2(EtCO2) - Mainstream
1. Plug EtCO2cabl into th back of th unit in th y llow port mark d CO2.
2. Attach s nsor to pati nt’s ET tub .
3. Turn s l ctor switch to gr y ar a lab l d MONITOR. If using BLS or Plus d vic ,
turn ON, th n pr ss MANUAL th n CONFIRM soft k ys to us in ALS mod .
3. Pr ss th PARAM soft k y.
4. Pr ss th CO2soft k y.
5. Pr ss th ENABLE EtCO2soft k y.
6. If prop rly attach d, th EtCO2valu s will display on th scr n.
7. To display wav form: Pr ss OPTIONS soft k y. Pr ss TRACES soft k y.
Pr ss TRACE 2 or TRACE 3 soft k y. S l ct CO2soft k y.
ECG M nit ring
Using OneStep ECG Cable
1. Disconn ct On St p l ctrod from th On St p Th rapy cabl .
2. Plug th On St p ECG cabl into th On St p Th rapy cabl .
3. Abrad skin to r mov out r lay r of d ad skin.
4. Snap l ads on to ach l ctrod .
5. P l off prot ctiv backing from l ctrod .
6. Apply l ctrod s to pati nt’s skin.
Using Standard ECG cable
1. Unplug On St p ECG cabl from back of unit.
2. Plug ECG cabl conn ctor into back of unit.
3. Abrad skin to r mov out r lay r of d ad skin.
4. Snap l ads onto ach l ctrod .
5. P l off prot ctiv backing from l ctrod .
6. Apply l ctrod s to pati nt’s skin.
ECG Display
1. Turn s l ctor switch to MONITOR on th R S ri s ALS unit.
If using BLS or Plus d vic , pr ss MANUAL th n CONFIRM
soft k ys to activat ALS mod .
2. Pr ss LEAD button to chang l ads.
3. Pr ss SIZE button to chang siz of display.
Dial settings for
R Series Monitoring
Large T Wave
Negative R Wave
Pacer Markers

Pag 8 Pag 9
Monitoring (Cont.)
SpO2
1. Conn ct th SpO2cabl to th pati nt s nsor and to
th blu SpO2port on th r ar of th unit lab l d SpO2.
2. Attach s nsor to pati nt’s fing r.
3. Turn s l ctor switch to gr y ar a lab l d MONITOR on
th R S ri s ALS. If using BLS or Plus d vic , turn ON,
th n pr ss MANUAL th n CONFIRM soft k ys to us
in ALS mod .
4. If prop rly attach d, th SpO2valu s will display
on th scr n.
5. To display wav form: Pr ss OPTIONS soft k y.
Pr ss TRACES soft k y. Pr ss TRACE 2 or TRACE 3
soft k y. S l ct SpO2soft k y.
NIBP
1. Plug NIBP cabl into th back of th unit in silv r port mark d NIBP.
2. Attach appropriat BP cuff to pati nt’s arm or thigh.
3. Turn s l ctor switch to gr y ar a lab l d MONITOR. If using BLS or Plus d vic ,
pr ss MANUAL th n CONFIRM soft k ys to us in ALS mod .
4. For ALS: Pr ss th PARAM soft k y, th n pr ss th NIBP soft k y.
5. On BLS or Plus d vic , pr ss illuminat d blood pr ssur icon on
bottom l ft to tak m asur m nt.
Alarms
1. Pr ss th ALARMS soft k y to s l ct alarms.
2. Pr ss RETURN soft k y to activat alarms.
3. To mut for 90 s conds: Pr ss ALARM SUSPEND button.
4. To r activat mut d alarm: Pr ss ALARM SUSPEND button.
5. To disabl : Pr ss and hold ALARM SUSPEND for 3 s conds.
Not : Alarms ar still activ , but sil nt.
Managing Data and Cable Connection
F r the R Series ALS, BLS, and Plus
Printing a Summary Report:
1. Pr ss th REPORT DATA soft k y.
2. Pr ss th PRINT LOG or th PRINT CHART soft k y.
Pr ss th PRINT ALL or th PRINT RANGE soft k y for sp cific v nts.
Transferring Full Disclosure Files to a Compact Flash Card:
1. Pr ss th REPORT DATA soft k y.
2. Pr ss th TRANSFER MODE soft k y.
3. Pr ss th REPORT TO CARD soft k y.
Erasing Summary Report and Full Disclosure:
• Pr ss th REPORT DATA soft k y.
• Pr ss th ERASE, th n ERASE ALL soft k ys.
Display
Screen
Battery
Indicator
AC Power
Indicator
Code Readiness
Indicator
Mode
Selector
Six Softkeys
Other manuals for R Series
7
Table of contents
Other ZOLL Medical Equipment manuals

ZOLL
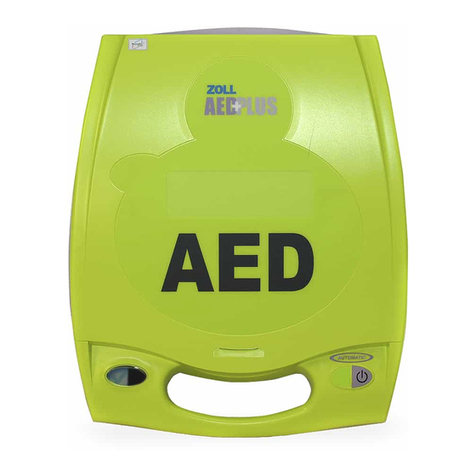
ZOLL Aed Plus Service manual

ZOLL
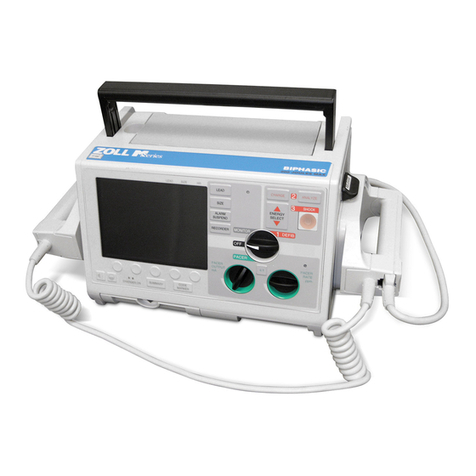
ZOLL R Series Manual

ZOLL
ZOLL M Series User manual

ZOLL
ZOLL LifeVest 4000 User manual

ZOLL
ZOLL Cool Line CL-2295A/8700-0781-01 User manual

ZOLL
ZOLL CPR-D-padz User manual

ZOLL
ZOLL PD 1200 Manual

ZOLL
ZOLL M Series User manual

ZOLL
ZOLL ResQPUMP User manual

ZOLL
ZOLL Infusion Dynamics Power Infuser M100B-3A User manual
Popular Medical Equipment manuals by other brands

Belluscura
Belluscura X-PLOR Cartridge Replacement Instructions

Beurer
Beurer IH 21 Instructions for use

SciCan
SciCan SANAO Red Dot Quick reference guide

Dräger
Dräger Prana S Instructions for use

TRI-TECH MEDICAL
TRI-TECH MEDICAL TSD Series Installation & operating instructions

Acteon
Acteon Piezotome Cube user manual