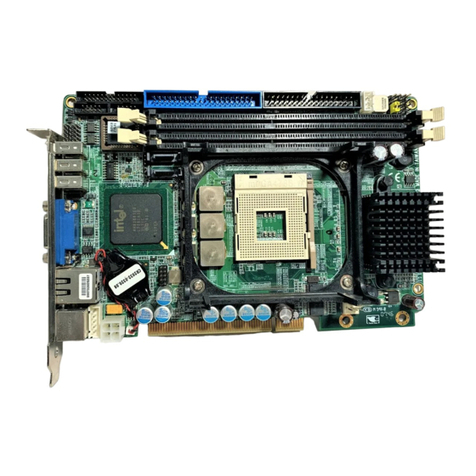
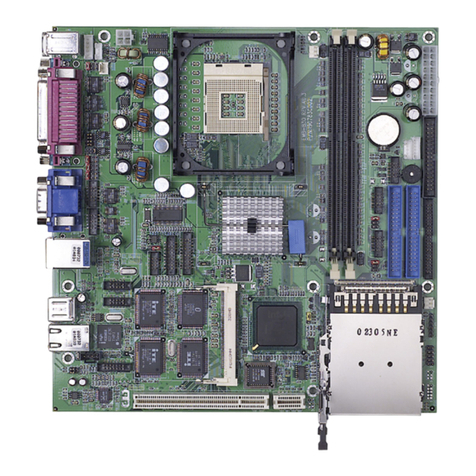
Aaeon PCM-5893L User manual

Compact Board PCM-5893/5893L
PCM-5893/5893L
All-in-one AMD Geode GX
466/500/533 Processor
Compact Board
With LCD, Ethernet,
Audio&4COMs
PCM-5893/5893L Rev. A Manual 1st Ed.
Jun. 2006

Compact Board PCM-5893/5893L
i
Copyright Notice
This document is copyrighted, 2006. All rights are reserved. The
original manufacturer reserves the right to make improvements
to the products described in this manual at any time without
notice.
No part of this manual may be reproduced, copied, translated,
or transmitted in any form or by any means without the prior
written permission of the original manufacturer. Information
provided in this manual is intended to be accurate and reliable.
However, the original manufacturer assumes no responsibility
for its use, or for any infringements upon the rights of third
parties that may result from its use.
The material in this document is for product information only
and is subject to change without notice. While reasonable
efforts have been made in the preparation of this document to
assure its accuracy, AAEON assumes no liabilities resulting
from errors or omissions in this document, or from the use of the
information contained herein.
AAEON reserves the right to make changes in the product
design without notice to its users.

Compact Board PCM-5893/5893L
ii
Acknowledgments
Award is a trademark of Award Software International, Inc.
CompactFlash™is a trademark of the Compact Flash
Association.
Microsoft Windows®is a registered trademark of Microsoft Corp.
IBM, PC/AT, PS/2, and VGA are trademarks of International
Business Machines Corporation.
All other product names or trademarks are properties of their
respective owners.

Compact Board PCM-5893/5893L
iii
Packing List
Before you begin installing your card, please make sure that the
following materials have been shipped:
• 1 Jumper Cap - 9657666600
• 1 Quick Installation Guide
• 1 PCM-5893 / PCM-5893L CPU Board
• 1 Utility CD
If any of these items should be missing or damaged, please
contact your distributor or sales representative immediately.

Compact Board PCM-5893/5893L
iv
Contents
Chapter 1 General Information
1.1 Introduction................................................................1-2
1.2 Features....................................................................1-3
1.3 Specifications............................................................1-4
Chapter 2 Quick Installation Guide
2.1 Safety Precautions....................................................2-2
2.2 Location of Connectors and Jumpers .......................2-3
2.3 Mechanical Drawing..................................................2-4
2.4 List of Jumpers..........................................................2-7
2.5 List of Connectors .....................................................2-8
2.6 Setting Jumpers ........................................................2-10
2.7 LCD Clock Operating Mode (JP1).............................2-11
2.8 CRT/TFT LCD Mode Selection (JP2) (Optional Function)
.........................................................................................2-11
2.9 DOC Address Selection (JP4)...................................2-11
2.10 AT/ATX Power Type Selection (JP5)......................2-12
2.11 CFD Master/ Slave Selection (JP6) ........................2-12
2.12 Clear CMOS (JP7) ..................................................2-12
2.13 COM Ports RI/+5V/+12V Selection .......................2-13
2.14 FAN Connection (CN1) ...........................................2-13
2.15 IrDA (CN2)...............................................................2-14
2.16 CAN BUS (CN4) (Optional Function)......................2-14

Compact Board PCM-5893/5893L
v
2.17 TFT LCD (CN5).......................................................2-14
2.18 USB Port #1 and Port #2 (CN6)..............................2-14
2.19 Front Panel (CN7)...................................................2-16
2.20 USB Port #3 and Port #4 (CN8)..............................2-16
2.21 PC/104 ISA Interface (CN9)....................................2-16
2.22 ATX Power Socket (CN10) .....................................2-20
2.23 AT Power Socket (CN11)........................................2-20
2.24 IDE Hard Drive (CN12)............................................2-21
2.25 CRT Display (CN14)................................................2-21
2.26 Audio Input/Output/ CD-in/ MIC (CN15)..................2-22
2.27 Parallel Port (CN16)................................................2-22
2.28 KS/MS Connector (CN17).......................................2-23
2.29 Digital I/O (CN18)....................................................2-23
2.30 Serial Port (CN19)...................................................2-24
2.31 Floppy (CN20).........................................................2-25
2.32 Ethernet 10/100Base-TX RJ-45 Phone Jack (CN21)
.........................................................................................2-26
2.33 Mini PCI Slot (MPCI1).............................................2-26
2.34 Compact Flash Disk Slot (CFD1)............................2-26
2.35 PCI Slot (PCI1)........................................................2-27
2.36 LAN LED (CN13) (EEPROM 10).............................2-28
2.37 DOC (U11) ..............................................................2-28
Chapter 3 Award BIOS Setup
3.1 System Test and Initialization. ..................................3-2
3.2 Award BIOS Setup....................................................3-3
Compact Board PCM-5893/5893L
vi
Chapter 4 Driver Installation
4.1 Software Drivers........................................................4-2
4.2 Necessary to Know ...................................................4-3
4.3 Installing VGA Driver.................................................4-4
4.4 Installing PCI to ISA Bridge Driver............................4-6
4.5 Installing Audio Driver ...............................................4-7
4.6 Installing Ethernet Driver...........................................4-8
4.7 Ethernet Software Configuration...............................4-9
Appendix A Programming The Watchdog Timer
A.1 Programming ........................................................A-2
A.2 ITE 8712 Watchdog Timer Initial Program ...........A-6
Appendix B I/O Information
B.1 I/O Address Map....................................................B-2
B.2 1st MB Memory Address Map ................................B-2
B.3 IRQ Mapping Chart................................................B-3
B.4 DMA Channel Assignments...................................B-3

Compact Board PCM-5893/5893L
Chapter1GeneralInformation 1- 1
General
Chapter
1
Information

Compact Board PCM-5893/5893L
Chapter 1 General Information 1-2
1.1 Introduction
The PCM-5893 / PCM-5893L is based on AMD GX466/500
(optional)/533 and is designed to provide the ideal combination of
low power, higher performance, widely expanded interfaces and
small size for applications that require a small form factor and
minimal processor support.
The PCM-5893 / PCM-5893L features CAN Bus, DDR SDRAM
supporting up to 512MB and LCD supporting up to
1280x1024@24bpp with UMA 16MB display memory that makes
the PCM-5893 / PCM-5893L powerful for higher performance.
The PCM-5893 / PCM-5893L also features PC/104 and Mini PCI
sockets that work with the entire suite of AAEON's PC/104
peripheral module and Mini PCI module series. It makes
PCM-5893 / PCM-5893L so flexible to adapt to legacy devices or
middle-high level devices, to be robust in electromagnetically noisy
environments and to expand more peripheral interfaces.
The PCM-5893 / PCM-5893L is an ideal board for application of
data acquisition, industrial control, thin client applications and other
applications that leverage low-power consumption with optimized
processor performance.

Compact Board PCM-5893/5893L
Chapter1GeneralInformation1-3
1.2 Features
• Onboard AMD Geode™ GX 466/500(Optional) /533
Series Processor
• 18/24-bit TTL TFT LCD / 24-bit DSTN LCD
(PCM-5893 only)
• Supports Type II CompactFlash™ and DiskOnChip
• Supports Type III Mini PCI, PC/104 and PCI slots
• 4 COM / 4 USB / Digital I/O
• Supports CAN Bus (Optional)
• Supports DDR Memory
• +5V only operation

Compact Board PCM-5893/5893L
Chapter 1 General Information 1-4
1.3 Specifications
System
• CPU: Onboard AMD Geode™ GX
466/500(optional) /533
(333/366/400MHz) CPU
Memory: 184-pin DDR SDRAM x 1, Max.
512MB (DDR266MHz)
Chipset: AMD Geode + CS5535
I/O Chipset: CS5535 + ITE IT8712F
Ethernet: Realtek RTL8100BL,
10/100Base-T RJ-45
connector x 2
PCI to ISA solution: ITE IT8888G
BIOS: AWARD256KB FLASH ROM
Watchdog Timer: Generate a Time-out System
Reset
H/W Status Monitoring: Supports Power Supply
Voltages and Temperatures
Monitoring
SSD: Type II CompactFlash™ slot x 1,
one DOC socket
Expansion Interface: PC/104 slot x 1, Type III Mini
PCI slot x 1 and PCI slot x 1
Battery: Lithium battery

Compact Board PCM-5893/5893L
Chapter1GeneralInformation1-5
Power Supply Voltage: +5V. AT/ATX
Board Size: 8”(L) x 5.75”(W) (203mm x
146mm)
Gross Weight: 1.2lb (0.5kg)
Operating Temperature: 32°F~140°F (0°C~60°C)
Display
Chip: AMD Geode™ GX (PCM-5893L)
SMI SM712 (PCM-5893)
Memory: Built-in 4MB SDRAM (PCM-5893)
Shared System Memory up to
16MB (PCM-5893L)
Resolutions: Up to 1280 x 1024 @ 24bpp
Colors for CRT; Up to 1280 x
1024 @ 24bpp Colors for TTL
LCD; 800 x 600 @24-bit for
DSTN LCD (for PCM-5893 only)
Note:
Please change BIOS setup as below when you want to use
simultaneous display or dual view display.
BIOS: PnP / PCI Configurations / Init Display / First / Onboard
I/O
MIO: EIDE x 1(UDMA66 x 1), FDD x
1, KB + Mouse x 1, RS-232 x 3,

Compact Board PCM-5893/5893L
Chapter 1 General Information 1-6
RS-232/422/485 x 1, Parallel x 1
IrDA: One IrDA Tx/Rx Header
Audio: MIC-in, Line-in, Line-out, CD-in
(include Stereo Amplifier)
USB: Two 5 x 2 Pin Headers Support
4 USB 1.1 Ports
Digital I/O: Supports 8 in or 8 out
CAN Bus: Two ports (Optional)

Compact Board PCM-5893/5893L
Chapter 2 Quick Installation Guide 2-1
Quick
Installation
Chapter
2
Guide
Notice:
The Quick Installation Guide is derive
d
f
rom Chapter 2 of user manual. For othe
r
chapters and further installation
instructions, please refer to the use
r
manual CD-ROM that came with th
e
p
roduct.
Part No. 2007589310 Printed in Taiwan Jun. 2006

Compact Board PCM-5893/5893L
Chapter 2 Quick Installation Guide 2 - 2
2.1 Safety Precautions
Always completely disconnect the power cord
from your board whenever you are working on
it. Do not make connections while the power is
on, because a sudden rush of power can
damage sensitive electronic components.
Always ground yourself to remove any static
charge before touching the board. Modern
electronic devices are very sensitive to static
electric charges. Use a grounding wrist strap at
all times. Place all electronic components on a
static-dissipative surface or in a static-shielded
bag when they are not in the chassis

Compact Board PCM-5893/5893L
Chapter 2 Quick Installation Guide 2 - 3
2.2 Location of Connectors and Jumpers
Component Side
BATTERY
CN12
CN10
CN5
CN21 CN19
CN14 CN15 CN16
CN20 CN18
CN17
CN2
JP4
CN4
JP6
CN7
CN13
JP1
JP2
MINIPCI
PCI1
DIMM1
JP5
JP7
JP9JP10
JP8JP11
CN9
CN6CN8
CN1

Compact Board PCM-5893/5893L
Chapter 2 Quick Installation Guide 2 - 4
Solder Side
CFD1

Compact Board PCM-5893/5893L
Chapter 2 Quick Installation Guide 2 - 5
2.3 Mechanical Drawing
Component Side
BATTERY
0.00
5.08
5.08
0.00
15.83
40.68
46.99
61.34
67.12
35.15
101.60
97.03
166.86 168.66
137.92
180.50
193.04
198.12
0.00
0.37
2.79
13.33
45.09
75.57
71.12
40.01
36.83
127.00
135.89
140.95
137.92
127.19
125.73
112.40
193.04
194.95
187.21
185.42
187.48
177.80
127.25
99.06
97.79
75.85
75.96
109.84
114.41
23.37
23.18
0.00
15.83
134.87
137.92
135.89
40.00
10.03
51.31
141.51
174.40
168.31
71.50
69.50
175.90
36.06
7.56
5.08
14.90
2.25
0.39
1.27
17.79
187.85
14.40 8.50
26.50
17.20
17.80
108.61
136.14
107.75
119.44
40.74
119.42119.38
120.65
125.73
106.24
94.30
137.40
31.48
61.73
84.08
40.88

Compact Board PCM-5893/5893L
Chapter 2 Quick Installation Guide 2 - 6
Solder Side
71.06
180.11
109.31
63.92
0.00
0.00
5.08
5.08
140.95
1
98.10

Compact Board PCM-5893/5893L
Chapter 2 Quick Installation Guide 2 - 7
2.4 List of Jumpers
The board has a number of jumpers that allow you to configure your
system to suit your application.
The table below shows the function of each of the board's jumpers:
Jumpers
Label Function
JP1 LCD Clock O
p
eratin
g
Mode
JP2 CRT/TFT LCD mode Selection (Optional)
JP3 CPLD Programming Interface (For Debug Only)
JP4 DOC Address Selection
JP5 AT/ATX Power Type Selection
JP6 CFD Master/Slave Selection
JP7 Clear CMOS
JP8, JP10 COM Ports RI/+5V/+12V Selection
JP9, JP11 COM Ports +5V/+12V Selection
This manual suits for next models
1
Table of contents
Other Aaeon Motherboard manuals

Aaeon
Aaeon EMB-B75A User manual

Aaeon
Aaeon UP Xtreme User manual

Aaeon
Aaeon IMBM-H61A User manual

Aaeon
Aaeon Compact Board PCM-9452 User manual

Aaeon
Aaeon PCM-6890B User manual

Aaeon
Aaeon IMBM-H110A User manual

Aaeon
Aaeon PICO-EHL4 User manual

Aaeon
Aaeon SBC-558P User manual

Aaeon
Aaeon GENE-8310 User manual

Aaeon
Aaeon PCM-6890 User manual

Aaeon
Aaeon MIX-Q370D1-A12 User manual

Aaeon
Aaeon SBC-558 User manual

Aaeon
Aaeon PCM-5896 User manual

Aaeon
Aaeon Gene-5310 User manual

Aaeon
Aaeon GENE-HD05 User manual

Aaeon
Aaeon ATX-Q370A User manual

Aaeon
Aaeon GENE-BT04 User manual

Aaeon
Aaeon SBC-676 User manual

Aaeon
Aaeon EMB-Q87A User manual

Aaeon
Aaeon FSB-B75G User manual