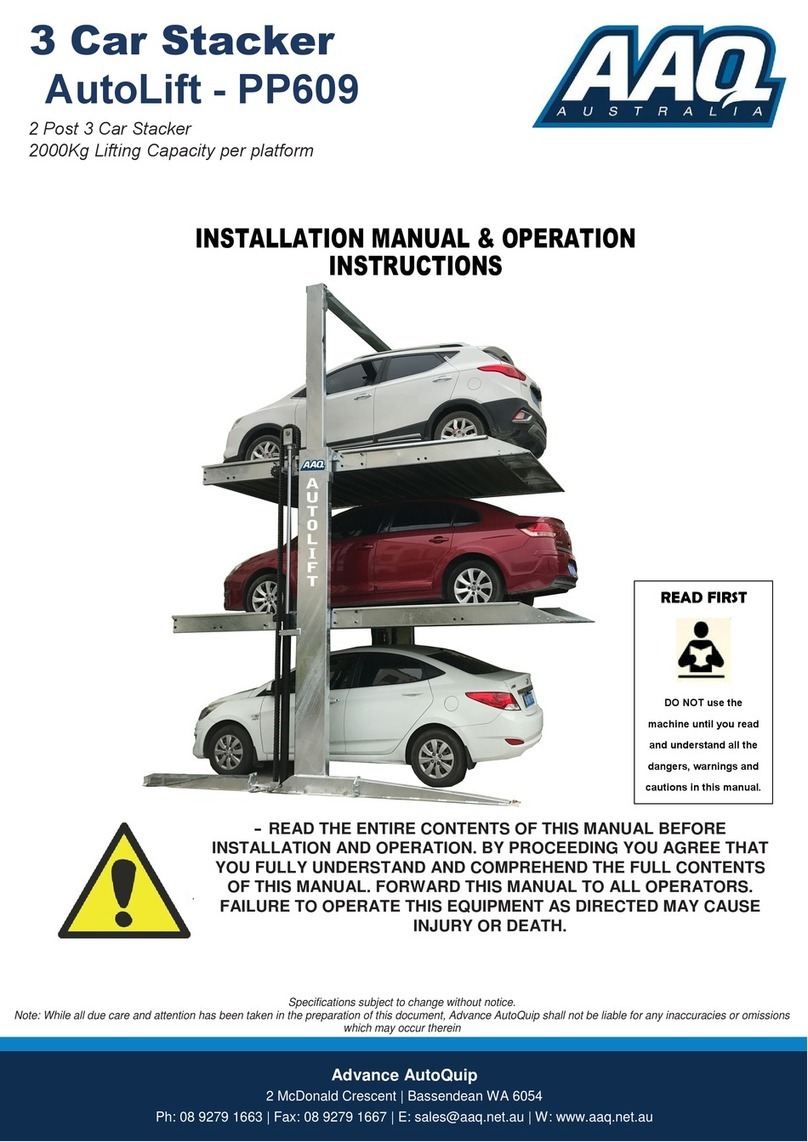
AAQ AutoLift AL-1132-220 User manual

AutoLift AL-1132-220
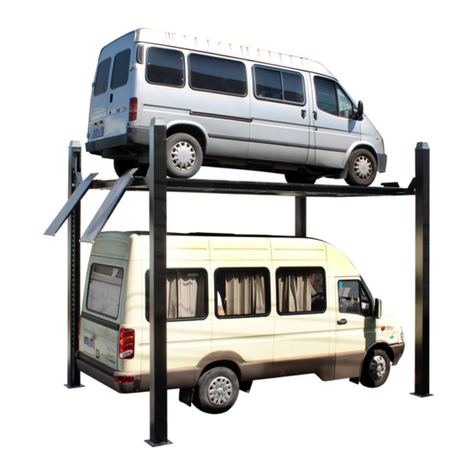
Professional Two Post Parking Hoist
INSTALLATION MANUAL
& OPERATION
INSTRUCTIONS
Advance AutoQuip
2 McDonald Crescent | Bassendean WA 6054
~ READ THE ENTIRE CONTENTS OF THIS MANUAL BEFORE
INSTALLATION AND OPERATION. BY PROCEEDING YOU AGREE THAT
YOU FULLY UNDERSTAND AND COMPREHEND THE FULL CONTENTS
OF THIS MANUAL. FORWARD THIS MANUAL TO ALL OPERATORS.
FAILURE TO OPERATE THIS EQUIPMENT AS DIRECTED MAY CAUSE
INJURY OR DEATH.
Specifications subject to change without notice.
Note: While all due care and attention has been taken in the preparation of this document, Advance AutoQuip shall not be liable for any inaccuracies or omissions
which may occur therein

AutoLift AL-1132-220
Installation & Operation Manual
INSTALLATION & MAINTENANCE
MANUAL FOR AUTOLIFT TWO
POST AL-1132-220 PARKING HOIST
3200Kg MAXIMUM LIFTING CAPACITY
INDEX
1. Introduction …………………………………………………………… 3
2. Hoist introduction ………………………………………………………… 3
3. Hoist transport …………………………………………………………… 4
4. Hoist assemble …………………………………………………………… 4
5. Control system introduction …………………………………………… 15
6. Hoist operation ………………………………………………………… 16
7. Hoist maintenance and repair ………………………………………… 17
8. Ordering information …………………………………………………… 22
READ THIS MANUAL
COMPLETELY
BEFORE
INSTALLING THE
PARKING HOIST
2
9.Warranty ..............……………………………………………………… 25
10.Commissioning report ………………………………………………… 26

AutoLift AL-1132-220
Installation & Operation Manual
1. Introduction
1.1 General Information
AL-1132-220 is atwo post hydraulic parking hoist. You should read the manual carefully before you operate
the hoist, the hoist must be installed by a competent person, please refer to current WorkSafe regulations
Australian Standards AS/NZS 1418.9 VEHICLE HOISTS .
We will never take responsibility for the damage to the hoist, car or personnel caused by the operation that
neglect the manual or the operation fail to submit the operation regulation.
1.2 Statement
2. Introduction to the hoist
2.1 Hoist description
Chart(1) single unit
Chart(
2
)
double linked unit
The AL-1132-220 is a two post parking hoist that
developed through continuous research. The hoist
enjoys great popularity with the features of simple
structure, easy assembling and space-saving.
The hoist is mainly consists of posts of two sides,
carriage of two sides, and wave plate platform. The
left and right post can be used in common. The left
and right carriage can from double-linked or
multi‐linked hoist with the column at
random.
This chapter contains warning instructions to operate the hoist properly and prevent injury to
operators or objects.
This manual has been written to be used by the technicians in charge of the hoist (operator) and routine
maintenance technician (maintenance operator).
The operating instructions are considered to be an integral part of the machine and must remain with it for
its whole useful life.
Read every section of this manual carefully before operating the hoist and unpacking it since it gives
helpful information about:
- SAFETY OF PEOPLE
- SAFETY OF THE HOIST
- SAFETY OF LIFTED VEHICLES
The supplier of the hoist is not liable for possible problems, damages, accidents, etc. resulting from
failure to follow the instructions contained in this manual.
Only skilled technicians of AUTHORISED DEALERS or SERVICE CENTERS AUTHORISED by
the manufacturer shall be allowed to carry out lifting, transport, assembling, installation, adjustment,
calibration, settings, extraordinary maintenance, repairs, overhauling and dismantling of the hoist. THE
MANUFACTURER IS NOT RESPONSIBLE FOR POSSIBLE DAMAGE TO PEOPLE, VEHICLES OR
OBJECTS IF SAID OPERATIONS ARE CARRIED OUT BY UNAUTHORIZED PERSONNEL OR THE
HOIST IS IMPROPERLY USED.
3

AutoLift AL-1132-220
Installation & Operation Manual
2.2 Hoist dimensions
2.3 Hoist parameter
Rated lifting load: 3200 Kg
Rated maximum lifting height: 2.1meters (about 83 inches)
Total hoist weight: about 1200kg.
3. Hoist transportation
The seller has packaged the equipment using packing frame, straps and paper board to avoid
damage during the transportation.
The shipment should be thoroughly inspected as soon as it is received. The signed consignment is
acknowledgement by the carrier of receipt in good condition of shipment covered by your invoice. If any of the
goods called for on this consignment are shorted or damaged, do not accept them until the carrier makes a
notation on the freight bill of the shorted or damaged goods. Do this for your own protection.
The hoist parts may come loose during transportation. Before you cut the packing belt used to fix the hoist, be
careful to avoid injury to personnel caused by fallen objects.
4. Hoist assembly
4.1 Important information
4.1.1 Before install the hoist,read and learn the safety warning in detail.
4.1.2 Keep the working site clean and tidy.
4
Size code
L
L1
W
H
H1
W1
value/mm remark
4318
4166
2658 Other models see actual size
Size name
Device length
Platform length
Device width
Device height 3497.5 Other models see actual size
Platform height 0≤H1≤2140
car capacity width 2126
Can be adjusted according to users’
requirement
Other models see actual size
W2
W3
platform width
Width between
carriages 2226
2200 Other models see actual size

AutoLift AL-1132-220
Installation & Operation Manual
4.1.3 Check the working environment of the hoist. Don't use the hoist in adamp environment. Keep good
ventilation and enough light of the use area.
4.1.4 Only trained person can operate the parking equipment. The staff untrained should keep away from the
working area. All the staff without training is forbidden to operate the hoist.
4.1.5 Motor must be grounded to avoid electric shock.
4.1.6 Turn power off when installing to secure the safety as there is high voltage on the power unit.
4.1.7 Always pay attention to your surroundings to avoid injury.
4.1.8 Operate the equipment in normal way. Do not modify the equipment in any way or use aftermarket parts
which are not purchased from Advance AutoQuip or its authorised repairers.
4.1.9 Prohibit modifying any parts.
4.1.10 Safety locking device should be well protected.
4.1.11 When lifting or lowering the vehicle, keep personnel away from the area.
4.1.12 Keep all other equipment away from the hoist area.
4.1.13 Warning: The working area should be not flammable as there is electric spark when the switch works.
4.1.14 this mark means safety warning.
4.1.15 Keep the equipment clean and keep regular maintenance. Appropriate lubrication and maintenance is
important for safety and warranty.
4.1.16 Keep handle and button clean and dry, avoid contamination of oil and grease from the hoist.
4.1.17 Check the synchronisation of the left and right carriage and check if there are any damage to parts, if there
is any fault, immediately cease operation and contact the authorised repairer.
4.2 Hoist layout
Before you install the hoist, you should check the following items:
4.2.1 The working area should be well designed and have enough space.
4.2.2 Avoid barrier like electric wire to the installiation area.
4.2.3 Check carefully if there is cracks to the concrete ground. Check if the strength of the concrete is per the
manufacturer's requirements. The compressive strength should be no less than than 425kg/cm. The thickness of
concrete basement should be no less than 200mm, the strength should be no less than 25-30 Mpa, the just finished
concrete basement must be solidified and cured over 28 days. Otherwise, this will cause damage to equipment or
injury & death.
4.2.4 The installation basement must assure certain levelness; the tolerance is not allowed over 5mm, the tolerance
within this limit can be adjusted byusing shims. If the ground is uneven, it must be re-pored to the correct
requirements.
4.2.5 Do not install equipment on asphalt or other non-concrete surface.
4.2.6 Do not install equipment on an uneven concrete surface.
4.2.7 Do not install equipment on a second or higher floor without the approval of an engineer.
4.2.8 Do not install the equipment outdoors, it will void the warranty.
4.2.9 Confirm the general installation position of the equipment, and then put columns and platform on their
respective places.
4.2.10 Confirm the location of the electric cabinet and keep enough space for operation.
4.2.11 Draw up the position of the baseboard of the column with chalk after the confirmation to assure the tolerance
within 3mm to avoid effecting the installation of the hoist.
4.2.12 Check carefully to assure the layout is correct.
5

AutoLift AL-1132-220
Installation & Operation Manual
4.3 Tools required to install the hoist
Hammer, Level, Open spanner, Socket head wrench, Adjustable spanner, Crow bar
Chalk or color pen, Flat screw driver, Tape measure (5m), Nipper pliers.
Concrete Foundation
FOUNDATION D,MENSIONS
IN 0M
QUALITY OF
CONCRETE
MIN.
PRESSURE
RESISTANCE
OF
SURFACE
MAX.
REACTION ON
EACH
BEARING
POINT
Length Width Thickness 25-30
Mpa
425
Kg/cm
2
0.9
Kg/cm
2
00 00 200
Fastening the hoist to the ground
Concrete Foundations
-3003$5(,1)25&('&21&5(7(
)REINFORC('0(6+
&203$&7('62,/
GRAVEL SHEETING
PP
[PP
)0HVK
200PP
PP 100PP
6
Please note:
For all parking hoists that are to be installed on a suspended concrete slab,
this will be the responsibility of the builder to first ensure the hoists are
approved for installation and the concrete has been engineered for such
purposes with an Engineer's Certificate.

AutoLift AL-1132-220
Installation & Operation Manual
4.4 Install steps
4.4.1 Feed no 1 oil hose from the top, down through the square conduit and connect to the bottom of the cylinder.
Connect no 2 oil hose to the bottom of the hydraulic cylinder and run the hose to the opposite side to the other cylinder.
7

AutoLift AL-1132-220
Installation & Operation Manual
4.4.2 Erect the column, connect the column base support and the column with the bolt on the front leg of
column and the oil hose guide slot. Connect the carriage connection plate and the platform side beam with the
bolt.
4.4.3 Install the wave plate platform. Assemble the bolt refer to chart (10) and chart (11).
.
Chart (8)
Chart (9)
Front leg of
column
Wave plate
p
latfor
m
carriage
8
The platform includes
15pcs wave plate+1 pcs steel plate+ramp
wave plate
steel plate
Ramp
Note: Install 1 pc of steel filler plate between wave plate and
ramp, to strengthen the platform.

AutoLift AL-1132-220
Installation & Operation Manual
Hexagon bolt with full screw M12X45
Flat washer C grade Φ12
Hexagon bolt M12
Grade A Type I hexagon nut with coarse screw M20
Standard spring washer 20
Flat washer C grade
Hexagon bolt with full and coarse screw
M20X50(4/side)
Hexagon socket
head screw
M10X16
Motor support plate
Hexagon bolt
with full screw
M8X25 Hexagon nut
M8
Chart (11)
4.4.4 Hang up the power pack. Fix the motor support plate on the power pack first, and then suspend it on the top of
the column..
Chart (10)
Chart (12)
Chart (13)
9

AutoLift AL-1132-220
Installation & Operation Manual
4.4.5 Connect the oil hose. According to 4.4.1, oil hose 1 and the oil hose 2 will be connected with cylinders.
The other end of the oil hose 1 connect the power pack...
4.4.6 Fix one end of the chain to the column, pull it out from the top of the chain pulley, pass through the opening
of the platform, and pull it out from the other end of the platform opening.
Chart (14)
Oil
hose 1
Oil hose 1
fitting
Chart (15)
Chart (16) chain installation sketch map
Chart (15)
Chart(15)
The adjustment nut can adjust
the tightness of the chain.
Chain pulley
Chain
Cotter pin 2.5
Chain pin
10

AutoLift AL-1132-220
Installation & Operation Manual
4.4.7 Pull the chain out from the another carriage chain pulley and fix it on the top support of the column.
4.4.8 Connect the locking hoist
The live knot bearing and the lock release pull rod connect the manual lock release device, the nut on the pull rod
adjust the tightness of the pull rod.
4.4.9 AddGrade 32hydraulicoilintothepowerpack, connectthepower andthenstartthe
powerpack. Controlthehoistoftheplatformwithhoistcontrolbutton, stopliftingwhenthe
platform hasraisedtotheheightofonemeter,tightenallboltson the carriageandplatform.
11

AutoLift AL-1132-220
Installation & Operation Manual
Chart (23) bottom view
Chart (24) the view after conceal the wave plate
4.4.10 Install electric lock release
Install the electromagnet according to the following diagram.
4.4.11 Install the down photocell sensor.
4.4.12 Install upper limit switch
Adjust the installation height according to the actual parking requirements.
12
The sensor is installed in the channel between
column and lock ladder.

AutoLift AL-1132-220
Installation & Operation Manual
4.4.13 Control arm installation of the button box.
4.4.14 Use base plate of post as a template to drill hole using a hammer drill. These holes should be about
120mm deep. After drilling the hole, clear the inside of the hole and check the alignment of the base plate and
chalk line.
Insert the bolt into the hole, until the washer touches the basement plate.
13

AutoLift AL-1132-220
Installation & Operation Manual
4.4.15 If the column is uneven to the ground, you need to insert U-type shims to adjust. After fixing the anchor
bolt, the column will be evenwith the ground.
4.4.16 Adjust the distance A1=B1 and A=B between the twocolumns. Add the shim to adjust when the distance
is unequal(A1>B1). After the column is vertical to the ground, fasten down the bolt and nut.
4.4.17 Fix the chain, the tightness should be moderate, adjust the column of two sides to make them parallel.
14

AutoLift AL-1132-220
Installation & Operation Manual
customer can adjust the installation position of the
limit switch according to the actual parking
requirement and site space. It will be automatic
shut ‐offiftheoperatorreleaseskeyswitch,andthen
conduct the vernier regulation of the lifting height
according to the actual parking requirement. Besides
the keyswitchonthebuttonboxofthecontrolarmin
front ofthedevice,thereisanemergencystopswitch,
you should press down the button under emergency
situation, to power down the device. But after
excludingthefault,rotatethebuttontoresetit,orthe
hoist will not be able to operate.
4.4.18 Rotate the key switch on the control box to raise the hoist.
4.4.19 When the hoist has raised to the highest position, stop rotating the key switch, avoid damage.
4.4.20 If you want to lower down, you should let it rise some distance, (about 10-20mm), and then unlock
automatically.
4.4.21 At this time, loosen the bleed bolt on the top of the cylinder, don't loosen it completely, screw it down after
bleeding.
4.4.22 Then continue to rotate keyswitch, lower down the hoist with safety. Repeat to lower it down for several
times, discharge the air in the cylinder.
Attention: during the whole lifting process, observe all theoperation parts, check the correctness of the
installation and the debugging, only when you confirm that there is no any mistakes finally can you start the hoist.
4.4.23 After the installation, lubricate each sliding parts with the lubricant (supramoly).
5. The introduction of the control system
5.1 Control operation
Thereislimitswitchonthetopofthehoist,tocontrolthelimitheightoftheplatformwhenmoveup. The
5.2 Important information
When assembling, confirm the fastness of the wiring; check if there is any visible wire end to avoid short circuit.
When handling the equipment or parts, take measures to avoid breaking the line, otherwise, it will cause short circuit.
If short circuit occurs, the fuse protector will take effects. After that, the fuse should be changed.
The failure of the control system should be maintained byprofessional technicians. It is forbidden for the staff without
electric service related knowledge to repair the hoist, to avoid of the body damage caused by electric shock or hoist
damage caused by wrong wiring.
Prohibit exposing electric elements in damp environment to avoid short circuit.
Chart (35)
15

AutoLift AL-1132-220
Installation & Operation Manual
Troubleshooting Possible Cause Remedy
The fuse of control circuit is burned. Check and change the burned fuse.
The power cord is open circuit. Check the wire circuit to confirm the wire
connection is right.
There is no response
when rotating the key
switch. The emergency stop switch is
pressed down.
Rotate the emergency stop switch to
reset it.
The platform has been in the
highest position.
Normal phenomenon.The platform can’t rise when
rotate the key switch, but can
be lowered down when rotate
it in opposite direction. Wiring of limit switch is in bad
condition.
Check the circuit of limit switch to
guarantee good connection.
6. Hoist operation
6.1 Attention item
6.1.1 If the equipment is not in servicedfor a long time, the main power supply should be turned off.
6.1.2 If the equipment has not been in service for a long time, please lubricate it and check if there is any damage
and rust corrosion before using it again. Check if the equipment is in good condition through no-load operation.
6.1.3 Do not use the equipment if the floor or any component is damaged.
6.1.4 Do not operate the equipment if there is person or other obstacle under it.
6.1.5 Prohibit using the equipment for other purpose.
6.1.6 Safety lock device should be in good condition at any time.
6.1.7 Do not let the unlocked equipment in a certain height, and leave.
6.1.8 Keep the motor dry, water damage is not covered by warranty.
Warning:
There should be enough space to escape if the vehicle is at the risk of falling down.
Gravity center of vehicle should be in the center of platform.
There should be enough space to place the hoist when lifting and lowering the vehicle.
Avoid of excessive shake when there is vehicle on the hoist.
Don't exceed the closed height the hoist control.
Avoid of the damage of the foot when lowering the hoist.
5.3 Troubleshooting
16

AutoLift AL-1132-220
Installation & Operation Manual
The hoist can only be used by the trained operator .
Only the staff authorized can stay on the hoist site.
When move and assemble the medium parts, safety bracket should be used.
6.2 Raising the hoist
6.2.1 Drive the car on the appropriate position of the platform. Avoid collision with the control cabinet and the rear of
the platform.
6.2.2 Apply the manual brake after the is parked in position.
6.2.3 Open the car door carefully to avoid any collision with the control arm.
6.2.4 Press down the up button, lift the car to the appropriate position, and lock the hoist. Take notice that the safety
locking device should always be valid.
6.2.5 You can park other vehicles under the platform, but before parking, check and confirm that all the vehicle height
of the parked vehicle should beno more than platform height, to avoid the vehicle being damaged.
6.3 Lowering the hoist
6.3.1 Be sure there is no person or obstacle under the car, if there is car parked under the platform, remove the car
away from the hoist.
6.3.2 Press the down button to lower the platform to the ground.
6.3.3 Drive the car off the platform.
7. Maintenance and service of hoist
7.1 Maintenance schedule
Conduct the maintenance every month regularly to ensure the use safety ofthe hoist.
1. Check the carriage is operating correctly.
2. Check the chain and it's connector, chain pin shaft, cotter pin is operating correctly.
3. Check if the expansion bolt is loose. You should tighten the expansion bolt if it is loose.
4. Check whether the locking device is operating correctly, if it is not, cease immediate use of the hoist and contact
your authorised service agent to remedy the fault.
5. Check if there is any distortion of the column. Check if the column is vertical to the ground. You should stop
operating the hoist if there is any serious distortion of the column caused by overload and abnormal use.
6. Lubricate the side block on the column with grease.
7. Check hydraulic fluid levels.
17

3200 kg
AutoLift 1132-220 Parking Hoist
OPERATING INSTRUCTIONS
The hoist should only be operated by personnel that have been thoroughly trained in
operation and maintenance of the hoist.
1. Drive top vehicle onto the elevating platform. Vehicles can be driven in nose first or backed in.
2. Drive until the top vehicle's forward tyres rest against the forward wheel stop.
3. Turn off car engine, engage safety brake, and place the vehicle's gear selector in Park. If vehicle is
manual transmission, place the transmission in first gear.
4. Check the front of the hoist to make sure that the vehicles forward tyres are securely set against the
wheel stop.
5. Walk around the hoist to ensure no obstructions will interfere with the vehicle being lifted.
6. Position yourself in front of the hoist within reach of the operator control console.
TO RAISE THE HOIST
1. Once all precautions above are followed, check around and above the hoist to ensure that no objects
hoist.
2. To raise the hoist platform, insert the key into the control console, turn the operator switch on the
control console to the left position and hold.
3. During operation, observe the entire perimeter of the hoist as well as overhead to ensure there are no
obstructions that may damage vehicle and / or the hoist.
4. ALWAYS raise the platform until it reaches its top custom-set lock position.
5. If a low ceiling is overhead be careful when lifting. NEVER allow the top vehicle to come in contact with
any overhead structure or object.
6. Once top position is reached, release the operator switch to its neutral position then push the center
button on the operator console, the hoist will then rest on the nearest lock position.
NOTE: Check for
correct engagement of each lock.
PLACEMENT OF LOWER VEHICLE
1. Once all precautions of the Pre-Lifting and Lifting Stage have been followed, drive the lower vehicle
under the hoist platform until the vehicle is correctly parked under the top platform, or, to the location
where the car is properly positioned under the hoist to allow clearance of the doors and mirrors.
2. Turn off the engine, set the parking brake and place the gear selector to Park, or place manual
transmission into first gear.
REMOVAL OF LOWER VEHICLE
1. Carefully drive out the lower vehicle after making sure all is clear before lowering the lift platform.
TO LOWER THE HOIST
1. Walk around the hoist to make sure nothing is below or near the hoist platforms entire lower area to
prepare for descent.
2. Be certain that no person (except the lift operator) is within 3 meters of the hoist area.
3.
Turn and hold the operator switch to the right position
NOTE: the hoist will automatically raise
approximately 50mm or enough to allow the mechanical locks to release.
4. The hoist will automatically stop and automatically start descending.
5. When lowering the hoist always be watchful for objects, persons or animals that may wander under the
hoist platform during operation. Cease operation by pressing the emergency stop on the control console
if area becomes obstructed.
6. KEEP HANDS AND FEET CLEAR OF ALL MOVING PARTS AND PINCH POINTS.
7. The top vehicle is now ready to be removed from the parking area. Turn the key to the off position on
the control console and remove.
MODEL:
AutoLift 1132-220
SERIAL NO.:
APPROVALS:
Design Code: AS1418.9 -1996

SAFETY OPERATING PROCEDURES
Vehicle Hoist
DO NOT use this machine unless you have been instructed
in its safe use and operation and have been given permission
PERSONAL PROTECTIVE EQUIPMENT
Safety glasses must be worn at
all times in work areas.
Long and loose hair must be
contained.
Do not stand on hoist whilst
hoist is in operation.
Sturdy footwear must be worn
at all times in work areas.
Close fitting/protective
clothing must be worn.
Rings and jewellery must not
be worn.
PRE-OPERATIONAL SAFETY CHECKS
Locate and ensure you are familiar with all machine
operations and controls.
Ensure all guards are fitted, secure and functional. Do
not operate if guards are missing or faulty.
Ensure the vehicle hoist has operating and maintenance
instructions permanently located and clearly visible.
Check the capacity of the hoist compared to the weight
of the vehicle. If vehicle is too heavy, do not proceed.
Ensure the area is clean and clear of grease, oil.
Check workspaces and walkways to ensure no slip/trip
hazards are present.
Check that all safety devices are in good condition.
Ensure support arms are capable of being locked in
position.
Ensure rubber pads are in good condition on all load
points.
OPERATIONAL SAFETY CHECKS
Centre the vehicle on the hoist, ensuring the weight is
evenly distributed to the front and rear.
Identify the correct jacking points and place the lifting
pads under the vehicle at the front and rear on the
jacking points, ensuring contact.
Only one person shall operate the hoist at a time.
The hoist must not be operated unless it has a current
certificate of inspection.
Ensure the area is clear of people and equipment before
operating.
Check vehicle stability by looking at the jacking points.
Engage manual lock.
ENDING OPERATIONS AND CLEANING UP
Lower the vehicle hoist and switch off machine when
work completed.
Leave the equipment and work area in a safe, clean and
tidy state.
POTENTIAL HAZARDS AND INJURIES
Falling objects.
Trapping hazards.
Crushing hazards.
Hair/clothing getting caught in moving machine parts.
DON’T
Do not use faulty equipment. Immediately report
suspect equipment.
Never leave the machine running unattended.
This SWP does not necessarily cover all possible hazards
associated with this equipment and should be used in
conjunction with other references. It is designed as a guide to
be used to compliment training and as a reminder to users
prior to equipment use.
19

AutoLift AL-1132-220
Installation & Operation Manual
Troubleshooting Possible Cause Remedy
There is air in the hydraulic oil.
Lift with idle load to the highest position, and keep
for seconds and then lower down, when lowered to
the half height, screw to open the oil hose
connector, discharge the air and then screw down.
the hydraulic oil solidify or viscosity
of the hydraulic oil is too big as
surrounding temperature is too low.
discharge the hydraulic oil,
refilling qualified hydraulic oil.
The motor works, no
hydraulic oil leakage,
the sound is abnormal,
but the platform can't rise.
The load is over weight. Check and confirm that hoist
weight is less than rated load.
The connector is loose. Screw down the tube connector.
Hydraulic oil leakage of
oil hose connector. The connector is damaged. Change the connector.
Hydraulic oil leakage of
the cylinder. The hydraulic seal kit is damaged. Change the seal kit or cylinder.
The motor is burned. Change the motor after check and
confirm that the power is correct.
The voltage is too low. Check and confirm that the voltage is
the regulated voltage.
The fuse is burned. Change the fuse.
Motor do not work.
The limit switch is damaged. Change the limit switch.
Platform can't fall down. The platform is locked. Control the platform hoist, after lock
release lower the platform down.
the hydraulic oil viscosity is too big. Change to the regulated hydraulic oil
or consult local hydraulic manufacture.
The plug valve of the power unit is
jammed.
take apart the valve part to wash(pay attention to
dust proofing)
Platform falls down slowly.
The oil hose or the hose connector
is jammed. Dredge the oil hose and hose connector.
Motor rotate reversely Wrong wiring Rewiring according to the circuit drawing
7.3 Operation, Maintenance and Service Guide
A. Operation
1. Please pay all your attention on the movement of platform operation immediately stop operation if any imbalance is found.
2. Keep holding the key switch to operate the equipment, it will stop at once if your hand releases.
3. The equipment can stop at once if the platform hoist up to top position where it has been set with the limit switch.
4. There are three statuses in descending:
(a)The distance of platform to ground is 2100mm (the top position), if you keep turning the key to DOWN: after no movement
for 3 to 5 seconds, the mechanical lock will be released automatically then platform start to descend.
7.2 Troubleshooting
20
Table of contents
Other AAQ Lifting System manuals

AAQ
AAQ AutoLift AL-243156 User manual

AAQ
AAQ AL-6254A User manual

AAQ
AAQ AutoLift AL-9500HD User manual

AAQ
AAQ AutoLift AL-167261 User manual

AAQ
AAQ AutoLift AL-10000T User manual

AAQ
AAQ AutoLift AL-8803 User manual

AAQ
AAQ 167212E User manual

AAQ
AAQ AutoLift AL-6000S2 User manual

AAQ
AAQ SXJS4019A User manual

AAQ
AAQ AutoLift AL-162016 User manual

AAQ
AAQ AL-3060 User manual

AAQ
AAQ AL-4000A User manual

AAQ
AAQ AL-6214A Guide

AAQ
AAQ AutoLift 163027 User manual
AAQ
AAQ AutoLift FP-VRC User manual

AAQ
AAQ AutoLift PP609 User manual

AAQ
AAQ AutoLift AL-3000AG User manual

AAQ
AAQ AutoLift AL-900DD Technical Document

AAQ
AAQ AutoLift AL-167251 User manual
AAQ
AAQ AutoLift AL-167262 User manual