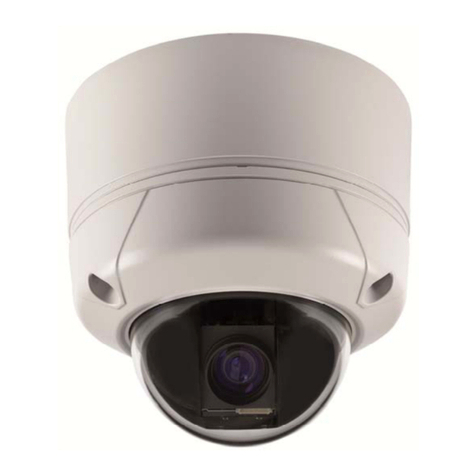
Abus Eyseo TV7057 User manual

28
Eyseo 35x Auto Focus
Camera Day / Night
TV7057

29
Contents
1. Preface ..........................................................................................................30
2. Scope of delivery...........................................................................................32
3. Features ........................................................................................................32
4. Precautions....................................................................................................33
5. Installing instructions ....................................................................................35
6. Description of the rear side of the camera.....................................................36
7. Display of the on-screen menu......................................................................39
8. Programming menu.......................................................................................42
9. Connecting a control unit...............................................................................52
10. Installation......................................................................................................53
11. Technical data ...............................................................................................54

30
1. Preface
Dear Customer,
Thank you for purchasing this Eyseo auto focus camera. You made the right
decision in choosing this state-of-the-art technology, which complies with the current
standards of domestic and European regulations. The CE has been proven and all
related certifications are available from the manufacturer (www.abus-sc.com) upon
request.
To maintain this status and to guarantee safe operation, it is your obligation to
observe these operating instructions.

31
The Eyseo auto focus camera is equipped with a 1/4” SONY Super HAD CCD image
sensor and digital signal processor. The all state circuitry provides extremely long life
and a high level of reliability. The cameras use class A microelements that are
resistant to external electromagnetic fields. They offer cutting-edge technology for
advanced video surveillance.
©ABUS Security-Center GmbH, August 2008
Every effort has been made to ensure that the contents of this manual are correct.
However, neither the authors nor ABUS Security-Center accept any liability for loss
or damage caused or alleged to be caused directly or indirectly by this manual. The
contents of this manual are subject to change without notice.

32
2. Scope of delivery
xEyseo auto focus camera
xFixing plate for camera holder incl. screws
xInstallation instructions
3. Features
The Eyseo 35x Autofocus day/night camera has following features:
x35x optical zoom and 16x digital zoom (total 560x zoom)
xAutomatic day/night switching due to electromechanical IR cut filter (ICR)
xAuto-Iris-Function (AI), Backlight compensation (BLC), automatic gain control
(AGC), automatic white balance (AWB), flickerless function (FL) and autofocus-
function
xOSD menu
xZoom control and menu access through RS485 (Protocols Pelco D, Native, LG)

33
4. Precautions
To reduce the risk of electric shock and to ensure that your guarantee remains valid,
do not remove cover (or back).
Avoid rain and humidity. Do not use the camera in damp places. This camera is
designed for indoor use only. If the camera becomes wet, the power supply must be
switched off immediately. The camera should then be checked by a service
technician before being used again.
Clean the glass lens of the integrated motor zoom lens. For cleaning, use only
lint-free cloth or a cotton-tip moistened with ethanol (alcohol). Never use corrosive or
abrasive cleaning substances.
Never point the camera towards the sun. Whether the camera is in use or not,
never aim the lens at the sun or other very bright objects (laser light). This can
damage the CCD element and create white dots on the monitor, a sign that CCD
pixels are destroyed.

34
Operate the camera only within the specified temperature, humidity and power
ranges. Operating the camera outside the prescribed ranges can lead to reduced
product life and early malfunction. Greatly exceeding the specified operating ranges
can also result in immediate failure of the camera. All specifications can be found in
the technical data.
Handle the camera with care. When installing the camera, make sure it is not
subject to excessive physical stress (shocks, vibrations, etc.). It should be installed
in a place that is free from shocks and vibration. Incorrect handling and transport can
lead to damage to the camera.

35
5. Installation instructions
This camera is designed for indoor use only. If the camera is used outdoors, damage
may occur as a result of dampness and temperatures outside the prescribed range.
Outdoors the camera should be installed in appropriate protective housing so that it
is suitably protected against outside weather influences and remains in compliance
with the ambient operating conditions. This camera is equipped with an IR-cut and
can be used in combination with IR illumination.
First-class video pictures are largely dependent on the illumination used. When
using artificial light, make sure you use lights with a colour spectrum as near as
possible to daylight, since colour distortion can otherwise occur with colour cameras.
The reason for poor picture quality is often bad-quality cabling. Make sure the
connections are properly crimped, avoid passive video signal distributors, and
always choose the shortest possible cable route between the camera and video
processing devices.

36
6. Description of the rear side of the camera
(T) Zoom NEAR (TELE +/S)
Enlarges the detail view and reduces the image framing. In the menu this key
causes the cursor to move upwards.

37
(W) Zoom WIDE (WIDE -/T)
Enlarges the image framing to the maximum horizontal angle. In the menu this key
causes the cursor to move downwards.
(N) Focus Near / +
Press to focus in / increase value (+).
(F) Focus Far / -
Press to focus out / decrease value (–).
(MENU)
Press to access the programming menu. Press again to exit the programming menu.
(Power) (+12V / GND-)
12V DC voltage supply. Approved for DC voltage are class 2 power supply units
only. Ensure the polarity is correct.

38
(P.LED) Status display LED
Shows whether the camera is correctly supplied with power.
(RS485) RS485 control port
Camera control using an RS485 interface. Connect (D+) and (D-) correctly to the
control device.
(VIDEO OUT)
BNC output. This connector is for connecting the camera video signal to the VIDEO
IN connector of, for example, the monitor (composite signal: 1Vp-p).
Name Function Note
12+ VDC 12V ±10%, Max 4.1W 12V ±0.5V
GND Ground for Power Supply
COM Ground for Zoom, Focus, Menu
FOCUS Focus (᧧: Far,᧩: Near) ±6V (᧧3V~᧧13V, ᧩3V~᧩13V)
ZOOM Zoom (᧧: Tele, ᧩: Wide) ±6V (᧧3V~᧧13V, ᧩3V~᧩13V)
COM Ground for Zoom, Focus, Menu
Menu Setup Menu ±6V (᧧3V~᧧13V, ᧩3V~᧩13V)
D+ Use for RS-485 Control
D- Use for RS-485 Control

39
7. Display of the on-screen menu
OSD position
1234
5-2
67 89
5-1

40
Function Display Meaning
1 Focus No display Auto focus of the camera active.
bFocus adjustment is done manually by the
user / Push Auto Mode
2Backlight
compensati
on (BLC)
No display Back-light compensation off
“BLC” Back-light compensation on / AUTO /Super
BLC Mode
3 AES No display Normal exposure time 1/50s
“Ff” Flickerless mode
1/125 …
1/30.000 Exposure time adjustable in 29 steps
4White
balance “AWB” Automatic white balance.
“HUE” The colour hue setting is active.
“IWB” Indoor white balance
“OWB” Outdoor white balance
“MWB” Manual white balance
“PWB” Push auto white balance

41
5
/
1
Protocol AUTO/NATIVE/
PELCO/LG After camera start, the protocol and
communications settings are shown for a
specific time.
COMM “BBBB,P,D,S”
5
/
2
Standby
mode “STAND-BY” Shows STAND-BY mode during camera
start.
6 Zoom
display Dx176 Digital zoom mode
Dx35 Optical zoom mode
7Camera ID 000~255 Camera ID number (for control using the
RS485 interface)
8 Camera
name User-defined camera name (max. 10 characters)
9 Brightness Brightness information
Note on point 5-1: “BBBB,P,D,S” E.g. “9600,N,8,1”
BBBB = Baud rate (2400/4800/9600/19200)
P = Parity (None, Odd, Even); D = data bits (8); S = stop bit (1)

42
8. Programming menu
Main menu
Changing menu settings:
To display the menu, press the Menu button. Select a menu item by using the (S)
and (T) buttons. To change a value, use the (+) and (–) buttons.
* All values printed bold are factory settings.
MENU
FOCUS SET
m o
AWB SET
m o
AE SET
m o
SPECIAL SET
m o
F OSD DISP
m o
COMMUNICAT
m o
INITIAL SET OFF
EXIT
m o

43
FOCUS SET
Name Function
FOCUS MODE AUTO: Automatic focus setting
MANUAL: Manual focusing
PUSH AUTO: Saves the selected value manually for
the set environment. If the display is changed, the focus
is not automatically changed.
FOCUS DIST Minimal focus distance
Values: 1CM, 10CM, 50CM, 1M, 1.5M, 3M, 5M or 10M
ZOOM START Zoom start factor
Values: x1 ~ x34
ZOOM END Zoom end factor
Values: x560 ~ x2
ZOOM SPEED Zoom speed
Values: SLOW, NORMAL, HIGH
ZOOM TRACK Focus setting for zoom
Auto: Automatic focusing after zoom
MANUAL: Manual focusing after zoom

44
INITIAL SET Changing the value to “ON” resets all focus settings.
RETURN Return to main menu
AWB SET
Name Function
WB MODE Setting white balance mode (WB mode)
Possible values: AUTO, HUE CONTROL, INDOOR,
OUTDOOR, MANUAL, PUSH AUTO
AUTO: WB colour temperature range =
2500°K ~ 8000°K
MANUAL WB: Setting the red and blue values for
desired white balance
PUSH AUTO: Saves the selected value manually for
the set environment.
HUE CONTROL: WB with colour hue change
INDOOR: WB mode for indoors
OUTDOOR: WB mode for outdoors

45
HUE
CONTROL Hue control values: 0 ~ 72
RED GAIN Red gain value: 0 ~ 255
BLUE GAIN Blue gain value: 0 ~ 255
PUSH AUTO ON: The white balance is adjusted the centre of the
picture.
OFF: Saves the set value. This value is always used
following a restart.
INITIAL SET Changing the value to “ON” resets all white balance
settings.
RETURN Return to main menu
AE SET
Name Function
AE MODE Mode for iris control (AE)
Possible values: AUTO, IRIS MAN, AGC MAN,
MANUAL

46
IRIS ADJUST Manual iris setting
Possible values: 0 (MIN) ~ 255 (MAX)
AGC MAX. /
AGC ADJUST Settings for automatic gain control (AGC)
AGC MAX: Maximum value for iris settings
0 (MIN) ~ 255 (MAX)
AGC ADJUST: Manual setting of AGC value
BRIGHTNESS Brightness adjustment. Possible values: 0 ~ 99
BACKLIGHT Backlight compensation mode (BLC): OFF, ON, AUTO
or SUPER
ON: BLC adjusts the brightness of the area according
to the BLC LEVEL.
AUTO: BLC adjusts the brightness of each individual
area automatically.

47
SUPER: BLC adjusts the brightness of the picture
according to the light conditions.
BLC LEVEL Manual settings of backlight intensity:
BLC level 0 ~ 80; function active with BLC ON
BLC AREA Defines the area under consideration, based on the
average light conditions of the overall picture; function
active with BLC ON or AUTO
BLC areas: Center(Area 0), TopS (Area 1+2), TopL
(Area 1+2+0), BottomS (Area 3+4), BottomL (Area
3+4+0), Left (Area 1+3), Right (Area 2+4)
FLICKERLESS Function for avoiding flickering pictures (ON / OFF)
(PAL: Shutter = 1/120; NTSC: Shutter = 1 /100)
SHUTTER Electronic exposure time (29 steps)
NORMAL = 1/50 (PAL);
Other possible values: 1/125 ~ 1/30000
INITIAL SET Changing the value to “ON” resets all iris adjustment
settings.
RETURN Return to main menu
Other manuals for Eyseo TV7057
1
Table of contents
Other Abus Security Camera manuals

Abus
Abus TV7180 User manual

Abus
Abus tvip21551 User manual

Abus
Abus IPCA52010 User manual

Abus
Abus TVCC50030 User manual

Abus
Abus TVHD70000 User manual

Abus
Abus IPCS29511 User manual

Abus
Abus eyseo. TV7600 User manual

Abus
Abus PPIC32520 User manual

Abus
Abus TVAC19000C User manual

Abus
Abus TVCC71000 User manual