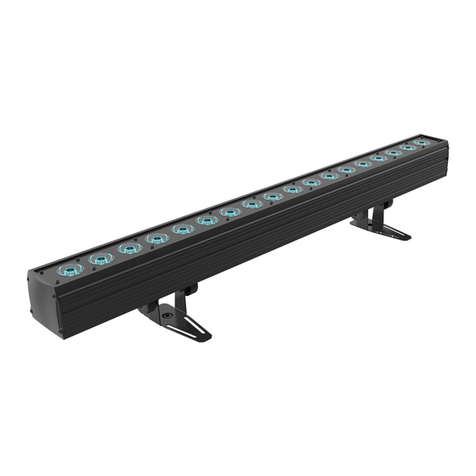
ACME Super Dotline User manual


- 1 -
CONTENTS
01/ Safety Instructions.................................................................................................. 2
02/ Technical Specifications ........................................................................................ 6
03/ Control Panel........................................................................................................... 8
04/ Fixture Installation.................................................................................................. 9
4.1 Hanging the Fixture...................................................................................... 10
4.2 Splicing the Fixtures .....................................................................................11
05/ How To Set The Unit............................................................................................ 14
5.1 Main Functions..............................................................................................14
5.2 Home Position Adjustment .........................................................................30
06/ Control By Universal DMX Controller.............................................................. 40
6.1 DMX512 Connection...................................................................................40
6.2 Address Setting.............................................................................................. 41
6.3 DMX512 Configuration...............................................................................42
07/ Error Information ..................................................................................................92
08/ Troubleshooting ....................................................................................................95
09/ Fixture Cleaning....................................................................................................96

- 2 -
01/ Safety Instructions
WARNING
Please keep this User Guide for future consultation. If you sell the unit to another user, be
sure that they also receive this instruction manual.
Important:
Damages caused by the disregard of this user manual are not subject to warranty. The dealer
will not accept liability for any resulting defects or problems.
Unpack and check carefully to ensure that there is no transportation damage before
using the unit.
This product is for indoor use only. Use only in a dry location.
DO install and operate by qualified operator.
DO NOT allow children to operate the fixture.
Use safety chain when fixing the unit. Handle the unit by carrying its base instead of
head only.
The unit must be installed in a location with adequate ventilation, at least 50cm from
adjacent surfaces.
Be sure that no ventilation slots is blocked, otherwise the unit will be overheated.
Before operation, ensure that you are connecting this product to the proper voltage in
accordance with the specifications in this manual or on the product’s specification label.
It’s important to ground the yellow/green conductor to earth in order to avoid electric
shock.
Minimum ambient temperature TA: 0℃. Maximum ambient temperature TA: 40℃.Do
not operate this product at a lower or higher temperature.
DO NOT connect the device to any dimmer pack.
Keep flammable materials away from the fixture while operating to avoid fire hazard.
Make sure the power cord is not crimped or damaged; replace it immediately if damaged.
Unit’s surface temperature may reach up to 75 ℃. DO NOT touch the housing
bare-handed during its operation.
Avoid any flammable liquids, water or metal from entering the unit. Once it happens, cut
Please read the instruction carefully which includes important information
about the installation, usage and maintenance.

- 3 -
off the mains power immediately.
DO NOT operate in a dirty or dusty environment. DO clean the fixture regularly.
DO NOT touch any wire during operation as there might be a hazard of electric shock.
Avoid entanglement of the power cord with other wires.
The minimum distance to objects/surface must be more than 0.5 meters.
Disconnect mains power before fuse replacement or servicing.
Replace fuse only with the same type.
In the event of serious operating problem, stop using the unit immediately.
Never turn on and off the unit time after time.
The housing, the lenses, or the ultraviolet filter must be replaced if they are visibly
damaged.
DO NOT open the housing as there are no user serviceable parts inside.
DO NOT attempt to operate this unit if it becomes damaged. DO NOT attempt any
repairs yourself. Repairs carried out by unskilled people can lead to damage or
malfunction. Please contact the nearest authorized technical assistance center if needed.
Disconnect this product from its power source before servicing.
DO use the original packaging if the device is to be transported.
Avoid direct eye exposure to the light source while the product is on.
DO NOT operate this product if you see damage on the housing, shields, or cables. Have
the damaged parts replaced by an authorized technician at once.

- 4 -
01/ Consignes de sécurité
ATTENTION
Veuillez conserver ce guide de l'utilisateur pour une consultation future. Si vous vendez
l'appareil à un autre utilisateur, assurez-vous qu'il reçoive également ce manuel
d'instructions.
Important:
Les dommages causés par le non-respect de ce manuel d'utilisation ne sont pas couverts par la
garantie. Le revendeur n'acceptera aucune responsabilité pour les défauts ou problèmes qui en
résultent.
Déballez et vérifiez soigneusement qu'il n'y a pas de dommages dus au transport avant
d'utiliser l'appareil.
Ce produit est destiné à un usage intérieur uniquement. Il doit donc être utilisé
uniquement dans un endroit sec.
L’installation et la mise en fonctionnement doit être effectué par un opérateur qualifié.
NE PAS permettre aux enfants d'utiliser l'appareil.
Utilisez une chaîne de sécurité lors de la fixation de l'unité. Manipulez l'appareil en
portant sa base au lieu de la tête uniquement.
L'unité doit être installée dans un endroit avec une ventilation adéquate, à au moins
50cm des surfaces adjacentes.
Assurez-vous qu'aucune fente d'aération du luminaire n'est obstruée, sinon il risque de
surchauffer.
Avant toute utilisation, assurez-vous que vous connectez ce luminaire à la tension
appropriée conformément aux spécifications que vous trouverez dans ce manuel ou sur
l'étiquette des spécifications collée sur la base du luminaire.
Il est important de relier le file jaune/vert à la terre afin d'éviter tout choc électrique.
Température ambiante minimale TA: 0℃. Température ambiante maximale TA: 40℃.
N'utilisez pas ce luminaire à des températures inférieures ou supérieures.
NE PAS connecter le luminaire à un pack de gradateurs.
Gardez les matériaux inflammables à l'écart du luminaire pendant le fonctionnement
Veuillez lire attentivement les instructions qui contiennent des informations
importantes sur l'installation, l'utilisation et l'entretien.

- 5 -
pour éviter tout risque d'incendie.
Assurez-vous que le cordon d'alimentation n'est pas pincé ou endommagé; remplacez-le
immédiatement s'il est endommagé.
La température de surface de l'unité peut atteindre 75℃. NE PAS toucher les capots à
mains nues pendant son fonctionnement.
Évitez que des liquides inflammables, de l'eau ou du métal ne pénètrent dans l'appareil. Si
cela se produit, coupez immédiatement l'alimentation secteur.
NE PAS utiliser le luminaire dans un environnement sale ou poussiéreux. Cette appareil
doit être nettoyer régulièrement.
NE touchez AUCUN file pendant le fonctionnement car il pourrait y avoir un risque de
choc électrique.
Évitez l'enchevêtrement du cordon d'alimentation avec d'autres fils.
La distance minimale de projection sur des objets ou sur des surfaces doit être supérieure
à 0.5 mètres.
Débranchez l'alimentation secteur avant le remplacement ou l'entretien des fusibles.
Remplacez le fusible uniquement par un fusible du même type.
En cas de problème de fonctionnement grave, arrêtez immédiatement d'utiliser l'appareil.
N'allumez et n'éteignez jamais ce luminaire à maintes reprises.
Le boîtier, les lentilles ou le filtre ultraviolet doivent être remplacés s'ils sont visiblement
endommagés.
NE PAS ouvrir le boîtier car il ne contient aucune pièce réparable par l'utilisateur.
NE PAS mettre ce luminaire en fonctionnement s'il est endommagé. N'effectuez pas de
réparations vous-même. Les réparations ne doivent être effectuées par des personnes
non qualifiées, cela peut entraîner des dommages ou des dysfonctionnements. Veuillez
contacter le centre d'assistance technique agréé le plus proche si nécessaire.
Débranchez ce produit du secteur avant de procéder à l'entretien.
Utiliser l'emballage d'origine si l'appareil doit être transporté.
Évitez une exposition directe des yeux à la source lumineuse lorsque le produit est
allumé.
N'utilisez PAS ce produit si vous constatez des dommages sur le boîtier, les blindages ou
les câbles. Faites remplacer immédiatement les pièces endommagées par un technicien
agréé.
- 6 -
02/ Technical Specifications
Power Voltage
100-240V~ 50/60Hz
Power Consumption
1205W
Light Source
12x60W RGBW LED
96x3W CW LED
96x3W WW LED
96x0.5W RGB LED
Beam Angle
2.8°-31°
Field Angle
5°-46°
Dimmer/Strobe
0-100% smooth dimming; outstanding strobe effect with variable
speed
Tilt Movement
202°
Control
DMX Channel
17/27/99/108/168/8+100/8+160/21
Channels
Control Mode
DMX512
RDM
Art-Net
sACN
Firmware Upgrade
via DMX link or USB disk
Construction
Display
OLED display
Battery backup for user setup without mains connection
Data In/Out
5-pin XLR (3-pin XLR is optional)
RJ45 Connector
Power In/Out
Power Connector in/out
Protection Rating
IP20
Description for power cord set should be used: Listed SJT flexible cord with rating: 300V,
105°C, 16AWGx3C, molded with 5-15P attachment plug and terminated with cord
connector model SAC3FX with rating 250V, 16A by Ningbo Seetronic Electronic
Technology Co Ltd. The power cord shall be at least 914mm (It is to be measured from the
face of attachment plug to the face of connector).
Features
Motorized zoom
Sharp and saturated beam effect
Outstanding color mixing effect

- 7 -
Dimensions
1000x120x290mm
39.4"x4.7"x11.4"in
Weight
25kgs
55lbs
Photometric Diagram:

- 8 -
03/ Control Panel
1. Display
To show the various menus and the selected function
2. Buttons
MENU
To enter into move backward or leave the menu
UP
To go backward to move up in the menu
DOWN
To go forward to move down in the menu
ENTER
To perform the desired functions
3. OFFLINE SETTING
4. FIRMWARE
UPGRADE
Used to upgrade fixture’s firmware
5. RESET
BUTTON
Used to reset the lock catch
6. LOCK CATCH
Used for splicing other fixtures
7. DMX IN
For DMX512 link, use 5-pin XLR cable to link the unit and DMX
controller to input DMX signal (3-pin XLR cable is optional)
8. POWER IN
To connect to supply power
9. ETHERNET
Transfers fixture’s information to a main controller
10. FUSE(T 15A)
Protects the unit from damage of over current or short circuit
11. POWER OUT
To connect to the next fixture
12. DMX OUT
For DMX512 link, use 5-pin XLR cable to link the next units to
output DMX signal (3-pin XLR cable is optional)
13. BOLT
Used to lock two fixtures

- 9 -
04/ Fixture Installation
DO install and operate by qualified operator. Fixture(s) should be installed in areas
outside walking paths, seating areas, or away from areas were unauthorized personnel
might reach the fixture by hand. NEVER stand directly below the fixture(s) when rigging,
removing or servicing.
Always ensure that the unit is firmly fixed to avoid vibration and slipping off during
operation. Ensure that the trussing or area of installation must be able to hold 10 times
the weight without any deformation. Always attach a safety cable that can hold at least
12 times the weight of the fixture whenever installing this fixture in a suspended
environment to ensure that the fixture will not fall if the clamp fails.
This fixture is fully operational in three different mounting positions: hanging
upside-down, mounted sideways on trussing, or fix on a flat level surface (such as the
ground or a wall). Always use and install the supplied safety cable as a safety measure to
prevent accidental damage and/or injury in the event the clamp fails.

- 10 -
4.1 Hanging the Fixture
There are four different installation methods for quick-lock fastener and clamp of this fixture,
and it is recommended that you use the standard one.
Standard installation (recommended):
Non-standard installation 1:
Non-standard installation 2:

- 11 -
Non-standard installation 3:
4.2 Splicing the Fixtures
Introduction:

- 12 -
Splicing steps for the fixtures:
Press the reset button and the lock catch will pop up automatically. Lift the bolt up and
rotate it for a certain angle (10°-170°), then release your hand.
Align and splice the second fixture to the first one, and splice the remaining fixtures in
sequence.

- 13 -
Align the upper positioning point with the lower one, then let go after rotating the bolt for a
certain angle, and the bolt will be automatically inserted into the positioning point to lock the
two fixtures.
Note: When separating the fixtures, first lift the bolt upward and rotate it for a certain angle
(10°-170°), then release your hand. Press the reset button, and at the same time pull the lock
catch to the extreme edge in the opposite direction, and then release the reset button to
unlock the machine. Finally, remove the fixture from above or below.

- 14 -
05/ How To Set The Unit
5.1 Main Functions
To access the control menus, press the [MENU] button.
Navigate the menu structure, using the [ENTER], [UP] and [DOWN] buttons.
To select a menu option or to confirm a selection, press the [ENTER] button.
To return to a higher level in the menu structure without making a change, press the
[MENU] button, or wait 30 seconds.
The main functions are shown below:
MENU
SUBMENU
OPTIONS
DMX Settings
Port A Address
1-496 (17 CH)
(Default=1)
1-486 (27 CH)
1-414 (99 CH)
1-405 (108 CH)
1-345 (168 CH)
1-505 (8+100 CH)
1-505 (8+160 CH)
1-492 (21 CH)
Port B Address
1-413 (8+100 CH)
(Default=1)
1-353 (8+160 CH)
DMX Channel Mode
17 CH
27 CH
99 CH
108 CH
168 CH
8+100 CH
8+160 CH
21 CH
No DMX Status
Blackout
Hold
Manual
View DMX Value
Connect Option
Auto
DMX
Art-Net
sACN

- 15 -
MENU
SUBMENU
OPTIONS
Network
IP Address
Default 1
Default 2
Manual
Subnet Mask
XXX.XXX.XXX.XXX
Art-Net Settings
Net
0-127
(Default=0)
Sub-Net
0-15
(Default=0)
Universe A
0-15
(Default=0)
Universe B
0-15
(Default=0)
sACN Settings
sACN Universe
1-32000
(Default=1)
sACN Priority
0-200
(Default=100)
Artnet to DMX
No
Yes
Fixture Settings
Tilt Invert
No
Yes
Tilt Feedback
No
Yes
Dimmer Curve
Linear
Square Law
Inv SQ Law
S Curve
Dimmer Speed
Fast
Smooth
White Balance
Red
125-255
Green
125-255
Blue
125-255
Red 1
125-255
Green 1
125-255
Blue 1
125-255
……
……
Red 12
125-255
Green 12
125-255
Blue 12
125-255
LED Refresh Rate
900Hz
1000Hz
1100Hz
1200Hz
1300Hz
1400Hz

- 16 -
MENU
SUBMENU
OPTIONS
1500Hz
2500Hz
4000Hz
5000Hz
6000Hz
10000Hz
15000Hz
20000Hz
25000Hz
Invert Pixel Order
No
Yes
Power Mode
Standard
Quiet
CCT Calibration
Off
On
Display Settings
Display Invert
No
Yes
Backlight Intensity
1-10
(Default=10)
Temperature Unit
°C
°F
Language
English
Chinese
Fixture Test
Auto Test
Manual Test
Mode 1
Mode 2
Clear
No/Yes
Clear
No/Yes
Tilt
0-255
Tilt
0-255
Zoom
0-255
Zoom
0-255
Dimmer
0-255
Dimmer
0-255
Strobe
Main
0-255
Strobe
Main
0-255
Strobe
Line W
0-255
Strobe
Line W
0-255
Stro
Line RGB
0-255
Stro
Line RGB
0-255
Red 1
0-255
Red
0-255
Green 1
0-255
Green
0-255
Blue 1
0-255
Blue
0-255
White 1
0-255
White
0-255
……
0-255
RGBW
CCT
0-255

- 17 -
MENU
SUBMENU
OPTIONS
Red 10
0-255
RGBW
Color
0-255
Green 10
0-255
RGBW
Macro
0-255
Blue 10
0-255
RGBW
Macro Sp
0-255
White 10
0-255
Pixel
CW
0-255
Pixel
CW 1
0-255
Pixel
WW
0-255
Pixel
WW 1
0-255
Line W
CCT
0-255
……
0-255
Line W
Macro
0-255
Pixel
CW 24
0-255
Line W
Macro Sp
0-255
Pixel
WW 24
0-255
Pixel
Red
0-255
Pixel
Red 1
0-255
Pixel
Green
0-255
Pixel
Green 1
0-255
Pixel
Blue
0-255
Pixel
Blue 1
0-255
Line RGB
Color
0-255
……
0-255
Line RGB
Macro
0-255
Pixel
Red 24
0-255
Line RGB
Mac. Sp
0-255
Pixel
Green 24
0-255
Two
Red All
0-255
Pixel
Blue 24
0-255
Two
Green All
0-255
Red 11
0-255
Two
Blue All
0-255
Green 11
0-255
Two
White All
0-255
Blue 11
0-255
White 11
0-255
Red 12
0-255
Green 12
0-255
Blue 12
0-255
White 12
0-255

- 18 -
MENU
SUBMENU
OPTIONS
Fixture Information
Fixture Use Hour
LED Use Hour
Total LED Hour
LED On Hour
LED Hours Reset
Password=050
Temperature
Current
Max
LED 1
LED 2
LED 3
Fan State
Base Fan
Head Fan 1
Head Fan 2
Head Fan 3
Head Fan 4
Head Fan 5
Upgrade File
Firmware Version
RDM UID
Error Logs
Fixture Errors
Reset Error Logs
No
Yes
Password=050
Reset Function
Tilt Reset
No
Yes
Effect Reset
No
Yes
All Reset
No
Yes
Special Function
Factory Settings
No
Yes

- 19 -
DMX Settings
Enter the control menu and select DMX Settings, press ENTER. Use the UP/DOWN button
to select Port A Address, Port B Address, DMX Channel Mode, No DMX Status, View DMX
Value, Connect Option, Network, Art-Net Settings, sACN Settings or Artnet to DMX.
Port A Address
Port B Address
Select Port B Address, press ENTER.
Use UP/DOWN button to select an address, confirm your selection with
ENTER.
CHANNEL MODE
DMX ADDRESS
8+100 CH
1-413
8+160 CH
1-353
To exit the menu, press MENU, or wait 30 seconds.
Select Port A Address, press ENTER.
Use UP/DOWN button to select an address, confirm your selection with
ENTER.
CHANNEL MODE
DMX ADDRESS
17 CH
1-496
27 CH
1-486
99 CH
1-414
108 CH
1-405
168 CH
1-345
8+100 CH
1-505
8+160 CH
1-505
21 CH
1-492
To exit the menu, press MENU, or wait 30 seconds.
Table of contents
Other ACME Dj Equipment manuals

ACME
ACME MP-400Z IP User manual

ACME
ACME LED WAVE 100 User manual

ACME
ACME MH-275R User manual

ACME
ACME Eventx 100 User manual

ACME
ACME SAM-50 User manual

ACME
ACME ENERGY HYBRID User manual

ACME
ACME Dotline 360 User manual

ACME
ACME LED?7TC User manual

ACME
ACME Festival LED-787 User manual

ACME
ACME E-10T WW DXX User manual

ACME
ACME PAGEANT 300ZR II User manual

ACME
ACME LED-BL4B User manual

ACME
ACME MH-600A Mobile Color User manual

ACME
ACME Diamonds LS-1010 RGB User manual

ACME
ACME LED-PAR 100 WW/CW User manual

ACME
ACME LED-MTX25 IP User manual

ACME
ACME CP-56U User manual

ACME
ACME GENESIS COLOR II User manual

ACME
ACME XP-1000WZ User manual

ACME
ACME ASTRO LED-256D User manual