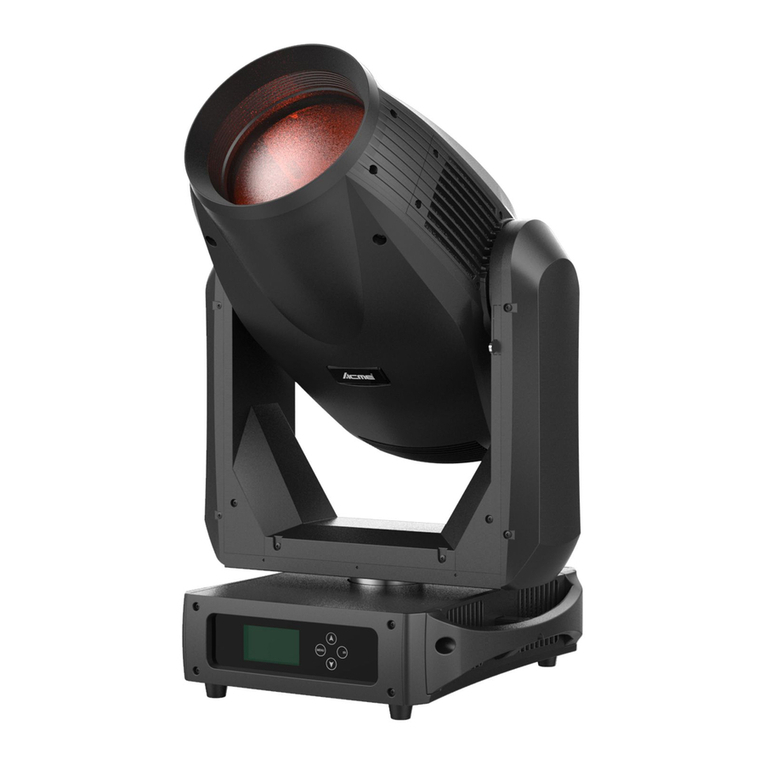
ACME THUNDERBOLT User manual


1D
Menu
1. Safety Instructions ............................................................................................................................2
2. Technical Specifications ....................................................................................................................6
3. Installation and Connection .............................................................................................................4
4. How to set the unit ...........................................................................................................................7
4.1 Rear Panel .......................................................................................................................................7
4.2 Main Function.................................................................................................................................8
5. How to control the unit ..................................................................................................................14
6. DMX512 configuration ...................................................................................................................14
7. DMX512 Connection.......................................................................................................................17
8.Troubleshooting ...............................................................................................................................17
9. Fixture Cleaning ..............................................................................................................................18

2D
1. Safety Instructions
WARNING
Please keep this User Guide for future consultation. If you sell the unit to another user, be sure that
they also receive this instruction manual.
Important:
Damages caused by the disregard of this user manual are not subject to warranty. The dealer will
not accept liability for any resulting defects or problems.
Unpack and check carefully to ensure that there is no transportation damage before using the
unit.
The equipment is suitable for wet/indoor use.
DO install and operate by qualified operator.
DO NOT allow children to operate the fixture.
Use safety chain when fixing the unit. Handle the unit by carrying its base instead of head only.
The unit must be installed in a location with adequate ventilation, at least 50cm from adjacent
surfaces.
Be sure that no ventilation slots is blocked, otherwise the unit will be overheated.
Before operation, ensure that you are connecting this product to the proper voltage in
accordance with the specifications in this manual or on the product’s specification label.
It’s important to ground the yellow/green conductor to earth in order to avoid electric shock.
Minimum ambient temperature TA: 0℃. Maximum ambient temperature TA: 40℃. Do not
operate this product at a lower or higher temperature.
DO NOT connect the device to any dimmer pack.
Keep flammable materials away from the fixture while operating to avoid fire hazard.
Make sure the power cord is not crimped or damaged; replace it immediately if damaged.
Unit’s surface temperature may reach up to 65℃. DO NOT touch the housing bare-handed
during its operation.
Avoid any flammable liquids, water or metal from entering the unit. Once it happens, cut off
the mains power immediately.
Please read the instruction carefully which includes important information about
the installation, usage and maintenance.
3D
DO NOT operate in a dirty or dusty environment. DO clean the fixture regularly.
DO NOT touch any wire during operation as there might be a hazard of electric shock.
Avoid entanglement of the power cord with other wires.
The minimum distance to objects/surface must be more than 1 meters.
In the event of serious operating problem, stop using the unit immediately.
Never turn on and off the unit time after time.
DO NOT open the housing as there are no user serviceable parts inside.
DO NOT attempt to operate this unit if it becomes damaged. DO NOT attempt any repairs
yourself. Repairs carried out by unskilled people can lead to damage or malfunction. Please
contact the nearest authorized technical assistance center if needed.
Disconnect this product from its power source before servicing.
DO use the original packaging if the device is to be transported.
Avoid direct eye exposure to the light source while the product is on.
DO NOT operate this product if you see damage on the housing, shields, or cables. Have the
damaged parts replaced by an authorized technician at once.

1. Consignes de sécurité
ATTENTION
Veuillez conserver ce guide de l'utilisateur pour une consultation future. Si vous vendez l'appareil à
un autre utilisateur, assurez-vous qu'il reçoive également ce manuel d'instructions.
Important:
Les dommages causés par le non-respect de ce manuel d'utilisation ne sont pas couverts par la
garantie. Le revendeur n'acceptera aucune responsabilité pour les défauts ou problèmes qui en
résultent.
Déballez et vérifiez soigneusement qu'il n'y a pas de dommages dus au transport avant
d'utiliser l'appareil.
Équipement adapté aux endroits secs et aux environnements humides
L’installation et la mise en fonctionnement doit être effectué par un opérateur qualifié.
NE PAS permettre aux enfants d'utiliser l'appareil.
Utilisez une chaîne de sécurité lors de la fixation de l'unité. Manipulez l'appareil en portant sa
base au lieu de la tête uniquement.
L'unité doit être installée dans un endroit avec une ventilation adéquate, à au moins 50cm des
surfaces adjacentes.
Assurez-vous qu'aucune fente d'aération du luminaire n'est obstruée, sinon il risque de
surchauffer.
Avant toute utilisation, assurez-vous que vous connectez ce luminaire à la tension appropriée
conformément aux spécifications que vous trouverez dans ce manuel ou sur l'étiquette des
spécifications collée sur la base du luminaire.
Il est important de relier le file jaune/vert à la terre afin d'éviter tout choc électrique.
Température ambiante minimale TA: 0. Température ambiante maximale TA: 40. N'utilisez pas
ce luminaire à des températures inférieures ou supérieures.
NE PAS connecter le luminaire à un pack de gradateurs.
Gardez les matériaux inflammables à l'écart du luminaire pendant le fonctionnement pour
éviter tout risque d'incendie.
Veuillez lire attentivement les instructions qui contiennent des informations
importantes sur l'installation, l'utilisation et l'entretien.
4D

Assurez-vous que le cordon d'alimentation n'est pas pincé ou endommagé; remplacez-le
immédiatement s'il est endommagé.
La température de surface de l'unité peut atteindre 65℃. NE PAS toucher les capots à mains
nues pendant son fonctionnement.
Évitez que des liquides inflammables, de l'eau ou du métal ne pénètrent dans l'appareil. Si cela
se produit, coupez immédiatement l'alimentation secteur.
NE PAS utiliser le luminaire dans un environnement sale ou poussiéreux. Cette appareil doit
être nettoyer régulièrement.
NE touchez AUCUN file pendant le fonctionnement car il pourrait y avoir un risque de choc
électrique.
Évitez l'enchevêtrement du cordon d'alimentation avec d'autres fils.
La distance minimale de projection sur des objets ou sur des surfaces doit être supérieure à 1
mètres.
En cas de problème de fonctionnement grave, arrêtez immédiatement d'utiliser l'appareil.
N'allumez et n'éteignez jamais ce luminaire à maintes reprises.
NE PAS ouvrir le boîtier car il ne contient aucune pièce réparable par l'utilisateur.
NE PAS mettre ce luminaire en fonctionnement s'il est endommagé. N'effectuez pas de
réparations vous-même. Les réparations ne doivent être effectuées par des personnes non
qualifiées, cela peut entraîner des dommages ou des dysfonctionnements. Veuillez contacter le
centre d'assistance technique agréé le plus proche si nécessaire.
Débranchez ce produit du secteur avant de procéder à l'entretien.
Utiliser l'emballage d'origine si l'appareil doit être transporté.
Évitez une exposition directe des yeux à la source lumineuse lorsque le produit est allumé.
N'utilisez PAS ce produit si vous constatez des dommages sur le boîtier, les blindages ou les
câbles. Faites remplacer immédiatement les pièces endommagées par un technicien agréé.
5D

6D
3. Installation and Connection
The unit should be mounted via its screw holes on the bracket. Always ensure that the unit is firmly fixed
to avoid vibration and slipping while operating. Always ensure that the structure to which you are
attaching the unit is secure and is able to support a weight of 10 times of the unit’s weight. Also always
use a safety cable that can hold 12 times of the weight of the unit when installing the fixture.
The equipment must be fixed by professionals. And it must be fixed at a place where is out of the touch
of people and has no one pass by or under it. The unit should be mounted in the height of 0 to 30m.
Method for using lamp hook and safety rope
2. Technical Specifications
11 channel Modes;
Ideal for discotheques, clubs, bars, parties, Mobile DJs, etc.
Input Voltage:100-240V~ 50/60Hz
Total Power consumption:
Power Cord Daisy Chain:
Beam Angle:
1580W
1Fixtuer(120V); 2 Fixtuer(220V);
22°
IP Grade:IP 65
LED Sources:15W RGBW x 144
Dimension/Weight:
623x133x397mm, 16Kgs
24.5"x5.2"x15.6"in, 9.9lbs

7D
4. How to set the unit
4.1 Rear Panel
○
1 Display: Show the various menus and the selected functions;
○
2 Button:
MENU
To select the programming functions

8D
DOWN
To go forward in the selected functions
UP
To go backward in the selected functions
ENTER
To confirm the selected functions
○
3Breathable punishment
○
4 Power input/output
For DMX512 link, use 3/5-pin XLR plug cable to input DMX signal, and to link the next unit.
○
5 DMX input/output:
For DMX512 link, use 3/5-pin XLR plug cable to input DMX signal, and to link the next unit.
○
6Ethernet in/ Ethernet Thru: For ArtNet link
4.2 Main Function
Turn on the unit, press the MENU button into menu mode, and press the UP/DOWN button until the
required function is shown on the monitor. Select the function by pressing the ENTER button. Use the
UP/DOWN button to choose the submenu, press the ENTER button to store and automatically return to
the last menu. Press the MENU button or let the unit idle 30 seconds to exit menu mode.
The main functions are shown below:

9D
Network
Art-Net Settings
Sacn Settings Sacn Settings
sACN Priority
1-32000
0-200
Connect Option
Auto
DMX
Art-Net
sACN
Standard
Quiet
RDM UIDxxxxxxxxxxxx
Power Mode
Fixture Errors
Reset Error Log
Error Logs

10D
DMX Address
Select the DMX Address, press enter to confirm, and the current DMX Address will be displayed on the
display screen. Use the UP / DOWN button to select 001 ~ 512 Addresses, and press the ENTER button
to save. Press the MENU button to return to the previous MENU or wait 30 seconds to automatically
exit the menu mode.
Channel Mode
Select the Channel Mode, press the ENTER button. Use the DOWN and UP button to select the Channel,
there are 11 channel Modes. Once selected, press the ENTER button to store. Press the MENU button
back to the last menu without any change or idling 30 seconds to exit menu mode.
DMX Last State
Select the DMX Last State, press the ENTER button. Use the DOWN and UP button to select Blackout or
Hold . Once selected, press the ENTER button to store. Press the MENU button back to the last menu
without any change or idling 30 seconds to exit menu mode.
DMX Settings
Enter MENU mode, select DMX settings, confirm by pressing ENTER on, and use UP / DOWN on
to select: DMX Address, Ethernet Setup and Connect Option.
Ethernet Setup
Select Ethernet Setup, press ENTER to confirm, and the current mode will be displayed on the display
screen. Select Network, Art-Net Settings or Sacn Settings through UP / DOWN button. When selecting
Network, select IP Address or Subnet Mask through UP / DOWN button. When selecting Art-Net
Settings , select Net, Sub-Net or Universe through UP / DOWN button, When the Art-Net setting is
selected, select the sACN Universe or sACN Priority the through UP / DOWN button, and press the
ENTER button to save. Each Network parameter of the lamp must be consistent with that on the
console before it can be controlled by the Network signal of the console. Press the menu button to
return to the previous MENU or wait 30 seconds to automatically exit the menu mode.
Connect Option
Select the Connect Option, press the ENTER button. The current mode will be displayed on the display
screen, which can be selected by UP / DOWN button: Auto, DMX, Art-Net or sACN, and press enter
button to save. Press the MENU button to return to the previous MENU or wait 30 seconds to
automatically exit the menu mode.

11D
Optically Linear Square Law Inverse-Square Law S-Curve
Mode 1(Optically Linear): The increase in light intensity appears to be linear as DMX value is increased.
Mode 2(Square Law): Light intensity control is finer at low levels and coarser at high levels.
Mode 3(Inverse Square Law): Light intensity control is coarser at low levels and finger at high levels.
Mode 4(S-cure): Light intensity control is finger at low levels and high levels and coarser at medium
levels.
Dimmer Speed
Select the Dimmer Speed, press the ENTER button. Use the DOWN and UP button to select Fast or
Smooth. Once selected, press the ENTER button to setup or exit menu mode without any change
after 30 seconds. Back to the functions without any change press the MENU button again.
White Balance
Select the White Balance, press the ENTER button to confirm. It can be adjusted with the whole fixture,
or it can be adjusted independently for each block.Use the UP and DOWN button to select
Red/Green/Blu/White, press the ENTER button to store, then use the UP and DOWN button to adjust
the value from (125~255), press the ENTER button to confirm. (DMX signal will be the first priority under
Manual Mode.) Once selected, press the ENTER button to store. Press the MENU button back to the last
menu without any change or idling 30 seconds to exit menu mode.
Dimmer mode 1 Dimmer mode 2 Dimmer mode 3 Dimmer mode 4
Dimmer curve
Select the Dimmer curve, press the ENTER button. Use the DOWN and UP button to select the curve you
need. Once selected, press the ENTER button to setup or exit menu mode without any change after 30
seconds. Back to the functions without any change press the MENU button again.

12D
Manual Test
Select the Manual Mode, press the ENTER button to confirm. Use the UP and DOWN button to adjust
the value for Red,Green,Blue,White, Intensity, Durate or Rate from 0~255, press the ENTER button to
confirm. (DMX signal will be the first priority under Manual Mode.) Once selected, press the ENTER
button to store. Press the MENU button back to the last menu without any change or idling 30 seconds
to exit menu mode.
Auto Test
Select Auto Test, press the ENTER button to confirm. The unit will test by itself automatic. Press the
MENU button back to the last menu or idling 30 seconds to exit menu mode.
Temperature
Select Temp., press the ENTER button to confirm. Display will show the temperature of the fixture.
Press the MENU button back to the last menu or idling 30 seconds to exit menu mode.
Fixture Hours
Select Fixture Hours, press the ENTER button to confirm. Display will show the number of working
hours of the unit. Press the MENU button back to the last menu or idling 30 seconds to exit menu mode.
Language
Select the Language, press the ENTER button to confirm. Use the UP and DOWN button to adjust
English or Chinese .Once selected, press the ENTER button to store. Press the MENU button back to the
last menu without any change or idling 30 seconds to exit menu mode.
RDM UID
To select RDM UID, press the ENTER button to confirm, RDM UID will show on the display, press the
MENU button back to exit.
Select Power Mode, press ENTER to confirm that the current Mode is displayed on the display, select
either: Standard or Quiet by the UP/DOWN button, and press ENTER to save. Press the MENU button to
go back to the previous MENU or wait 30 seconds to automatically exit MENU mode.
Power Mode

13D
Software Version
Select Software Version , press the ENTER button to confirm. The display will show the version of
software of the unit. Press the MENU button back to the last menu or idling 30 seconds to exit menu
mode.
Select Factory Reset, press the ENTER button to confirm. Use the UP and DOWN button to adjust the
NO/Yes.Select Yes, fixture will resume factory settings. Press the MENU button back to the last menu or
idling 30 seconds to exit menu mode.
Factory Reset
Error Logs
To select Error Logs, press the ENTER button to confirm. Use the UP/DOWN button to select Fixture
Errors or Reset Error Log, press the ENTER button to store. To select Reset Error Log, press the
ENTER button to confirm, use the UP/DOWN button to select No or Yes, press the ENTER button to
store. To select Yes, press the ENTER button to confirm, use the UP/DOWN button to set the
password 050, Press the MENU button to return to the previous menu or wait one minute to
automatically exit the menu mode.
RDM FUNCTIONS
Select the MANUFACTURER menu to display the MANUFACTURER of the device.
Select the SOFTWARE VERSION menu to display the program VERSION number of the luminaire.
Select the START ADDRESS menu to set the DMX ADDRESS of your lamp (001-512) .
Select the DEVICE MODEL DESCRIPTION menu to display the DEVICE MODEL number.
Select the DEVICE LABEL menu to change the model of the lamp.
Select the DMX PERSONALITY menu to set the channel mode for the lamps.
Select the DMX PERSONALITY DESCRIPTION menu to display the currently selected channel mode of
the luminaire.
Select the DEVICE HOURS menu to display the running time of the lamp.
Select the RESET DEVICE menu, and the WARM RESET/COLD RESET option appears. When WARM
RESET is selected, the lamp will be hot RESET, and when COLD RESET is selected, it will exit.

14D
6. DMX512 configuration
Channel Mode:
5. How to control the unit
1.By DMX controller;
No need to turn the unit off when you change the DMX address, as new DMX address setting will be
affected at once. Turn on the unit, under the DMX signal , the LED will display the saved channel address
(001-512).

15D

16D

17D
7. DMX512 Connection
Mode connection:
8.Troubleshooting
Following are a few common problems that may occur during operation. Here are some suggestions for
easy troubleshooting:
A. The fixture does not work, no light
1. Check the connection of power and main fuse.
2. Measure the mains voltage on the main connector.
1. At last unit, the DMX cable has to be terminated with a terminator. Solder a 120-o h m 1/4 W
resistor between pin 2(DMX-) and pin 3(DMX+) into a 3-pin XLR-plug and plug it in the DMX-output
of the last unit.
2. Connect the unit together in a “daisy chain” by XLR plug cable from the output of the unit to
the input of the next unit. The cable can only be used in series and cannot be connected in parallel.
DMX 512 is a very high-speed signal. Inadequate or damaged cables, soldered joints or corroded
connectors can easily distort the signal and shut down the system.
3. The DMX output and input connectors are pass-through to maintain the DMX circuit, when one
of the units’ power is disconnected.
4. Each lighting unit needs to have a DMX address to receive the data by the controller. The
address number is between 1-512.
5. The end of the DMX 512 system should be terminated to reduce signal errors.
6. 3 pin XLR connectors are more popular than 5 pins XLR.
3 pin XLR: Pin 1: GND, Pin 2: Negative signal (-), Pin 3: Positive signal (+)
5 pin XLR: Pin 1: GND, Pin 2: Negative signal (-), Pin 3: Positive signal (+), Pin4, Pin5 not used.

18D
B. Not responding to DMX controller
1. DMX LED should be on. If not, check DMX connectors, cables to see if link properly.
2. If the DMX LED is on and no response to the channel, check the address settings and DMX polarity.
3. If you have intermittent DMX signal problems, check the pins on connectors or on PCB of the fixture
or the previous one.
4. Try to use another DMX controller.
5. Check if the DMX cables run near or run alongside to high voltage cables that may cause damage or
interference to DMX interface circuit.
C. Fault report :
1.Fan.Error
Check whether the fan is out of operation
Check whether the circuit of PCB board related detection is damaged or not
2.Temp.Error
Check whether the lead is in good contact and disconnected
Check if the thermistor is broken
Check whether PCB board related circuit is damaged or not
9. Fixture Cleaning
The cleaning of internal must be carried out periodically to optimize light output. Cleaning frequency
depends on the environment in which the fixture operates: damp, smoky or particularly dirty
surrounding can cause greater accumulation of dirt on the fixture’s optics.
Clean with soft cloth using normal glass cleaning fluid.
Always dry the parts carefully.
Clean the external optics at least every 20 days.

19D
Table of contents
Other ACME Dj Equipment manuals

ACME
ACME LED-BR10 User manual

ACME
ACME LED-245 II User manual

ACME
ACME LED-MTX25 IP User manual

ACME
ACME E-10C WW DXX User manual

ACME
ACME CHEETAH LED-GF50 User manual

ACME
ACME LED-BL4B User manual

ACME
ACME XP-1200F User manual

ACME
ACME E-200 MB MC User manual

ACME
ACME PAGEANT 300ZR II User manual

ACME
ACME iMove 50SR User manual

ACME
ACME CYC-200 FC User manual

ACME
ACME LED-MB50 User manual

ACME
ACME LED-ST1000 User manual

ACME
ACME SAM-50 User manual

ACME
ACME LED-7871 User manual

ACME
ACME Junior Series User manual

ACME
ACME LED-747-1W User manual

ACME
ACME LED-MTX36 HEX User manual

ACME
ACME PAGEANT 300ZR User manual

ACME
ACME CA-DD12 II User manual