manuals.online logo
Brands
  1. Home
  2. •
  3. Brands
  4. •
  5. ACO
  6. •
  7. Intercom System
  8. •
  9. ACO INSPIRO+VIDEO User manual

ACO INSPIRO+VIDEO User manual

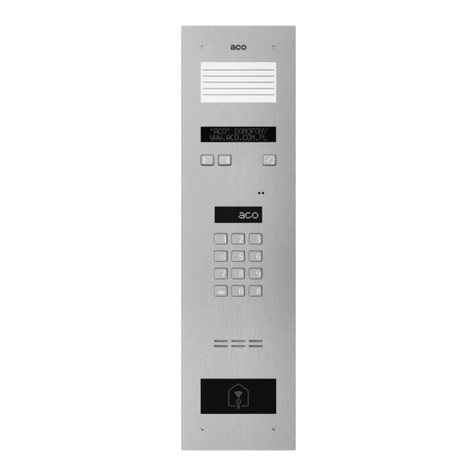
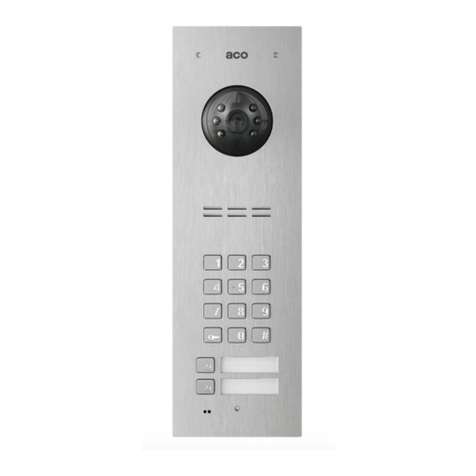
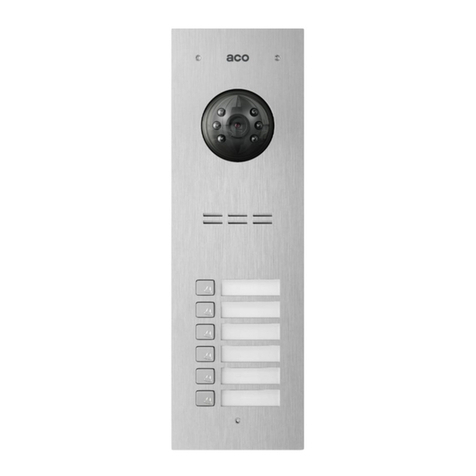
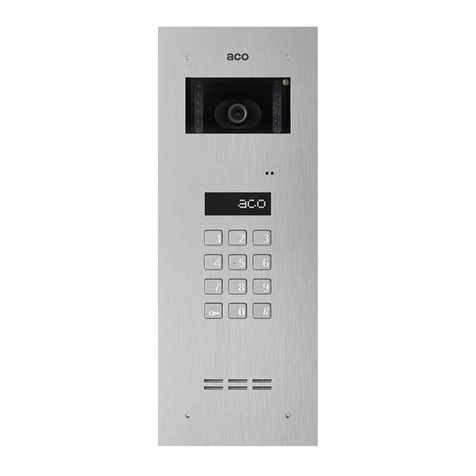
INSPIRO+video DIGITAL DOOR PHONE PANEL MANUAL
62-002 Suchy Las, ul. Diamentowa 7, tel./ fax +48 61 843 93 72
www.aco.com.pl
DISPOSAL OF WASTE ELECTRICAL EQUIPMENT
Do not dispose of waste electrical equipment with other (household / municipal) waste types. Dispose of it separately as permitted by
law. Consult the authority of jurisdiction or licensed waste recycling service providers. – Directive 2002/96/EC of 27/01/2003
MOUNTING THE PANEL
Mount the panel on the wall in a way that will minimise the effects of adverse atmospheric conditions.
Typically, the camera should be positioned approx. 1.60 m above the ground. Ideally, you should test
the mounting position empirically. Avoid places where the camera lens may be exposed to direct,
perpendicular light rays (sunlight, street lamps, etc.).
Install the flush mounting box using wall plugs and plaster in the appropriate wall slot so that the front
edge is in line with the wall’s surface.
CAUTION! To ensure proper operation and safety of use, provide the door phone panel (set in its metal
frame) with protective earth bonding by connecting the earthing terminal on the housing with the
appropriate earthing system (PE).
Connect the panel to the entrance door electric strike and its power with a 1 mm2 core cable (e.g.
LY1.0). The cable should be no longer than 7 m for the electric strike connection and no longer than
15 m for the power circuit connection! An insufficient power supply rating, insufficient sizes of wiring
cores and excessive length of interconnecting wiring (resulting in voltage drops) may interfere with
proper operation (including the “humming” noise in the audio line or inadvertent triggering of the reset
system, especially when releasing the electric strike). The 15V DC voltage from the power adapter
should be connected to the combiner’s terminals using a 2 x 1 mm2 wire.
If a polarity-insensitive electric strike is installed, connect the wiring to the ELOCK terminals in any
order. If a fail-safe (NO) electric strike is installed, connect jumper Z13 (below the resistor on the left-
hand side of the PCB)! For a fail-safe (NO) electric strike, the “ELOCK” output is live depending on the
power adapter type; use a compatible fail-safe (NO) electric strike. An optional MOD-DC-12V module
may be used to feed 12V DC to a fail-safe (NO) electric strike when the door phone is fed by an 15
VDC power supply. The additional relay OUTPUT terminal (Master only) can be wired to control an
additional entrance gate (by factory default) with a code keypad (with “the double Key button press”)
and button F2 of the uniphone. The live voltage time and functions of the OUTPUT terminal can be
configured using the additional I/O module, port 2 of the Program (as in the CND-I/O module).
All wiring connections must be soldered.
Connect the following wires to the panel:
•2 x 1 mm2 cable to power the panel (connected to the combiner),
•2 x 1 mm2 cable: electric strike control;
•1 cable wire with yellow-and-green insulation – to connect the ground of the housing.
•system bus (UTP cat. 5 cable, T568B standard): 1x UTP cat. 5 cable for the “Master” panel,
2x UTP cat. 5 cable for “Slave” panel
UNIPHONE INSTALLATION & WIRING
Install the uniphones as specified in their original manuals. Connect the cables making sure that the
address in the monitor’s decoder is set properly and that all of the RJ45 connections are clamped
properly (T568B standard), that there are no short circuits between the cable conductors, and that the
conductors have ducting. If even a single RJ45 connector is clamped incorrectly or there is a short
circuit between the wires, the monitor, splitter, or the panel itself may sustain damage.
VOLUME SETTING
Set the volume as follows once the uniphone is connected properly:
- the “MIC” potentiometer is used for adjusting the sensitivity of the panel microphone
- the “SPK” potentiometer sets the speaker volume
- the “SOUNDS” potentiometer sets the panel sound output volume
Having set the values, operate the “BALANCE” potentiometer to find the points of excitation of the
speaker (indicated by squeaking sounds); next, adjust the potmeter halfway between these points.
ELECTRICAL PARAMETERS OF THE PANEL
•Power supply: 13.5-15V DC (a 15V DC ACO unit is recommended)
•Standby mode min. power consumption: ~1.6 W
•Power load: max. 535 mA (not counting the electric strike)
•Permitted load of the electric strike output: 1 A (approx. 0.5 A for the fail-safe electric strike)
•Max. line length: 70 m – from the last power unit, 300 m total if extra power units are used.
•Installation type: digital PV system (cat. 5e or 6 cable)
•Compatible with the P digital system
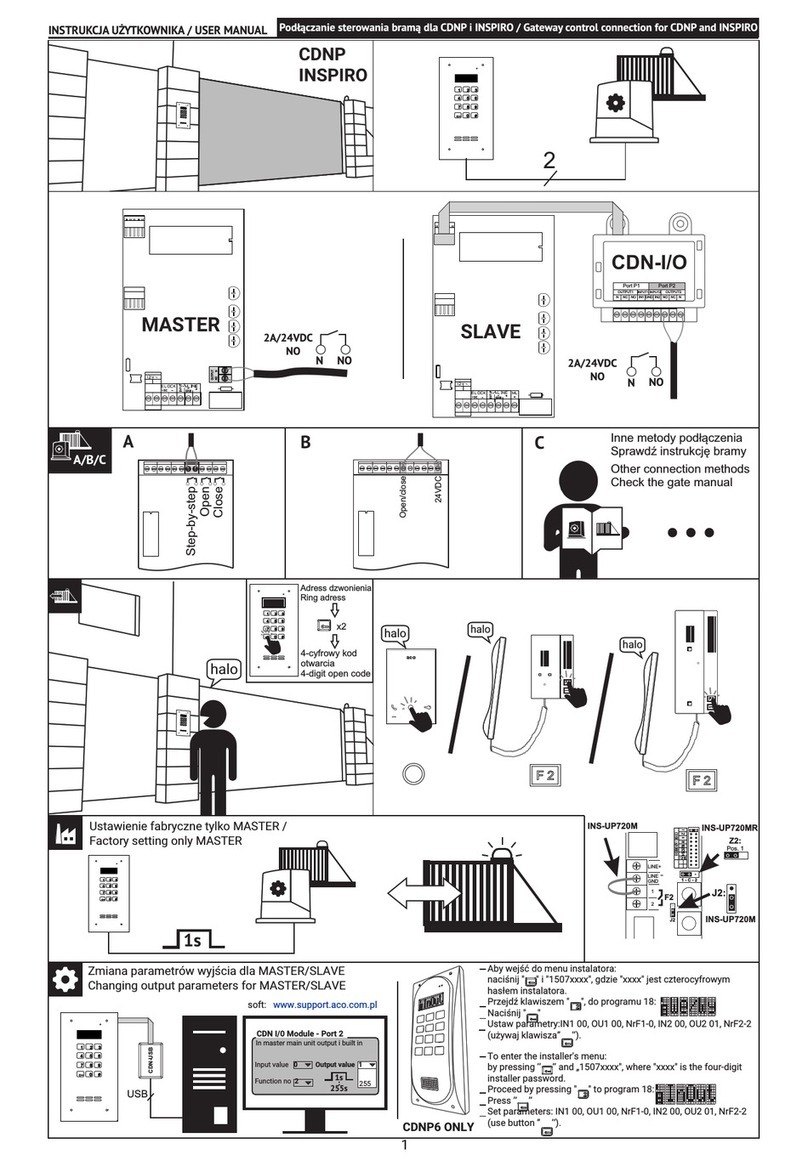
SINGLE INSPIRO+VIDEO PANEL CONNECTION DIAGRAM
OPERATION
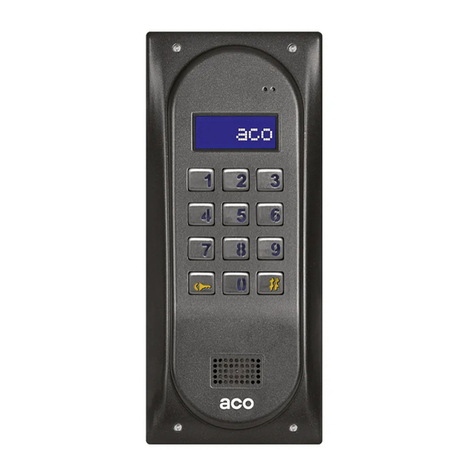
When in standby, the display shows the “Intro” message (which reads “aco” by default). The “Intro”
message contents are freely configurable. The default range of dialled numbers is 1 to 255, with each
value mapped directly to the physical addresses configured in the inside units (the software
configuration tool permits any dialled number range between 0 and 999999 and a free assignment of
each number to the inside unit address, or to restrict the range of supported inside units). Dialling is
done by inputting the apartment number with the keypad; if the optional 230E module is installed, select
the apartment number entry with the arrow buttons, followed pressing the Doorbell button. After approx.
3 s the receiver in the selected apartment will start ringing. If the dialled call is received in the dialling
mode, a voice conversation is possible with unlocking the door electric strike. Opening the door electric
strike by inputting an apartment code: input the apartment number, confirm with the Key button and
follow with the 4-digit apartment code mapped to the input apartment number. In order to print the full
table of user codes or ready business cards for tenants together with the instructions for use, use the
"ACO Code Generator" available at www.aco.com.pl in the user area ("download"). For each "Master"
control panel, the code table is factory-set on the back of the device as a 4-digit number, and for "Slave"
devices, enter the same table as in "Master". Opening the door electric strike with one of the five
building administrator access codes: press the Key button and follow by inputting the six-digit code.
The building administrator access codes are intended for use by building administration and
maintenance personnel, e.g. maintenance technicians, the janitor, postmen, etc. The wired door
electric strike can also be unlocked by shorting the additional INPUT to ground. If a proximity reader
(ACC) is wired, the door electric strike is unlocked with the proximity card or keyfob (paired with the
DES and issued to e.g. the tenants, the building administration staff, or the DES installer). An attempt
of entry with a proximity card or keyfob which has not been paired will make the device respond with
three beeps from the speaker. When the door electric strike is unlocked, the display shows the following
text string: “Enter!”. The OUTPUT (of the Master only) is activated with button F2 on the inside unit
(during a dialled call) or entering a valid access code; this requires pressing the Key button twice before
the access code is entered, not unlike in the regular door electric strike unlock procedure. In devices
with ACC, the second output will be activated when the “key” button is not pressed, and a registered
card/keyfob is used. As long as the 2nd output remains triggered, the display shows the following text
string: “Enter!”.
If working with Module 4 of the SW4S-DIN zones (1020 apartments), the appropriate option should be
set in the software (the mounting and installation details are found in the extended manual).
PROGRAMMING
Accessing the Installer menu: press the Key button and input “1507xxxx” within the next 5 seconds;
the string “xxxx” is the 4-digit installer access code, which is “0000” by default. It should be changed
to a custom string! (Menu 7: retype the current access code first). CAUTION!
In the newest panels, “0000” has been replaced by the last four digits of the product's serial number
visible on the sticker on the electronics board. Successful access to the Installer menu is confirmed
with a sound and the software version appearing on the display, which is followed by Program 0: “Open”.
You can navigate between the menus by pressing “2” to navigate “up” and “8” to navigate “down”. The
Key button opens the currently selected menu (shown on the display) and confirms the changes of
value. In the Installer menu, you can reset (and restart) the door entry system panel by pressing buttons
“7” and “9” at the same time. When exiting the Installer menu (by pressing “#”), the display shows the
current temperature inside the panel.
INSTALLER MENU ITEM DESCRIPTION
SERVICE-MODE ELECTRIC
STRIKE RELEASE
ENTERS THE APARTMENT
CODE SETTING MODE
CHANGING 5 ADMIN CODES,
ADDING ADMIN
CARD/KEYFOB
SETTING THE NUMBER OF
CALL RINGS;
ENABLE/DISABLE VOICE
DIALLING OF APARTMENTS
ENABLE/DISABLE THE
DOORBELL TINKLING AT THE
APARTMENT ONCE THE DOOR
ELECTRIC STRIKE IS
RELEASED
SETTING ONE OF THE FOUR
RING TONES
SETTING THE TIME TO LOCK
THE ELECTRIC STRIKE ONCE
RELEASED
CHANGING INSTALLER
PASSWORD
ADDING INSTALLER
CARD/KEYFOB
DISPLAYS THE CARDS PAIRED
WITH APARTMENTS
OPENS THE ACCESS CODE
TABLE INPUT MODE
ENABLE/DISABLE FAIL-SAFE
(NO) ELECTRIC STRIKE
ENABLE/DISABLE RESETTING
TO DEFAULT SETTINGS
ENTERS THE MODE OF
PAIRING PROXIMITY CARDS
AND KEYFOBS WITH AN ACC
PROXIMITY READER
ENTERS THE PROGRAMMING
MODE TO PAIR TENANT
NAMES TO KEYPAD BUTTONS
2, 6, 10NP (in Zone 1 only)
SETTING THE DOOR
ELECTRIC STRIKE RELEASE
DELAY AFTER MAKING THE
INPUT TERMINAL
SETTING THE DELAY TO
DISPLAY THE “CALL
SERVICE” MESSAGE
TRIGGER APARTMENT
CALLBACK
IN THE INSTALLER MODE
(THE PERMITTED
APARTMENT NO. RANGE)
TRIGGER APARTMENT
CALLBACK IN THE SERVICE
MODE (FROM A SPECIFIC
APARTMENT)
SEARCHES FOR UNIPHONES
WITH FAULTS OR NOT
PROPERLY REPLACED
HANDSETS
RUNS A LINE TEST TO CHECK
THE WIRED UNITS FOR
FAULTS
CAUTION! Accessing the full configuration requires the software configuration tool (“x700”) which can be downloaded for free from
www.aco.com.pl. The panel can be interfaced with a PC laptop with an optional CDN-USB data cable (which is purchased separately). The
website Downloads section also includes the full operating manual for the CDNP7ACC and INSPIRO+, complete with a troubleshooting
guide for most common problems. IU0303enVF.1938
Rings
OpInf
Tones
LTime
Fobs
Table
ReEL
RstLo
M-ACC
M-xNP
CaSrv
InsCa
SrvCa
LTest
PIN
Searc
IPass
Delay
Open
AKey

This manual suits for next models

1

Other ACO Intercom System manuals

ACO INS-UC 720M User manual

ACO

ACO INS-UC 720M User manual

ACO CDNP7ACC User manual

ACO

ACO CDNP7ACC User manual

ACO FAM-P Series User manual

ACO

ACO FAM-P Series User manual

ACO CDNP6ACC User manual

ACO

ACO CDNP6ACC User manual

ACO FAM-P Installation instructions

ACO

ACO FAM-P Installation instructions

ACO CDNP6ACC Installation instructions

ACO

ACO CDNP6ACC Installation instructions

ACO INS-UP 720B User manual

ACO

ACO INS-UP 720B User manual

ACO INSPIRO+audio User manual

ACO

ACO INSPIRO+audio User manual

ACO INSPIRO 4 Series User manual

ACO

ACO INSPIRO 4 Series User manual

ACO GLASS-IP-7 User guide

ACO

ACO GLASS-IP-7 User guide

ACO CDNP7ACC User manual

ACO

ACO CDNP7ACC User manual

ACO INS-UA720M User manual

ACO

ACO INS-UA720M User manual

ACO COMO-PRO User manual

ACO

ACO COMO-PRO User manual

ACO FAM-PV Series Installation instructions

ACO

ACO FAM-PV Series Installation instructions

ACO COMO-PRO-V Series User manual

ACO

ACO COMO-PRO-V Series User manual

ACO INSPIRO 1 Series User manual

ACO

ACO INSPIRO 1 Series User manual

ACO FAM-P Series User manual

ACO

ACO FAM-P Series User manual

ACO MOD-SPK-PRO User manual

ACO

ACO MOD-SPK-PRO User manual

ACO COMO-PRO-POST-A1 Series User manual

ACO

ACO COMO-PRO-POST-A1 Series User manual

ACO CDNP6ACC User manual

ACO

ACO CDNP6ACC User manual

ACO acoGO! P User guide

ACO

ACO acoGO! P User guide

ACO Familio PRO User manual

ACO

ACO Familio PRO User manual

Popular Intercom System manuals by other brands

Comelit 4893 Technical manual

Comelit

Comelit 4893 Technical manual

DMP Electronics 1119 installation guide

DMP Electronics

DMP Electronics 1119 installation guide

PS Engineering PM2000 Operator's manual

PS Engineering

PS Engineering PM2000 Operator's manual

Smartwares VD36W instruction manual

Smartwares

Smartwares VD36W instruction manual

Comelit Simplebus Diva Series Technical sheet

Comelit

Comelit Simplebus Diva Series Technical sheet

Comelit KAE5064 Technical manual

Comelit

Comelit KAE5064 Technical manual

Aiphone NDA-20 instructions

Aiphone

Aiphone NDA-20 instructions

KOCOM KVL-C302i user manual

KOCOM

KOCOM KVL-C302i user manual

AES global PRIME6-PROX-IMPK-PE-4GA installation instructions

AES global

AES global PRIME6-PROX-IMPK-PE-4GA installation instructions

TCS Tasta Series instruction manual

TCS

TCS Tasta Series instruction manual

Farfisa 1 FEV/4 manual

Farfisa

Farfisa 1 FEV/4 manual

ABB Welcome M M25102 C Series user manual

ABB

ABB Welcome M M25102 C Series user manual

Akuvox C319 Series quick guide

Akuvox

Akuvox C319 Series quick guide

Unitec Portal TI+ installation manual

Unitec

Unitec Portal TI+ installation manual

Fermax KIT VIDEOCHALET CITYMAX manual

Fermax

Fermax KIT VIDEOCHALET CITYMAX manual

Smartwares DIC-22815 manual

Smartwares

Smartwares DIC-22815 manual

Jupiter Avionics wi JAC2-T32 operating manual

Jupiter Avionics

Jupiter Avionics wi JAC2-T32 operating manual

GVS T Series user manual

GVS

GVS T Series user manual

manuals.online logo
manuals.online logoBrands
  • About & Mission
  • Contact us
  • Privacy Policy
  • Terms and Conditions

Copyright 2025 Manuals.Online. All Rights Reserved.