manuals.online logo
Brands
  1. Home
  2. •
  3. Brands
  4. •
  5. ACS
  6. •
  7. Test Equipment
  8. •
  9. ACS ALCOLOCK B-2 Series Use and care manual

ACS ALCOLOCK B-2 Series Use and care manual

ENGLISH
ESTONIAN
Series B-2
B-2-Seeria
Calibration manual
Kalibreerimisjuhend
ACS, ALCOHOL COUNTERMEASURE
SYSTEMS, ALCOLOCK, ALCOSIM and the
―Molly‖ are trademarks of Alcohol Countermeasure
Systems (International) Inc. and are used under
license. Alcohol Countermeasure Systems is the
trading style of Alcohol Countermeasure Systems
Corp.
ACS, ALCOHOL COUNTERMEASURE
SYSTEMS, ALCOLOCK, ALCOSIM ja ―Molly‖ on
ettevõtte Alcohol Countermeasure Systems
(International) Inc kaubamärgid, mida kasutatakse
litsentsi alusel. Alcohol Countermeasure Systems
on ettevõtte Alcohol Countermeasure Systems
Corp kaubanimi.
The information disclosed in this document is the
valuable property of Alcohol Countermeasure
Systems and all copyright and other proprietary
rights to this document are reserved. No
reproduction of this document is permitted without
the prior written consent of Alcohol
Countermeasure Systems.
Selles dokumendis avaldatud teave on Alcohol
Countermeasure Systemsi vara ning sellele
dokumendile on reserveeritud kõik autori- ja muud
varalised õigused. Selle dokumendi mis tahes viisil
taastootmine ei ole lubatud ilma Alcohol
Countermeasure Systemsi eelneva kirjaliku loata.
FRONT VIEW
VAADE EEST
Mouthpiece
Huulik
Status LED
Oleku LED
Sampling port
Prooviava
Display
Kuva
Left navigation button
Vasak navigeerimisnupp
Right navigation button
Parem navigeerimisnupp
SIDE VIEW
VAADE KÜLJELT
Air vent
Õhutusava
Cable input port
Kaabli sisend
The navigation buttons permit the selection of
options shown on the display.
Navigeerimisnupud võimaldavad valida kuval
näidatavate suvandite vahel.
SAFETY AND PRECAUTIONS
OHUTUS JA ETTEVAATUSABINÕUD
WARNING: Failure to comply with the warnings
and precautions in this manual may cause
personal injury, product damage, voiding of
product warranty or a failed calibration.
HOIATUS: Selles juhendis toodud hoiatuste ja
ettevaatusabinõude eiramine võib tuua kaasa
vigastused, toote kahjustumise, toote garantii
tühistamise või kalibreerimise ebaõnnestumise.
GENERAL
ÜLDIST
The ALCOSIM breath alcohol simulator is intended
for authorized technicians only
Hingeõhu alkoholisisalduse simulaator ALCOSIM
on mõeldud kasutamiseks ainult volitatud tehnikute
poolt
Use the ALCOSIM simulator for its intended
purpose only
Kasutage simulaatorit ALCOSIM ainult ettenähtud
eesmärgil
Use parts specified by ACS only
Kasutage ainult ACSi poolt ettenähtud osasid
Before use, check that the simulator power supply
rating (24Vdc, 2.5A) conforms to local supply
ratings
Veenduge kasutamise eel, et simulaatori
toitenäitajad (24 V alalisvool, 2,5 A) vastab kohaliku
elektrivõrgu näitajatele
Do not disassemble product, except as specified
Ärge võtke toodet osadeks, v.a siinkirjeldatud
viisidel
Do not attempt to repair product; you must contact
an authorized service provider
Ärge üritage toodet remontida. Võtke ühendust
volitatud teenindajaga
It is recommended that calibration be done indoors,
in a service facility
Kalibreerimist on soovitatav läbi viia
sisetingimustes, näiteks teeninduses
COMPRESSED GAS SAFETY
SURUGAASI OHUTUS
Damaged or broken valves can turn a canister into
an unguided missile. Attach the valve in a safe
location
Vigased või katkised ventiilid võivad põhjustada
mahuti juhtimatu lendutõusu. Paigaldage ventiil
ohutus kohas
Calibration should be performed indoors, in a
service facility, where the gas standard cylinder can
be properly stored
Kalibreerimine tuleks viia läbi teeninduse
siseruumides, kus gaasistandardi mahutit on
võimalik nõuetekohaselt hoiustada
Transportation and storage of compressed gases in
vehicles is dangerous and should be avoided
Surugaaside transport ja hoiustamine sõidukites on
ohtlik ja seda tuleb vältida
Examine the canister and valve for any damage;
pay close attention to the expiration date on the
label
Veenduge, et mahutil ja ventiilil ei ole vigastusi.
Pöörake erilist tähelepanu sildil toodud
kõlblikkusajale
Observe all cautions and safety warnings found on
the canister
Järgige kõiki mahutil toodud hoiatusi ja
ettevaatusabinõusid
Never remove or alter canister labels
Ärge kunagi eemaldage ega muutke mahutite silte
Never modify the rigid delivery tube in any way
Ärge kunagi modifitseerige voolikut
Always remove the valve and install the protective
cap on cylinders when not in use
Kui mahuteid ei kasutata, siis eemaldage neilt alati
ventiilid ja paigaldage kaitsekorgid
Store cylinders in a cool, well ventilated area, away
from sources of heat
Hoidke balloone jahedas hästiõhutatud kohas
eemal soojusallikatest
ALCOSIM SETUP, USAGE AND DISASSEMBLY
ALCOSIMI HÄÄLESTAMINE, KASUTAMINE JA
DEMONTEERIMINE
CAUTION! When assembling, disassembling or
preparing the ALCOSIM breath alcohol simulator
for use, ensure that it is not plugged into an
electrical outlet
ETTEVAATUST! Veenduge hingeõhu
alkoholisisalduse simulaatori ALCOSIM
koostamisel, demonteerimisel või
ettevalmistamisel, et see ei ole ühendatud
toitepistikusse
CAUTION! Hot surface –avoid contact with the
heating element
ETTEVAATUST! Kuum pind! Vältige kokkupuudet
kütteelemendiga
Place the ALCOSIM simulator on a flat surface,
free from obstruction
Asetage simulaator ALCOSIM tasasele pinnale nii,
et midagi ei takistaks ligipääsu sellele
Do not expose the simulator to direct sunlight for
extended periods of time
Ärge jätke simulaatorit pikemaks ajaks otsese
päikesevalguse kätte
Do not use the simulator with any toxic or
flammable liquids, or in explosive atmospheres
Ärge kasutage simulaatorit mürgiste või süttivate
vedelikega või plahvatuslikus keskkonnas
Recommended: use the simulator within room
temperature environments (23 °C ± 2 °C and
approx. 50% RH)
Soovitatav: kasutage simulaatorit toatemperatuuril
(23 °C ± 2 °C ja suhteline niiskus u 50%)
The solution container, tubing and mouthpieces
must be completely dry; even slight condensation
may disrupt calibration
Lahuse mahuti, voolikud ja huulikud peavad olema
täiesti kuivad. Vähimgi kondensaat võib
kalibreerimise nurjata
Fit tubing or mouthpieces on an aquarium air pump
or a similar setup for drying
Paigaldage voolikud ja huulikud kuivatamiseks
akvaariumi õhupumbale või muule sarnasele
seadmele
CAUTION! Never connect the simulator to an
electrical outlet without first adding solution and
attaching the top housing
ETTEVAATUST! Ärge kunagi ühendage
simulaatorit toitepistikusse eelnevalt lahust
mahutisse lisamata ja pealmist katet paigaldamata
The simulator requires 500 mL of solution; the fill
line is marked on the simulator container
Simulaator vajab 500 mL lahust. Täitejoon on
tähistatud simulaatori mahutil
Do not under or over fill the simulator container
Ärge ala- ega ületäitke simulaatori mahutit
Do not over tighten the top housing
Ärge pingutage pealmist korpuse osa üle
Connect the simulator cables neatly to ensure
simple disconnection after use
Ühendage simulaatori kaablid neid puntrasse
ajamata, et tagada mugav lahtiühendamine
kasutamise järel
Do not force a misaligned cable connector into
place
Ärge suruge viltust kaabliühendust kokku
If solution overheats considerably beyond 34 °C,
disconnect the simulator power immediately
Kui lahus kuumeneb märkimisväärselt üle 34 °C,
siis ühendage simulaator kohe toitevõrgust lahti
Disconnect the simulator power after use
Ühendage simulaator kasutamise järel toitevõrgust
lahti
CAUTION! After disconnecting the simulator power,
allow 10 to 15 minutes for the heating element to
cool before detaching the top housing
ETTEVAATUST! Simulaatori toitevarustuse
katkestamisel laske selle kütteelemendil enne
mahuti pealmise korpuse eemaldamist 10 kuni 15
minutit jahtuda
Empty out the solution container at the end of the
work day
Tühjendage lahusti mahuti tööpäeva lõpus
Store the simulator in an environment of 5 to 40 °C
and 10 to 85% RH
Hoidke simulaatorit temperatuurivahemikus 5 kuni
40 °C ja suhtelise niiskusega 10 kuni 85%
ALCOHOL REFERENCE SOLUTION
ALKOHOLI VIITELAHUS
Use the solution concentration specified in the
manual for breath testing devices
Kasutage lahust alkomeetri juhendis täpsustatud
kontsentratsioonil
Replace solution every 5 days or 20 tests
Asendage lahus iga 5 päeva või 20 testi järel
Use of solution over time affects alcohol
concentration
Lahuse pikaajaline kasutamine mõjutab alkoholi
kontsentratsiooni
Do not use a solution bottle with a broken seal, or
an expired bottle
Ärge kasutage katkise tihendiga lahusepudelit või
aegunud lahust
Never use artificial methods to reheat or cool
solution, or the solution container
Ärge kunagi kasutage kunstlikke viise lahuse või
lahuse mahuti kuumutamiseks või jahutamiseks
Keep solution at room temperature
Säilitage lahust toatemperatuuril
Do not freeze or refrigerate solution
Ärge külmutage lahust
Do not ingest solution
Ärge võtke lahust sisse
If solution is ingested, do not induce vomiting;
contact your local poison control centre
Lahuse allaneelamisel ei tohi oksendamist esile
kutsuda. Võtke ühendust arstiga
Keep solution away from eyes
Hoidke lahust silmadest eemal
If solution comes in contact with eyes, flush eyes
with water; if irritation continues, contact your local
poison control centre
Kui lahus peaks sattuma silma, siis loputage silmi
veega. Kui ärritus ei kao, võtke ühendust arstiga
Refer to your local environmental regulations for
more information about safe solution-disposal
amounts
Täpsema teabe lahuse ohutu vabanemise ja
lubatud koguste kohta leiate kohalikest
keskkonnamäärustest
Dispose solution down a drain
Valage lahus äravoolu
CLEANING THE ALCOSIM BREATH ALCOHOL
SIMULATOR
HINGEÕHU ALKOHOLISISALDUSE
SIMULAATORI ALCOSIM PUHASTAMINE
Disconnect the ALCOSIM breath alcohol simulator
power before cleaning
Ühendage hingeõhu alkoholisisalduse simulaator
ALCOSIM enne puhastamist toitevõrgust lahti
CAUTION! After disconnecting the ALCOSIM
simulator power, allow 10 to 15 minutes for the
heating element to cool off before detaching the top
housing
ETTEVAATUST! Simulaatori ALCOSIM
toitevarustuse katkestamisel laske selle
kütteelemendil enne mahuti pealmise korpuse
eemaldamist 10 kuni 15 minutit jahtuda
Do not submerge the top housing in water
Ärge sukeldage ülemist korpuse osa vette
Clean the top housing by wiping with a water
dampened cloth
Puhastage korpuse pealmist osa niiske lapiga
pühkides
Wash the solution container with plain water and
dry with paper towel
Peske lahusti mahutit puhta veega ja kuivatage
paberrätiga
CALIBRATION TYPES
KALIBREERIMISE TÜÜBID
There are two methods of calibration for the
ALCOLOCK V3 alcohol interlock:
Alkoluku ALCOLOCK V3 kalibreerimiseks on kaks
meetodit:
Alcohol Reference Standard (ARS), which uses the
ALCOSIM breath alcohol simulator. See the
―Alcohol Reference Standard (ARS) Calibration‖
section of this manual.
Alkoholi viitestandard, mis kasutab hingeõhu
alkoholisisalduse simulaatorit ALCOSIM. Vt selle
juhendi peatükki „Alkoholi viitestandardiga
kalibreerimine‖
Gas Standard, which uses an alcohol gas standard
cylinder. See the ―Gas Standard Calibration‖
section of this manual.
Gaasistandard, mis kasutades alkoholi
gaasistandardit sisaldavat mahutit. Vt selle juhendi
peatükki „Gaasistandardiga kalibreerimine‖
To ensure accurate results, three calibration cycles
may be necessary. The first cycle starts the
calibration and subsequent cycles are used to
ensure that the same threshold is met.
Täpsete tulemuste kindlustamiseks võib osutuda
vajalikuks kolm kalibreerimistsüklit. Esimene
tsükkel käivitab kalibreerimise ning järgnevaid
tsükleid kasutatakse veendumaks, et sama lävi
kordub.
Read the following section, then proceed to the
method being used to calibrate your handset.
Lugege järgnevat peatükki, seejärel jätkake teie
käsiseadme kalibreerimiseks sobiva meetodiga.
HANDSET PREPARATION
KÄSISEADME ETTEVALMISTUS
Regardless of the method being used, calibration is
possible both with the ALOCOLOCK V3 Download
Station or a maintenance code (without the
ALCOLOCK V3 Download Station).
Sõltumata kasutatavast meetodist, calibreerimine
on võimalik nii allalaadimisjaamaga kui
hoolduskoodiga (ilma allalaadimisjaamata).
Do A or B.
Viige läbi toiming A või B.
A. WITH THE ALCOLOCK V3 DOWNLOAD
STATION
A. ALLALAADIMISJAAMAGA
1. Connect the ALCOLOCK V3 Download Station
to a power source.
1. Ühendage allalaadimisjaam toiteallikaga.
2. Disconnect the handset from the ECU of the
vehicle.
2. Ühendage käsiseade juhtploki küljest lahti.
Connect the handset to the ALCOLOCK V3
Download Station. The handset powers on
automatically.
Ühendage allalaadimisjaam rõngaskaabli abil
käsiseadmega. Käsiseade lülitub automaatselt
sisse.
3. Select CAL. The handset displays the current
date and time.
3. Vajutage käsiseadme vasakut nuppu, et valida
KAL. Kuvatakse käsiseadme praegune kuupäev ja
kellaaeg.
4. In the Date / Time screen, do I or II:
4. Viige ekraanil Date / Time (Kuupäev / Kellaaeg)
läbi toiming I või II:
I. If the date and time are correct, press OK –the
Select method menu is displayed.
I. Kui kuupäev ja kellaaeg on õiged, siis vajutage
OK. Kuvatakse menüü Select method (Valige
tüüp).
II. If the date or time is incorrect, press Set to
II. Kui kuupäev või kellaaeg on vale, siis vajutage
automatically synchronize handset time with
download station time, and press OK –the Select
method menu is displayed.
Set (Muuda), et automaatselt sünkroniseerida
käsiseadme kell allalaadimisjaamaga kellaga, ja
vajutage OK.
NOTE: If a tachograph is installed, the date and
time cannot be changed.
MÄRKUS: Kui seadmele on paigaldatud
tahhograaf, siis ei saa kuupäeva ega aega
muuta.
5. In the Select method menu, press Next to scroll
to Manual and press Select. The Select type
menu is displayed.
5. Vajutage menüüs Select method (Valige
meetod), Next (Järgmine), et kerida valikuni
Käsitsi. Seejärel vajutage Manual (Vali).
6. Choose either Dry Gas or Wet Bath in the
Select type menu. The Select value menu is
displayed.
6. Valige menüüst Select type (Vali tüüp) kas Dry
Gas (Kuivgaas) või Wet Bath (Märgvann).
Kuvatakse menüü Select value (Valige väärtus).
Proceed to the ―Gas Standard‖ section if you are
using a gas standard cylinder or to the ―Alcohol
Reference Standard (ARS)‖ section if you are using
the ALCOSIM breath alcohol simulator
Kui te kasutate gaasistandardi mahutit, siis jätkake
osaga „Gaasistandard―. Kui te kasutage hingeõhu
alkoholisisalduse simulaatorit ALCOSIM, siis
jätkake osaga „Alkoholi viitestandard―.
B. BY MAINTENANCE CODE (WITHOUT THE
ALCOLOCK V3 DOWNLOAD STATION)
B. HOOLDUSKOODIGA (ILMA
ALLALAADIMISJAAMATA)
NOTE: The handset must be connected to an
ECU in a vehicle or a demonstration stand.
MÄRKUS: Käsiseade peab olema juhtplokiga
ühendatud.
1. Power the handset on by holding down either
the right or left navigation button.
1. Lülitage käsiseade sisse, hoides all paremat
või vasakut navigeerimisnuppu.
2. Access the menu screen by pressing and
holding the left button.
2. Sisenege menüüekraanile vajutades ja hoides
vasakut nuppu.
NOTE: Where available, press and hold the
right navigation button to exit a current screen /
menu.
MÄRKUS: Kui seadmel on see võimalik, siis
hoidke paremat navigeerimisnuppu all, et
valitud ekraanilt / menüüst väljuda.
3. Press Next to scroll to System Maintenance
and press Select.
3. Vajutage Järgmine, et kerida valikuni Süsteemi
hooldus ja vajutage Vali.
4. Input the daily System Maintenance Code
(contact an authorized dealer orACS). To do so:
4. Sisestage igapäevane süsteemi hoolduskood
(edasimüüjalt). Selleks toimige järgmiselt:
Press [+] repeatedly to increment a digit
Vajutage [+] korduvalt, et arvu suurendada
Press Next to move the cursor to the next digit
Vajutage Järgmine, et liigutada kursor järgmise
arvuni
5. With the code entered, press Next to move the
cursor to OK and press Select.
5. Kui kood on sisestatud, siis vajutage Järgmine,
et liigutada kursor valikuni OK ja vajutage Vali.
6. In the service menu, press Next to scroll to
Calibration, and press Select. The Date / Time
menu is displayed.
6. Vajutage menüüs Next (Järgmine), et kerida
valikuni Calibration (Kalibreerimine). Seejärel
vajutage Select (Vali).
7. In the Date / Time screen, do I or II:
7. Viige ekraanil Date / Time (Kuupäev / Kellaaeg)
läbi toiming I või II:
I. If the date and time are correct, press OK –the
Select type menu is displayed.
I. Kui kuupäev ja kellaaeg on õiged, siis vajutage
OK. Kuvatakse menüü Select type (Valige tüüp).
II. If the date or time is incorrect, change as follows:
II. Kui kuupäev või kellaaeg on vale, siis muutke
järgmiselt:
NOTE: If a tachograph is installed, the date and
time cannot be changed.
MÄRKUS: Kui seadmele on paigaldatud
tahhograaf, siis ei saa kuupäeva ega aega
muuta.
a. Press Set to enter the Set Clock screen.
a. Vajutage Set (Muuda), et siseneda ekraanile Set
Clock (Muuda kella).
b. Press [+] repeatedly to increment a digit.
b. Vajutage [+] korduvalt, et arvu suurendada.
c. Press Next to move the cursor to the next digit.
c. Vajutage Next (Järgmine), et liigutada kursor
järgmise arvuni.
NOTE: Press and hold the left button anytime to
cancel time set and to return to the Date / Time
screen.
MÄRKUS: Võite igal ajal vasakut nuppu all
hoida, et tühistada aja määramine ja liikuda
tagasi ekraanile Kuupäev / Kellaaeg.
d. With the time adjusted, press Next to scroll
through the options until Set is displayed, then
select Set. The Select type menu is displayed.
d. Kui aeg on muudetud, siis jätkake käskluse Next
(Järgmine) vajutamist kuni kuvatakse Set
(Muuda). Valige see käsklus.
8. In the Select type menu, press Next to scroll
between Dry Gas and Wet Bath (depending on
whether you are using a gas standard cylinder or
the ALCOSIM breath alcohol simulator) and press
Select. The Select value menu is displayed.
8. Valige menüüs Select type (Vali tüüp) käsklus
Next (Järgmine), et kerida valikute Dry Gas
(Kuivgaas) ja Wet Bath (Märgvann) vahel (sõltuvalt
selles, kas kasutada gaasistandardi mahutit või
hingeõhu alkoholisisalduse simulaatorit ALCOSIM)
ning vajutage Select (Vali). Kuvatakse menüü
Select value (Valige väärtus).
Proceed to the ―Gas Standard‖ section if you are
using a gas standard cylinder or to the ―Alcohol
Kui te kasutate gaasistandardi mahutit, siis jätkake
osaga „Gaasistandard―. Kui te kasutage hingeõhu
Reference Standard (ARS)‖ section if you are using
the ALCOSIM breath alcohol simulator.
alkoholisisalduse simulaatorit ALCOSIM, siis
jätkake osaga „Alkoholi viitestandard―.
GAS STANDARD
GAASISTANDARD
CALIBRATION MATERIALS
KALIBREERIMISMATERJALID
105 L, 70 F cylinder of alcohol gas standard 0.24
mg/L (50 mg/dL), ACS #95-000426
105 L, 70 F alkoholi gaasistandardi mahuti, 0,24
mg/L (50 mg/dL), ACS #95-000426
Regulator valve assembly (6 L/min flow rate): ACS
#94-000225 (trigger); ACS #94-000226 (push
button)
Reguleerimisklapi koost (voolukiirus 6 L/min): ACS
#94-000225 (päästik); ACS #94-000226 (surunupp)
CYLINDER SETUP
BALLOONI PAIGALDAMINE
Remove the protective cap of the canister and
screw on the regulator valve assembly. Attach the
rigid delivery tube to the regulator valve. Continue
to the next section.
Eemaldage kaitsekork ja keerake ventiil mahutile.
Paigaldage jäik ühendusvoolik. Ärge kunagi
modifitseerige voolikut kuidagi.
Rigid delivery tube
Jäik ühendustoru
Trigger release valve
Päästikuga ventiil
Alcohol gas standard canister
Alkoholi gaasistandardi mahuti
Regulator valve
Reguleerklapp
Regulator valve assembly
Reguleerklapi koost
GAS STANDARD CALIBRATION
GAASISTANDARDIGA KALIBREERIMINE
See the ―Handset Preparation‖ section of this
manual if you are using the ALCOLOCK V3
Download Station or a maintenance code.
Kui te kasutate ALCOLOCK V3 Download Stationit
või hoolduskoodi, siis vaadake selle juhendi
peatükki „Käsiseadme ettevalmistus―.
1. The Select value menu contains the gas
standard concentration options. Verify your
canister label, press Next to scroll to 130 PPM
and press Select. This enters the Altitude
menu.
1. Menüü Select value (Valige väärtus) sisaldab
gaasistandardi kontsentratsiooni sätteid.
Kontrollige mahuti sildilt üle. Seejärel vajutage
Next (Järgmine), et kerida valikuni 130PPM ja
vajutage Select (Valige). See avab menüü
Altitude (Kõrgus).
Altitude is preset to 0 (meters).
Kõrguse eelseadistuseks on 0 (meetrit).
2. Determine the altitude of your exact location.
2. Tehke kindlaks enda asukoha täpne kõrgus.
NOTE:
MÄRKUS:
Find exact altitude online
Täpse kõrguse leiate internetist
Altitude may vary within general region or city;
always use exact value
Kõrgus võib üldise regiooni või linna piires
varieeruda. Kasutage alati täpset väärtust
3. If your altitude is:
3. Kui te kõrgus on:
100 m or lower –leave at 0 m. Press Accept.
100 m või madalam –jätke 0 m. Vajutage Accept
(Nõustu).
101 m or higher –press [+] to adjust the value
(increases by increments of 200 m). Round to the
nearest increment (see the ―Altitude Reference
Table‖ section of this manual). Press Accept.
101 m või kõrgem –vajutage [+] väärtuse
muutmiseks (kasvab 200 m kaupa). Ümardage
lähima astmeni (vt tabelit tagapool). Vajutage
Accept (Nõustu).
4. Wait is displayed followed by a 2 minute warm-
up. The handset is ready for calibration when Turn
on gas is displayed.
Kuvatakse teade Wait (Oodake), millele järgneb 2-
minutiline soojenemine. Käsiseade on
kalibreerimiseks valmis, kui kuvatakse teade Turn
on gas (Avage gaasivarustus).
5. Insert the rigid delivery tube from the regulator
valve into the mouthpiece port of the handset.
5. Sisestage rõhuventiili ühendusvoolik huuliku
avasse.
Hold the handset in place for the next step.
Hoidke käsiseadet tugevalt kuna ühendusvoolik on
jäik.
6. Press and hold the regulator valve down to
release the gas while still holding the handset.
6. Gaasi väljalaskmiseks vajutage ventiili alla,
hoides samal ajal käsiseadet tugevalt käes (vt
joonist).
Hold handset
Hoidke käsiseadet
Press valve
Vajutage ventiili
Blowing is displayed and the handset emits a tone.
Kuvatakse teade Blowing (Puhub) ja käsiseade
esitab helitooni.
7. Continue holding the valve down until the
handset tone stops, even after the handset clicks.
7. Hoidke ventiili all kuni käsiseadme helitoon
vaikib. Ärge laske end segada käsiseadme
klõpsumisest.
Analyzing is displayed followed by Wait and a 45
second countdown. The handset is ready for the
second sample when Turn on Gas is displayed.
Kuvatakse teade Analyzing (Analüüsin), millele
järgneb Wait (Oodake) ja loetakse alla 45 sekundit.
Käsiseade on valmis teiseks prooviks, kui
kuvatakse teade Turn on gas (Avage
gaasivarustus).
Depending on the sensor calibration drift, up to 4
samples may be required.
Sõltuvalt anduri kalibreerimisnihkest, võib
vajalikuks osutuda kuni 4 proovi.
If only 2 tests are required, Verification OK is
displayed when the calibration is complete.
Kui vaja on ainult 2 testi, siis kuvatakse
kalibreerimise lõpetamisel teade Verification OK
(Kontroll OK).
If 3 or 4 tests are required, Calibration OK is
displayed when the calibration is complete.
Kui vaja on 3 või 4 testi, siis kuvatakse
kalibreerimise lõpetamisel teade Calibration OK
(Kalibreerimine OK).
8. Do I or II:
8. Viige läbi toiming I või II:
I. For calibration with the ALCOLOCK V3 Download
Station, disconnect the handset from the download
station and reconnect it to the ECU of the vehicle.
I. Allalaadimisjaamaga kalibreerimiseks ühendage
käsiseade jaama küljest lahti ja tagasi juhtplokile.
II. For calibration without the ALCOLOCK V3
Download Station, press the right button to finish
(there is also the option to retry by pressing the left
button).
II. Ilma allalaadimisjaamata kalibreerimisel vajutage
lõpetamiseks paremat nuppu (teil on ka võimalus
uuesti üritada, vajutades vasakut nuppu).
CALIBRATION IS COMPLETE
KALIBREERIMINE LÕPETATUD
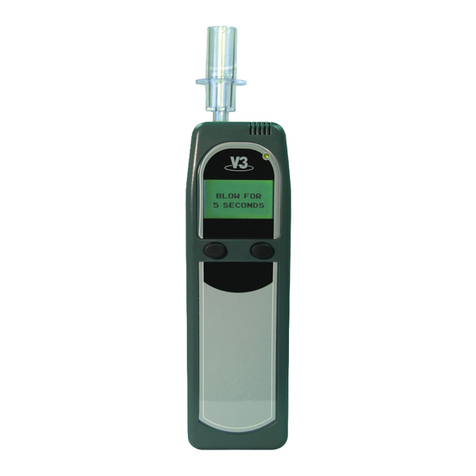
The V3 handset returns to ready state and Blow
for 5 seconds is displayed.
ALCOLOCK V3 käsiseade on taas valmis testideks
ja kuvatakse teade Blow for 5 seconds (Puhuge 5
sekundit).
NOTE: If the calibration fails on numerous
attempts, the sensor may need replacement.
Contact an authorized service provider for
return instructions.
MÄRKUS: Kui kalibreerimine ebaõnnestub
mitmel korral, siis võib andur vajada
asendamist. Edasiste juhiste saamiseks võtke
ühendust ACSiga.
ALCOHOL REFERENCE STANDARD (ARS)
ALKOHOLI VIITESTANDARD
CALIBRATION MATERIALS
ALIBREERIMISMATERJALID
Alcohol Reference Solution, 50mg% ACS #95-
000305
Alkoholi viitelahus, 50 mg% ACS #95-000305
ALCOSIM kit (includes the ALCOSIM breath
alcohol simulator and all accessories):
ALCOSIMi komplekt
(sisaldab hingeõhu alkoholisisalduse simulaatorit
ALCOSIM ja selle lisatarvikuid):
Australian kit ACS #94-001200
Austraalia komplekt ACS #94-001200
UK kit ACS #94-001210
Suurbritannia komplekt ACS #94-001210
European kit ACS #90-001220
Euroopa komplekt ACS #90-001220
North American kit ACS #94-001230
Põhja-Ameerika komplekt ACS #94-001230
Japanese kit ACS #94-001240
Jaapani komplekt ACS #94-001240
Brazilian kit ACS #94-001250
Brasiilia komplekt ACS #94-001250
ALCOSIM kit contents include:
ALCOSIMi komplekti kuulub:
ALCOSIM breath alcohol simulator ACS #79-
007600
Hingeõhu alkoholisisalduse simulaator ALCOSIM
ACS #79-007600
AC power cord: part number depends on your
region
Toitekaabel: osa number sõltub teie piirkonnast
Power supply (24Vdc, 2.5A) ACS #07-000075
Toiteplokk (24 V alalisv., 2,5 A) ACS #07-000075
1.5 feet of vinyl tubing ACS #70-000002
0,5 m vinüülvoolikuid ACS #70-000002
Square mouthpiece ACS #95-000121
Kandiline huulik ACS #95-000121
Round mouthpiece ACS #95-000250
Ümar huulik ACS #95-000250
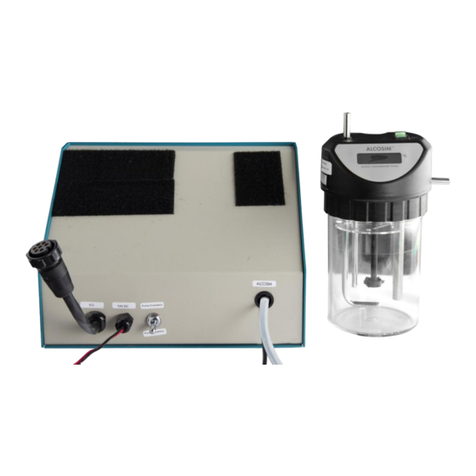
ALCOSIM BREATH ALCOHOL SIMULATOR –
OVERVIEW
HINGEÕHU ALKOHOLISISALDUSE
SIMULAATOR ALCOSIM –ÜLEVAADE
The ALCOSIM simulator is used by technicians to
calibrate and verify breath alcohol testing devices.
The simulator is a wet-bath calibration / verification
device.
Simulaatorit ALCOSIM kasutavad tehnikud
hingeõhu alkoholisisaldust mõõtvate seadmete
kalibreerimiseks ja kontrollimiseks. Simulaator on
märgvanniga kalibreerimis-/kontrollseade.
PARTS DIAGRAM
OSADE SKEEM
Air inlet tube
Õhu sisselaskevoolik
Wide viewing angle 7-segment LCD
Laia vaatenurgaga 7 elemendiga LCD
Stirrer
Segaja
Temperature sensors 1 and 2
Temperatuuriandurid 1 ja 2
Propeller
Kruvi
Illuminated ON/OFF switch
Indikaatoriga toitelüliti
Air outlet tube
Õhu väljalaskevoolik
Baffle plate
Vaheplaat
500 mL solution fill line
Lahuse täitejoon (500 mL)
Heating element
Kütteelement
Dispersion tube
Jaotusvoolik
FRONT
ESIKÜLG
Optional thermometer port
Valikulise termomeetri ava
24V power input
24V toitesisend
Communication port
Ühendusport
Top housing
Korpuse pealmine osa
Solution container
Lahuse mahuti
BACK
TAGAKÜLG
KIT CONNECTION DIAGRAM
KOMPLEKTI ÜHENDUSSKEEM
Round mouthpiece (for manually blowing into the
simulator)
Ümar huulik (simulaatorisse puhumiseks)
Plastic tubing (cut to size by a technician)
Plastvoolik (tehniku poolt õigesse pikkusesse
lõigatud)
Square mouthpiece (connects to a breath tester)
Kandiline huulik (ühendatakse alkomeetriga)
Power cord
Toitekaabel
ALCOHOL REFERENCE SOLUTION –
OVERVIEW
ALKOHOLI VIITELAHUS –ÜLEVAADE
The technician adds solution of precise BrAC to the
ALCOSIM breath alcohol simulator for calibration /
verification of breath testing devices.
Tehnik lisab hingeõhu alkoholisisalduse
simulaatorisse alkomeetrite kalibreerimiseks /
kontrollimiseks kindla hingeõhu alkoholisisaldusega
lahust.
Supplied in 500 mL tamper-sealed bottles
Tarnitakse 500 mL lukustatud pudelites
Premixed and ready for immediate use with the
ALCOSIM simulator
Eelsegatud ja valmis koheseks kasutamiseks
ALCOSIMi simulaatoris
This calibration requires a bottle of 50 mg%
solution
See kalibreerimine vajab pudelit 50 mg% lahust
For availability, pricing and ordering, contact your
local authorized service provider or visit acs-
corp.com.
Pöörduge saadavuse, hindade ja tellimise asjus
enda kohaliku volitatud teenusepakkuja poole või
külastage aadressi acs-corp.com.
ALCOSIM SETUP AND OPERATION STEPS
ALCOSIMI HÄÄLESTAMINE JA KASUTAMINE
1. With the ALCOSIM breath alcohol simulator
power disconnected, turn the top housing
counter clockwise (left) and detach it from the
container.
1. Veenduge, et hingeõhu alkoholisisalduse
simulaator ALCOSIM ei ole toitevõrku
ühendatud. Seejärel keerake korpuse pealmist
osa vastupäeva (vasakule) ja eemaldage see
mahutilt.
2. Add the entire contents of the 500 mL bottle of
50 mg% alcohol reference solution into the
ALCOSIM solution container.
2. Lisage kogu 500 mL pudel 50 mg% alkoholi
viitelahust ALCOSIMi lahuse mahutisse.
The bottle contains the exact liquid volume required
for calibration, which is also marked on the
ALCOSIM container.
Pudel sisaldab täpselt kalibreerimiseks vajalikku
vedelikuhulka (märgitud ka ALCOSIMi mahutile).
3. Return the top housing onto the container, be
careful not to over tighten.
3. Paigaldage korpuse pealmine osa tagasi
mahutile. Vältige ülepingutamist.
4. Connect tubing with the round mouthpiece to the
4. Ühendage ümara huulikuga voolik simulaatori
ALCOSIM simulator air inlet and tubing with the
square mouthpiece to the air outlet.
ALCOSIM õhu sisselaskeavaga ning kandilise
huuliku voolik õhu väljalaskeavaga.
5. Perform a leak check by covering the air outlet
tube with your thumb and blowing into the air inlet
tube.
5. Viige läbi lekketest, kattes selleks õhu
väljalaskevooliku pöidlaga ja puhudes
sisselaskevoolikusse.
Air bubbles should not appear in the solution. In
case of bubbling, refer to the ―Troubleshooting‖
section in this manual.
Lahusesse ei tohi tekkida õhumulle. Mullide
tekkimisel lugege selle juhendi peatükki
„Veaotsing―.
6. Connect the power cable to the simulator power
input and to a wall outlet.
6. Ühendage toitekaabel simulaatori toitesisendi ja
seinapistikuga.
7. Switch on the simulator. The following occurs:
7. Lülitage simulaator sisse. Toimub alljärgnev:
The LCD display illuminates and the simulator
beeps
LCD-kuva süttib ja simulaator teeb piiksu
The propeller rotates and the heating element
activates
Kruvi pöörleb ja kütteelement aktiveerub
Cold is displayed until solution reaches 32 ºC,
wherein the LCD screen displays actual solution
temperature
Kuni lahus pole saavutanud temperatuuri 32 ºC,
kuvatakse ekraanil Cold (Külm) ja lahuse
hetketemperatuur.
The simulator maintains solution at a constant 34
ºC ± 0.2 ºC
Simulaator säilitab lahuse temperatuuri püsivalt 34
ºC ± 0,2 ºC juures.
Solution heat-up takes about ten minutes. When 34
ºC ± 0.2 ºC is displayed, the simulator is ready to
provide a breath sample.
Lahuse soojenemiseks kulub umbes kümme
minutit. Kui kuvatakse 34 ºC ± 0,2 ºC, siis on
simulaator valmis puhumistestiks.
ALCOHOL REFERENCE STANDARD (ARS)
CALIBRATION
ALKOHOLI VIITESTANDARDIGA
KALIBREERIMINE
See the ―Handset Preparation‖ section of this
manual if you are using the ALCOLOCK V3
Download Station or a maintenance code.
Kui te kasutate ALCOLOCK V3 Download Stationit
või hoolduskoodi, siis vaadake selle juhendi
peatükki „Käsiseadme ettevalmistus―.
1. The Select value menu contains the Alcohol
Reference Standard (ARS) options. Press Next
to scroll to 50mg% and press Select. The
display will count down 2 minutes and then
show Ready with a solid green indicator light.
1. Menüü Select value (Valige väärtus) sisaldab
alkoholi viitestandardi sätteid. Vajutage Next
(Järgmine), et kerida valikuni 50mg% ja
vajutage Select (Vali). Kuval käivitub 2-
minutiline taimer, mille lõpuni jooksmise järel
kuvatakse Ready (Valmis) ja roheline
indikaator jääb põlema.
2. Insert the tip of the square mouthpiece into the
sensor inlet of the handset.
2. Sisestage kandilise huuliku ots käsiseadme
anduri sisendisse.
3. Blow into the round mouthpiece of the ALCOSIM
breath alcohol simulator. Blowing is displayed on
the handset and a continuous tone is heard.
Continue until the handset clicks.
3. Puhuge hingeõhu alkoholisisalduse simulaatori
ALCOSIM ümarasse huulikusse. Käsiseadmel
kuvatakse Blowing (Puhumine) ja kostub püsiv
toon. Jätkake kuni käsiseade teeb klõpsu.
4. The handset displays Analyzing followed by
Wait and a 45 second countdown. The handset is
ready for the second sample when Ready is
displayed.
4. Käsiseade kuvab Analyzing (Analüüsin), millele
järgneb Wait (Oodake) ja 45-sekundiline taimer.
Käsiseade on teiseks prooviks valmis, kui
kuvatakse Ready (Valmis).
Depending on the sensor calibration drift, up to 4
samples may be required.
Sõltuvalt anduri kalibreerimisnihkest, võib
vajalikuks osutuda kuni 4 proovi.
If only 2 tests are required, Verification OK is
displayed when the calibration is complete.
Kui vaja on ainult 2 testi, siis kuvatakse
kalibreerimise lõpetamisel teade Verification OK
(Kontroll OK).
If 3 or 4 tests are required, Calibration OK is
displayed when calibration is complete.
Kui vaja on 3 või 4 testi, siis kuvatakse
kalibreerimise lõpetamisel teade Calibration OK
(Kalibreerimine OK).
5. Do I or II:
5. Viige läbi toiming I või II:
I. For calibration with the ALCOLOCK V3 Download
Station, disconnect the handset from the download
station and reconnect it to the ECU of the vehicle.
I. Allalaadimisjaamaga kalibreerimiseks ühendage
käsiseade jaama küljest lahti ja tagasi juhtplokile.
II. For calibration without the ALCOLOCK V3
Download Station, press the right button to finish
(there is also the option to retry by pressing the left
button).
II. Ilma allalaadimisjaamata kalibreerimisel vajutage
lõpetamiseks paremat nuppu (teil on ka võimalus
uuesti üritada, vajutades vasakut nuppu).
CALIBRATION IS COMPLETE
KALIBREERIMINE LÕPETATUD
The V3 handset returns to a ready state and Blow
for 5 seconds is displayed.
ALCOLOCK V3 käsiseade on taas valmis testideks
ja kuvatakse teade Puhuge 5 sekundit.
NOTE: If the calibration fails on numerous
attempts, the sensor may need to be replaced.
Contact an authorized service provider for
return instructions.
MÄRKUS: Kui kalibreerimine ebaõnnestub
mitmel korral, siis võib andur vajada
asendamist. Edasiste juhiste saamiseks võtke
ühendust ACSiga.
TROUBLESHOOTING
VEAOTSING
In the event of a calibration failure using the
ALCOSIM simulator, consult the ―Troubleshooting
—Error Codes‖ section of the ALCOSIM Breath
Alcohol Simulator Instruction Manual (ACS #60-
Kui teil tekib simulaatori ALCOSIM kasutamisel
kalibreerimistõrge, siis tutvuge hingeõhu
alkoholisisalduse simulaatori juhendi (ACS #60-
000180) peatükiga „Veaotsing — veakoodid‖.
000180).
If a calibration fails while using an alcohol gas
standard cylinder, it may be due to the following:
Kalibreerimise ebaõnnestumisel kontrollige järgmisi
tüüpvigasid:
Plastic tubing has been overused or condensation
is present
Plastikvoolik on kulunud või sisaldab kondensaati
The alcohol gas standard cylinder is expired
Alkoholi gaasistandard on aegunud
The alcohol gas standard value is not 130 PPM, or
the value has been incorrectly entered in the
Select Value menu
Alkoholi gaasistandardi väärtus ei ole 130 ppm või
väärtus on menüüs Select Value (Valige väärtus)
valesti sisestatud
The value entered in Altitude menu is incorrect
Menüüs Altitude (Kõrgus) sisestatud väärtus on
vale
ALTITUDE REFERENCE TABLE
KÕRGUSTE VIITETABEL
The altitude adjustment is in increments of 200
meters. Round the altitude up or down to the
closest value as follows:
Kõrguse valik toimub 200-meetriste sammudena.
Ümardage kõrgus vastavalt üles või alla lähima
väärtuseni:
IF ALTITUDE IS
KUI KÕRGUS ON
THEN SET TO
SIIS VALIGE

This manual suits for next models

2

Other ACS Test Equipment manuals

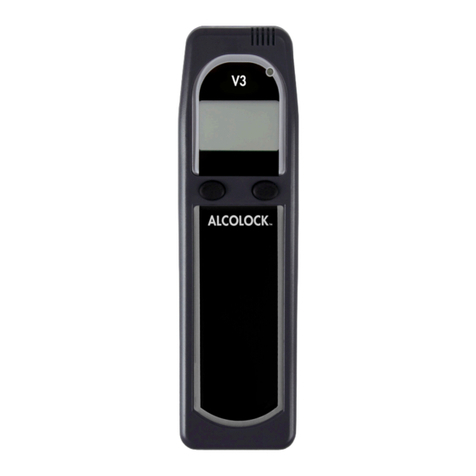
ACS ALCOLOCK V3 B-2 WI-FI Series Use and care manual

ACS

ACS ALCOLOCK V3 B-2 WI-FI Series Use and care manual

ACS A1208 User manual

ACS

ACS A1208 User manual

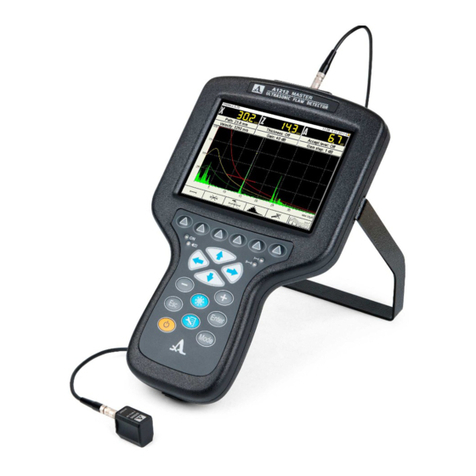
ACS A1212 MASTER User manual

ACS

ACS A1212 MASTER User manual

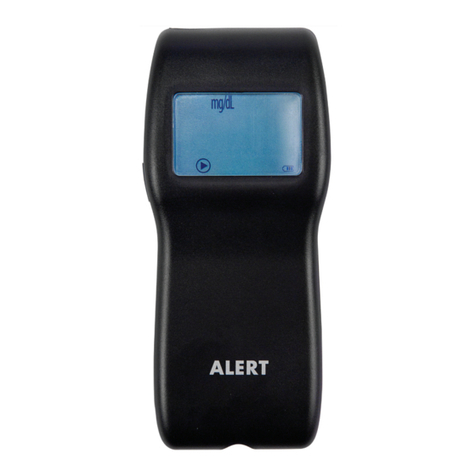
ACS Alert J5 User manual

ACS

ACS Alert J5 User manual

ACS UK1401 User manual

ACS

ACS UK1401 User manual

ACS ALCOLOCK IR User manual

ACS

ACS ALCOLOCK IR User manual

ACS Alert J5 User manual

ACS

ACS Alert J5 User manual

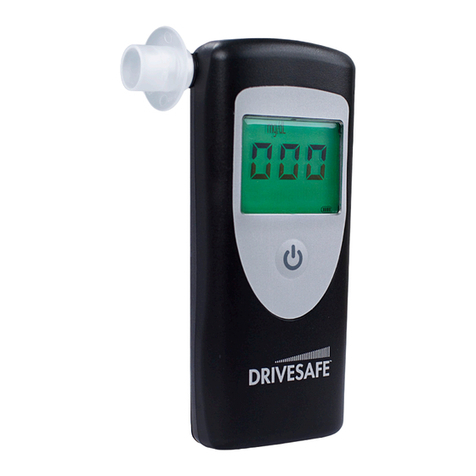
ACS DRIVESAFE Use and care manual

ACS

ACS DRIVESAFE Use and care manual

ACS SAF'IR EVOLUTION User manual

ACS

ACS SAF'IR EVOLUTION User manual

ACS UK1401 User manual

ACS

ACS UK1401 User manual

ACS WR3 User manual

ACS

ACS WR3 User manual

ACS ALERT J4X User manual

ACS

ACS ALERT J4X User manual

ACS ALCOLOCK LR User manual

ACS

ACS ALCOLOCK LR User manual

ACS ALERT J4X User manual

ACS

ACS ALERT J4X User manual

ACS Alcolock WR2 Installation and operating manual

ACS

ACS Alcolock WR2 Installation and operating manual

ACS DRIVESAFE User manual

ACS

ACS DRIVESAFE User manual

ACS ALCOHOL INTERLOCK V3 User manual

ACS

ACS ALCOHOL INTERLOCK V3 User manual

ACS WR3 User manual

ACS

ACS WR3 User manual

ACS Alcoscan User manual

ACS

ACS Alcoscan User manual

ACS ALCOSENTRY User manual

ACS

ACS ALCOSENTRY User manual

ACS Alert J5 Use and care manual

ACS

ACS Alert J5 Use and care manual

ACS ALCOLOCK LR Programming manual

ACS

ACS ALCOLOCK LR Programming manual

ACS Alcolock GR User manual

ACS

ACS Alcolock GR User manual

ACS ALCOCHECK User manual

ACS

ACS ALCOCHECK User manual

Popular Test Equipment manuals by other brands

Boston D412 user manual

Boston

Boston D412 user manual

Testboy TV 900 operating manual

Testboy

Testboy TV 900 operating manual

Inder Hydraulic P-231F User instruction manual

Inder

Inder Hydraulic P-231F User instruction manual

CATU DETEX MS-917 quick start guide

CATU

CATU DETEX MS-917 quick start guide

Tektronix WFM6100 Opt. MB Technical reference

Tektronix

Tektronix WFM6100 Opt. MB Technical reference

Tezter TIP-HOL-MT-8 user manual

Tezter

Tezter TIP-HOL-MT-8 user manual

Hameg HM303-6 Operator's manual

Hameg

Hameg HM303-6 Operator's manual

Mityvac MV5536 user manual

Mityvac

Mityvac MV5536 user manual

FIS Thunder Bolt Operation manual

FIS

FIS Thunder Bolt Operation manual

Tektronix TMT4 Installation and safety instructions

Tektronix

Tektronix TMT4 Installation and safety instructions

Altek 222A quick start guide

Altek

Altek 222A quick start guide

LeCroy ZD200 instruction manual

LeCroy

LeCroy ZD200 instruction manual

DTDAUTO MOTOSCAN CE manual

DTDAUTO

DTDAUTO MOTOSCAN CE manual

Silex technology SX-DS-3000WAN Setup guide

Silex technology

Silex technology SX-DS-3000WAN Setup guide

Nieaf-Smitt EazyPV Quick start manual

Nieaf-Smitt

Nieaf-Smitt EazyPV Quick start manual

Tektronix 511A instruction manual

Tektronix

Tektronix 511A instruction manual

Philips PM 3210 operating manual

Philips

Philips PM 3210 operating manual

Sonel UV-260 Corona Camera operating manual

Sonel

Sonel UV-260 Corona Camera operating manual

manuals.online logo
manuals.online logoBrands
  • About & Mission
  • Contact us
  • Privacy Policy
  • Terms and Conditions

Copyright 2025 Manuals.Online. All Rights Reserved.