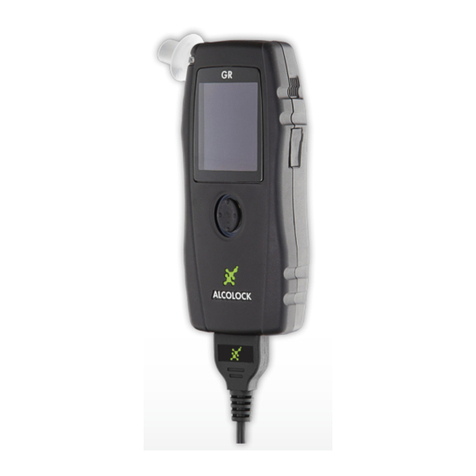
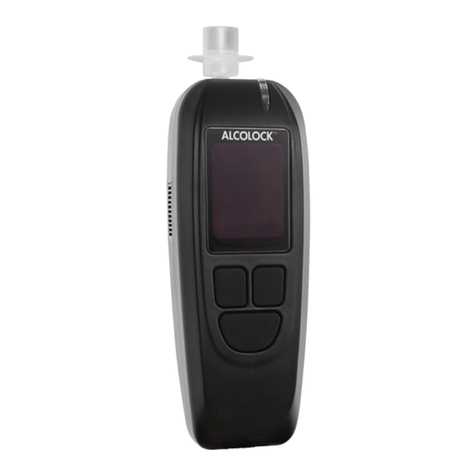
ACS ALCOHOL INTERLOCK V3 User manual


© Alcohol Countermeasure Systems Corp.
The information disclosed in this document is the valuable property of Alcohol
Countermeasure Systems Corp. and all copyright and other proprietary rights to this
document are reserved. No reproduction of this document is permitted without the prior
written consent of Alcohol Countermeasure Systems Corp.

Safety and Precautions
V3 breath alcohol ignition interlock is designed for easy and safe operation. The
following precautions should be followed:
• Do not open the handset case. Doing so will void the warranty and potentially
damage the components within.
• Avoid exposing handset to direct sunlight for extended periods of time.
• If any liquid is spilled on the handset, remove all excess fluid with a cloth and allow
the handset to dry thoroughly. If it is believed there is excessive water damage, do not
power on the handset. Contact your dealer.
• Keep all RF transmitting devices (such as cell phones) away from the handset to
ensure minimal interference.
Warranty
All ACS products are warranted to be free of defects in workmanship and materials
for a period of one year from the date of shipment.
ACS agrees to replace or repair any defective V3, provided the defect was not
caused by misuse or mishandling.
Any V3 being returned for warranty repair must be properly packaged and shipped
prepaid to the authorized dealer’s facility.
Maintenance
V3 is made for field use, making them susceptible to dirt and debris. The handset
should be cleaned with a damp cloth and mild soap. Do not use abrasive cleaners or
solvents.
Periodic maintenance and calibration is required. Contact your dealer for more
information.
Contact Information
acs-corp.com
Alcohol Countermeasure Systems Corp
60 International Boulevard
Toronto, Ontario M9W 6J2
Canada
T +1 416 619 3500
F +1 416 619 3501
Type Approval: ECE Regulation No.10
1. This type approval follows only the specifications regarding the electromagnetic compatibility.
2. The devices must be installed in such a manner that all applicable technical rules, and also observing
other technical directives and regulations, for the vehicle to be modified still apply.
3. The national regulations and behavioral rules must be observed when using this device.
V3 User Guide v
Table of Contents
Safety and Precautions ..............................................................iii
Warranty ................................................................................iii
Maintenance ...........................................................................iii
Contact Information ..................................................................iii
INTRODUCTION 1
What is an Alcohol Interlock? .................................................... 1
How does it work? ................................................................... 1
Installation ............................................................................... 1
More information ..................................................................... 2
Alcohol Influence on Testing ................................................... 2
Operating Temperature .......................................................... 2
Battery Voltage ..................................................................... 2
Using the Interlock 3
Starting the motor ..................................................................... 3
Restarting the motor .................................................................. 5
Running retests (optional) ........................................................... 6
Sharing a vehicle ..................................................................... 7
Overriding the Interlock ............................................................. 8
Menu Options 9
Dates ...................................................................................... 9
Volume Set ............................................................................ 10
Wake-up Mode ...................................................................... 10
Sleep Mode ........................................................................... 11
Time ..................................................................................... 11
Language Selection ................................................................ 12
Maintenance & Troubleshooting 13
Accessing maintenance functions .............................................. 13
TABLE OF CONTENTS

vi V3 User Guide
Servicing the Vehicle .............................................................. 13
Calibration ............................................................................ 13
Troubleshooting Table ............................................................. 14
Display Messages .................................................................. 15
Disposal of Unit at End of Service Life ....................................... 18
Replacement Parts .................................................................. 18
Index 19
Service Record 21

V3 User Guide
1
Introduction
What is an Alcohol Interlock?
An alcohol interlock is an in-vehicle breath alcohol testing
instrument. It prevents a vehicle from starting if it detects
that a driver’s breath alcohol concentration (BrAC) is over
a preset limit. It is designed to fit inside the vehicle, near
the driver’s seat, and connects directly to the vehicle’s
ignition system. The interlock consists of a handset and
ECU. The ECU enables or disables the ignition of the
motor and stores the handset settings.
How does it work?
V3 uses the same alcohol sensing technology used by police in
roadside screening. A special alcohol-sensitive cell detects the amount
of alcohol in the breath. Breath alcohol concentration (BrAC) is directly
proportional to the amount of alcohol in the blood. The blood alcohol
concentration (BAC) limit is customizable, and can be set to any specific
jurisdictional requirement.
Installation
V3 is to be installed by a qualified installer in accordance with national
regulations. An unqualified installation may invalidate the type
approval of the vehicle.
The Installation guide is to be followed during installation, the
installation guide part numbers are as follows:
60-000053 12V ECU installation
60-000054 24V ECU installation
INTRODUCTION

2V3 User Guide
More information
Alcohol Influence on Testing
Drinking alcohol and eating foods containing alcohol will cause a
failed alcohol test.
Some other factors that may affect a test (because they may contain or
produce residual alcohol in the mouth) are medicines, drops, burping,
smoking, using mouthwash or mouth spray.
Rinsing the mouth with water after using mouthwash or mouth spray will
remove the alcohol content in the mouth.
According to the previous information, do not eat, smoke or drink for at
least 10 minutes before taking a test.
Additionally do not spray any air fresheners, disinfectants, cologne or
perfume in the vehicle prior to a test, as these can also contain alcohol.
Note! The above mentioned list of factors that may affect a test is not
exhaustive. There are additional items that may affect the results of a breath
test. Follow this guide carefully to avoid incorrect results.
Operating Temperature
The maximum ambient operational temperature is between -40°C and
+85°C.
Note! Depending on the ambient temperature, the handset takes a few
seconds to warm up (approximately 15 seconds at 20°C, approximately 1
minute at 0°C).
Battery Voltage
The voltage supplied to the ECU, which in turn powers the handset, is
supplied by the vehicle battery.
For a 12V Interlock system, the vehicle battery voltage can range from
9V - 18V. For a 24V Interlock system, the vehicle battery voltage can
range from 16V - 36V

V3 User Guide
3
Using the Interlock
Starting the motor
1. Turn the handset power on by pressing the
right button. The Wait message is displayed
during warm-up.
Alternatively, the power can be turned on by
switching the ignition key on and off.
Note: The key must be in the OFF position before
moving on.
2. The handset displays the message
Blow for 5 seconds when it is ready for a breath
test. The warm-up time is longer in colder
temperatures.
Note: Do not store the mouthpiece to be used in a
cold area. This causes condensation in the
mouthpiece and increases the opportunity for
water to enter the handset.
3. Insert a new mouthpiece. Using a new
mouthpiece practices good hygiene and ensures
a good breath sample.
Note! Do not eat, drink or smoke anything for at least 10 minutes before taking
a test. This could contaminate the breath sample.
4. Blow into the mouthpiece moderately and continuously while
listening for a tone indicating proper breath flow. If you are not blowing
correctly, a message is displayed providing instructions on how to blow
correctly.
5. Stop blowing when the handset tone stops. The Wait message is
displayed as the breath sample is analyzed.
USING THE INTERLOCK

4V3 User Guide
6. The handset beeps and displays the result:
Start Motor
The breath test passed and no alcohol is
detected. You may start the motor.
Note! The motor must be started within 5* minutes.
Caution
The breath test passed, but alcohol below the limit
has been detected. There are 2 options:
•Wait 5* minutes and try the test again if you
are certain there is no alcohol in your breath.
• Press the right Start button to acknowledge
you will be driving with alcohol in your system.
The motor must be started within 5* minutes.
Lockout
The breath test failed. The alcohol level detected
is over the preset limit. You may NOT start the
motor.
•Lockout and a countdown timer is displayed.
Wait for the timer to expire before attempting
another breath test.
WARNING! Do not attempt another breath test until you are sure your
alcohol level is under the limit. A second failed breath test may result in a
longer lockout time.
* This value is customizable.

V3 User Guide
5
Using the Interlock
Restarting the motor
If the motor is turned off for less than 5* (or 30) minutes (time depends on
the settings of the interlock), it can be restarted without providing another
breath test. This is a safety feature if the motor stalls, or convenient for
frequent short stops.
Observe the message on the handset:
Restart Available
The motor can be restarted without providing
another breath test.
To cancel the restart, press and hold the right
button.
Blow for 5 seconds
The restart period has expired and a passed
breath test is required to start the motor.
Refer to the Starting the motor section.
* This value is customizable. Please contact your
administrator for your unit’s settings.

6V3 User Guide
Running retests (optional)
Additional breath tests can be required at random intervals to ensure the
driver has not consumed alcohol since the motor has been started.
1. The handset beeps and
displays Retest.
Do not provide a breath test while the vehicle
is in motion. V3 allows a few minutes for the
user to stop in a safe location.
2. Provide a breath sample and observe the display message:
Drive Safely
The breath test passed, you can continue driving.
Pull over, turn off Motor
The alcohol level is above the preset limit. The motor must be turned
off. Lockout and a countdown timer is displayed until another breath
test can be attempted. You cannot start the motor until a passed
breath test is provided.
WARNING! Do not attempt another breath test until you are sure your
alcohol level is under the limit. A second failed test may result in a longer
lockout time.

V3 User Guide
7
Using the Interlock
Sharing a vehicle
Drivers with their own handset can operate the same vehicle without
reprogramming V3. All the custom settings are downloaded into the ECU
when a new handset is connected.
The handset can be changed with the motor on or off.
It is recommended to exchange handsets when the motor is off and the
vehicle is parked at a safe location.
1. Pinch the connector at the sides and pull
the cable away from the handset to
disconnect.
WARNING! Do not pull on the handset
cord. It requires just a gentle squeeze on the
release tabs to disconnect.
2. If the motor is running, the ECU beeps
every 15 seconds until the handset is
reconnected.
If the motor is off the ECU will not beep.
3. Reconnect the handset to the handset
cable. It makes a click sound if it is
properly connected.
All the handset settings are downloaded to
the ECU.
Note! If the handset is replaced while the
motor is running, a breath test is required.

8V3 User Guide
Overriding the Interlock
In emergency situations, the ignition interlock can be overridden using a
four-digit Override Code provided by your dealer. This code is
randomly generated and changes daily. The use of the override function
is stored in the log.
1. Press and hold the left button to access the Main
Menu. Press the left button to scroll to Override.
Select with the right button.
2. Use the right button to increase the number and
the left to move digits. Once entered, press the
left button to move to OK? and press right button
to Select.
3. The handset beeps and displays Start Motor. A
breath test will be required again the next time
the motor is started.
If the code is incorrect, the handset beeps and
there is no action. Verify the code is correct and
re-enter.
Override
Menu
Next
Select
0000 OK?
[+]
Override Code
Next
Start motor
Cancel (hold)

V3 User Guide
9
Menu Options
V3 has a number of menus and customizable options, such as
language selection, time adjustment, sleep and wake-up time
settings. All are found in the Main Menu, which is accessed by
pressing and holding the left button.
Dates
The current clock date and time, calibration dates,
lockout date and service date are found in this
menu.
Calibration is required to maintain optimum
accuracy. A reminder is displayed on the handset
14 days before the calibration expiry date.
1. Press and hold the left button to access the Main Menu. Press the left
button to scroll to Dates. Select with the right button.
2. Use the left button to scroll through the dates (Lockout, Service,
Calibration, Cal. Expiry and Current).
3. Press and hold the right button to exit the Dates menu.
MENU OPTIONS

10 V3 User Guide
Volume Set
The handset uses audio tones. The volume of the
tones is set from the Main Menu.
Note! The volume setting is for the handset only. The
volume of the ECU cannot be set.
1. Press and hold the left button to access the Main Menu. Press the left
button to scroll to Volume. Select with the right button.
2. Use the left and right buttons to adjust the volume up or down.
3. Press and hold the right button to save the setting and exit the Volume
menu.
Wake-up Mode
The handset has the capability to wake-up up to
three times a day. This ensures the handset is
warmed up and ready before entering the vehicle.
Note! Before using this option, be sure the vehicle
battery has a sufficient charge.
The wake-up option is automatically disabled if the
handset is not used for three consecutive days.
1. Press and hold the left button to access the Main Menu. Press the left
button to scroll to Wake-up. Select with the right button.
2. Select a time slot by placing the cursor underneath an on/off. Set the
wake-up time for that slot. The left button moves the cursor and the right
button changes the value.
3. Press and hold the right button to save the time selection and exit the
Wake-up menu.

V3 User Guide
11
Menu Options
Sleep Mode
The handset can be put into sleep mode manually or
automatically when the ignition is off. This
conserves the handset battery.
To put the handset into sleep mode manually, press and hold both
buttons. To put the handset into sleep mode automatically:
1. Press and hold the left button to access the Main Menu. Press the left
button to scroll to Sleep. Select with the right button.
2. The sleep menu contains 4 pre-programmed times: 5,30,60 and 90
minutes. Use the left button to scroll and select the time.
3. Press and hold the right button to save the time selection and exit the
Sleep menu.
Time
The time of the handset can be adjusted when
changing time zones and daylight savings time.
This time adjustment is primarily for the Wake-up
feature and does not change the times in the Dates
menu.
1. Press and hold the left button to access the Main Menu. Press the left
button to scroll to Time. Select with the right button.
2. The current time is displayed with the option to increment the time by
+\- 0.5 to 3.0 hours. Press the right button to increase the time [+] and
the left button to decrease [-].
3. Press and hold the right button to save the time setting and exit the Time
menu.

12 V3 User Guide
Language Selection
The V3 is available in multiple languages. The
selections are made at the time of order and
programmed at the factory.
For more information on the additional languages
that are available, contact your dealer.
1. Press and hold the left button to access the Main Menu. Press the left
button to scroll to Language. Select with the right button.
2. Use the left button to scroll through the languages. Stop at the new
language selection.
3. Press and hold the right button to save the language selection and exit
the Language menu.

V3 User Guide
13
Maintenance & Troubleshooting
Accessing maintenance functions
V3’s system maintenance functions can only be accessed by your dealer
using a System Code provided from ACS. This code is randomly
generated and changes daily. The use of this function is stored in the
log.
Servicing the Vehicle
When the vehicle requires service and an interlock is installed, a Dealer
Code provided from your dealer can be used to start the motor. This
code is randomly generated and changes daily. The use of this code is
stored in the log.
Calibration
Yearly calibration is required to maintain optimum breath test accuracy.
The handset displays a message 14 days before calibration is due.
Calibration is performed with either a breath alcohol simulator or a gas
alcohol reference.
MAINTENANCE & TROUBLESHOOTING

14 V3 User Guide
Troubleshooting Table
The following table lists basic problems that may occur, along with their
solutions. For other problems, contact your dealer.
If V3... You should...
Will not turn on Check the vehicle battery
Displays an error code Refer to the table of messages on the next
page
Aborts a breath test Retry the test, or investigate the Abort code
Is in permanent lockout Contact your dealer
Requires service Contact your dealer
Table of contents
Other ACS Test Equipment manuals

ACS
ACS DRIVESAFE Use and care manual

ACS
ACS DRIVESAFE User manual

ACS
ACS WR3 User manual

ACS
ACS ALCOSENTRY User manual

ACS
ACS ALCOCHECK Use and care manual

ACS
ACS Alcolock WR2 Installation and operating manual

ACS
ACS Alcoscan User manual

ACS
ACS WR3 User manual

ACS
ACS A1410 PULSAR User manual

ACS
ACS ALERT J4X User manual

ACS
ACS ALCOLOCK IR User manual

ACS
ACS A1212 MASTER User manual

ACS
ACS WR3 User manual

ACS
ACS SAF'IR EVOLUTION User manual

ACS
ACS ALCOLOCK LR User manual

ACS
ACS Alcocheck User manual

ACS
ACS UK1401 User manual

ACS
ACS ALCOLOCK B-2 Series Use and care manual

ACS
ACS ALCOLOCK LR Programming manual

ACS
ACS UK1401 User manual