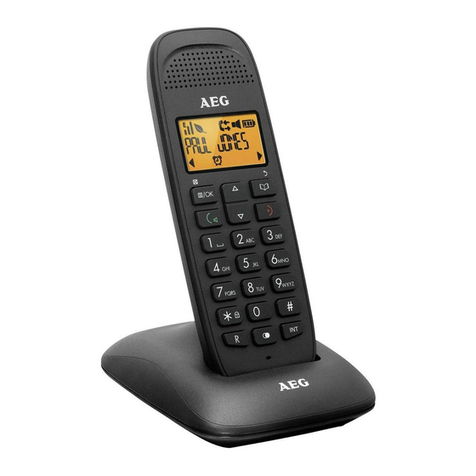
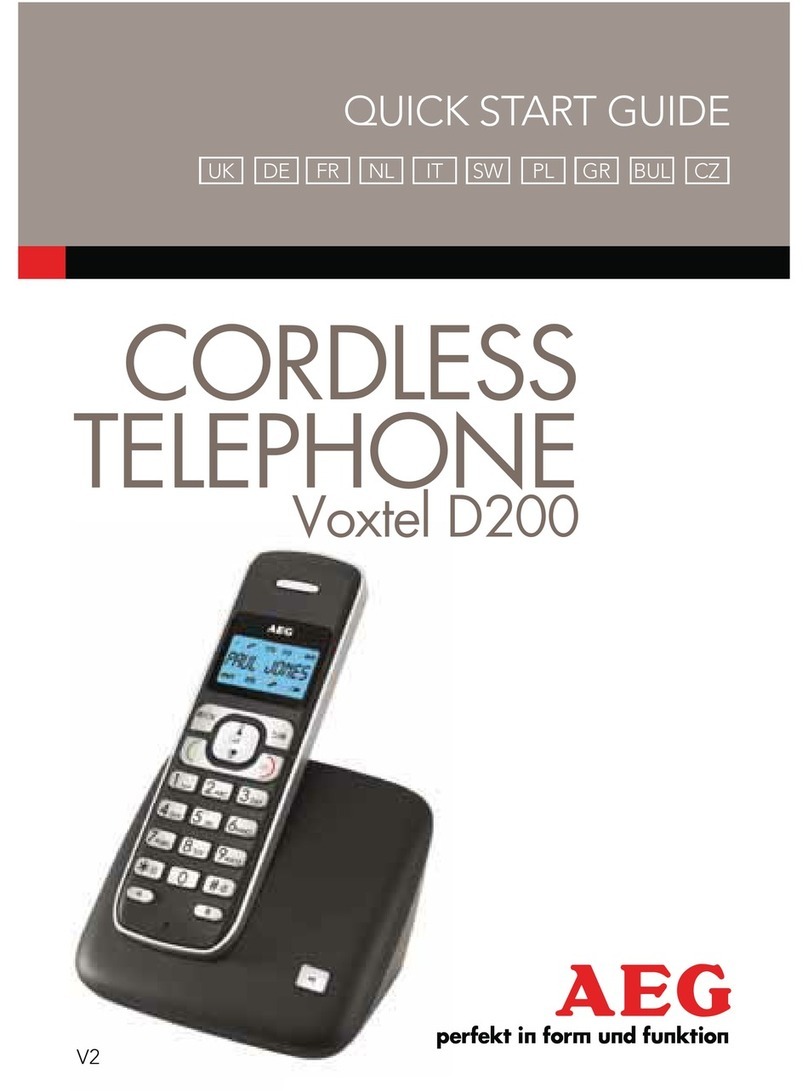
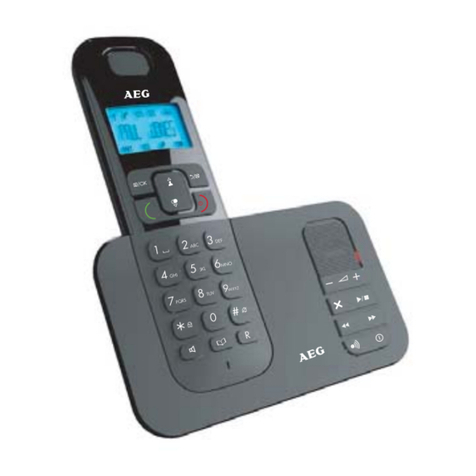
AEG D 7000 User manual

AEG
D 5000 / D 7000
Cordless DECT Phone with Caller Identification (CID)
D 7000 with built-in digital answering machine
Instruction Manual
06/02wh

2
CE Declaration
0700
This cordless, analogue DECT – telephone D5000/D7000, complies with the requirements of the EC
guidelines:
99/5/EG Guideline for radio facilities and telecommunication terminals
The conformity evaluation process has been carried out according to Appendix II of the EC guideline
99/5/EG.
The conformity of the telephone with the above mentioned guidelines is certified by the EC sign.
This unit corresponds to unit class 1.
Due to the existing differences between public telecommunication networks of different states, this
authorisation in itself does not constitute an unconditional guarantee for the successful operation of
this unit on every network terminal point.
Eggenstein, 24.06.2002
………………………………….
Ralph Kimmig
ITM Technology AG
Siemensstr.2
D-76344 Eggenstein
Designated use:
This unit is authorised for being switched into the public analogue telephone network and must be
used exclusively for telephoning in living and business areas. Anybody can switch it on via the
telephone connection unit (TAE) and operate it.. Any other use is deemed as not designated use.
Unauthorised alterations or modifications, which are not described in this handbook, are not
admissible.
These operating instructions are for information purposes. Their content is not part of the contract. All
specified data states only normal values. The described equipment and options can differ dependant
on country-specific requirements. Technical alterations reserved.
Copyright: ITM Technology AG
All rights reserved
The complete or partial duplication of this handbook is only permitted with the written approval of ITM
Technology AG.

3
TABLE OF CONTENTS
CE Declaration .......................................................................................................................... 2
TABLE OF CONTENTS .......................................................................................................... 3
Delivery extent ........................................................................................................................... 6
Notes on safety........................................................................................................................... 6
Description................................................................................................................................. 7
Menu Structure ................................................................................................................................. 7
Brief Overview .................................................................................................................................. 8
D 7000 Base station..................................................................................................................................... 10
Features............................................................................................................................................ 10
Delivery Settings.............................................................................................................................. 11
Installation............................................................................................................................... 13
Power Supply/ Battery.................................................................................................................... 13
Telefone Line ................................................................................................................................... 13
Beltclip ............................................................................................................................................. 13
Replacing the battery...................................................................................................................... 14
Out of range..................................................................................................................................... 14
Switching off handset.................................................................................................................................. 15
Subscribing a Handset to a Base Set .............................................................................................15
Subscribing the Handset to a D 5000 or D 7000 Base Set........................................................................... 15
Removing a Handset from a Base Set ........................................................................................... 16
Selecting a Base ............................................................................................................................... 16
Settings..................................................................................................................................... 17
Day/ Time......................................................................................................................................... 17
Selection Mode ................................................................................................................................ 18
Language.......................................................................................................................................... 18
Setting of Flash Time ...................................................................................................................... 18
Programming the PIN Code........................................................................................................... 19
Locking / Unlocking the Keypad ................................................................................................... 19
Switching On/Off Key Click........................................................................................................... 20
Setting the Earpiece Volume.......................................................................................................... 20
Setting the Ring Volume of the Handset ....................................................................................... 21
Setting the Ring Volume of an Internal Call ............................................................................................... 21
Setting the Ring Melody of the Handset ....................................................................................... 22
Setting the Ring Volume of the Base .......................................................................................................... 22
Pause Key......................................................................................................................................... 23
Call Barring..................................................................................................................................... 24
Switching On Call Barring .......................................................................................................................... 24
Switching Off Call Barring.......................................................................................................................... 24
Factory Reset (reset handset to default)........................................................................................25
Telephoning ............................................................................................................................. 25

4
Answering Calls .............................................................................................................................. 25
Answer an External Call.............................................................................................................................. 26
Answering an Internal Call.......................................................................................................................... 26
Hands free Calling .......................................................................................................................... 26
External Call.................................................................................................................................... 27
Block Dialing ................................................................................................................................... 27
Redialing .......................................................................................................................................... 27
Last Number Redial..................................................................................................................................... 27
Redial of the 5 Last Numbers...................................................................................................................... 27
Dialing a Number from the Phone Book....................................................................................... 28
External comfort functions ............................................................................................................ 28
Call waiting and toggle................................................................................................................................ 28
Call-back and toggle.................................................................................................................................... 28
Three-party-conference ............................................................................................................................... 29
Intercom........................................................................................................................................... 30
Transferring a Call to Another Handset....................................................................................... 30
Internal Comfort Functions ........................................................................................................... 30
Transferring and Holding a Call.................................................................................................................. 30
Call Back and Toggle .................................................................................................................................. 31
Conference Call (3-Party-Call).................................................................................................................... 31
Direct Call (Baby Call) ................................................................................................................... 31
Programming the Direct Call Number......................................................................................................... 31
Activating of the Direct Call ....................................................................................................................... 32
Deactivating of the Direct-Call.................................................................................................................... 32
Calling the Handsets from the Base Set ( Paging)........................................................................ 32
Call Duration Display ..................................................................................................................... 32
Mute ................................................................................................................................................. 32
Phone Book.............................................................................................................................. 33
Alphanumerical Keypad................................................................................................................. 33
Entries in the Phone Book .............................................................................................................. 33
Searching Phone Book Entries....................................................................................................... 33
Editing Phone Book Entries........................................................................................................... 34
Deleting Phone Book Entries ......................................................................................................... 34
Call Log (CLIP)....................................................................................................................... 35
Viewing the Call Log ...................................................................................................................... 35
Calling a Number from the Call Log ............................................................................................ 35
Storing a Number From the Call Log into the Phone Book........................................................ 36
Deleting Single Records .............................................................................................................................. 36
Deleting All Records ................................................................................................................................... 36
Answering Machine (only D 7000)......................................................................................... 37
Answering Machine Operation...................................................................................................... 37
Switching On/Off the Answering Machine ................................................................................... 37
Settings ............................................................................................................................................. 38
Setting Day/Time......................................................................................................................................... 38
Checking the Time ...................................................................................................................................... 38
Setting Day/Time......................................................................................................................................... 38
Setting the Ring Volume ............................................................................................................................. 38

5
Setting and Checking the Ring Tone........................................................................................................... 39
Changing the Ring Tone.............................................................................................................................. 39
Setting the Operation Mode......................................................................................................................... 40
Recording a New Outgoing Message .......................................................................................................... 40
Restoring Default Outgoing Messages (1 and 2)......................................................................................... 41
Automatic Reset .......................................................................................................................................... 41
Renewed Operation Start............................................................................................................................. 41
Showing Received Messages....................................................................................................................... 41
“Memory Full”-Mode.................................................................................................................................. 42
Programming the PIN Code ........................................................................................................................ 42
Operation ......................................................................................................................................... 43
Receiving Messages .................................................................................................................................... 43
Playing Back of Messages and Memos ....................................................................................................... 43
Repeating the Current Message................................................................................................................... 43
Playing Back the Previous Message............................................................................................................ 43
Playing Back the Next Message .................................................................................................................. 43
Selecting and Deleting Messages ................................................................................................................ 44
Deleting all Received Messages .................................................................................................................. 44
Loudspeaker Function / Taking the Call...................................................................................................... 44
Recording a Personal Message (Memo) ...................................................................................................... 44
Remote Control........................................................................................................................ 45
Remote Control Functions ............................................................................................................. 45
Remote Control Codes Message Playback .................................................................................................. 45
Troubleshooting....................................................................................................................... 47
Guarantee * ..................................................................................................................................... 49
Maintenance .................................................................................................................................... 49
Recycling.......................................................................................................................................... 49
Technical Data................................................................................................................................. 50
Short Instruction Answering Machine: Tele-Call ................................................................. 52

6
Delivery extent
•one base
•one handset
•one battery pack, NiMH, Type AAA, 600 mAh
•one power adapter
•one telphone connection cable (TAE)
•one instruction manual
Notes on safety
Do not position the unit in the vicinity of heat sources (heater ventilators or
similar) and never expose the unit to direct sun radiation, excessive sources of dust
or vibrations.
Insert authorised, rechargeable battery packs of the same type only! Never
customary (not chargeable) batteries, as these can result in injuries to health
and persons!
Insert the rechargeable battery pack correctly polarised; observe the note on
the battery pack and in the battery pack compartment!
Use battery packs of the type stated in the operating instructions only!
The function of medical units could be impaired. Observe the conditions of the
environment (doctors surgeries)
The handset can cause an unpleasant humming tone in hearing aids.
Do not place the base in bathrooms or shower rooms. The location of the
base should have a room temperature between +5°C and +35°C and a
humidity between 25% and 85%.
Use only the supplied power adapter, as stated in the operating instructions.
Dispose of the battery packs and the telephone in an environmentally
friendly way!

7
Description
Menu Structure
MENÜ
INTERCOM INT_
TAST EINST
TELEF BUCH
TAST SPERR
TASTENTON
FREIGEBEN SPERREN
TON EIN TON AUS
SUCHEN
NEU NR
AENDERN
LOESCHEN
_
NAME
Name & Rufnummer
Name &
Rufnummer
Name &
Rufnummer
RUFMELODIE
INTERN
EXTERN RUFLAUTST 0...9;0MELODIE 1...9
MELODIE 1...9 RUFLAUTST 1...9
DIREKT
NUMMER
_
EINSTELLEN
PIN CODE
SUB BASIS
SPERREN
FLASH
MT ABMELD
BASIS WAHL
Sprache
TAG / ZEIT
DEUTSCH
AUTO
SPANISH
NIEDERL
FRANZOES
ENGLISCH
JAHR
MONAT
TAG
STUNDE
MINUTE
MANUELL BASIS _
SUCHEN
SUCHEN
SUB PIN MT ABMELD_
LANG KURZ
SUB PIN SPERREN 1...5
HS -----
WIEDERHOLE
CODE NEUCODE ALT
ZURUECKST SUB PIN
BASIS _ SUCHEN Kennung
SUB PIN
EIN / AUS
WAHLVERF MFV / TON
IWV / IMPULS
BASIS STAT MELODIE 1-.9;0 RUFLAUTST 1...9;0

8
Brief Overview
12
5 1
11 2
10 3
4
9
13
8
6
7 14
19
15 17
16
18

9
20
21
22 23
26 25
27
31 32 28 24 29 30
1. LCD display
2. Line key to pick up a call and to hang
3. Arrow right key to scroll the call log or the menu, to activate/ deactivate the
speakerphone, to view the call log and to set the ring of volume and melody
4. Program key to open menus and submenus
5. Phone book key to enter numbers into the memory
6. Pause / redial key P/tt to insert a pause and to redial one of the five last
numbers dialed
7. Microphone
8. Volume / ring key to set the listening volume and to select the ring
volume and melody of the handset
9. Alphanumerical keypad to dial numbers and to enter names in the phone
book
10. Mute / delete key to switch on/off the microphone and to delete the call
log, messages and to exit menus and submenus
11. Arrow left key Í/ R – to scroll the call log or the menu and to access info
services (if available), to set the ring melody and volume, to transfer calls, for
call back and toggle
12. Earpiece
13. Battery compartment
14. Handset charge contacts
15. Paging / subscription key to call a handset and to subscribe a handset
to a base set
16. Line / charge indicator
17. Power jack
18. Telephone line jack
19. Base charge contacts

10
D 7000 Base station
20. Line / charge display
21. LED-display “memory full“
22. + / - key to set the ring of volume of the earpiece
23. LED display to switch on the answering machine and for new messages
24. play back key of messages and pause during the play back
25. Go to the next message and recording of a personal message (Memo)
26. Paging- / subscribing key to call a handset and to subscribe a handset
27. play back of the previous message / go back to the begin of the message and
recording of an own outgoing message
28. ¦display and setting of the answering machine time
29. key to switch on/off the answering machine and switch between modus –
outgoing message with recording / only outgoing message and to store the own
outgoing messages in the memory
30. ±delete key
31. key ( at the bottom of the unit) to set the number of ring signals for the
automatic recording of incoming messages
32. key ( at the bottom of the unit) for outgoing message and setting of the PIN
Features
Handset D 5000 / D7000
DECT, GAP
LCD display with 3 lines ,11 characters, display :12 digits und 10 icons
5 display languages
Display lighting
Standby time : 200 hours
Talk time: 12 hours
Phone book for 20 entries (10 characters and 25 digits)
Redial memory of 5 last numbers dialled (max. 25 digits each)
Ring volume: 10 levels for external call (0 for no ring)
9 levels for internal call (levels 1-9), 9 Ring melodies
Earpiece volume control: 5 levels
Dial preparation with edit function
Phone book editing during conversation
Call timer
External call priority
Hands free calling
Key lock
Auto Standby
Flash recall: user programmable 100ms/300ms
Pause of 3 seconds
Mute (with indication)
Direct call/ Baby phone feature
Out of range warning: Audible beep and visual indication
Battery low warning: Audible beep and visual indication
Power save mode
Detachable belt clip
Paging
Intercom

11
Subscribing 5 handsets possible
Subscribing one handset to 4 base stations possible
Transferring external-internal-internal
Three party conference extern-intern-intern
Caller identification type 1 FSK and DTMF with automatic identification
Phonebook matching
Support name and numbers
Date time stamping
Call log for 30 records (10 characters + 25 digits)
Deleting call log (selective or collective)
Storing numbers from the call log into the phone book
Redialing from the caller list
Base D5000
Ring volume signal
Status display
Base D7000
Ring volume signal
Status display
Built-in answering machine
Volume: 4 levels
Recording time: 11 minutes
Date- and time-display for incoming messages
2 Modes – only outgoing message or outgoing message with recording of incoming
messages
2 digital outgoing messages in the memory, can be changed by recording of own
messages with each max. 2 minutes
New messages displayed
Message memory due to power failure (Flash memory)
Memory full displayed
Fast forward and rewind feature
Play back pause
Setting of ring signals 2 - 9 rings, economy feature
Remote pickup and -setting
Three-digit entry code for the remote control
Delivery Settings
One Handset subscribed to the Base Set
PIN 0000
Base ring volume 5
Handset ring volume 3
Extern melody 1
Intern melody 5
Flash time 300ms
Battery supplied, not insert
Language German
Answering machine modus 1, 3 Calls, Day: Sunday, Time 12:00, (only D 7000)

12

13
Installation
Power Supply/ Battery
For maximum battery capacity, charge the battery for the first time at least 20 hours
without connecting the telephone line.
1. Insert the power plug in the power jack (17) in the back 17
of the base set. 18
2. Plug the adaptor into a power outlet. (230V~).
3. Open the battery compartment (13). (Fig. a).
4. Install the battery into the compartment. (Fig. b).
Be sure of the correct polarisation!
5. Close the battery compartment. (Fig. c).
6. Install the handset on the base set. The line/ charge indicator
(20) will light up.
Telefone Line
1. Plug the Telefone line cord into the Telefone line jack (18) in the back of the base
set.
2. Plug the other end of the telephone line cord (TAE) in the telephone wall outlet.
( F-code).
The telephone is now operational.
Beltclip
1. Slide the belt clip over the back of the handset up to the notches.
2. To remove the belt clip lift one end from a notch.
Notches belt clip

14
Replacing the battery
1. Open the battery pack compartment. (picture a)
2. Take off the empty batteries.
3. Insert the new battery pack correctly polarised. (picture b)
4. Close the battery pack compartment. (picture c)
Important: Batteries are dangerous, chemical waste. Used batteries cannot be
thrown away with household refuse but have to be disposed of in a responsible
and environmentally friendly manner!
Special battery collection!
Batteries are poisonous. Keep them away from children!
$100% recharged
&50% recharged
%+ warning tones: weak battery
Out of range
1. Warning tone will be heard if handset is out of range. The display will show
SEARCHING and the antenna symbol gwill blink.
2. Go nearer to the Base Set.
3. When you hear warning tone and antenna symbol g lights permanently, the
contact is restored.

15
Switching on handset
1. The handset is switched off.
2. Press the Menu button (4). The display will show SEARCH.
3. The Handset is subscribed to the Base Set again. The Handset is switched on
again when the display shows 00/00 NCHR or BU1 HS1.
Switching off handset
1.The handset is switched on.
2. Press Menu button (4).
3. Press arrow keys Í(11) or Î(3), until ON/OFF is shown on the display.
4. Press menu button (4).
5. The Handset power will switched off, dialing numbers or making calls is not
possible anymore.
With D 7000 the answering machine remains activated even if the handset is
turned off!
Subscribing a Handset to a Base Set
To a D 5000/ D 7000 base set 5 handsets can be subscribed. You can also
subscribe the handset to another GAP compatible DECT base set. The RFPI of the
base set is the universal code for all GAP compatible DECT base sets.
Important: If you use a D 5000 or D 7000 telephone, the additional Handset have to
be subscribed to the base. (description below)
The answering machine is independent.
Subscribing the Handset to a D 5000 or D 7000 Base Set
1. The handset is in standby (no tone).
2. Press 10 seconds the page/subscribe key (15 or 26) until the line/charge
indicator (16 or 20) starts flashing quickly.
3. Now the base set is in subscribing mode. All following operations must be
performed as long as the line/charge indicator /(16 or 20) is flashing quickly
(approximately 1 minute). Although the indicator is flashing, the phone
works normally.
4. Press the menu key (4).
5. Press the arrow key Í(11) or Î(3) until BASE SUB is displayed.
6. Press the menu key B (4).
7. BASE is displayed.
8. Enter the number (1 to 4) which will be assigned to this base set by pressing
the numerical keys.
9. SEARCHING is displayed and the antenna symbol is flashing.
10. The RFPI –Code of the Base Set is displayed and the Handset emits a tone
when it recognises the Base.

16
11. Press the menu key (4).
12. PIN is displayed.
13. Enter the 4 digits of the PIN of this Base Set by pressing the numerical keypad
(default 0000).
14. Press the menu key (4).
15. The Handset is subscribed to this Base.
Subscribing the Handset to Another (GAP compatible DECT) Base
1. The handset is in standby (no tone).
2. Read the Instruction manual of your base to set it to subscribing mode.
3. Continue from item 4 under Subscribing the Handset to a D 5000 or D 7000
Base Set above.
Removing a Handset from a Base Set
A handset can be deprogrammed from a base set. This feature enables you
to remove a defective handset and to replace it by a new one.
NOTE: You can only remove a handset from a base set with another handset
that is subscribed to the same base.
1. The handset is in standby (no tone).
2. Press the menu key (4).
3. Press the arrow key Í(11) or Î(3) until SETTING is displayed.
4. Press the menu key (4).
5. DATE/TIME is displayed.
6. Press the arrow key Í(11) or Î(3) until REMOVE HS is displayed.
7. Press the menu key (4).
8. SUB PIN is displayed.
9. Enter the PIN code by pressing the numerical keys.
10. Press the program key (4).
11. REMOVE HS — is displayed.
12. Enter the number of the handset (HS1 to HS5) you want to remove by
pressing the numerical keys.
13. Press the menu key B (4).
14. SEARCHING is displayed, then the selected handset is removed.
Selecting a Base
If the handset is subscribed to several base sets, it can only operate on one at
a time. Therefore it has to select a base set.
Automatic Base Selection
The handset will operate on the first base set found.
1. The handset is in standby (no tone).
2. Press the menu key B (4).

17
3. Press the arrow key l(11) or k (3) until SETTING is displayed.
4. Press the menu key B(4).
5. DATE/TIME is displayed.
6. Press the arrow key l(11) or k (3) until BASE SEL is displayed.
7. Press the menu key B(4).
8. Press the arrow key l (11) or k (3) until AUTO is displayed.
9. Press the menu key B(4).
10. SEARCHING is displayed and the antenna symbol is flashing.
11. The handset emits a tone and returns to standby. It has found a base set.
Manual Base Selection
1. Same procedure as under Automatic Base Selection above up to item 8.
8. Press the arrow key l(11) or k (3) until MANUAL is displayed.
9. Press the menu key B (4).
10. The display shows BASE_.
11. Enter the number of the base set you want to use by pressing the numerical
keys.
12. Press the menu key B (4).
13. SEARCHING is displayed and the antenna symbol is flashing.
14. The handset emits a tone and returns to standby. It uses the selected base
set.
NOTE: To select a base set, the handset already has to be subscribed to it.
Settings
Day/ Time
If the day and time are not transmitted by the public telephone network, you
have to program these settings manually, otherwise the call log will not
register the day and time the call came in. In case of doubt, please ask your
provider.
1. The phone is in standby mode (no tone).
2. Press the menu key B (4).
3. Press the arrow key l(11) or k (3) until SETTING is displayed.
4. Press the menu key B(4).
5. DATE/TIME is displayed
6. Press the menu key (4). The display shows YEAR and the year number
(for ex. 00 for 2000).
7. Enter the last two figures of the year with the numerical keys (2001 -> 01).
8. Press the menu key B(4). MONTH is displayed.
9. Enter the number of the month (01-12) with the numerical keys.
10. Press the menu key B(4). DAY is displayed.
11. Enter the number of the day (01-31) with the numerical keys.
12. Press the menu key B (4). HOUR is displayed.
13. Enter the hour (00-24) with the numerical keys.
14. Press the menu key B(4). MINUTE is displayed.
15. Enter the minutes with the numerical keys.
16. Press the menu key B(4) to confirm.

18
NOTE:
Please check the date/time setting after the battery has been disconnected
or dead. Set again, if necessary.
Selection Mode
There are two selection modes:
•MFV (tone selection) – standard today
•IWV (pulse selection) – only necessary for older telephones
1. The handset is in standby (no tone).
2. Press the menu key B (4).
3. Press the arrow key l (11) or k (3) until SETTING is displayed.
4. Press the menu key B(4).
5. DATE/TIME is displayed.
6. Press the arrow key l (11) or k (3) until DIAL MODE is displayed.
7. Press the menu key B(4). TONE or PULSE is displayed.
8. Press the arrow key l (11) or k (3) to set the selection mode you want to use.
9. Press the menu key B (4) to confirm.
NOTE: For quick and reliable phone operation we recommend tone dialing.
Factory/default setting is tone dialing.
Language
You can choose between five languages to display the menus: English, French,
German, Dutch and Spanish. Default setting is German (DEUTSCH). To set the
language, proceed as follows:
1. The handset is in standby (no tone).
2. Press the menu key B(4).
3. Press the arrow key l(11) or k (3) until EINSTELLEN (SETTING)
is displayed.
4. Press the menu key B(4).
5. TAG/ZEIT (DATE/TIME) is displayed.
6. Press the arrow l(11) or k (3) key until SPRACHE (LAN-GUAGE)
is displayed.
7. Press the menu key B(4).
8. The set language is displayed.
9. Press the arrow key l(11) or k (3) to select the language
you want to use.
10. Press the menu key B (4) to confirm the selected language.
Setting of Flash Time

19
You can program a LONG (300ms) or SHORT (100ms) line interruption on the R-
key. Some services will not operate with a short delay, such as call waiting
management for instance. But for some professional applications or extensions,
setting to SHORT may be necessary. If used on a PABX, the right flash time must be
set according to the PABX’s user manual.
1. The handset is in standby (no tone).
2. Press the menu key B(4).
3. Press the arrow key l (11) or k (3) until SETTING is displayed.
4. Press the menu key B (4).
5. DATE/TIME is displayed.
6. Press the arrow key l(11) or k (3) until FLASH is displayed.
7. Press the menu key B (4).
8. LONG is displayed: the delay is set to LONG; or
SHORT is displayed: the delay is set to SHORT.
9. Press the arrow key l (11) or k (3) to select your choice.
10. Press the menu key B (4) to confirm your choice.
Programming the PIN Code
Some features are only accessible after entering a PIN code. This feature
enables you to secure access to your settings or certain features and to prohibit
operation of handsets which are not subscribed to this base set. The PIN
code consists of 4 digits. The default PIN code is 0000.
Modifying the PIN code:
1. The handset is in standby (no tone).
2. Press the menu key B(4).
3. Press the arrow key l (11) or k (3) until SETTING is displayed.
4. Press the menu key B (4).
5. DATE/TIME is displayed.
6. Press the arrow key l(11) or k (3) until PIN CODE is displayed.
7. Press the menu key B (4).
8. OLD CODE is displayed.
9. Enter the old PIN code by pressing the numerical keys.
10. Press the menu key B(4).
11. NEW CODE is displayed.
12. Enter the new PIN code by pressing the numerical keys.
13. Press the menu key B (4).
14. AGAIN is displayed
15. Enter the new PIN code again.
16. Press the menu key B (4).
17. The handset emits a confirmation tone to confirm storage of the new PIN code.
NOTE: If you have forgotten your PIN code, you have to run a complete reset!
Locking / Unlocking the Keypad

20
This feature enables you to prevent numbers from being called accidentally.
When the keypad is locked, only the menu key B(4) is operative and KEY
LOCKED is displayed.
1. The handset is in standby (no tone).
2. Press the menu key B(4).
3. Press the arrow key l(11) or k (3) until KEY SETUP is displayed.
4. Press the menu key B(4).
5. KEY LOCK is displayed.
6. Press the menu key B(4).
7. The set keypad mode is displayed:
UNLOCK: the keypad is unlocked; or
LOCK: the keypad is locked.
8. Press the arrow key l(11) or k (3) to select your choice.
9. Press the menu key B(4) to confirm your choice.
Switching On/Off Key Click
The handset emits a tone each time you press a key. You can switch off key
click.
1. The handset is in standby (no tone).
2. Press the menu key B(4).
3. Press the arrow key l(11) or k (3) until KEY SETUP is displayed.
4. Press the menu key B(4).
5. KEY LOCK is displayed.
6. Press the arrow key l(11) or k (3) until KEY CLICK is displayed.
7. Press the menu key B(4).
CLICK ON is displayed: key click is on; or
CLICK OFF is displayed: key click is off.
8. Press the arrow key l(11) or k (3) to select your choice.
9. Press the menu key B(4) to confirm your choice.
Setting the Earpiece Volume
This features enables you to set the volume of the earpiece.
Table of contents
Other AEG Cordless Telephone manuals

AEG
AEG Spirit 100 User manual

AEG
AEG Voxtel D81 User manual

AEG
AEG Designer 10 User manual

AEG
AEG voxtel D550BT User manual

AEG
AEG Voxtel D85 twin User manual

AEG
AEG Voxtel S100 User manual

AEG
AEG Voxtel S110 Combo User manual

AEG
AEG Beat 15 User manual

AEG
AEG Voxtel D505 User manual

AEG
AEG VOXTEL D500 User manual

AEG
AEG Voxtel D155 User manual

AEG
AEG voxtel D550BT Instruction manual

AEG
AEG Voxtel S120 User manual

AEG
AEG Voxtel S100 User manual

AEG
AEG Voxtel S100 User manual

AEG
AEG Elegant User manual

AEG
AEG Lloyd Combo15 Instruction manual

AEG
AEG Birdy User manual

AEG
AEG Boomerang 10 User manual

AEG
AEG Voxtel S105 User manual