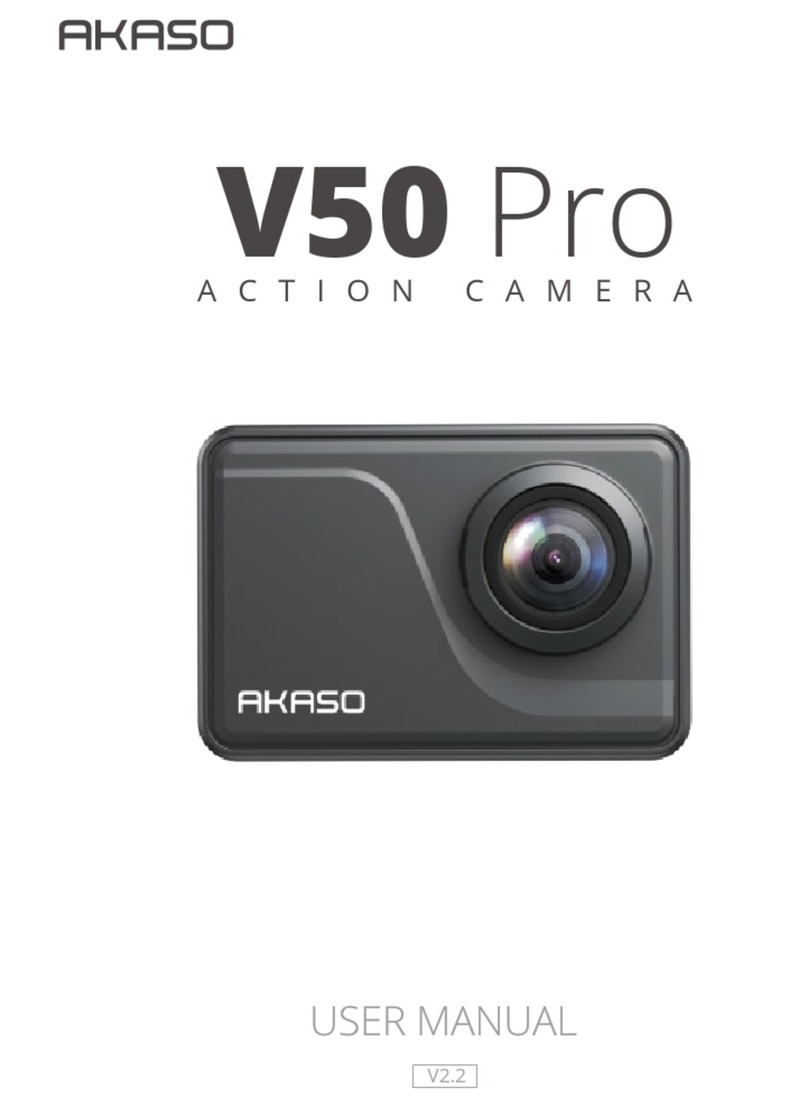
Akaso V50 Pro SE User manual

USER MANUAL
AKASO V50 Pro Action Camera

YOUR V50 PRO
01 02
1
10
2
6
11
5
7
8
9
12
1413
4
3
1. Power / Mode Button
2. Shutter / Select Button
3. MIC
4. Wi-Fi Indicator
5. Micro HDMI Port
6. MicroSD Slot
7. Mini USB Port
8. Lens
9. Operating Indicator
10. Touch Screen
11. Speaker
12. Tripod Hole
13. Battery Door
Note: Camera does not record sound when it is in the waterproof case.
English

GETTING STARTED
Welcome to your AKASO V50 Pro. To capture video and photos, you need a microSD
card (sold separately).
MICROSD CARDS
Use brand name memory cards that meet these requirements:
• microSD, microSDHC, or microSDXC
• Class 10 or UHS-III rating
• Capacity up to 64GB (FAT32)
Note:
1. Please format the microSD card first in this camera before using. To keep your microSD
card in good condition, reformat it on a regular basis. Reformatting erases all of your
content, so be sure to offload your photos and videos first.
2. FAT32 format microSD card stops recording when the storage of each file is over 4GB
and starts to record again on a new file.
POWERING ON AND OFF
To Power On:
Press and hold the Mode button for three seconds. The camera beeps while the camera
status light is on. When information appears on the LCD display or the camera status
screen, your camera is on.
To Power O:
Press and hold the Mode button for three seconds. The camera beeps while the camera
status light is off.
SWITCHING MODE
To Switch Mode:
Turn on the camera, tap Mode Shift icon or press Mode button to switch mode.
To Exit Mode:
Press Mode button to exit mode.
TURNING ON / OFF Wi-Fi
To turn on Wi-Fi
Turn on camera, swipe down from the top of the screen with your finger or tap shortcut
key to access to menu. Then tap Wi-Fi icon to turn on Wi-Fi. You can also enter General
Setting to turn on Wi-Fi.
To turn o Wi-Fi
Press and hold Shutter button for 5 seconds to turn off Wi-Fi.
There are 4 modes: Video, Photo, Playback and Setting.
OVERVIEW OF MODES
Video Mode
Video Mode is the default mode when you turn on the camera.
In Video Mode, press Shutter button, the camera starts recording video. Press Shutter
button to stop recording video.
03 04
M
4K/30fps
Video Mode
Video Resolution
Menu
Mode Shift
Image Stabilization
Shotcut Key
Battery Capacity
M
Beep Mic Speaker RF Wi-Fi

PHOTO MODE
Press Mode button once to switch to Photo Mode after you turn on camera.
In Photo Mode, press Shutter button, the camera takes a photo.
Playback Mode
Press Mode button twice to switch to Playback Mode.
Setting Mode
Press Mode button three times to switch to Setting Mode.
Video Setting
1. Video Resolution: 4K / 30fps, 2.7K / fps, 1080P / 60fps, 720P / 120fps
Default setting is 4K / 30fps.
Note: You cannot select 720P/120fps when Image Stabilization is ON. When capturing
video at high resolutions or high frame rates in warm ambient temperatures, the camera
may become warm and use more power.
2. Codec: H.264 / H.265
Default setting is H.264.
A video codec is an electronic circuit or software that compresses or decompresses digital
video. It converts uncompressed video to a compressed format or vice versa.
According to multiple studies, HEVC, High Efficiency Video Coding (H.265) should deliver
up to 50% better compression than H.264 in video on demand (VOD) applications, which
means better quality at half the bit rate. In live encoding, which obviously has to be
performed in real time, the initial expectations are a 35% bandwidth reduction at similar
quality levels. Alternatively, HEVC can also enable larger resolution movies, whether 2K or 4K.
CUSTOMIZING YOUR V50 PRO
05 06
Setup
Video Photo
Effect General
Exit / Back
Shotcut Key
Setting
M
14m
Mode Shift
Shotcut Key
Playback
M
14m
Mode Shift
Video file
Photo file
Video file 0/0
Delete
Exit / Back
Shotcut Key
M
14m
Battery Capacity
Photo Resolution
Mode Shift
Photo Mode

In addition, encoding existing SD and HD content with HEVC rather than H.264 will add to
cost savings and/or the ability to stream higher quality video to lower bit rate connections.
3. ImageStabilization: On / Off
Default setting is off.
This setting adjusts the footage to offset for motion during capture. The result is smoother
footage, especially in activities with relatively small but fast motion including cycling,
motorcycling, and handheld uses.
4. Video File Length: Unlimited / 1 Min / 5 Min
Default setting is Unlimited.
Loop recording allows your camera to overwrite old files with new files. Once the memory
card becomes full, the camera will delete the first video file to make room for the latest
file. For example, if the setting for loop recording is “1 Minute”, then the camera will create
video clips of 1 minute in length, and a 1-minute clip will be deleted when the camera
needs more memory.
5. Time Lapse Interval: Off / 1 Sec / 3 Sec / 5 Sec / 10 Sec / 30 Sec / 1 Min
Default setting is off.
Time Lapse Video creates video from frames captured at specific intervals. This option lets
you capture a time lapse event and immediately view or share it as a video. Time Lapse
Video is captured without audio.
Select 3 seconds means recording 3 seconds to get one frame per second.
For example: If you select 4K/30FPS and 3 seconds, you need to record 90 seconds, then
you can get 1 second video for 4K/30FPS.
6. Time Lapse Duration: Unlimited / 5 Min / 10 Min / 15 Min / 20 Min / 30 Min / 60 Min
Default setting is Unlimited.
Note: If you want to set Time Lapse Duration, please turn on Time Lapse Interval first.
7. Slow Motion Movie: On / Off
Default setting is off.
Slow motion is an effect in film-making whereby time appears to be slowed down.
Note: If you want to select Slow Motion Movie, please turn off Image Stabilization first,
then choose 720P / 120fps under Video Resolution.
8. Fast Motion Movie: Off / 2x / 4x / 6x / 10x / 15x
Default setting is off.
Action that appears to move faster than normal on the screen, accomplished by filming
the action at less than normal speed in the camera and then projecting it at normal speed.
9. Wind NoiseReduction: On / Off
Default setting is off.
Turn on Wind Noise Reduction, it can lower the noise to an acceptable level.
10. Scene Mode: Manual / Water / Riding / Winter / Diving / Night
Default setting is Manual.
11. Date Stamp: Off / Date / Date&Time
Default setting is Date&Time.
If you select Date&Time, this camera adds date stamp to the videos you take.
12. Auto Low Light: On / Off
Default setting is Off.
Auto Low Light mode will automatically adjust settings according to lighting conditions to
achieve the best low light performance. Even if you move back and forth between bright
and dark environments, you do not need to manually adjust the camera settings.
Photo Settings
1. Resolution: 20MP / 16MP / 14MP / 10MP / 8MP / 5MP / 2MP
Default setting is 14MP.
2. Time Lapse Interval: Off / 3 Sec / 5 Sec / 10 Sec / 30 Sec / 1 Min
Default setting is off.
Time Lapse Photo captures a series of photos at specified intervals. Use this mode to
capture photos of any activity, then choose the best ones later.
07 08
3. Time Lapse Duration: Unlimited / 5 Min / 10 Min / 15 Min / 20 Min / 30 Min / 60 Min
Default setting is Unlimited.
Note: If you want to set Time Lapse Duration, please turn on Time Lapse Interval first.
4. Photo Burst: Off, 3 shots / 1s, 7 shots / 2s, 15 shots / 4s, 30 shots / 8s
Default setting is off.
Burst captures up to 30 photos in 8 seconds, so it is perfect for capturing fast-moving
activities.
5. Delay Timer: Off / Delay 2s / Delay 10s
Default setting is off.
A Delay timer gives a delay between pressing the shutter release and the shutter's firing.
It is most commonly used to let photographers to take a photo of themselves (often with
family).
6. Date Stamp: Off / Date / Date&Time
Default setting is Date&Time.
If you select Date&Time, this camera adds date stamp to the photos you take.
7. Scene Mode: Manual / Outdoor / Indoor / Portrait / Landscape / Night
Default setting is Manual.
8. Picture Quality: S-Fine/ Fine/ Normal
Default setting is S-Fine.
9. Long Exposure: Off / 1 Second / 2 Second / 5 Second / 8 Second / 30 Second /
60 Second
Default setting is off.
Long exposures are easiest to accomplish in low-light conditions, but can be done in
brighter light using neutral density filters or specially designed cameras.
ectSetting
1. AE Meter: Center / Average / Spot
Default setting is Center.
In photography, the metering mode refers to the way in which a camera determines
exposure. Cameras generally allow the user to select between center, average or spot
metering modes. The different metering modes allow the user to select the most
appropriate one for use in a variety of lighting conditions.
2. Filter: Off / Black&White / Sepia / Vivid / Natural / Negative / Warm / Cool / Red /
Green / Blue
Default setting is None.
3. White Balance: Auto / Daylight / Shade / Tungsten Light / White Fluorescent
Default setting is Auto.
White Balance lets you adjust the color temperature of videos and photos to optimize for
cool or warm lighting conditions. When you change this setting, the LCD display
immediately shows you the effect on your image.
4. EV: -2.0 / -1.0 / +0.0 / +1.0 / +2.0 (Exposure Value)
Default setting is +0.0.
By default, your camera uses the entire image to determine the appropriate exposure
level. However, Exposure lets you select an area that you want the camera to prioritize
when determining exposure. This setting is particularly useful in shots where an important
region might otherwise be over- or underexposed.
When you change this setting, the LCD display immediately shows you the effect on your
image. If you change modes, the camera returns to using the entire scene to determine
the correct level of exposure.
5. ISO: Auto / 50 / 100 / 200 / 400 / 800 / 1600
Default setting is Auto.
ISO determines the camera’s sensitivity to light, and creates a trade-off between brightness
and resulting image noise. Image noise refers to the degree of graininess in the image.
In low light, higher ISO values result in brighter images, but with greater image noise.
Lower values result in lower image noise, but darker images. When you change this setting,
the LCD display immediately shows you the effect on your image.
09 10

General Setting
1. Control: Mic / Speaker / Brightness
You can adjust the mic, speaker and brightness of your V50 Pro.
2. Sounds: Shutter: ON / OFF
Boot-up: ON/ OFF
Beep: ON/ OFF
Default setting is on.
You can turn on or off the shutter, boot-up, beep sounds.
3. Distortion Calibration: ON/ OFF
Default setting is off.
Turn on Distortion Calibration, it can correct the image distortion.
4. Angle: Super Wide / Wide / Medium / Narrow
Default setting is Super Wide.
The angle refers to how much of the scene (measured in degrees) can be captured
through the camera lens. Super Wide angle captures the largest amount of the scene,
while Narrow angle captures the least.
5. Power Frequency: 50Hz / 60Hz
Default setting is 50Hz.
6. Diving Mode: ON / OFF
Default setting is off.
Turn on Diving Mode, it can compensate for the lack of red light in underwater scenes.
Diving Mode is designed to be used in tropical and blue water, optimized for use between
10 and 80 feet.
7. WIFI: ON / OFF
Default setting is off.
8. RF: ON / OFF (Remote)
Default setting is off.
9. Date & Time: MM / DD / YY HH / MM / AM or PM
Default setting is MM / DD / YY HH / MM / AM or PM.
10. Screen Saver: OFF / 1Min / 3Min / 5Min
Default setting is 1Min.
Turns off the LCD display after a period of inactivity to save battery life. To turn on the LCD
display again, press any button on the camera.
11. Auto Power Off: OFF / 1Min / 3Min / 5Min
Default setting is 3Min.
Powers off your V50 Pro after a period of inactivity to save battery life.
12. Quick Record: ON / OFF
Default setting is off.
If you turn on Quick Record, the camera records video automatically after you turn on
V50 Pro.
If you turn on Quick Record and use it as a dash cam, the camera will turn on automatically
if you start your car and will turn off if you stop your car.
13. USB: Storage / PC Camera
If you connect this camera to computer, please select ‘Storage’.
If you want to use this camera as a PC camera, please select ‘PC Camera’.
14. Reset WiFi Setting: Yes / No
Default setting is No.
This option can erase the WiFi data of V50 Pro.
15. Language: English / German / French / Italian / Spanish / Japanese /
Simplified Chinese/ Traditional Chinese
Default setting is English.
16. Format Card: Yes / No
To keep your micro SD card in good condition, reformat it on a regular basis. Reformatting
erases all of your content, so be sure to offload your photos and videos first.
11 12

To reformat your card, please enter General Setting, then scroll through the options to
locate and tap ‘Format Card’, then tap ‘Yes’.
17. System: FactoryReset: Yes / No
System Info: V50 Pro-TJT08022018_V4
Card Info: Capacity / Free Space
FactoryReset option resets all settings to their default values.
System Info option let you check the model, version and updated time of your V50 Pro.
Card Info option let you check the capacity and free space of your microSD card.
1. Download iSmart Pro + from Google Play or Apple Store.
2. Turn on the camera, tap Shotcut Key to turn on Wi-Fi.
3. Turn on Wi-Fi of your mobile phone, connect to the Wi-Fi SSID: ‘AKASO_V50Pro_XXXXX’.
4. Enter the password: 1234567890.
5. Open the app iSmart Pro+.
Note: Please download iSmart DV app if the iSmart Pro+ app does not work.
CONNECTING TO THE ISMART PRO+ APP
1. Enter playback mode. If your microSD card contains a lot of content, it might take a
minute for it to load.
2. Tap the video or photo file icon.
3. Tap the video or photo file you want to delete.
4. Tap . The selected file will be deleted.
You can also try the following steps to delete video and photo on your V50 Pro.
1. Enter playback mode.
2. Tap the video or photo file icon.
3. Tap .
4. Tap the file you want to delete.
5. Tap again. The screen shows ‘Delete This File? Yes / No’.
6. Tap ‘Yes’. The selected file will be deleted.
DELETING VIDEOS AND PHOTOS ON YOUR V50 PRO
You can play back your content on the camera’s LCD display, your computer, TV, or
smartphone / tablet.
You can also play back content by inserting the microSD card directly into a device, such
as a computer or compatible TV. With this method, playback resolution depends on the
resolution of the device and its ability to play back that resolution.
VIEWING VIDEOS AND PHOTOS ON YOUR V50 PRO
1. Enter Playback mode. If your microSD card contains a lot of content, it might take a
minute for it to load.
2. Tap video or photo file icon.
3. Tap any video or photo file.
4. Tap Forward or Backward icon to playback video or photo files.
PLAYING BACK YOUR CONTENT
Action Camera
My AlbumCamera
Distcont and exit
Ver 1.0.10
03:00:32
FHD60
99% 25%
13 14

PHOTO VIDEO
20180907_161357.JPG
20180907_161352.JPG
20180907_161347.JPG
20180907_161241.JPG
4320 x 3240
09 / 07 / 2018
4320 x 3240
09 / 07 / 2018
4320 x 3240
09 / 07 / 2018
4320 x 3240
09 / 07 / 2018 1 files 4.16MB
1 files 4.56MB
1 files 4.51MB
1 files 4.32MB
2 Files 8.72MB
PHOTO VIDEO
20180907_161357.JPG
20180907_161352.JPG
20180907_161347.JPG
20180907_161241.JPG
4320 x 3240
09 / 07 / 2018
4320 x 3240
09 / 07 / 2018
4320 x 3240
09 / 07 / 2018
4320 x 3240
09 / 07 / 2018 1 files 4.16MB
1 files 4.56MB
1 files 4.51MB
1 files 4.32MB
2 Files 8.72MB
Do you want to download the files?
8.72MB
2 files
CANCEL OK
4
Contents
PHOTO VIDEO
20180907_161357.JPG
20180907_161352.JPG
20180907_161347.JPG
20180907_161241.JPG
4320 x 3240
09 / 07 / 2018
4320 x 3240
09 / 07 / 2018
4320 x 3240
09 / 07 / 2018
4320 x 3240
09 / 07 / 2018 1 files 4.16MB
1 files 4.56MB
1 files 4.51MB
1 files 4.32MB
OFFLOADING YOUR CONTENT TO A COMPUTER
To play back your video and photos on a computer, you must first transfer these files to a
computer. Transferring also frees up space on your microSD card for new content.
To offload files to a computer using a card reader (sold separately) and your computer’s
file explorer, connect the card reader to the computer, then insert the microSD card. You
can then transfer files to your computer or delete selected files on your card. Note that
you must use a card reader to offload photos or audio files.
OFFLOADING YOUR CONTENT TO SMARTPHONE OR TABLET
1. Open the ‘iSmart Pro+’ app.
2. Tap ‘Folders icon’ at the left corner of the bottom screen.
3. Tap ‘ ’ at the top screen.
4. Tap the files you want to download.
5. Tap ‘ ‘ at the top screen. The screen shows ‘Do you want to download the files?
CANCEL / OK’.
6. Tap ‘OK’ icon.
OFFLOADING YOUR CONTENT
To keep your microSD card in good condition, reformat it on a regular basis. Reformatting
erases all of your content, so be sure to offload your photos and videos first.
1. Press and hold Mode button for 3 seconds to turn on V50 Pro.
2. Enter General Setting.
3. Scroll through the screen to find ‘Format Card’ option.
4. Tap ‘Format Card’, the screen shows ‘Yes / No.’
5. Tap ‘Yes’, the screen shows ‘Please wait’. Then you format your microSD card successfully.
REFORMATTING YOUR MICROSD CARD
Follow these guidelines to get the best performance from your camera:
1. For best audio performance, shake the camera or blow on the mic to remove debris
from the microphone holes.
2. To clean the lens, wipe it with a soft, lint-free cloth. Do not insert foreign objects around
the lens.
3. Don’t touch the lens with fingers.
4. Keep the camera away from drops and bumps, which may cause damage to the parts
inside.
5. Keep the camera away from high temperature and strong sunshine to avoid being
damaged.
MAINTENANCE YOUR CAMERA
If the battery reaches 0% while recording, the camera saves the file and powers off.
To maximize battery life, follow these guidelines when possible:
• Turn off Wireless Connections
• Capture video at lower frame rates and resolutions
• Use Screen Saver setting.
MAXIMIZING BATTERY LIFE
15 16

The camera contains sensitive components, including the battery. Avoid exposing your
camera to very cold or very hot temperatures. Low or high temperature conditions may
temporarily shorten the battery life or cause the camera to temporarily stop working
properly. Avoid dramatic changes in temperature or humidity when using the camera, as
condensation may form on or within the camera.
Do not dry the camera or battery with an external heat source such as a microwave oven
or hair dryer. Damage to the camera or battery caused by contact with liquid inside the
camera is not covered under the warranty.
Do not store your battery with metal objects, such as coins, keys or necklaces. If the
battery terminals come in contact with metal objects, this may cause a fire.
Do not make any unauthorized alterations to the camera. Doing so may compromise
safety, regulatory compliance, performance, and may void the warranty.
WARNING: Do not drop, disassemble, open, crush, bend, deform, puncture, shred,
microwave, incinerate or paint the camera or battery. Do not insert foreign objects into
the battery opening on the camera. Do not use the camera or the battery if it has been
damaged - for example, if cracked, punctured or harmed by water. Disassembling or
puncturing the battery can cause an explosion or fire.
BATTERY STORAGE AND HANDLING Power Button
Press the Power Button for 3s to turn on / off the remote.
How to Connect the Remote to Camera?
1. Press Power / Mode Button to turn on the camera.
(QWHU6HWXS*HQHUDOWXUQRQWKH5)
3. Turn on the remote.
Power Button
Video Button
Photo Button
Splashproof only, not waterproof
REMOTE
Attach your camera to helmets, gear and equipment.
MOUNTING YOUR CAMERA
17 18

For any inquires with AKASO products, please feel free to contact us, we will respond
within 24 hours.
E-mail: [email protected]
Tel: (888) 466-9222 (US) Mon-Fri (except holiday) 9am-5pm (EST)
Ocial website: www.akasotech.com
CONTACT US
19 20
English

Batteriefach
Micro HDMI Slot
Mini USB Slot
Stativloch
Linse
Wassergeschütztes
Gehäuse
V50 Pro
Griff /
Halterung
Schutzgehäuse
Befestigung 1
Befestigung 6 Befestigung 7 Befestigung 8
Befestigung 3
Befestigung 5
Befestigung 10
Befestigung 4 Befestigung 9
Tuch für Linse
Helmbefestigung
Anbindungen
Befestigung 2
Binden Fernbedienung
LadegerätBatterie USB-Kabel
Strom- / Modus-Taste Auslöser / Auswahltaste
WLAN-Anzeige
MIKROFON
Micro SD Slot
Bedienungsanzeige Lautsprecher
Touchscreen
Was ist Enthalten
Kameratasten & Funktionen
Befestigen Sie Ihre Kamera an Helmen, Ausrüstung und Geräte
Befestigen Ihre Kamera
EK7000Plus
Deutsch
21 22

Stromtaste
Drücken Sie die Stromtaste für 3 s, um die Fernbedienung ein-/auszuschalten.
So verbinden Sie die Fernbedienung mit der Kamera
1. Drücken Sie die Strom- / Modus-Taste, um die Kamera einzuschalten.
2. Rufen Sie (LQVWHOOXQJHQ$OOJHPHLQ auf und schalten Sie RF ein.
3. Schalten Sie die Fernbedienung ein.
Stromtaste
Videotaste
Fototaste
Nur spritzwassergeschützt, nicht wasserdicht
Fernbedienung
Willkommen zum Verwenden ihrer $.$62$FWLRQ.DPHUD. Zum Filmen oder
Aufnehmen von Bildern ist eine Micro SD-Karte (nicht im Lieferumfang enthalten)
erforderlich.
0LFUR6'.DUWHQVSH]LILNDWLRQHQ
MicroSD / Micro SDHC / Micro SDXC
Klasse 10 / UHS-I
Bis zu 64GB (FAT32)
Formatieren Sie zuerst die SD-Karte auf dieser Kamera, bevor Sie sie verwenden.
Durch regelmäßige Formatierung der SD-Karte bleibt die Karte in einwandfreiem
Zustand. Stellen Sie vor dem Formatieren sicher, dass Sie alle Dateien auf Ihrer
SD-Karte sichern.
Batterie
Bitte stellen Sie sicher, dass der Akku bei der ersten Verwendung voll ist.
Laden Sie den Akku auf: Schließen Sie die Kamera an einen Computer oder eine
USB-Stromversorgung an. Beim Laden bleibt das Licht eingeschaltet. Bei voller
Ladung wird das Licht ausgeschaltet.
(LQ$XVVFKDOWHQ
Zum Einschalten drücken Sie die Strom- / Modus-Taste. Zum Ausschalten
drücken und halten Sie die Strom- / Modus-Taste.
$QZHLVXQJH
23 24

hEHUEOLFNEHU*UXQGOHJHQGH)XQNWLRQHQ
(VJLEW0RGL9LGHR)RWR:LHGHUJDEHXQG(LQVWHOOXQJ
9LGHRPRGXV ist der Standardmodus nach dem Einschalten der Kamera.
Drücken Sie den $XVO|VHU$XVZDKOWDVWH die Kamera beginnt mit der
Videoaufnahme. Währenddessen blinkt das Statuslicht und ein Piepton wird von
der Kamera ausgegeben.
Drücken Sie den $XVO|VHU$XVZDKOWDVWH um die Videoaufnahme zu beenden.
M
4K/30fps
Videomodus
Videoauflösung
Menü
Moduswechsel
Bildstabilisierung
Ziehen Sie mit den Fingern vom oberen Bildschirmrand nach unten durch, um
auf das Menü zuzugreifen
Shortcut-Taste
9LGHRPRGXV
Modus
Video Foto
Wiedergabe Einstellungen
Zurück
Einstellungen
Video Foto
Effekt Allgemein
Batteriekapazität
M
Beep Mic Speaker RF Wi-Fi
Drücken Sie die Strom / Modus-Taste wiederholt, um zum Fotomodus zu
wechseln.
Foto aufnehmen: Drücken Sie im Fotomodus die $XVO|VHU$XVZDKOWDVWH, um
Fotos aufzunehmen. Die Kamera gibt ein Kamerageräusch von sich, wenn Sie es
im Einstellungsmodus eingeschaltet haben.
Um Videos auf der Kamera zu überprüfen, drücken Sie wiederholt die Strom- /
Modus-Taste, um zum Wiedergabemodus zu wechseln.
Drücken Sie die $XVO|VHU$XVZDKOWDVWH, um die gewünschte Wiedergabe zu
starten.
Um Videos zu löschen, drücken Sie den Auslöser 5 Sekunden lang. Das Menü
zum Löschen wird angezeigt.
Drücken Sie dann die $XVO|VHU$XVZDKOWDVWH, um die gewünschten Videos zu
löschen.
Wiedergabemodus
Fotomodus
M
14m
Batteriekapazität
Fotoauflösung
Moduswechsel
Fotomodus
Shortcut-Taste
Wiedergabe
M
14m
Shortcut-Taste
Moduswechsel
Video file
Fotodatei
Videoodatei 0/0
Löschen
Verlassen / Zurück
25 26

9LGHRDXIO|VXQJ 4K / 30fps, 2.7K / 30fps,
1080P / 60fps, 720P / 120fps
&RGHF H.264 / H.265
%LOGVWDELOLVLHUXQJEin / Aus
/lQJHGHU9LGHRGDWHL Unbegrenzt/ 1 Min/ 5 Min
=HLWUDIIHULQWHUYDOO Aus / 1 Sek / 3 Sek / 5 Sek /
10 Sek / 30 Sek / 1 Min
9LGHRHLQVWHOOXQJHQ
9LGHRHLQVWHOOXQJHQ
Videoauflösung
Codec
Bildstabilisierung
So löschen Sie ein Video (2 Methoden)?
1. Berühren Sie das 9LGHRGDWHL6\PERO und wählen Sie das Video aus, das Sie
löschen möchten. BerührenSie dann das /|VFKHQ6\PERlund wählen Sie „Ja“.
2. Berühren Sie das 9LGHRGDWHL und das /|VFKHQ6\PERO, um das Video
auszuwählen, das Sie löschen möchten. Berühren Sie dann das /|VFKHQ
6\PERO und wählen Sie „Ja“.
So löschen Sie ein Foto (2 Methoden)?
1. Berühren Sie das )RWRGDWHL6\PERO und wählen Sie das Video aus, das Sie
löschen möchte., Berühren Sie dann das /|VFKHQ6\PERO und wählen Sie „Ja“.
2. Berühren Sie das Fotodatei- und das /|VFKHQ6\PERO, um das Video
auszuwählen, das Sie löschen möchten. Berühren Sie dann das /|VFKHQ
6\PERO und wählen Sie „Ja“.
Einstellungsmodus
Setup
Video Foto
Effekt Allgemein
Verlassen / Zurück
Shortcut-Taste
Einstellungen
M
14m
Moduswechsel
Berühren Sie das (LQVWHOOXQJVV\PERO, Sie gelangen zu 9LGHRHLQVWHOOXQJHQ
Fotoeinstellungen, Effekteinstellungen und $OOJHPHLQH(LQVWHOOXQJHQ.
$(0HWHUZentrum / Durchschnitt / Spot
),/7(5Keiner / Schwarz / Weiß / Sepia /
Lebhaft / Natürlich / Negativ / Warm /
Kalt / Rot / Grün / Blau
:HLDEJOHLFKAuto / Tageslicht / Schatten /
Wolframlicht / Weiß fluoreszierend
(9-2.0 / -1.0 / +0.0 / +1.0 / +2.0
,62Auto / 50 / 100 / 200 / 400 / 800 / 1600
Effekt
=HLWUDIIHUGDXHU Unbegrenzt / 5 Min / 10 Min / 15 Min / 20 Min / 30 Min / 60 Min
=HLWOXSHQILOP Ein / Aus
=HLWUDIIHUILOP Aus / 2x / 4x / 6x / 10x / 15x
:LQGJHUlXVFKUHGX]LHUXQJ Ein / Aus
6]HQHQPRGXV Manuell / Wasser / Reiten / Winter / Tauchen / Nacht
'DWXPVVWHPSHO Aus / Datum / Datum&Zeit
$XWR6FKZDFKHV/LFKW Ein / Aus
+LQZHLV 1. Wenn Sie Zeitlupenfilm verwenden wollen, stellen Sie bitte zuerst die
Bildstabilisierung aus und wählen Sie dann 720P / 120fps unter Videoauflösung.
2. Wenn Sie die Zeitrafferdauer einstellen wollen, schalten Sie bitte zuerst den
Zeitrafferintervall ein.
$XIO|VXQJ20MP / 16MP / 14MP / 10MP / 8MP/
5MP / 2MP
=HLWUDIIHULQWHUYDOOAus / 3 Sek / 5 Sek / 10 Sek /
30 Sek / 1 Min
=HLWUDIIHUGDXHUUnbegrenzt / 5 Min / 10 Min /
15 Min / 20 Min / 30 Min / 60 Min
)RWRDXVO|VHUAus / 3 Bilder / 1 Sek / 7 Bilder /
2 Sek / 15 Bilder / 4 Sek / 30 Bilder / 8 Sek
9HU]|JHUXQJVWLPHUAus / Verzögerung 2 Sek / Verzögerung 10 Sek
'DWXPVVWHPSHOAus / Datum / Datum&Zeit
6]HQHQPRGXVManuelle / Outdoor / Indoor / Porträt / Landschaft / Nacht
%LOGTXDOLWlWS-Fine / Fine / Normal
/DQJ]HLWEHOLFKWXQJ Aus / 1 Sekunde / 2 Sekunden / 5 Sekunden / 8 Sekunden /
30 Sekunden / 60 Sekunden
Fotoeinstellungen
Fotoeinstellungen
Auflösung
Zeitrafferintervall
Zeitrafferdauer
Effekteinstellungen
AE Meter
FIL TER
Weißabgleich
6WHXHUXQJMikrofon / Lautsprecher / Helligkeit
.OlQJHAuslöser: Ein / Aus Boot-up: Ein/Aus Biep: Ein / Aus
9HU]HUUXQJVNDOLEULHUXQJAus / Ein
:LQNHOSuperbreit / Breit / Mittel / Eng
6WURPIUHTXHQ]50Hz / 60Hz
$OOJHPHLQ
27 28

7DXFKHQPRGXVEin / Aus
:/$1Ein / Aus
5)Aus / Ein (Fernbedienung)
'DWXP=HLWYY / MM / DD / HH / MM
%LOGVFKLUPVFKRQHUAUS / 1Min / 3Min / 5Min
$XWR$EVFKDOWHQAUS / 1Min / 3Min / 5Min
6FKQHOOH$XIQDKPHAus / Ein
86%Speicher / PC Kamera
:/$1(LQVWHOOXQJHQ]XUFNVHW]HQJa / Nein
6SUDFKHQ Englisch / Deutsch / Französisch /
Italienisch / Spanisch / Japanisch /
Vereinfachtes Chinesisch / Traditionelles Chinesisch
.DUWHIRUPDWLHUHQJa/ Nein
6\VWHP Factory-Reset : Ja / Nein
System-Info: AKASO_V50Pro_xxxxxx
Karten-Info
Kamera Einstellung
Kontrolle
Klänge
Verzerrungskalibrierung
,QZHLVWenn Sie
Verzerrungskalibrierung
verwenden wollen, stellen Sie bitte
zuerst die Bildstabilisierung aus.
.DPHUD$SS
Bevor Sie die WLAN-Funktion nutzen, installieren Sie die App Smart Pro+ zuerst
auf Ihrem Mobilgerät.
1. Laden Sie iSmart Pro+ von *RRJOH3OD\ oder dem $SSOH6WRUH herunter.
2. Schalten Sie die Kamera ein, berühren Sie die 6KRUWFXW7DVWH, um WLAN zu
aktivieren.
Nachdem das WLAN aktiviert wurde, wird auf dem Bildschirm eine Nachricht
angezeigt ‚:DUWHQDXI:/$19HUELQGXQJ’.
3. Finden Sie das WLAN-Netzwerk mit dem Namen ‚$.$62B93URB;;;;;’ auf
Ihrem Mobilgerät. Verbinden Sie es mit dem Passwort:
4. Öffnen Sie die App iSmart Pro+ auf Ihrem Mobilgerät.
.DPHUDZDUWXQJ
• Wenn sich die Kamera im Leerlauf befindet, bewahren Sie sie an einem
trockenen, schattigen Ort auf.
• Verwenden Sie Schutzhüllen, um Kratzer an Linse und IPS zu vermeiden.
• Wenn die Linse gereinigt werden muss, blasen Sie zuerst den Staub von der
Oberfläche ab und verwenden Sie dann ein Tuch oder Papier, das für die
Reinigung von optischen Geräten geeignet ist. Reinigungsmittel könnte bei
Bedarf verwendet werden.
• Bitte verwenden Sie kein organisches Lösungsmittel zum Reinigen.
• Bitte berühren Sie das Objektiv nicht mit den Fingern.
• Bitte stellen Sie die Kamera nicht an einen feuchten oder staubigen Ort.
Stromaustritt kann Brand verursachen.
• Vermeiden Sie Stöße und ein Aufprallen der Kamera. Es kann zu Schäden an
den Teilen im Inneren führen.
• Halten Sie die Kamera von hohen Temperaturen und starker
Sonneneinstrahlung fern, um Beschädigungen zu vermeiden.
• Bitte beachten Sie, dass die Kamera nach längerem Gebrauch heiß wird.
Das ist normal.
)$4
4 Die Videodateien konnten nicht auf Computern wiedergegeben werden.
$ Der Media Player unterstützt keine 4K-Anzeige.
4 WLAN-Netzwerk kann nicht in Telefon / Tablet gefunden werden.
$ 1, Schalten Sie WLAN des Telefons / Tablets aus.
2, Schalten Sie die Kamera EIN.
3, Aktivieren Sie in der WLAN-Einstellung der Kamera das WLAN.
4, Öffnen Sie die WLAN-Einstellungen auf Ihrem Gerät und versuchen Sie, eine
Verbindung zum WLAN-Netzwerk mit dem Telefon/Tablet herzustellen.
5, Wenn das Netzwerk nicht in der Liste des Telefons/Tablets vorhanden ist,
versuchen Sie nach Möglichkeit ein anderes Telefon/Tablet
6, Wenn alle oben genannten Schritte nicht funktionieren, wenden Sie sich bitte
mit einer ausführlichen Problembeschreibung an den Verkäufer. Sie werden
bereit sein, Ihnen alle Fragen zu beantworten und weiterzuhelfen.
4 Kameraaufnahmen sind verzerrt oder haben schlechte Qualität.
$ 1, Das Kameragehäuse kann Kondensation aufweisen. Versuchen Sie, die
Kamera für ein oder zwei Stunden unter die Sonne zu stellen.
2, Kameraobjektiv kann fehlerhaft sein. Kameraobjektiv kann Kratzer oder Risse
aufweisen, wodurch Videos und Fotos verzerrt erscheinen. Überprüfen Sie
die Linse nach Risse und Kratzer.
3, Der Kamerasensor ist möglicherweise fehlerhaft. Wenn Fotos und Videos
beschädigt oder verzerrt sind, ist der Sensor Ihrer Kamera möglicherweise
defekt.
4 Die Kamera funktioniert nicht mit meiner Speicherkarte.
$ 1, Versuchen Sie, die Speicherkarte in anderen Geräten zu verwenden. Wenn es
nicht funktioniert, ist die Speicherkarte möglicherweise ehlerhaft.
Wenn es auf einem anderen Gerät funktioniert, vergewissern Sie sich, dass es
sich um eine Micro SD-Karte der Klasse 10 handelt.
2, Wenn die obigen Schritte beweisen, dass die Speicherkarte funktionsfähig
ist, ist der Speicherkartensteckplatz möglicherweise defekt.
Bitte wenden Sie sich an den Verkäufer, um eine Lösung zu finden.
Für Anfragen, Probleme oder Kommentare zu unseren Produkten senden Sie
bitte eine E-Mail an die untenstehende Adresse oder rufen Sie uns an. Wir
werden Ihnen so schnell wie möglich antworten.
(PDLO[email protected]
Kontaktieren Sie Uns
Deutsch
29 30

Compuerta de
la batería
RanuraMicro HDMI
Ranura Mini USB
Hoyo para
el trípode
Lente
Carcasa a prueba
de agua
V50 Pro
Barra de
manipulación /
Poste de Montura
Protector
posterior
Montura 1
Montura 6 Montura 7 Montura 8
Montura 3
Montura 5
Montura 10
Montura 4 Montura 9
Paño para lente
Soporte de
Carcasa
Ataduras
Montura 2
Vendas Control remoto
CambiadorBatería Cable USB
Botón de encendido
/ modo
Botón Disparador / Selector
Indicador de Wi-Fi
Micrófono
Ranura Micro SD
Indicador de
funcionamiento Speaker
Pantalla táctil
¢4XH,QFOX\HOD&DMD"
%RWRQHV\)XQFLRQHVGHOD&iPDUD
Conecte su cámara al casco, equipo y equipo.
0RQWDUVX&iPDUD
EK7000Plus
Español
31 32

%RWyQGHHQFHQGLGR
Presione el %RWyQGHHQFHQGLGR por 3s para encender o apagar el control remoto.
¿Cómo conectar el control remoto a la cámara?
1. Presione el %RWyQGHHQFHQGLGRPRGR para encender la cámara.
2. Ingrese a &RQILJXUDFLyQ*HQHUDO, encienda el RF.
3. Encender el control remoto.
Botón de encendido
Botón de video
Botón de fotografía
Sólo anti salpicaduras, no resistente al agua
Control Remoto
Le damos la bienvenida para usar su Cámara Action AKASO, para grabar o tomar
fotos, la Tarjeta Micro SD (no incluida) es indispensable.
Especificaciones de la Tarjeta Micro SD:
Micro SD / Micro SDHC / Micro SDXC
Categoría 10 / UHS-I
Hasta 64GB (FAT32)
Primero formatee en esta cámara la tarjeta SD antes de usarla. Formatear la tarjeta
SD con regularidad la mantendrá en buenas condiciones de funcionamiento. Antes
de formatearla, asegúrese de respaldar todos los archivos de su tarjeta SD.
Batería
Asegúrese que la bacteria esté cargada completamente antes de usarla por
primera vez.
Carga de la batería: conecte la cámara a un computador o una fuente USB. Al
cargarse, la luz queda encendida. Al cargase completamente, la luz se apaga.
Encendido / Apagado
Para encender, presione el Botón de Encendido / Modo; para apagar, presione
y mantenga el Botón de Encendido / Modo.
,QVWUXFFLRQHV
33 34

5HVXPHQGH)XQFLRQHV%iVLFDV
([LVWHQPRGRV9LGHR)RWR5HSURGXFFLyQ\&RQILJXUDFLyQ
El modo de video es la opción por defecto al encender la cámara.
Presione el%RWyQGLVSDUDGRUVHOHFWRUla cámara comenzará a grabar video.
Mientras la luz de estado parpadeará y la cámara emitirá un sonido.
Presione el %RWyQGLVSDUDGRUVHOHFWRUpara finalizar la grabación del video.
M
4K/30fps
Modo de Video
Resolución
de Video
Menú
Modo de Cambio
Estabilización
de Imagen
Desplácese hacia abajo desde la parte superior de la pantalla con el dedo
para ir al Menú.
Tecla de atajo
0RGRGH9LGHR
Modo
Video Foto
Reproducir Configurar
Salir /
Atrás
Configurar
Video Foto
Efectos Genera
Capacidad de
la Batería
M
Beep Mic Speaker RF Wi-Fi
Presione el Botón de Encendido / Modo repetidamente para cambiar al Modo
Foto.
Tomando fotos: en el Modo Foto, presione el %RWyQGLVSDUDGRUVHOHFWRU para
tomar fotos; La cámara emitirá un sonido, si esto fué activado en la Configuración.
Para ver videos en la cámara, presione repetidamente el %RWyQGH(QFHQGLGR
Modo para cambiar al Modo de reproducción.
Presione el %RWyQ'LVSDUDGRU6HOHFWRU para reproducir el video deseado.
Para borrar videos, presione el %RWyQ'LVSDUDGRU6HOHFWRU por 5s. Se mostrará
el menú para borrar.
Luego presione el %RWyQ'LVSDUDGRU6HOHFWRU para borrar el video que quiera.
0RGRGH5HSURGXFFLyQ
Modo Foto
M
14m
Capacidad Bat
Resolución Foto
Modo de cambio
Modo Foto
Tecla de atajo
Reproducir
M
14m
Tecla de atajo
Modo de Cambio
Video file
Archivo de Foto
Archivo de Video 0/0
Borrar
Salir / Atras
26
35 36
Other manuals for V50 Pro SE
9
Table of contents
Other Akaso Action Camera manuals

Akaso
Akaso EK7000 User manual

Akaso
Akaso V50X User manual

Akaso
Akaso Brave 8 User manual

Akaso
Akaso Brave 4 User manual

Akaso
Akaso Brave 7 LE User manual

Akaso
Akaso Brave 4 User manual

Akaso
Akaso V50 Elite User manual

Akaso
Akaso Brave 7 LE User manual

Akaso
Akaso Brave 6 Plus User manual

Akaso
Akaso EK7000 User manual

Akaso
Akaso Brave 5 User manual

Akaso
Akaso Brave 7 User manual

Akaso
Akaso EK7000 Pro User manual

Akaso
Akaso EK7000 User manual

Akaso
Akaso EK7000 User manual

Akaso
Akaso V50 Elite User manual

Akaso
Akaso EK7000 User manual

Akaso
Akaso BRAVE 4 PRO User manual

Akaso
Akaso Brave 4 User manual

Akaso
Akaso V50 Elite User manual