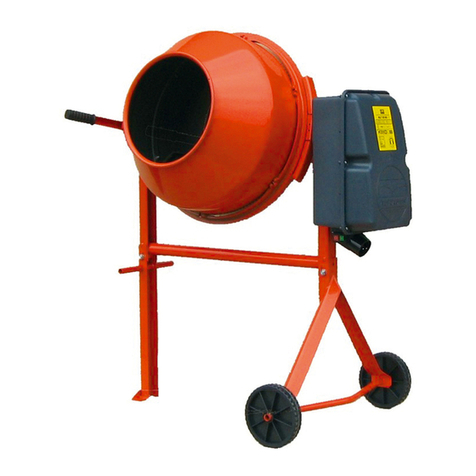
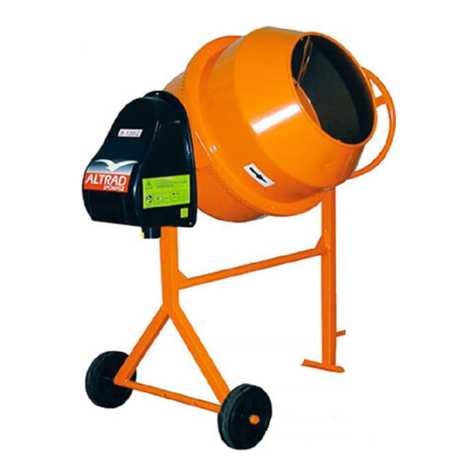
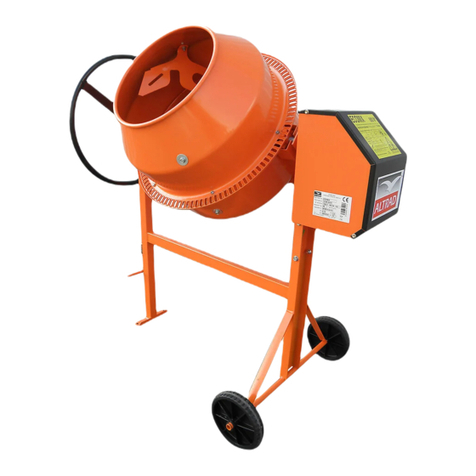
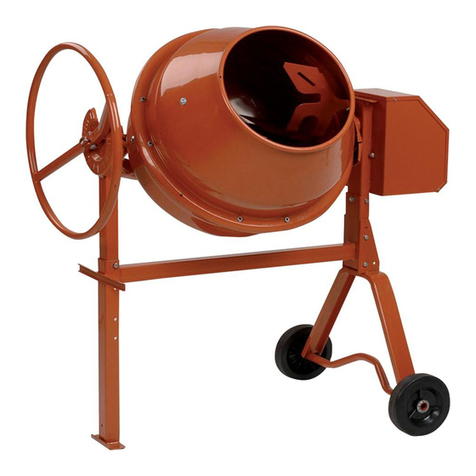
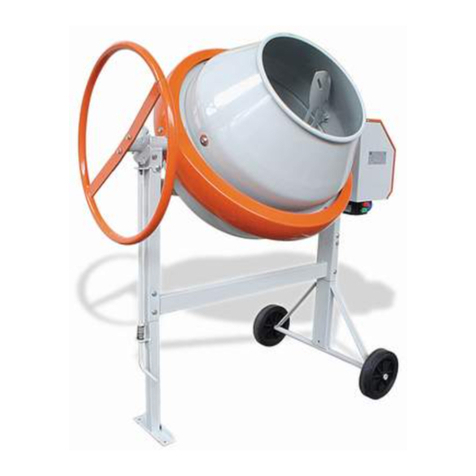
Altrad ECOMIX User manual

EE
EECC
CCOO
OOMM
MMII
IIXX
XX

NL
F
D
GB
I
E
P
2
3
7
11
15
19
23
27

1
2
345
6
7
FABRICATION DES BÉTONS ET MORTIERS
Le disque d’inclinaison possède 7 crans différents
Position 1Ouverture de la cuve vers le haut.
Position 2Malaxage à gauche.
Position 3Vidange côté gauche.
Position 4Ouverture de la cuve vers le bas.
Position 5Vidange côté droit.
Position 6 et 7 Malaxage à droite.
UTILISATION - ENTRETIEN - PIÈCES DE RECHANGE
BÉTONNIÈRE ECOMIX
F
- Positionner la cuve à l’inclinaison choisie (d’un côté ou
de l’autre). L’inclinaison la plus proche de l’horizontale
donne un meilleur malaxage des matériaux collants
(mortiers) mais réduit la capacité.
- Introduire dans la cuve un peu d’eau, ajouter les
agrégats (gravier ou sable) puis le ciment. Faire le
complément d’eau en cours de chargement. Le tableau
de dosage vous guidera dans vos travaux.La quantité
d’eau est donnée à titre indicatif, elle dépend du degré
d’humidité des agrégats.
- Laisser tourner la cuve une à deux minute environ,
pour obtenir un bon mélange. Ne pas prolonger le
malaxage au-delà de deux minutes, afin d’éviter de
centrifuger les matériaux.
- 1 pelletée = environ 4 litres , 1 brouette = 60 litres.
Les proportions ci-dessus sont données à titre indicatif
et ne peuvent en aucun cas engager la responsabilité
du fabricant.
Capacité de cuve L 130
Capacité de malaxage maximum L 110
Moteur monophasé 230V/50Hz
Puissance absorbée W 600
Longueur mm 1220
Largeur mm 700
Hauteur mm 1280
Roues pleines ø mm 160
Poids kg 48
CARACTÉRISTIQUES TECHNIQUES ECOMIX
3
Dosage des bétons et mortiers courants pour 1
sac de ciment de 25 kg
Béton de fondation
(Béton de propreté, semelle)
Béton armé courant
(dalle de compression)
Béton armé
(linteau, poutre)
Mortier (assemblage
briques, parpaings)
Mortier
(enduit, chape)
Mortier
(scellement de carrelage)
Eau
Gravier
20 mm
Sable
0,2 à 0,5 mm
50 litres
30 litres
30 litres
60 litres
50 litres
100 litres
80 litres
60 litres
50 litres
-
-
-
13 litres
environ
13 litres
environ
15 litres
environ
13 litres
environ
12 à 15 litres
environ
13 litres
environ
Test réalisé avec
Lafarge Ciments

4
F
Rep Qté
ECOMIX
Désignation
17 1 394002 Pignon moteur
18 1 334104 Plot double
19 1 334105 Plot simple
20 1 394012 Moteur IP0 - 600 W
21 1 335168 Porte de capot
22 1 399102 Flasque extérieur
23 2 009916 Circlips 30 x 2 e
24 1 399101 Fond de cuve
25 1 399113 Protège pignon
26 1 399100 Cône de cuve
27 2 399103 Palette de cuve
28 1 394066 Fil d’alimentation
29 1 394030 Joint
30 1 009923 Circlips 42 x 1,75 e
31 1 394049 Contacteur
32 2 394054 Raccord FF
33 1 9FCD8 Condensateur 8 mF
Rep Qté
ECOMIX
Désignation
1 1 391006 Châssis
2 1 391002 Pied arrière
3 1 391001 Pied avant
4 2 331007 Roue Ø 160 mm
5 2 009911 Rondelle auto frein Ø 20
6 1 391027 Capot moteur
7 1 393010 Système de blocage
8 1 399106 Etrier
9 1 393009 Palier d’étrier
10 1 393013 Volant
11 1 399104 Pignon d’entrainement
12 2 000906 Roulement 6202 2RS
13 1 399109 Axe d’entrainement
2 009857 Goupille spirale 6 x 36
14 1 394001 Roue crantée
15 1 009909 Rondelle auto frein
16 1 394004 Courroie crantée

son support, cela provoque des chutes
de tension importantes occasionnant
une surchauffe du moteur.
• La ligne doit être équipée de fusibles
ou disjoncteur pour assurer la
protection.
ATTENTION : Eviter de faire
tourner à vide une bétonnière
équipée d’un moteur électrique
monophasé; cela provoque une
surchauffe du moteur.
■ ENTRETIEN
• Après chaque utilisation, nettoyer
l’intérieur et l’extérieur de votre
bétonnière. Pour la laver avec un jet ou
un nettoyeur HP, veiller à ce que les
projections d’eau n’atteignent pas le
moteur. Pour nettoyer l’intérieur de la
cuve efficacement, utiliser une pelletée
de gravillons et de l’eau.
• Ne pas oublier de temps en temps de
huiler les paliers de rotation de l’étrier.
• Les roulements de la cuve et du pignon
d’entraînement sont graissés à vie.
■ MISE EN SERVICE
Placer la bétonnière sur un sol dur et bien
horizontal afin d’assurer à la machine une
bonne stabilité. Dégager les abords de la
machine de tout objet pouvant
occasionner un risque accidentel ou gêner
l’utilisateur.
Avant de mettre votre bétonnière
en marche, vérifier que :
◆Bétonnière à Moteur
Electrique Monophasé
• La tension du réseau est de 230 Volts
sur 2 fils.
• Capacité minimum du compteur doit être
de 5 ampères.
• L’ensemble capot moteur bénéficie de la
double isolation classe II de l’indice de
protection IP44.
• Prévoir un câble d’alimentation de deux
conducteurs de section 2,5 mm2pour
une longueur maximale de 50 m
(matériel classe II : pas de fil de terre). Si
la longueur est supérieure à 50 m,
prévoir une section de fil plus forte.
CONSIGNES DE
SÉCURITÉ
Générales
Vérifier avant la mise en
marche de votre bétonnière :
• Que tous les dispositifs de protection
sont en place et en bon état.
• Que personne n’est en contact avec la
bétonnière ou à proximité et qu’aucun
outil n’est appuyé contre.
• Ne jamais laisser un câble enroulé sur
5
F

6
F
CONSIGNES DE SÉCURITÉ
• Ne pas mettre les mains, la tête ou
quelconque outil à l’intérieur de la cuve
lorsqu’elle est en mouvement.
• Ne jamais faire fonctionner la bétonnière
sans ses protections.
• Ne pas brancher et utiliser le moteur
électrique hors de son fonctionnement
prévu capot fermé.
• Arrêter et débrancher votre bétonnière
avant toutes interventions de quelque
nature que ce soit.
• N’utiliser le mélangeur de la bétonnière
qu’avec des matériaux destinés à la
maçonnerie (Tout autre mélange d’ordre
chimique ou alimentaire est
déconseillé).
• Ne jamais remplacer une pièce
défectueuse par une pièce d’une
marque différente.
Débrancher le cordon d'alimentation
secteur avant d'ouvrir le capot.
L'appareil doit être utilisé uniquement
lorsque toutes les protections sont en
place.
Attention : Appareil doublement isolé.
Lors de réparations, la classe II n'est
préservée qu'à condition d'utiliser les
pièces d'origine et que les distances
d'isolation ne soient pas modifiées.
Le constructeur décline toute
responsabilité en cas de non respect
des consignes de sécurité et des
règles d'utilisation.
Pour toute demande de garantie,
adressez vous à votre revendeur
muni de votre facture d'achat.
■
MAINTENANCE
Le pignon d’entraînement de cuve est une
pièce d’usure de votre bétonnière. Pour
éviter toute immobilisation, il est prudent
de prévoir une pièce d’avance.
■
GARANTIE
Le Constructeur garantit votre bétonnière
pour une durée de 12 MOIS à partir du jour
d’achat. Cette garantie assure le
remplacement gratuit des pièces qui sont
défectueuses par suite d’un vice de
construction ou d’un défaut de matériel. Le
constructeur se réserve le droit
d’expertiser les pièces défectueuses.
Aucune garantie n’est accordée pour les
défectuosités causées par : une
manutention maladroite, une mauvaise
utilisation, l’emploi de pièces de rechange
étrangères ou d’un mauvais entretien. La
garantie des moteurs est accordée par le
Fabricant de ceux-ci.
■
PIECES DE RECHANGE
Pour toute commande, s’adresser au
détaillant revendeur de la bétonnière et
indiquer le type , la date de fabrication et
son numéro de série (plaque sur le capot).
Préciser la quantité, la désignation et
la référence des pièces désirées.
■
MODIFICATION DU
PRODUIT
Soucieux d’améliorer constamment la
qualité et l’efficacité de nos produits, nous
nous réservons le droit de modifier, en
cours de série, le produit ici-décrit.

BEDIENUNG - PFLEGE - EINZELTEILE
BETONMISCHMASCHINEN ECOMIX
1
2
345
6
7
HERSTELLUNG VON MÖRTEL UND BETON
Die Rasterscheibe zur Einstellung der Trommelneigung
ermöglicht 7 Rasterpositionen :
Position 1Öffnen der Mischtrommel nach oben
.
Position 2Mischen linksseitig.
Position 3Entleeren/Ruhestellung linksseitig.
Position 4Öffen der Mischtrommel nach unten.
Position 5Entleeren/Ruhestellung rechtsseitig.
Position 6 und 7 Mischen rechtsseitig.
D
Dosierung für laufenden Beton und MÖrtel
(mit einem 25 kg Zementsack).
BETON
MÖRTEL
Wasser
Kies
Sand
30 L
60 L
60 L
-
Etwa
13 L
Etwa
13 L
•Stellen Sie die gewünschte Neigungsrichtung
der Mischtrommel (nach rechts oder nach links)
ein. Neigungswinkel im Horizontalbereich
bewirken eine bessere Durchmischung, bringen
allerdings eine Verringerung der Kapazität mit
sich.
•Bringen Sie zunächst ein kleines Volumen
Wasser in die Mischtrommel ein, fügen Sie das
erforderliche Quantum Zement zu den
Zuschlagstoffen (Kies oder Sand) und beschicken
Sie damit die Trommel. Geben Sie dann während
des Beschickens weiterhin Wasser zu.
•Die Tabelle S. 1 gibt Auskunft über die
Dosierungen. Bei der Wassermenge handelt es
sich um unverbindliche Angaben; sie können je
nach Feuchtegehalt der Zuschlagstoffe variieren.
Die Tabellenwerte tragen also den Charakter
unverbindlicher Empfehlungen, für die der
Hersteller keine Gewähr übernimmt (1 Schaufel =
4 Liter ; 1 Schubkarren = 60 Liter).
•Lassen Sie die Mischmaschine etwa 1 Minute
lang laufen, um eine gute Durchmischung zu
erzielen. Lassen Sie aber den Mischgang nicht
länger als 2 Minuten andauern, sonst kommt es
zum Auszentrifugieren der einzelnen Stoffe.
Es handelt sich um unverbindliche Ausmaße,
für die der Hersteller keine Gewähr übernimmt.
7
Fassungsvermögen Mischtrommel L 130
Mischkapazität L 110
Elektromotor 230V/50Hz W 600
L mm 1220
B mm 700
H mm 1280
Rad, Durchm. ø mm 160
Gewicht mit Elektromotor kg 48
TECHNISCHE DATEN ECOMIX

8
D
ZeichQtät
ECOMIX
Bezeichnung
18 2 334104 Doppelisoliershraube
19 1 334105 Isolierschraube einfach
20 1 394012 Elektromotor IP 0
21 1 335168 Klappe/Motorhaube
22 1 399102 Flansch
23 2 009916 Ringsicherung 30x2e
24 1 399101 Unterteil Mischt.
25 1 399113 Schutzhalbteil
26 1 399100 Oberteil Mischt.
27 2 399103 Mitnehmerblech
28 1 394003 Steckdose
29 1 394030 Gummidichtung
30 1 009923 Ringsicherung 42x1,75 e
31 1 394049 Schalter
32 2 394054 Verbindung FF
33 1 9FCD8 Kondensator 8 mF
ZeichQtät
ECOMIX
Bezeichnung
1 1 391006 Montagerahmen
2 1 391002 Hinterer Stützfuß
3 1 391001 Vorderer Stützfuß
4 2 331007 Rad/Gummi
5 2 009911 Scheibe
6 1 391012 Haube
7 1 393010 Verriegelungssystem
8 1 399106 Bügelklammer
9 1 393009 Bügelklammerstütze
10 1 393013 Abnehmb. Drehrad
11 1 399104 Ritzel
12 2 000906 Wälzager 6202 EE
13 1 399109 Antriebsachse
14 1 394001 Zahnrad
15 1 009909 Scheibe
16 1 394004 Zahnriemen
17 1 394002 Motorritzel

Spritzwasserschutz), einem elektro-
magnetischen Schalter sowie einem
thermischen Abschalter.
•ACHTUNG ! Vermeiden Sie es, die
Maschine im Leerlauf zu betreiben. Das
führt zu Überhitzung des Motors.
EMPFEHLUNGEN UND
SICHERHEITSBESTIMMUNGEN
• Bei eingeschalteter Maschine darf
keinesfalls Kabel auf der Trommel
aufgerollt bleiben; dies führt zu großen
Spannungsabfällen und zur Beschädigung
des Motors.
• Kommen Sie nicht mit Kopf oder Händen
oder Werkzeugen in das Innere der
Mischtrommel, solange die Maschine läuft.
• Öffnen Sie niemals die Schutzhaube
solange die Maschine nicht vom Netz
getrennt ist.
• Schalten Sie die Betonmischmaschine aus
und trennen Sie die Maschine vom Netz
bei jedem Eingriff, gleich welcher Art.
• Setzen Sie die Maschine niemals in Gang,
wenn Schutzvorrichtungen fehlen.
• Verwenden Sie die Betonmischmaschine
nur für Baustoffe. Von der Verwendung für
jegliche Gemische anderer Art,
z.B.Chemikalien, ist abzuraten.
• Schlagen Sie niemals mit Werkzeug auf
die Mischtrommel.
• Verwenden Sie beim Auswechseln
defekter Teile niemals markenfremde
Ersatzteile.
■BETRIEBNAHME
Stellen Sie die Mörtelmischmaschine auf
festem, ebenen Untergrund auf, um eine gute
Standfestigkeit zu gewährleisten. Räumen Sie
das Umfeld der Maschine frei von sämtlichen
Gegenständen, die ein Unfallrisiko darstellen
oder bei der Arbeit an der Maschine stören
könnten.
Bevor Sie die Maschine einschalten,
überprüfen bzw. beachten Sie bitte
:
• Die Netzspannung beträgt 230 V (anliegend
an zwei Leiterphasen).
• Die Mindestkapazität muß 5 Ampere
entsprechen.
• Der Stromkreis muß mit Sicherungen bzw.
einem Schutzschalter gesichert werden.
• Die Personen müssen weder direkt in
Kontakt mit der Maschine sein noch sich in
unmittelbarer nähe aufhalten und sich davon
versichern, dab kein Werkzeug gegen die
Maschine gelehnt ist.
• Sie benötigen ein Stromzuführungskabel mit
Gummischlauchleitung H 07 RN-F oder
gleichwertiger Bauart mit 2 Leiterphasen
(Querschnitt 1,5mm2).
• Die maximale länge beträgt 50 m (Material
der Klasse II, kein Nulleiter). Bei Kabellängen
über 50 m ist ein größerer
Leiterquerschnitt erforderlich.
• Alle Schutzvorrichtungen der Maschine
müssen vorhanden und in
ordnungsgemäßem Zustand sein.
WICHTIGE BEMERKUNGEN
• Der gesamte Motorblock ist ausgestattet
mit Doppelisolierung der Klasse II und IP
44 - Schutz (allseitigem
9
D

■
PFLEGE
• Nach jeder Benutzung, reinigen Sie das
Innere der Mischtrommel mit einer
Schaufel Kies und Wasser.
• ACHTUNG ! Vor jeder Außenpflege die
Maschine ausschalten und vom Netz
trennen. Wenn ein Wasserstrahl bzw.
ein Hochdruckstrahl benutzt wird,
achten Sie bitte darauf, daß kein
Wasser in den Motor spritzt.
• Ölen Sie von Zeit zu Zeit das Lager der
Bügelklammer durch die dafür
vorgesehene Öffnung.
• Die Wälzlager der Mischtrommel und
des Antriebsritzels sind wartungsfrei,
Schmieren ist hier nicht erforderlich.
• Der Zahnkranz ist aus
hochbeständigem, unverschleißbarem
Verbundmaterial gefertigt, er ist
wartungsfrei, braucht nicht geschmiert
zu werden und trägt wirksam zum
Lärmschutz bei.
Vor dem Öffnen der Verkleidung
Netzstecker ziehen. Der Mischer darf
nur mit vollständig geschlossener
Verkleidung betrieben werden.
Achtung ! Schutzisolierte Maschine.
Schutzklasse II bleibt nur erhalten,
wenn bei Reparatur
Originalisolierstoffteile verwendet und
Isolationsabstände nicht verändert
werden.
■
WARTUNG
Das Antriebsritzel der Mischtrommel und der
Treibriemen sind Verschleißteile. Um
jegliche Ausfälle/Stillstandszeiten zu
vermeiden, sollten Sie am besten ein
entsprechendes Ersatzteil vorrätig haben.
■
ERSATZTEILE
Ersatzteilbestellungen richten Sie bitte unter
Angabe des Typs und der Typen-Nr. der
Betonmischmaschine (s. Typenschild auf der
Motorhaube) sowie der gewünschten
Anzahl, der Artikelbezeichnung und der
Artikel-Nr. der betreffenden Teile an den
Vertragshändler.
■
VERÄNDERUNGEN AN
DIESEM ERZEUGNIS
Wir sind stets um die Erhöhung der Qualität
und der Effektivität unserer Erzeugnisse
bemüht und behalten uns daher das Recht
vor, für die laufende Serie am hier
beschriebenen Produkt Veränderungen
vorzunehmen.
■
GARANTIE
Der Hersteller garantiert Ihre
Betonmischmaschine für 12 MONATE auf
der Grundlage von dem Einkaufstag. Diese
Garantie sichert den Freiersatz der
fehlerhaften Stücke infolge eines
Konstruktionsfehlers oder eines
Materialfehlers. Der Hersteller vorbehaltet
sich das Recht die Fehlstücke zu
begutachten. Keine Garantie ist vereinbart
für die Fehlerhaftigkeiten wegen : einer
ungeschickten Handhabung, einer
schlechten Benutzung, des Gebrauchs von
fremden Ersatzteilen oder eines schlechten
Unterhaltungszustand. Die Garantie des
Motors ist bei dem Motorhersteller
vereinbart.
Der Hersteller lehnt die Verantwortung
ab im Falle der Nichteinhaltung
den Empfehlungen und Sicherheits-
bestimmungen.
10
D
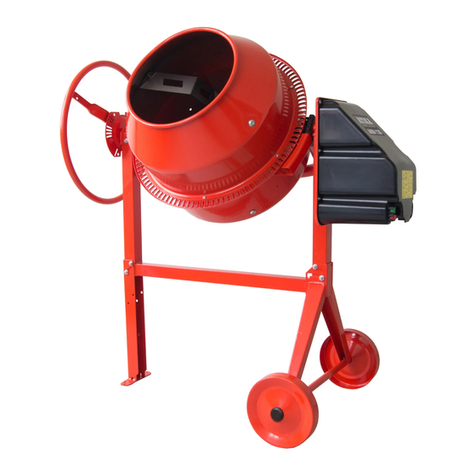
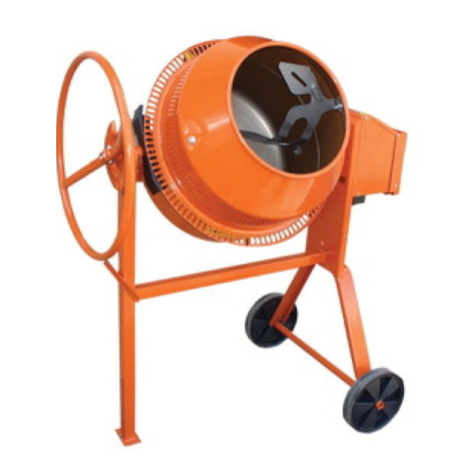
INSTRUCTIONS FOR USE - MAINTENANCE - SPARE PARTS
Concrete mixer ECOMIX
1
2
345
6
7
PRODUCTION OF CONCRETES ANS MORTARS
GB
The tilting disk has 7 different notches
Position 1
Opening of the drum upward.
Position 2
Mixing on lefthand side.
Position 3
Emptying on lefthand side and storing.
Position 4
Opening of the drum downward.
Position 5
Emptying on righthand side and storing.
Position 6 et 7
Mixing on righthand side.
- Set the drum at the selected angle (on one side
or the other). The angle the nearest to the
horizontal will provide a better mixing of the
agregates, but will reduce the capacity.
- Put some water into the drum, spread the right
quantity of cement over the agregates (gravel or
sand), and load the drum. Add some water while
loading.
- The enclosed chart will guide you in the
proportions of your works. The quantity of water is
given as an indication only ; it will depend on the
degree of humidity of the agregates.These
proportions are given as information only, and
cannot engage the responsability of the
manufacturer.
- 1 shovel = 4 litres, 1 wheelbarrow = 60 litres.
- Let the drum turn during one minute or so, in
order to obtain a good mix. Do not continue the
mixing beyond two minutes otherwise you will
centrifugate the materials.
The above sizes are for your information and
cannot engage the responsibility of the
manufacturer.
Batch for usual concrete and mortar (with
one 25 kg cementbag).
Concrete
Mortar
Water
Gravel
Sand
30 L
60 L
60 L
-
around
13 L
around
13 L
11
Drum capacity L 130
Maximum mixing capacity L 110
Single phase motor 230V/50Hz
Used power W 600
Length mm 1220
Width mm 700
Height mm 1280
Wheels ø mm 160
Weight kg 48
TECHNICAL DATA ECOMIX

12
GB
Rep Qty
ECOMIX
Designation
18 2 334104 Double support
19 1 334105 Simple support
20 1 394012 Motor IP 0
21 1 335168 Cover door
22 1 399102 Ball race
23 2 009916 Circlips 30 x 2e
24 1 399101 Drum back
25 1 399113 Protection
26 1 399100 Drum top
27 2 399103 Blade
28 1 394066 Plug
29 1 394030 Joint
30 1 009923 Circlips 42 x 1,75 e
31 1 394049 Switch
32 2 394054 Connection FF
33 1 9FCD8 Condenser 8 mF
Rep Qty
ECOMIX
Designation
1 1 391006 Frame
2 1 391002 Foot
3 1 391001 Foot
4 2 331007 Wheel
5 2 009911 Lock washer ø 20
6 1 391012 Cover
7 1 393010 SLocking system
8 1 399106 Bracket
9 1 393009 Bearing for bracket
10 1 393013 Steering wheel
11 1 399104 Pinion
12 2 000906 Ball bearing 6202EE
13 1 399109 Pin
14 1 394001 Wheel
15 1 009909 Lock washer
16 1 394004 Belt
17 1 394002 Pinion motor

■
MAINTENANCE
• After each use, clean the inside and the outside
of your mixer. If you wash it with a high pressure
cleaner, make sure that the water projections
do not reach the motor.
• For a good and efficient leaning of the drum,
use a shovel of gravels and water.
• Do not forget from time to time to grease the
bearing of the bracket, a hole is foreseen for
this.
• The bearings of the drum and of the driving axle
are greased for life.
• The slew ring is made of synthetic material,
high resistance, unalterable, maintenance and
greasing free, which participates efficiently to
the reduction of sound nuisances.
■
INSTALLATION
Install the mixer on a hard and horizontal soil
in order to ensure a good stability to the
machine.
Clear the surroundings of the machine from
all thing likely to occasion a risk of accident
or to impede the operator.
◆Before starting your mixer
make sure that :
Electric driven mixer
• The tension of the network is 230 volts on
two wires.
• Minimum capacity of the meter should be 5
Amps.
• The motor hood set benefits from double
insulation class II protection grade IP 44.
• Foresee a two wires supply cable having a
section of 2,5 mm2 for a maximum length
of 50 m (equipment class II no need for a
ground wire). If length is more than 50 m,
foresee a cable with a bigger section.
SAFETY INSTRUCTIONS
General
Before starting your mixer, check that :
• all protection devices are in position and
good condition.
• Nobody is into contact or close to the
mixer, and no tool is leaning against it.
• Never let a cable rolled on its support,
this will cause impodant drops of tension
and lead to overheating.
• The line must be fitted with fuses or
circuit breaker to ensure the protection.
• Do not plug in and use the electric motor
without making sure that the motor hood is
closed.
13
GB

SAFETY INSTRUCTIONS
• The operator must wear appropriate shoes
and working clothes.
• Do not put hands, head or any tool inside
the drum while it is running.
• Never operate the mixer without its
protections.
• Never open the hood of the electric motor
while the latter is running.
• Stop and unplug your mixer before
proceeding to any kind of interventions.
• Use your mixer only to mix materials for
construction (any other mixing of chemical
or food products is not recommended).
• Never replace a part by a non-genuine
one.
Unplug the supply cable before every
cover opening. The appliance must be
used only when all protections are
setting.
Be careful ! Doubly insulated machine.
During repairs, class II keeps
preserved only when origin parts are
used and insulation distances remain
unchanged.
Maintenance
The pinion driving the drum is a wearing
part of your mixer. In order to avoid any
immobilization, it is recommended
to foresee a replacement beforehand.
■
SPARE PARTS
For all orders, contact the nearest dealer,
and specify the type and serial number of
your mixer (plate on engine hood).
Indicate the quantity, the designation, and
the number of the parts you need.
■
MODIFICATION OF THE
PRODUCT
With the aim to constantly improve the
quality and the efficiency of our products, we
reserve the right to modify, at any moment
and without prior notice, the product
as described hereby.
■
WARRANTY
The manufacturer warranties your mixer for a
period of 12 MONTHS as from the date of
purchase. This warranty covers the free
remplacement of the parts which will be
acknowledged as defective, as the result of a
default in the construction or a default in the
material. The manufacturer reserves the
right to make a valuation of the defective
pieces. No warranty will apply to failures
caused by : an improper handling or
manoeuvring, a bad use, the use of non
genuine spare parts, or a bad maintenance.
The warranty of the engines is ensured by
the manufacturer of those.
The manufacturer takes no
responsability in the event of failure to
respect the safety instructions and
utilization rules.
14
GB

UTILIZZO - MANUTENZIONE - RICAMBI
BETONIERE ECOMIX IT
1
2
345
6
7
FABBRICAZIONE DI CALCESTRUZZO E CALCINA
Il disco di inclinazione comprende 7 posizioni differenti :
Posizion 1Apertura della vasca verso l’alto.
Posizion 2Miscelazione a sinistra.
Posizion 3Svuotamento a sinistra.
Posizion 4Apertura della vasca verso il basso.
Posizion 5Svuotamento a destra.
Posizion 6 e 7 Miscelazione a destra.
I
•Portare la vasca in posizione di carico tenendo
premuto il pedale e manovrando il volante fino al
raggiungimento della posizione desiderata.
•Introdurre dentro la vasca un po’ di acqua, riempire
di cemento e di aggregati necessari per un
impasto.Fare un’aggiunta di acqua prima di
terminare il carico. La tabella allegata vi guidera’ nel
dosaggio dei vostri lavori. La quantita’ di acqua e’ da
ritenere a titolo indicativo poiché’ deve variare a
seconda del grado di umidita’ dei componenti.
•La vasca deve girare almeno un minuto per ottenere
un buon impasto. Non prolungare la
miscelazioneoltre i due minuti per evitare la
centrifugazione dei materiali.
•Per prelevare l’impasto dalla vasca, mantenere la
macchina in rotazione, afferrare saldamente il
volante esbloccarlo premendo sull’ apposito pedale.
A questo punto ruotare il volante fino ad ottenere il
rovesciamento dell’ impasto nel recipiente
sottostante. Se durante questa operazione il peso
della vasca vincesse la forza dell’ operatore,
rilasciare immediatamente il pedale in maniera che
entri in funzione il dispositivo di blocco che agisce
sul disco di inclinazione.
Le proporzioni qui sotto sono date a titolo indicativo
e non possono in nessuno caso impegnare la
responsabilità del costruttore.
Dosaggio dei calcestruzzi e calcine correnti per
1 sacco da cemento de 25 kg
Cemento
Malta di calce
Acqua
Graniglia
Sabbia
30 L
60 L
60 L
-
13 L
circa
13 L
circa
15
Capacità vasca L 130
Capacità miscelazione L 110
Motore monofase 230V/50Hz
Potenza assorbita W 600
Lunghezza mm 1220
Larghezza mm 700
Altezza mm 1280
Ruote ø mm 160
Peso kg 48
DATI TECNICI ECOMIX IT

I
Rif Qta
ECOMIX IT
Designazione
17 1 394002 Pignone motore
18 2 334104 Isolatore doppio
19 1 334105 Isolatore singolo
20 1 394012 Motore IP 0
21 1 335168 Sportello cabina
22 1 399102 Flangia
23 2 009916 Anelli seeger 30x2e
24 1 399101 Fondo vasca
25 1 399113 Protezione
26 1 399100 Cono vasca
27 2 399103 Pala impasto
28 1 394006 Interruttore CEI
29 1 394030 Jiunto
30 1 009923 Anelli seeger 42x1,75 e
31 1 335135 Protezione volano
Rif Qta
ECOMIX IT
Designazione
1 1 391006 Telaio
2 1 391002 Assale
3 1 391001 Montante anteriore
4 2 331007 Ruota
5 2 009911 Rondella autofrenant
6 1 391012 Cabina
7 1 393010 Pedalina
8 1 399106 Braccio
9 1 393009 Supporto braccio
10 1 393013 Volano
11 1 399104 Pignone di rotazione
12 2 000906 Cuscinetto 6202EE
13 1 399109 Albero di rotazione
14 1 394001 Ruota dentata
15 1 009909 Rondella autofrenante
16 1 394004 Cinghie trapezoidali
16

IL PRESENTE LIBRETTO FORNISCE UTILI
INDICAZIONI PER IL CORRETTO
FUNZIONAMENTO E LA MANUTENZIONE
DELLA BETONIERA. ESSENDO PARTE
INTEGRANTE DELLA MACCHINA DEVE
ESSERVI ACCLUSO ALL’ ATTO DELLA
VENDITA. E’ INDISPENSABILE PRESTARE
LA MASSIMA ATTENZIONE A TUTTI QUEI
PARAGRAFI CHE ILLUSTRANO LE
ISTRUZIONI DI SICUREZZA DA SEGUIRE.
LA BETONIERA DEVE ESSERE
UTILIZZATA SOLO PER IMPASTARE
MATERIALI INERTI AD USO EDILIZIO
QUALI RENA, CEMENTO, CALCE,
ARGILLA ECC.
NON SONO AMMESSI UTILIZZI DIVERSI DA
QUANTO PRESCRITTO !
■CONTROLLI PRELIMINARI
E MESSA IN OPERA
• La betoniera deve operare solamente su
superfici rigide e orizzontali. In caso di
vento l’utilizzatore deve provvedere ad
ancorare opportunamente la macchina per
garantirne la stabilita’. La macchina e’
costruita per poter lavorare con vento fino
a 72 Km/h . Prima di iniziare il lavoro,
liberare le zone intorno alla macchina da
oggetti che possano creare disagi o rischi
di incidente all’operatore.
• Verificare che la tensione di alimentazione
sia conforme a quella richiesta dal motore.
Effettuare l’allacciamento elettrico della
betoniera tramite cavi di sezione adeguata
(n° 2 conduttori di sezione 2,5 mm2,
materiale classe II senza filo di terra), per
una lunghezza massima di 50 m, ad un
impianto munito di interruttore
differenziale. Se la lunghezza e’ superiore
prevedere un cavo con sezione
maggiorata. La capacita’ del contatore
17
I
deve essere almeno di 5 ampere. La
cabina e il motore sono realizzati in
doppio isolamento classe II, grado di
protezione IP 44 e con interruttore
elettromagnetico.
La macchina non richiede illuminazione
propria ; prevedere comunque nella zona
di utilizzo un’ illuminazione in conformita’
alle normative vigenti.
■AVVIAMENTO E UTILIZZO
• Verificare che tutti i dispositivi di
protezione (sulla corona, sul pedale di
sgancio ecc.) siano al loro posto.
• Verificare che non ci siano persone od
oggetti appoggiati alla betoniera.
ISTRUZIONI DI SICUREZZA
• Non arrotolare il cavo elettrico. Questo
provoca cadute di tensione e
surriscaldamento del motore.
• Il motore elettrico continua ad emanare
calore anche dopo lo spegnimento,
evitare quindi contatti con lo stesso fino
a raffreddamento avvenuto.
• Evitare di far funzionare a vuoto la
betoniera ; questo provoca un
surriscaldamento del motore.
• Non mettere la testa, le mani, o
qualunque altro oggetto all’ interno
della vasca quando questa e’ in
movimento.
• Non utilizzare mai la betoniera senza le
sue protezioni.
• Non aprire mai il cofano del motore
mentre questo e’ in funzione.
• Fermare la betoniera prima di effettuare
qualsiasi intervento.

• L’arresto della macchina si ottiene
premendo il pulsante rosso
dell’interruttore.
• In caso di mancanza di tensione di rete,
il successivo avviamento della betoniera
puo’ essere fatto soltanto agendo
nuovamente sul pulsante verde.
• Non sostituire mai pezzi difettosi od
usurati con ricambi non originali.
• E’ fondamentale conoscere le funzioni
ed i comandi della betoniera. Non deve
essere permesso l’utilizzo della
macchina a persone estranee. Tenere
sempre i bambini a distanza di
sicurezza.
• L’operatore e’ sottoposto (durante
l’utilizzo della betoniera) ad
inquinamento acustico. E’ necessario
pertanto che adotti adeguate misure di
sicurezza.
• Non utilizzare la betoniera in ambienti
con atmosfera esplosiva.
Disinnestare l'allaciamento elettrico prima di
aprire la cabina. L'aparecchio deve essere
utilizzato solamente quando tutte le protezioni
sono a posto.
Attenzione ! L'aparecchio doppiamente isolato.
La classe II sta preservata solamente a
condizione che, durante i riparazioni, sìano
utilizate pezzi d'origine e che le distanze di
isolamento non sìano modificate.
■
MANUTENZIONE
• Dopo ogni utilizzo pulire l’interno e
l’esterno della macchina. Assicurarsi che i
getti d’acqua non raggiungano il motore.
Per pulire l’interno della vasca utilizzare
acqua con un po’ di ghiaia.
• Lubrificare saltuariamente il tratto piano di
rotazione della staffa, tramite apposito
ingrassatore.
• I cuscinetti della vasca e del pignone di
rotazione non hanno bisogno di
manutenzione.
• La corona di rotazione e’ realizzata in
materiale ad alta resistenza, inalterabile,
senza manutenzione .
■
RICAMBI
Per le ordine, rivolgersi al dettagliante
rivenditore della betoniera e indicare il tipo e
il numero della macchina (placa suI cofano).
Precisare le quanità, la designazione e la
referenza delle pezze desiderate.
■
MODIFICAZIONE DEL
PRODOTTO
Preoccupati di migliorare sempre la qualità e
l'efficacia dei nostri prodotti, ci reserviamo il
diritto di modificare, in corso di serie, il
prodotto qui descritto.
■
GARANZIA
Il costruttore garantisce la vostra betonniera
durante 12 mesi dalla datta di compra.
Questa garanzia assicura la sostituzione
gratuita delli particolari difettosi a causa di
un vizio di fabbricazione o di un difetto di
materiale Il costrutore si reserva il dritto di
perizare i pezzi difettosi. Non è prevista
nessuna garanzia a causa di : una cattiva
manutenzione, una cattiva utilizzazione dei
pezi di ricambio non originali o di usu
impropio. La garanzia sui motori è fornita dal
fabbricante degli stessi.
Il costruttore declina tutta responsa-
bilita en caso de non rispetto de
consegne di securizza e delle regole
d'utilizzazione.
Interuttore elettromagnetico
réf. 394006
18
I

GEBRUIK - ONDERHOUD - ONDERDELEN
BETONMOLEN ECOMIX
1
2
345
6
7
FABRIKATIE VAN BETONS EN MORTELS :
De schuine schijf bestaat uit 7 verschillende inkervingen
Positie
1
Opening van de kuip naar de bovenkant.
Positie
2
Menging links.
Positie
3
Lediging aan linkse kant.
Positie
4
Opening naar de onderkant.
Positie
5
Lediging aan rechtse kant.
Positie
6 et 7
Menging rechts.
NL
•Plaats de kuip schuin volgens uw wens (langs de
ene of de andere kant). De schuining die het
dichtst bij de horizontale is geeft de beste
menging van de materialen maar herleidt de
kapaciteit.
•Breng een weinig water aan in de kuip, verspreidt
de cement over de ingrediënten (steentjes of
zand) en vul de kuip op. Breng het nodige water
aan tijdens het opvullen.
•De tabel biz. 1 zal u helpen bij het bepalen van
de dosis voor uw werken. De hoeveelheid water is
als indicatie aangegeven. Dit hangt af van de
vochtigheid van de ingrediënten. Is aangegeven
als indicatie en wordt niet ter verantwoordelijkheid
van de fabrikant gesteld.
•1 schop = 4 liter - 1 kruiwagen = 60 liter.
•Laat de kuip ongeveer 1 minuut draaien om een
goede menging te bekomen. Het draaien niet
verlengen meet meer dan twee minuten om het
centrifugeren van de materialen te voorkomen.
De boven vermelde hoeveelheden zijn
aangegeven als indicatie. De fabrikant kan
hiervoor niet verantwoordelijk gesteld worden.
Dosierung für laufenden Beton und MÖrtel
(mit einem 25 kg Zementsack).
Betonnen
Mortels
Water
Steen
Zand
30 L
60 L
60 L
-
13 L
Etwa
13 L
Etwa
19
Kapaciteit van den Kuip liter 130
Kapaciteit van den menging liter 110
Elektrisch motor 230V/50Hz W 600
Lengte mm 1220
Breedte mm 700
Hoogte mm 1280
Wielen ø mm 160
Gewicht van de elektrisch motor kg 48
TECHNISCHE EIGENSCHAPPEN ECOMIX

20
NL
NR HVD
ECOMIX
BEPALING
18 2 334104 Dubbel Kontaktstuk
19 1 334105 Eenvoudig Kontaktstuk
20 1 394012 Motor IP 0
21 1 335168 Deur motorkap
22 1 399102 Buitenkuip
23 2 009916 Cirklips 30 x 2e
24 1 399101 Bodem kuip
25 1 399113
26 1 399100 Bovenkant kuip
27 2 399103 Palet
28 1 394066 Elektrisch nemen
29 1 394030 Samengevoegd
30 1 009923 Cirklips 42 x 1,75 e
31 1 394049 Schakelaar
32 2 394054 Overgang FF
33 1 9FCD8 Condensator 8 mF
NR HVD
ECOMIX
BEPALING
1 1 391006 Chassis
2 1 391002 Achterpoot
3 1 391001 Voorpoot
4 2 331007 Rubberwiel
5 2 009911 Ring auto rem
6 1 391012 Motorkap
7 1 393010 Blokkeersysteem
8 1 399106 Beugel
9 1 393009 Lager
10 1 393013 Stuur
11 1 399104 Rondsel
12 2 000906 Rolling 6202 EE
13 1 399109 Aandrijvingsas
14 1 394001 Tandjeswiel
15 1 009909 Ring auto
16 1 394004 Tandjesriem
17 1 394002 Rondsel motor
Table of contents
Languages:
Other Altrad Mixer manuals

Altrad
Altrad ATIKA AKM 130 User manual

Altrad
Altrad LIV MLZ NG Series User manual

Altrad
Altrad BELLE MINIMIX 150 User manual

Altrad
Altrad BET ECOMIX 150 User manual

Altrad
Altrad PROMIX 1600 User manual

Altrad
Altrad B 130 User manual

Altrad
Altrad ATIKA Compact 140L User manual

Altrad
Altrad Lescha BX 135 User manual

Altrad
Altrad BELLE PREMIER PREMIER XT User manual

Altrad
Altrad LB 140 User manual