9
Service and Maintenance
GB
Before starting any maintenance or repairs, switch off motor, and isolate from the main power supply.
2QFRPSOHWLRQRIPDLQWHQDQFHFKHFNWKDWWKHPL[HUIXQFWLRQVFRUUHFWO\DQGWKDWDOOJXDUGVDUHFRUUHFWO\¿WWHG
ELECTRIC MIXER
All portable electric appliances are dangerous if abused. This machine will only operate on one voltage. Check the power supply to
ensure it corresponds to the voltage as indicated on the rating label.
Make sure that the motor is switched off before you plug it into the power supply.
230v - Always use a Residual Current Device (“RCD”), (earth leakage trip), plugged directly into the 230v socket. If using an
extension cable, plug it directly into the RCD.
110v - When using a portable transformer it must have a minimum output of 2.5kw and to continuous rated. Always use an RCD
between the 230V supply and the portable transformer.
The symbols on the ON/OFF switch are 0 (Red) = OFF and I (Green) = ON in accordance with international standards.
GEARBOX
The factory has preset the gearbox oil level. Before inspecting the gearbox oil level, make sure the gearbox is cold before removing
WKH¿OOHUSOXJ7RSXSWKHJHDUER[LQWKHPL[LQJSRVLWLRQWRWKHOHYHORIWKH¿OOHUSOXJ7RSXSZLWK(3*HDU2LORQPDFKLQHVEXLOW
before August 2006 or Silkgear 220 Synthetic Oil on machines built after August 2006.
DO NOT use an extension cable between the transformer and the power supply. Always ensure that
WKHFDEOHEHWZHHQWKHYPL[HUDQGWUDQVIRUPHULVDPLQLXPOHQJWKRIPHWUHV(QVXUHFDEOHLV¿WWHG
with cable clip to the mixer frame at all times.
WARNING
EXTENSION CABLES
If you need to use an extension cable it must be no longer than 30 metres (100 feet) in length. The wire section must be 1.5mm2
on 230v and 2.5mm2on 110v. Ensure that the extension cable is carefully laid out avoiding liquids, sharp edges and places where
vehicles might run over it. Avoid allowing the extension cable to be trapped underneath the mixer. Unroll it fully or it will overheat and
FRXOGFDWFK¿UH0DNHVXUHWKDWDQ\H[WHQVLRQFDEOHFRQQHFWLRQVDUHGU\DQGVDIH
THERMAL PROTECTION DEVICE
7KH(OHFWULFPRWRULV¿WWHGZLWKD7KHUPDO3URWHFWLRQ'HYLFH6KRXOGFLUFXPVWDQFHVDULVHZKHUH
this activates, the motor will stop. Once the thermal trip resets itself the motor will be able to be
restarted at the on/off switch.
The thermal trip reset time could vary from 2 minutes to 10 minutes.
COMBUSTION ENGINES
&KHFNRLOUHJXODUO\OHYHOHQJLQHXSZKHQGRLQJVR)RU,QLWLDOHQJLQH¿OORUWRSXSXVHD
suitable engine oil of a 10W/30 grade. In your own interests read the makers instruction
OHDÀHWLVVXHGZLWKWKHPDFKLQHEHIRUHVWDUWLQJXS
If the safety facilities are damaged or don’t function correctly the mixer must not be used.
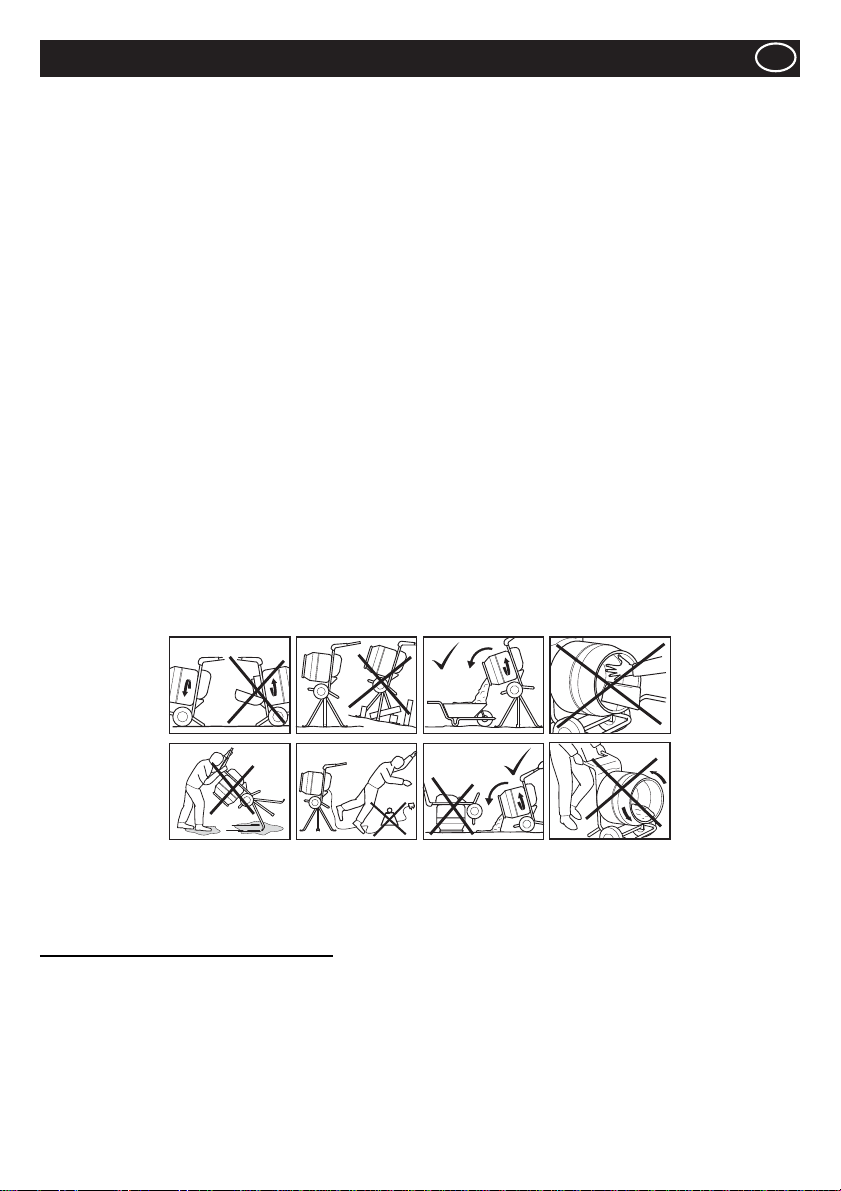
Be aware of exhaust venting directions, all exhausts vent to the left hand side of the
machinewhen viewed from the rear of the machine.To maintain correct lubrication the mixer
must always be opened on level ground.Always read the engine manufacturers manual
before starting the engine. Ensure plenty of ventilation when running the gasoline engines in a
FRQ¿QHGDUHD%HZDUHRIKRWSDUWV
NOTE:- ONLY HONDA GX120 VARIANTS HAVE A VARIABLE THROTTLE. SEE ENGINE MANUAL FOR MORE DETAILS.
DRUM
This is instantly removable by unscrewing anti-rclockwise. When replacing make sure that it is fully screwed home to the shoulder or
the shaft will break. Take care when screwing on the drum, spinning on fast may damage the gearbox.
CLEANING
Wipe off any external material. DO NOT XVHSHWUROWXUSHQWLQHODFTXHURUSDLQWWKLQQHUGU\FOHDQLQJÀXLGVRUVLPLODUSURGXFWV1HYHU
let any liquids near the engine/motor. Use 1” gravel and clean water to clean the inside of the drum. DO NOT use bricks etc. as this
will damage the drum.
FRAME
The hole on the underside of the frame is to drain away any water.
BELT
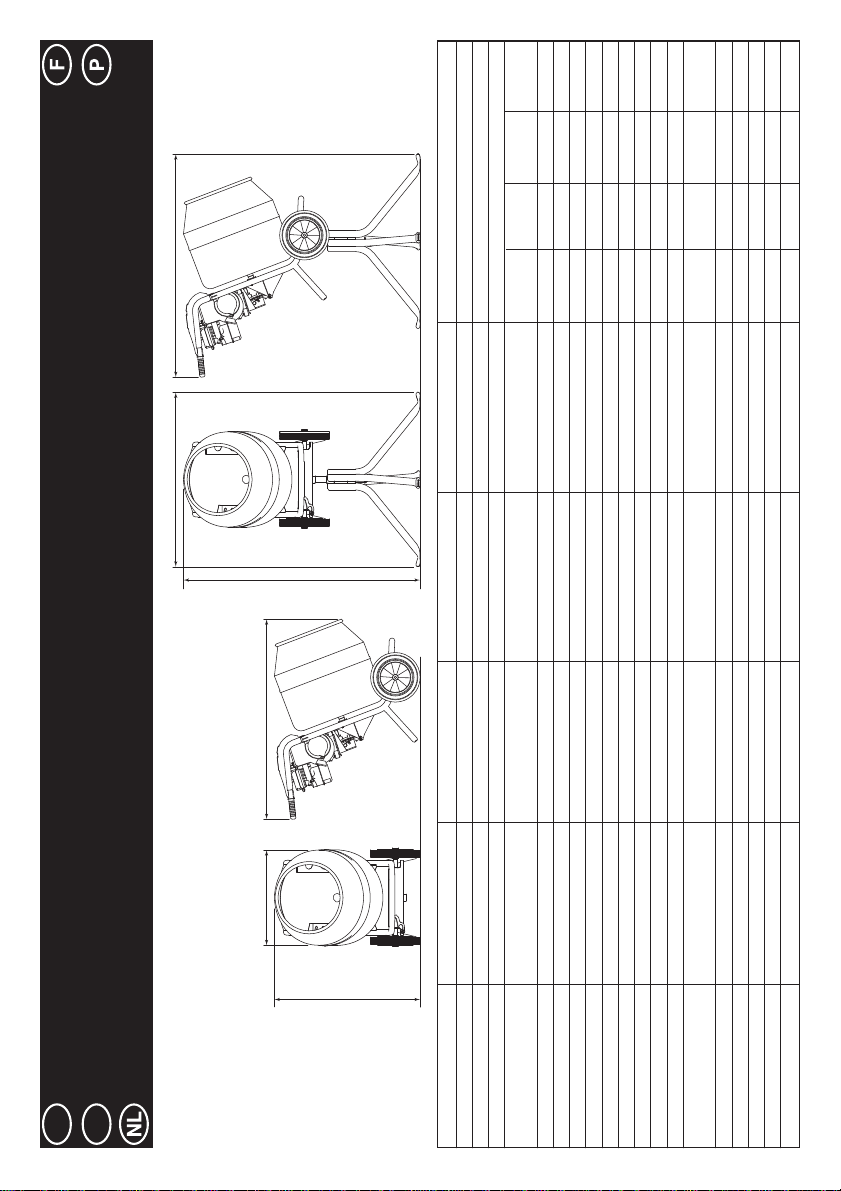
1
2
Gearbox Oil Filling Position
Mixing Position Oil Fill Plug
$OO%HOOHPL[HUV(OHFWULF3HWURODUH¿WWHGZLWKDSUHVHWWHQVLRQHGWRRWKHGEHOW1RDGMXVWPHQWLV
necessary. DO NOTWU\WRDGMXVWZLWKWKHPRWRUUXQQLQJ(QVXUHWKHH[WHQVLRQOHDGLVDOZD\VXQSOXJJHG
before the motor cover is removed.
WARNING