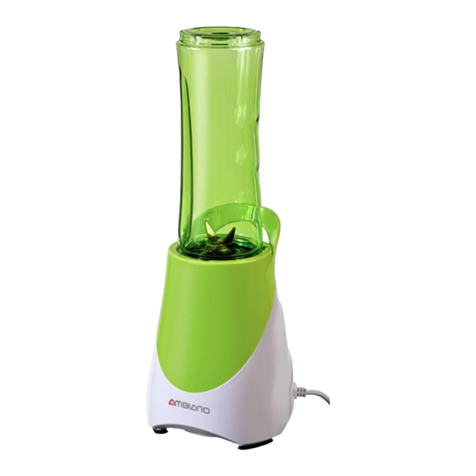
Ambiano JB-218 User manual

\
MILKSHAKE MAKER
MÁQUINA PARA HACER
MALTEADAS
User Manual
Manual
del usuario
English……3
Español…..12

Contents
Parts list.....................................................................3
Contents ...............................................................3
Assembly ..............................................................3
Important safety instructions ...................................4
User instructions .......................................................8
Helpful hints .........................................................9
Cleaning and maintenance......................................10
Other useful information ........................................11
Technical specifications ......................................11
Storing ................................................................11

Parts List
3
Main parts
1. Stainless steel mixing cup
2. Removable mixing shaft
3. Tilting head
4. Milkshake maker base with power switch
5. Cup support and rest
Contents of packaging
•Milkshake maker base with mixing shaft
•Stainless steel mixing cup
•Instruction manual
Assembly
1. Unpack the Milkshake Maker from the box.
2. Remove any unwanted packaging materials such as cardboard, plastics or
styrofoam.
3. Tilt the head back and pull down gently but firmly on the mixing shaft. After
cleaning the shaft, tilt the head back and gently but firmly push the shaft back
into place until you hear a soft snap.
4. Wipe clean all the parts with a soft damp cloth or sponge and warm water.
Rinse and dry thoroughly. DO NOT IMMERSE THE MILKSHAKE MAKER BASE IN
WATER OR ANY OTHER LIQUID.
DO NOT USE ANY ABRASIVE MATERIALS TO CLEAN THE SURFACE
DO NOT IMMERSE THE STAND MIXER BASE IN WATER AT ANY TIME

Safety instructions
4
IMPORTANT SAFETY INSTRUCTIONS
When using electrical appliances, basic safety precautions should always be followed.
PLEASE READ AND SAVE ALL
INSTRUCTIONS BEFORE USING THE
MILKSHAKE MAKER.
KEEP AWAY FROM WATER!
1. To protect against electrical shock, do not immerse the power cord, plug or
milkshake maker base in water or any other liquid.
2. Always operate this unit on a flat stable surface.
3. Do not use the milkshake maker for other than intended use. For household
use only.
4. Close supervision is necessary when any appliance is being used by or near
children. This milkshake maker is not intended for use by persons (including
children) with reduced physical, sensory or mental capabilities, or lack of
experience and knowledge, unless they have been given supervision or
instruction concerning the use of the milkshake maker by a person responsible
for their safety.
5. Never leave the milkshake maker unattended while it is operating.
6. Always unplug this unit from the electrical outlet when not in use, before
cleaning, and before putting on or taking off the attachments.
7. Do not operate the milkshake maker with a damaged power cord or plug or
after the appliance malfunctions or is dropped or damaged in any manner.
Return the milkshake maker to the warranty center for examination, repair, or
electrical or mechanical adjustment. See warranty page. Do not attempt to
repair the milkshake maker yourself.
8. Do not let the power cord hang over the edge of a table or counter or touch
any hot surface.
9. The use of accessory attachments not recommended by the manufacturer may
result in fire, electrical shock, or risk of injury.
10. Do not place the milkshake maker on or near hot gas or electric burner, or in a
heated oven.
11. Never add to the mixing cup while the milkshake maker is operating.

Safety instructions
5
12. Keep hands, clothing, as well as spatulas and other utensils away from mixing
shaft during operation to reduce the risk of injury to persons, and/or damage
to the milkshake maker. Always avoid contact with moving parts.
13. Do NOT use this milkshake maker as an ice crusher as you may damage the
mixing shaft and/or the motor.
14. The mixing cup must be securely in place before operating.
15. Do NOT blend hot liquids.
SAVE ALL INSTRUCTIONS!

Safety instructions
6
Safety instructions
CAUTION:
WARNING: Read and understand all instructions. Failure to follow all instructions
listed below may result in electric shock, fire or serious personal injury. The
warnings, cautions, and instructions discussed in this instruction manual cannot
cover all possible conditions and situations that may occur. It must be understood
by the operator that common sense and caution are a factor which cannot be
built into this product, but must be supplied by the operator.
CAUTION: A short power supply cord is provided to reduce the risk of personal
injury resulting from becoming entangled in or tripping over a longer cord.
Extension cords are available from local hardware stores and may be used if care
is exercised in their use. If an extension cord is required, special care and caution
is necessary. Also, the cord must be: (1) marked with an electrical rating of 125V,
and at least 13 A., 1625 W., and (2) the cord must be arranged so that it will not
drape over the countertop or tabletop where it can be pulled on by children or
tripped over accidentally.
Polarized plug
NOTE:
•This milkshake maker has a polarized plug (one blade is wider than the other).
•As a safety feature to reduce the risk of electrical shock, this plug is intended
to fit in a polarized outlet only one way.
•If the plug does not fit fully in the outlet, reverse the plug.
•If the plug still does not fit, contact a qualified electrician. Do not attempt to
defeat this safety feature.
Electric power
If electric circuit is overloaded with other appliances, your milkshake maker may
not operate properly. The milkshake maker should be operated on a separate
electrical circuit from other operating appliances.

Safety instructions
7
Safety warning
Although your milkshake maker is easy to operate, for your safety, the warnings
below must be followed:
1. Do not place the milkshake maker near a heat source.
2. Never leave the milkshake maker unattended while connected to the
electrical outlet.
3. Use the milkshake maker on a stable work surface away from water.
4. Do not unplug from the wall outlet by pulling on the supply cord.
5. The milkshake maker must be unplugged:
A. After each use.
B. If it appears to be faulty.
C. Before cleaning or maintenance.
THIS PRODUCT IS INTENDED FOR HOUSEHOLD USE ONLY.
SAVE THESE INSTRUCTIONS!

User instructions
8
User instructions
1. Place your ingredients into the stainless-steel cup. Please note that there are
indentations on the cup that show a minimum height and a maximum height
for your ingredients. Of the three indentations, the minimum height is the
lowest indentation and the maximum height is the highest. If the minimum
height is not reached the mixing shaft will not be able to work properly. If the
ingredients go past the maximum height indentation the ingredients may
overflow while mixing.
Note: When mixing your milkshake, add 2 to 3 cups of ice cream + ¾ to 2 cups
milk + desired ingredients. These are approximate measurements. Always add
the liquid ingredients first. You may look online or at your local library for
milkshake recipes.
2. Place the mixing cup under the top support clip and let it rest on the bottom
rest clip.
3. Make sure the power switch is OFF, plug the power cord into an electrical
outlet, and switch to LOW (1). After 10 seconds you can switch to HIGH (2) if
needed.
4. If you are using very hard ice cream or if the shake is very thick you may
carefully remove the cup from the support and rest clips, and with the mixing
shaft still submerged in the shake, move the cup around slightly for more
thorough mixing.
5. When finished, switch the power to OFF, remove the cup (using the tilt head
feature if needed) and pour your shake into a glass to serve.
Unplug the milkshake maker when not in use.

Helpful hints
9
Helpful hints
•Most drinks can be mixed in less than 2 minutes.
•Whole fruit should not be used when making fruit drinks. Finely dice, mash or
puree your fruit first, add it to the ingredients, then mix.
•For best results, all liquid ingredients should be added first and should be as
cold as possible. Milk drinks will taste best if milk is very cold. The colder the
milk, the thicker and frothier the drink.
•All syrups and powdered mixes should be added just before mixing to prevent
it from sinking to the bottom of the cup.
•The cup must always be filled to at least the minimum level mark or the liquid
will not reach the mixing shaft.
•When mixing thin mixtures do not fill above the maximum level mark or the
liquid could overflow while mixing.
•DO NOT use the milkshake maker to crush ice.
•Add your favorite ice cream and flavorings to milk to make your own delicious
combinations.
•Mix and match chopped up candies, diced or mashed fruit, chopped nuts, or
finely diced veggies with plain for flavored yogurt, your favorite ice cream, or
your favorite frozen yogurt to create your favorite drink.
•To remove the mixing shaft, tilt the head back and pull down gently but firmly.
WARNINGS
DO NOT use as an ice crusher.
ALWAYS keep fingers and utensils away from the mixing shaft.
ALWAYS make sure that the milkshake maker is unplugged from the power outlet
when not in use.
ALWAYS make sure the mixing shaft is placed securely in the tilt head before you
begin mixing.

Cleaning and maintenance
10
Cleaning and maintenance
CAUTION:
Always be sure that the Milkshake Maker is unplugged and completely cooled
before cleaning or attempting to store the item. NEVER IMMERSE base in water or
any other liquid.
It is important to clean your Milkshake Maker thoroughly after each use to
prevent sticky build ups that are difficult to clean later. Proper cleaning of the
Milkshake Maker can lead to a clean, better tasting food.
1. When performing any cleaning or maintenance to this unit, be sure to unplug
from power outlet first.
2. Wipe the outer surface of the milkshake maker base with a warm damp cloth
and dry with a soft cloth.
3. Remove the mixing shaft as specified earlier and hand wash in warm soapy
water and dry thoroughly before replacing the mixing shaft into the tilt head.
NOTE: To remove the mixing shaft, tilt the head back and pull down gently but
firmly.
4. Do not immerse the base in water or any other liquid.
It is recommended that you hand wash the stainless-steel cup but you can use
the top rack of the dishwasher if needed.

Other useful information
11
Other useful information
Technical specifications
Model Number JB-218
Rating Voltage 120V, 60Hz
Nominal Power 70W
Storing
•Always unplug the Milkshake Maker before storing.
•Store the Milkshake Maker in a dry location in the original box if possible.
•Do not place any heavy items on top of the Milkshake Maker during storage as
this may result in possible damage.
Service center
If you have any questions in regard to the operation of this Milkshake Maker or
are in need of a spare part, please contact our service center at:
Tel: 1-888-367-7373
Business Hours: Mon-Fri 10:00am –5:00pm EST
Environmental protection
If the Milkshake Maker should no longer work at all, please make sure that it is
disposed of in an environmentally friendly way.

Other useful information
12
Contenido
List de componentes ...........................................13
Contenido .......................................................13
Ensamblaje .....................................................13
Instrucciones de seguridad importantes.............14
Instrucciones para el usuario .............................18
Consejos útiles ...............................................19
Limpieza y mantenimiento .................................20
Información adicional de utilidad ......................21
Especificaciones técnicas ...............................21
Almacenamiento ............................................21

Lista de piezas
13
Componentes principales
1. Taza de mezcla de acero inoxidable
2. Eje de mezcla desmontable
3. Cabeza inclinable
4. Base de la máquina para hacer malteadas con interruptor de encendido
5. Apoyo y orificio para taza
Contenido del embalaje
•Base de la máquina para hacer malteadas con eje de mezcla
•Taza de mezcla de acero inoxidable
•Manual de instrucciones
Ensamblaje
1. Saque la máquina para hacer malteadas de la caja.
2. Quite todos los materiales de embalaje como cartones, plásticos o espuma de
poliestireno.
3. Incline el cabezal hacia atrás y jale hacia abajo suave y firmemente sobre el eje de
mezcla. Después de limpiar el eje, vuelva a inclinar el cabezal y empuje hacia arriba
suave y firmemente de regreso a su lugar hasta que escuche un chasquido.
4. Limpie todas las piezas desmontables con un trapo suave o esponja humedecidos con
agua tibia. Enjuagar y secar bien. NO SUMERJA LA BASE DE LA MÁQUINA PARA
HACER MALTEADAS EN AGUA NI EN NINGÚN OTRO LIQUIDO.
NO UTILICE MATERIALES ABRASIVOS PARA LIMPIAR LA SUPERFICIE
NO SUMERJA LA BASE DE LA MÁQUINA PARA HACER MALTEADAS EN AGUA EN NINGÚN
MOMENTO

Instrucciones de seguridad
14
INSTRUCCIONES DE SEGURIDAD
IMPORTANTES
Al usar aparatos electrodomésticos, siempre se deben seguir las precauciones de
seguridad básicas.
LEA Y GUARDE TODAS LAS
INSTRUCCIONES ANTES DE USAR LA
MÁQUINA PARA HACER MALTEADAS.
¡MANTENER LEJOS DEL AGUA!
1. Para protegerse contra descargas eléctricas, no sumerja el cable de alimentación, el
enchufe o la base de la máquina para hacer malteadas en agua u otro líquido.
2. Utilice siempre este electrodoméstico sobre una superficie plana y estable.
3. No use la máquina para hacer malteadas para un uso que no sea el previsto. Para uso
doméstico solamente.
4. Es necesaria una atenta supervisión cuando el aparato es usado por niños o cerca de
estos. Esta máquina para hacer malteadas no está destinada para ser utilizada por
personas (incluidos niños) con disminución en sus capacidades físicas, sensoriales o
mentales; o con falta de experiencia y conocimiento, a menos de que hayan recibido
supervisión o instrucciones relativas al uso de la máquina para hacer malteadas por
una persona responsable de su seguridad.
5. No deje nunca la máquina para hacer malteadas desatendida mientras está en
funcionamiento.
6. Siempre desenchufe la máquina para hacer malteadas del tomacorriente cuando no
está en uso, antes de limpiarla, y antes de ponerle o quitarle los accesorios.
7. No utilice la máquina para hacer malteadas con un cable o enchufe dañado, después
de una avería o si se ha caído o dañado de cualquier manera. Devuelva el máquina
para hacer malteadas al centro de garantía para su revisión, reparación o ajuste
eléctrico o mecánico. Consulte la página de la garantía. No intente reparar la máquina
para hacer malteadas usted mismo.
8. No deje que el cable de alimentación cuelgue sobre el borde de una mesa o mostrador,
ni que toque ninguna superficie caliente.
9. El uso de accesorios no recomendados por el fabricante puede provocar incendios,
descargas eléctricas o el riesgo de sufrir lesiones.
10. No coloque la máquina para hacer malteadas sobre o cerca de una hornilla de gas o
eléctrica, o en un horno caliente.

Lista de piezas
15
11. Nunca agregue la taza de mezcla mientras la máquina para hacer malteadas está en
funcionamiento.
12. Para reducir el riesgo de lesiones personales y/o daño a la máquina para hacer
malteadas mantenga las manos, vestimenta, espátulas y utensilios lejos del eje de
mezcla durante su funcionamiento. Siempre evite el contacto con las piezas en
movimiento.
13. NO use la máquina para hacer malteadas como pica hielo ya que podría dañar el eje de
mezcla y/o el motor.
14. La taza de mezcla debe quedar fija antes de usarla.
15. NO mezcle líquidos calientes.
¡GUARDAR TODAS LAS INSTRUCCIONES!

Instrucciones de seguridad
16
Instrucciones de seguridad
PRECAUCIÓN:
ADVERTENCIA: Lea y comprenda todas las instrucciones. Si no se cumplen todas
las instrucciones indicadas a continuación se pueden producir descargas
eléctricas, incendios o lesiones graves. Las advertencias, precauciones e
instrucciones que se detallan en este manual de instrucciones no cubren todas las
condiciones y situaciones posibles que podrían suceder. El operador debe
entender que el sentido común y la precaución son factores que no se pueden
incluir en el producto, sino que los debe aportar el operador mismo.
PRECAUCIÓN : Se proporciona un cable eléctrico corto para reducir el riesgo de
lesiones personales resultantes de enredarse o tropezar con un cable más largo.
Hay disponibles cables de extensión en las tiendas locales de hardware y estos se
pueden utilizar si se tiene cuidado en su uso. Si se requiere usar un cable de
extensión, es necesario tener especial cuidado y precaución. Además el cable
debe: (1) estar marcado con una clasificación eléctrica de 125 V y al menos 13 A,
1625 W y (2) el cable debe colocarse de manera que no cuelgue de un mostrador
o mesa en donde los niños pudieran halarlo o tropezar con él accidentalmente.
Enchufe polarizado
NOTA:
•La máquina para hacer malteadas posee un enchufe polarizado (una clavija es
más ancha que la otra).
•Como medida de seguridad para reducir el riesgo de descarga eléctrica, este
enchufe está diseñado para entrar en un tomacorriente polarizado en un solo
sentido.
•Si el enchufe no entra completamente en el tomacorriente, gire el enchufe.
•Si el enchufe aún no encaja, comuníquese con un electricista calificado. No
intente eliminar esta característica de seguridad.
Alimentación eléctrica
Si el circuito eléctrico está sobrecargado con otros electrodomésticos, la máquina
para hacer malteadas podría no funcionar correctamente. La máquina para hacer
malteadas debe conectarse en un circuito eléctrico diferente al de otros aparatos
en funcionamiento

Instrucciones de seguridad
17
Advertencia de seguridad
Si bien la máquina para hacer malteadas es fácil de utilizar, se deben cumplir las
siguientes advertencias por razones de seguridad:
1. No coloque la máquina para hacer malteadas cerca de una fuente de calor.
2. No deje nunca la máquina para hacer malteadas desatendida mientras está
conectada a la red eléctrica.
3. Utilice la máquina para hacer malteadas en una superficie de trabajo estable
lejos del agua.
4. No la desconecte del tomacorriente tirando del cable de alimentación.
5. La máquina para hacer malteadas debe desconectarse:
A. Después de usarla.
B. Si parece estar defectuosa.
C. Antes de cualquier operación de limpieza o mantenimiento.
ESTE PRODUCTO ESTÁ DESTINADO EXCLUSIVAMENTE PARA USO DOMÉSTICO.
¡GUARDE ESTAS INSTRUCCIONES!

Instrucciones para el usuario
18
Instrucciones para el usuario
1. Coloque los ingredientes en la taza de acero inoxidable. Observe las
hendiduras de la taza que muestran una altura mínima y máxima para los
ingredientes. De las tres, la de altura mínima es la de más abajo y la de altura
máxima es la de más arriba. Si no se llega a la altura mínima, el eje de mezcla
no funcionará correctamente. Si los ingredientes superan la hendidura de la
altura máxima, podrían desbordar durante la mezcla.
Nota: Cuando mezcle la malteada, agregue de 2 a 3 tazas de helado + ¾ a 2
tazas de leche + ingredientes deseados. Estas son las medidas aproximadas.
Siempre agregue los ingredientes líquidos primero. Puede buscar recetas de
malteadas en línea o en la biblioteca local.
2. Coloque la taza de mezcla debajo del clip de apoyo superior y deje que se
apoye sobre el inferior.
3. Asegúrese de que el interruptor de encendido en OFF, conecte el cable de
alimentación a un tomacorriente y llévelo a LOW (1). 10 segundos después
puede pasarlo a HIGH (2) de ser necesario.
4. Si usa helado muy duro o si la mezcla es muy espesa puede quitar la taza con
cuidado del apoyo y soporte y con el eje de mezcla aún sumergido en la
mezcla, mueva la taza a mano para lograr una mezcla más exhaustiva.
5. Cuando termine, coloque el interruptor en OFF, quite la taza (con la
característica de la cabeza inclinable de ser necesario) y vierta el batido sobre
un vaso para servir.
Desconecte la máquina para hacer malteadas cuando no la use.

Consejos útiles
19
Consejos útiles
•La mayoría de las bebidas estarán listas en menos de 2 minutos.
•No debe usar fruta entera al preparar bebidas frutales. Rebane, aplaste o
exprima la fruta primero, agréguela a los ingredientes y luego mezcle.
•Para obtener mejores resultados, todos los ingredientes líquidos se deben
agregar primero y deben estar lo más fríos posible. Las bebidas con leche
saben mejor si la leche está bien fría. Cuanto más fría la leche, más espesa y
espumosa quedará la bebida.
•Todos los jarabes y mezclas en polvo deben agregarse justo después de la
mezcla para evitar que se sumerjan a la parte inferior de la taza.
•La taza siempre debe llenarse al menos hasta la marca del nivel mínimo o el
líquido no llegará hasta el eje de mezcla.
•Al preparar mezclas delgadas no llene por encima de la marca de nivel
máximo o el líquido podría desbordarse durante la mezcla.
•NO use la máquina para hacer malteadas para picar hielo.
•Agregue el helado y los sabores favoritos a la leche para preparar sus
combinaciones preferidas.
•Mezcle dulces picados, fruta rebanada o aplastada, nueces picadas o verduras
bien cortados con yogur saborizado, su helado favorito, o el yogur helado
favorito para crear su bebida favorita.
•Para quitar el eje de mezcla, incline la cabeza hacia atrás y jalelo hacia abajo
suave y firmemente.
ADVERTENCIAS
NO usar como pica hielo.
SIEMPRE mantenga los dedos y utensilios lejos del eje de mezcla.
SIEMPRE asegúrese de que la máquina para hacer malteadas esté desenchufada
del tomacorriente cuando no la use.
SIEMPRE asegúrese de que el eje de mezcla esté bien colocado en el cabezal
inclinable antes de comenzar la mezcla.

Limpieza y mantenimiento
20
Limpieza y mantenimiento
PRECAUCIÓN:
Asegúrese siempre de que la máquina para hacer malteadas esté desenchufada y
se haya enfriado completamente antes de limpiarla o tratar de guardarla. NUNCA
SUMERJA la base en agua o cualquier otro líquido.
Es importante limpiar la máquina para hacer malteadas a fondo después de cada
uso para evitar acumulaciones pegajosas que son difíciles de limpiar después. Una
máquina para hacer malteadas limpia puede preparar alimentos más limpios y con
mejor sabor.
1. Al limpiar o dar mantenimiento a esta unidad, asegúrese de desenchufarla del
tomacorriente primero.
2. Limpie la superficie de la base de la máquina para hacer malteadas con un
paño húmedo caliente y séquelo con un trapo suave.
3. Quite el eje de mezcla como se especificó, lávelo a mano con agua tibia y
jabón y séquelo antes de volver a colocarlo en la cabeza inclinable.
NOTA: Para quitar el eje de mezcla, incline la cabeza hacia atrás y jálelo hacia
abajo suave y firmemente.
4. No sumerja la base en agua o cualquier otro líquido.
Se recomienda lavar la taza de acero inoxidable a mano, pero puede usar la
parte superior del lavavajillas de ser necesario.
Table of contents
Languages:
Other Ambiano Kitchen Appliance manuals
Ambiano
Ambiano 61221 User manual

Ambiano
Ambiano PM-1300S User manual

Ambiano
Ambiano MC-603D User manual

Ambiano
Ambiano BL-05 User manual

Ambiano
Ambiano XJ-14709C1 User manual

Ambiano
Ambiano KYS-338B User manual

Ambiano
Ambiano TX-103O User manual

Ambiano
Ambiano YD509 User manual

Ambiano
Ambiano XJ-14709C0 User manual

Ambiano
Ambiano MD 37430 User manual

Ambiano
Ambiano KG6000 User manual

Ambiano
Ambiano MF006 User manual

Ambiano
Ambiano WHB-13H User manual

Ambiano
Ambiano S-201 User manual

Ambiano
Ambiano SM-1004SP User manual
Ambiano
Ambiano 57438 User manual
Ambiano
Ambiano FD550 User manual

Ambiano
Ambiano MD 10128 User manual
Ambiano
Ambiano PM-3400 User manual

Ambiano
Ambiano L-PM250 User manual