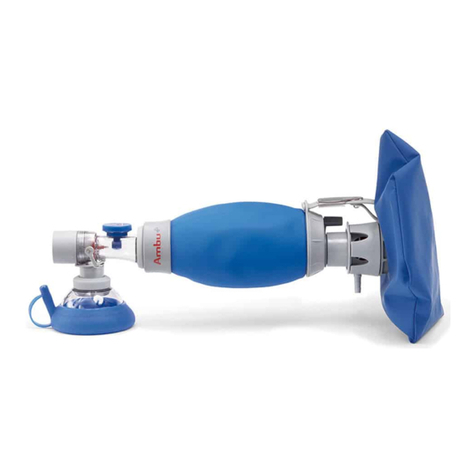
Ambu Mark IV User manual

English
3
1. Warnings and cautions
WARNING
• Insufficient, reduced or lack of ventilation may lead to brain damage
in the ventilated patient.
• Should only be used by personnel trained in performing resuscita-
tion. It is important to obtain a tight seal between the face and the
mask. Otherwise, this may cause reduced or no ventilation. Make
sure that such personnel are made familiar with the contents of
these instructions for use.
• Watch the movement of the chest, and listen for the expiratory flow
from the valve to check the efficiency of the ventilation. Failure to do
so may result in insufficient ventilation.
• Switch IMMEDIATELY to mouth-to-nose or mouth-to-mouth ventila-
tion in accordance with local guidelines if efficient ventilation cannot
be obtained with the device. Failure to do so may result in insuffi-
cient ventilation.
• Do not smoke or use open flames when using oxygen - fire may
result.
• Do not use the resuscitator in toxic or hazardous atmospheres as this
may harm the patient. See Section 5.4 for further details.
CAUTIONS
• According to US federal regulations, this product may only be sold
by or on the order of a physician (only applies in the USA and Canada).
• It is important to check that all parts of the resuscitator are in good
condition, that it is properly assembled, and that a complete func-
tional test is carried out every time the device has been disassembled
- also before the initial use.
• This functional test, which is described in chapter 8.1, should also be
carried out every time the device is taken into use.
• If the resuscitator and its accessories are kept on standby for emer-
gency situations, the entire equipment should be checked regularly
to ensure that it is functional.
• Avoid the use of or contact with oil or grease as they may damage
the materials of the resuscitator. In case of contact, the surface must
be thoroughly cleaned.
• Do not use oil or grease in close proximity to oxygen equipment -
fire may result.
• Do not force the outer cover of the bag to bulge locally by closing
the patient connector and squeezing the bag so hard with your hand
that a local bulge appears on the outer cover - this has an extreme
impact on the material.

4
English
2. Application
The Ambu Mark IV resuscitator is intended for pulmonary resuscita-
tion of adults and children with a body weight of more than approx.
15 kg (3 years).
3. Specifications
The Ambu Mark IV resuscitator is in conformity with the
following standards: ASTM F 920-93 and EN ISO 10651-4:2002.
The Ambu Mark IV resuscitator is in conformity with the
European Medical Directive 93/42/EEC.
Application: Adults and children with a body weight of more
than approx. 15 kg (3 years).
Maximum provided volume: Approx. 1300 ml
Length x Diameter (with patient valve): 275 mm x 135 mm
Weight of the resuscitator with patient valve, (without oxygen
reservoir bag and mask): Approx. 415 g
Maximum frequency of ventilation: Depends on the inspiratory
volume used. The rate of expansion of the bag is sufficiently fast for
all frequencies recommended for practical use.
Patient connector: 22 /15 mm (ISO)
Expiration connector: 30 mm male (ISO)
Inspiration connector: (EN ISO 10651-4) 32 mm female for connec-
tion of Ambu oxygen reservoir bag or ISO refilling valve
Dead volume: < 5 ml
Leaks (both ways): Non-measurable
Inspiratory resistance at 50 l/min: Approx. -0.35 kPa (-3.5 cmH2O)
The inspiratory resistance of the oxygen reservoir bag at 50 l/min
without supply of oxygen: Approx. -0.1 kPa (-1.0 cmH2O)
Maximum attainable delivery pressure at 0.2 l/kPa: Approx. 10
kPa (100 cmH2O)
Pressure-limiting system: The elasticity of the outer cover of the bag
limits the airway pressure to approx. 7 kPa (70 cmH2O) when squeez-
ing the bag normally with one hand, as shown in P.
Expiratory resistance at 50 l/min: Approx. 0.26 kPa (2.6 cmH2O)
Volume of the oxygen reservoir bag: Approx. 1500 ml
Application temperature: -18°C to 50°C (0°F to 122°F)
Storage temperature: -40°C to 70°C (-40°F to 158°F)
Parts / Materials
Inner bag Silicone rubber
Outer bag Silicone rubber
Patient valve housing PSU
O-ring (internal part of patient connector) Silicone rubber
Patient connector PSU
Valve disc Silicone rubber
Expiration connector Reinforced PP
Oxygen reservoir bag (optional accessory) PES/TPU
Reservoir housing incl. cap and
screw cap (optional accessory) POM/reinforced PP
Supporting strap Silicone rubber
Oxygen supply tube (optional accessory) EPDM rubber
Adapter for tube (optional accessory) POM
Extension tube (optional accessory) EPDM rubber
Splash guard (optional accessory) PSU
Nameplate Aluminium
Window with snap fastener PSU
Connector POM
Inlet valve housing POM
Screw cap (two parts) POM
0086

English
5
4. Operating principles
Qshows how the ventilation air flows into the resuscitator and to and
from the patient during manual ventilation as well as when the patient
respires spontaneously.
The air flow remains unchanged when the patient spontaneously
respires through the device.
Q1.1: Air, 1.2: Oxygen inlet, 1.3: Patient, 1.4: Expiration,
1.5: Outlet cap (optional accessory)
The valve disc guide pin in the patient valve is a visible indicator of
correct functioning of the unit. The user should always - before as well
as during use - check that the valve guide moves forward on inspira-
tion and backward on expiration. See W.
W2.1: Guide pin (forward), 2.2: Insufflation or spontaneous inspira-
tion, 2.3: Guide pin (backward), 2.4: Expiration
5. Instructions for use
5.1. Ventilation with face mask - see
E
Clear mouth and airway.
Use recommended techniques to position the patient correctly to keep
the airways open.
Place the mask so that it makes an airtight fit with the patient's face.
Hold the mask firmly against the face while tilting the head correctly
for the airways to be kept open.
WARNING
Thorough practice in the correct application of the facemask is impor-
tant before use of the resuscitator. Lack of practice may result in no or
reduced ventilation.
Squeeze the bag with one hand.
While insufflating, check that the patient's chest is rising.
Loosen the grip on the bag, listen for the expiratory air from the
patient valve, and check that the chest is lowering. In case of resis-
tance on insufflation, check the airways for foreign bodies, or place
the head in the correct position.
The frequency of ventilation may vary. Follow the current nationally or
internationally recommended ventilation frequencies.
In case of the patient vomiting under mask ventilation, the patient's
airways must immediately be cleared of vomit. Before resuming venti-
lation, squeeze the bag a few times without the mask being in contact
with the face.
Check that insufflation and expiration are unhindered.
The patient valve can be disassembled and cleaned if large volumes of
vomit block the free airflow in the valve.
If the valve is disassembled and cleaned, the device must be tested
before resuming ventilation. (See Section 8.1)
Administer oxygen according to medical indications.
See Section 5.2 to 5.4.
5.2. Oxygen enrichment without oxygen reservoir
bag - see
R
Extra oxygen is administered by connecting oxygen to the O2connec-
tor of the inlet valve.
Tshows examples of O2percentages obtainable with different
volumes and frequencies without the use of an oxygen reservoir bag.
VT :Tidal volume, f : Frequency

6
English
5.3. Oxygen enrichment with oxygen reservoir
bag - see
Y
Optimal oxygen savings are obtained by connecting the oxygen reser-
voir bag to the resuscitator. The ventilation gas is close to 100% O2
when the oxygen supply is equal to or larger than the minute ventila-
tion.
Y6.1: Filled, 6.2: Empty (Oxygen connector on oxygen reservoir bag
= 6 mm).
Ushows examples of O2percentages obtainable with different vol-
umes and frequencies when using an oxygen reservoir bag.
VT :Tidal volume, f : Frequency
A simplified table is printed on the oxygen reservoir bag for quick ref-
erence. See I. As a minimum, the oxygen concentrations indicated
are obtained as long as the minute ventilation is equal to or less than
1000 x 15 = 15 l/min and 300 x 20 = 6 l/min, respectively.
Examples: Administer 13 l/min oxygen through the inlet of the oxy-
gen reservoir bag. With a tidal volume of max. 1000 ml and a fre-
quency of compression of max. 15 per minute, an adult patient
receives an oxygen concentration of at least 85%.
Administer 2 l/min oxygen through the inlet of the oxygen reservoir
bag. With a tidal volume of max. 300 ml and a frequency of compres-
sion of max. 20 per minute, an child receives an oxygen concentration
of at least 40%.
6. Description
The Ambu Mark IV resuscitator is designed in accordance with the
original Ambu double wall principle.
The standard Ambu Mark IV resuscitator consists of the following
parts: Bag with inlet valve and patient valve.
6.1. Bag - see
O
9.1: Connector, 9.2: Thin-walled outer cover, 9.3: Self-expanding inner
bag, 9.4: Inlet valve housing (ISO 32 mm connector for connecting the
oxygen reservoir bag as well as the oxygen inlet connector used when
the oxygen reservoir bag is not connected), 9.5: Flange lock.
9.9: The bag is supplied with a supporting strap that supports the grip
on the bag during ventilation, and it has an integrated hanging strap,
9.10: The hanging strap has a window with a snap fastener with a
nameplate. The nameplate can be stamped or engraved.
During normal operation of the bag with one hand, the elasticity of
the outer bag will prevent the airway pressure from exceeding approx.
7 kPa (70 cm H2O). This pressure limitation with no stroke volume loss
is unique to the Ambu Mark IV resuscitator.
6.2. Patient valve - see
{
The function of the valve is described in Section 4.
{11.1:Splash guard (optional accessory), 11.2 30 mm ISO male
expiration connector for direct connection of Ambu PEEP valve,
11.3: 24 mm inspiration connector (male),
11.4: 22/15 ISO patient connector.
6.3. Oxygen reservoir bag (optional) - see
O
The oxygen reservoir bag consists of PES/TPU (9.8) connected to a
reservoir housing (9.6) with cap (9.7), which fits the inlet valve connec-
tor on the resuscitator.
The valve has two silicone rubber valve discs that enable intake of
external air when the bag is empty, and discharge of excess oxygen
when the bag is full.

English
7
7. Cleaning - disinfection - sterilisation
}shows the disassembled resuscitator ready for cleaning, disinfection
and sterilisation.
Note: The parts should not be further disassembled than shown in the
picture.
Clean - disinfect - sterilise after each patient or in accordance
with local procedures.
}12.1: Patient valve incl. splash guard, 12.2: Bag incl. connector,
12.3: Oxygen reservoir bag, 12.4: Extension tube, 12.5: Oxygen
supply tube
Clean - disinfect - sterilise the entire resuscitation equipment
after use on patients or in environments containing infectious
diseases.
Applicable
methods
●applicable
❍not applicable
Parts
12.1 ●●●●●●●
12.2 ●●●●●●●
12.3 ●●●●●●●
12.4 ●●●●●●●
12.5 ●●●●●●●
Manual
washing Washing
machine Heat treatment Boiling Chemical
disinfection 121°C
(250°F) 134°C
(273°F)
Cleaning Disinfection - sterilisation
Washing Disinfection Autoclaving

8
English
Detergents and chemical disinfectants
There are a wide range of detergents and chemical disinfectants avail-
able on the market. Use only detergents or chemical disinfectants that
are compatible with the materials of the resuscitator. Otherwise, the life
of the equipment may be reduced. See the materials list in Section 3.
Follow the manufacturer's guidelines for dilution and exposure time of
the detergent or the chemical disinfectant. Agents containing phenol
should be avoided.
On request, information on the compatibility of a selection of deter-
gents and chemical disinfectants with the materials of the resuscitator
is provided by the nearest Ambus dealer or Ambu A/S.
Note: Avoid cleaning the product with agents containing phenol.
Phenol causes rapid wear and deterioration of the materials or a
reduced life of the equipment.
Note: Immediately remove all detergent or disinfectant residues from
the resuscitator. These residues may result in rapid wear or a reduced
life of the device.
Cleaning, disinfection and sterilisation procedure
The following items should be followed. Use the methods that are
suitable for the individual parts as indicated in the table above.
7.1. Disassembly of the resuscitator
The resuscitator must always be disassembled before cleaning as shown in
}.
Note: Do not attempt to disassemble the patient connector from the
patient valve (permanently assembled).
Note: The parts should not be further disassembled than shown in }.
See qfor further information.
Removing the supporting strap: Disengage the strap at the back of
the transparent nameplate cover as shown in Fig. e.
Pull the cap over the strap and remove the nameplate. Pull the strap
through the slot. Pull the strap through the slot in front of the connector.
7.2. Cleaning of parts
Manual washing or automatic washing machine
Wash the parts in water using a detergent that is compatible with the
materials of the resuscitator. See Section 3. Rinse all parts thoroughly
in clean water to remove all detergent residues.
If the exterior faces of the resuscitator bag are to be cleaned and/or
disinfected, check that the detergent and/or disinfectant used is com-
patible with the materials of the resuscitator. Make sure that all
residues are removed completely by rinsing with clean water. If the
residue is allowed to dry on the resuscitator, the life of the materials
may be reduced.
An automatic washing machine with a programme for washing anaes-
thetics equipment is applicable.
7.3. Disinfection and/or sterilisation
Select heat treatment or chemical disinfection according to local prac-
tice for disinfection and the table of applicable methods.
Washing machine - heat disinfection programme:
Automatic washing machines designed for medical equipment are
usually equipped with heat disinfection programmes.
Boiling: Use clean water - heat the parts, and boil them for 10 minutes
to disinfect them.
Chemical disinfection (e.g. Cidex, chemical with sodium
hypochlorite, etc.): Follow the manufacturer's guidelines for dilution
and exposure time of the chemical disinfectant. The parts of the resus-
citator are thoroughly rinsed with clean water to remove all residues
following contact with the chemical disinfectant.
English
9
Note: As it is very difficult to thoroughly clean the oxygen reservoir
bag, it is recommended not to immerse it in chemical disinfectants.
Autoclaving: Use standard autoclaveing equipment set to 121°C or
134°C (250°F or 273°F), respectively for the individual parts of the
resuscitator according to the table above.
7.4. Drying and cooling
Let the parts dry and cool completely before the resuscitator is
reassembled.
7.5. Inspection of parts
After cleaning, disinfection and/or sterilisation, all parts must be care-
fully checked for damage or wear. Replace if necessary. Certain meth-
ods can lead to discolouring of rubber parts without affecting the life
of these parts. In case deterioration of the materials, e.g. crack forma-
tion, the parts should be replaced.
In case of washing and autoclaving, the oxygen reservoir bag can look
slightly wrinkled. This has no impact on its life or function.
7.6. Assembly and functional testing - see
w
When inserting the inner bag in the outer cover (see 14.1, 14.2 and
14.3): Check that the connecting piece on the outer cover is pushed
completely into the outlet connector (14.4).
Check that the outer cover is not inside out (the lot no. and the Ambu
logo on the outer cover must be on the outside).
The connector is snapped into engagement with the outlet connector
of the inner bag, (see 14.5 and 14.6). The inlet valve housing is
snapped into engagement with the connecting piece of the inner bag
(14.7 and 14.8), and the screw cap is screwed on (14.9).
When inserting the patient valve disc, check that the end of the butt
of the pin goes through the hole in the middle of the patient valve
housing, and then the expiration connector is screwed in (see 14.10,
14.11 and 14.12). When the outlet cap (optional accessory) is mounted,
check that the cap opening faces the patient connector (see 14.12).
Carry out a functional test. See Section 8 of these directions for use.
8. Functional test
8.1. Resuscitator
1) Connect a 1-1.5 l breathing bag to the patient connector.
Squeeze and release the resuscitator repeatedly. Check that the
breathing bag is filled.
By continued ventilation, the breathing bag must be visibly filled
and emptied. See r.
2) Squeeze the resuscitator, and keep it compressed. Thus, a positive
pressure is created in the breathing bag, and this is maintained for
up to 10 seconds or until the grip on the resuscitator is loosened.
WARNING
Perform the test below immediately before use. If this test is not per-
formed, there is a risk of no or reduced ventilation.
3) Close the patient connector with a finger, and squeeze the bag
hard to check its tightness. Also check that the valve is correctly
positioned. See t.

10
English
8.2. Oxygen reservoir bag
Set an oxygen flow of approx. 5 l/min on the oxygen inlet connector.
Close the outlet with a hand, and check that the oxygen reservoir bag
unfolds. See y.
Shut the flow. Compress the bag, and check that the gas leaks unhin-
dered through the holes in the pressure-limiting valve. See u.
9. Service
The Ambu Mark IV resuscitator requires no scheduled maintenance
other than regular cleaning, inspection and testing.
It is recommended to thoroughly check all parts after disassembly for
cleaning, disinfection or sterilisation.
If any parts are missing or defective, spare parts are available (see the
list in Section 11).
Note: The Ambu Mark IV resuscitator must be checked in accordance
with these instructions for use before being released for use again (see
Section 8).
10. Storage
The Mark IV resuscitator should not be exposed to direct sunlight or
elevated temperatures during storage.
In case of compact storage of the equipment, e.g. in a resuscitator
pack, push the inlet part half-way into the bag as shown in i.
Note: Never store the resuscitator in a compressed state in any other
way than shown in i.
Note: Never squeeze the bag too hard on storage.
Never store the resuscitator in close proximity to products containing
oil or grease.
Storage temperature: -40°C to 70°C (-40°F to 158°F).
In case of long-term storage, the resuscitator should be packed away
in a cool place away from direct sunlight.

English
11
12. Accessories - see
p
Cat. no See
230 000 001 Transparent Ambu Pack,
empty L x H x D: 350 x 280 x 140 mm
Weight, empty: 0.705 kg 22.1
230 000 051 Orange Ambu Pack,
empty L x H x D: 350 x 280 x 140 mm
Weight, empty: 0.705 kg 22.2
000 137 000 PEEP 10 valve 22.3
000 213 000 PEEP 20 valve 22.4
209 000 701 Extension tube, length 30 cm with
two adapters 22.5
209 000 702 Extension tube, length 90 cm with
two adapters 22.6
209 000 703 Extension tube, length 105 cm with
two adapters 22.7
000 059 274 28/32 mm adapter for tube, 28 mm female
connector for the inlet connector on the Mark IV
patient valve, 32 mm male connector for the
inlet valve on the Mark IV bag 22.8
000 059 276 24 mm female adapter for tube for the
outlet connector on the Mark IV bag 22.9
304 000 507 Oxygen reservoir bag, complete 22.10
000 171 004 Oxygen supply tube 22.11
11. Spare parts - see
o
Cat. no. See
000 245 010 Splash guard (optional accessory) 21.1
000 245 009 Expiration connector 21.2
304 000 501 Ambu Mark IV inner bag 21.7
304 000 502 Ambu Mark IV outer cover 21.6
304 000 503 Ambu Mark IV connector, complete 21.5
304 000 504 Ambu Mark IV strap, complete
with name plate 21.16 -21.17 -21.18
304 000 505 Ambu Mark IV inlet valve, complete 21.8 -21.9 -21.10
304 000 506 Name plate 21.18
304 000 507 Oxygen reservoir bag,
complete 21.11-21.12 -21.13 -21.14
304 000 508 Oxygen reservoir bag 21.14
304 000 509 Oxygen reservoir bag housing 21.11 - 21.12 - 21.13
245 000 514 Valve disc for oxygen reservoir bag 21.12
245 000 509 Valve disc for single shutter patient
valve and inlet valve 21.3
295 000 501 Single shutter patient valve, complete 21.2 - 21.3 - 21.4
295 000 502 Single shutter patient valve, complete
with splash guard 21.1 - 21.2 - 21.3 - 21.4
295 000 503 Single shutter patient valve housing 21.4

12
Deutsch
1. Warnhinweise und Vorsichtsmaßnahmen
WARNHINWEISE
• Ein ungenügender, verringerter oder gänzlich fehlender Luftstrom
kann zu einer Hirnschädigung des beatmeten Patienten führen.
• Das Gerät darf nur von Personen verwendet werden, die in der Re-
animation ausgebildet sind. Eine dichte Versiegelung zwischen Gesicht
und Maske ist von grundlegender Bedeutung. Andernfalls wird die
Beatmung beeinträchtigt oder erfolgt gar nicht. Stellen Sie sicher, dass
die Benutzer mit dem Inhalt dieses Handbuchs vertraut sind.
• Die Wirksamkeit der Beatmung ist durch Beobachtung der Brust-
korbbewegungen sowie durch akustische Kontrolle der Exspirations-
luft am Ventil zu überprüfen. Andernfalls kann es zu einer ungenü-
genden Beatmung kommen.
• Beginnen Sie SOFORT mit der Mund-zu-Nase- oder Mund-zu-Mund-
Beatmung, wenn eine effektive Beatmung mit diesem Gerät nicht
möglich ist. Andernfalls kann es zu einer ungenügenden Beatmung
kommen.
• Beim Einsatz von Sauerstoff darf nicht geraucht und nicht mit offen-
er Flamme gearbeitet werden – dies kann einen Brand verursachen.
• Verwenden Sie den Beatmungsbeutel nicht in toxischer oder
gefährlicher Atmosphäre. Andernfalls kann es zu Verletzungen des
Patienten kommen. Weitere Informationen finden Sie in Abschnitt 5.4.
VORSICHTSMASSNAHMEN
• Gemäß US-Bundesgesetz darf dieses Gerät nur durch oder im
Auftrag eines Arztes verkauft werden (nur USA und Kanada).
• Nach dem Auspacken und nach jedem Zerlegen des Beatmungsbeutels
muss sichergestellt werden, dass alle Teile in einwandfreiem Zustand
sind und wieder korrekt zusammengebaut werden.
• Vor dem Einsatz des Geräts muss die in Abschnitt 8.1 beschriebene
Funktionskontrolle erfolgen.
• Wenn der Beatmungsbeutel samt Zubehör zur sofortigen
Verwendung im Notfall bereitgehalten wird, muss das gesamte
System regelmäßig auf seine Funktionsfähigkeit geprüft werden.
• Vermeiden Sie den Kontakt mit Ölen und Schmierstoffen. Diese
Substanzen können die Materialien des Beatmungsbeutels angreifen.
Reinigen Sie den Beatmungsbeutel nach einem Kontakt mit solchen
Materialien gründlich.
• Öl oder Schmierstoffe sollten nicht in unmittelbarer Nähe von
Sauerstoffausrüstung verwendet werden. Dies kann einen Brand
verursachen.
• Die Außenhülle des Beutels darf nicht punktuell gedehnt werden,
indem der Patientenanschluss geschlossen und der Beutel mit einer
Hand so fest zusammengedrückt wird, dass sich in der Hülle eine
Blase bildet. Dadurch wird das Material übermäßig beansprucht.

Deutsch
13
2. Einsatzbereich
Der Ambu Mark IV Beatmungsbeutel wurde für die Beatmung von
Erwachsenen und Kindern mit einem Körpergewicht von mehr als ca.
15 kg (3 Jahre) entwickelt.
3. Spezifikationen
Der Ambu Mark IV Beatmungsbeutel entspricht den folgenden
Normen: ASTM F 920-93 und EN ISO 10651-4:2002.
Der Ambu Mark IV Beatmungsbeutel entspricht der
Richtlinie des Rates 93/42/EWG über medizinische Geräte.
Anwendung: Erwachsene und Kinder mit einem Körpergewicht von
mehr als ca. 15 kg (3 Jahre).
Max. Hubvolumen: Ca. 1.300 ml
Länge x Durchmesser (mit Patientenventil): 275 mm x 135 mm
Gewicht des Beatmungsbeutels mit Patientenventil (ohne
Sauerstoffreservoirbeutel und Maske): Ca. 415 g
Max. Beatmungsfrequenz: Abhängig vom Beatmungsvolumen.
Die Entfaltungsgeschwindigkeit des Beutels ist adäquat für alle in
der Praxis empfohlenen Frequenzen.
Patientenstutzen: 22/15 mm (ISO)
Exspirationsstutzen: 30 mm, männlich (ISO)
Inspirationsstutzen: (EN ISO 10651-4) 32 mm, weiblicher Konus, für
Anschluss des Ambu Sauerstoffreservoirbeutels oder des ISO-
Beutelfüllventils.
Totraum: < 5 ml
Vor- und Rückwärtsleckage: Nicht messbar
Inspiratorischer Widerstand des Beatmungsbeutels bei 50 l/min:
Ca. -0,35 kPa (-3,5 cmH2O)
Inspiratorischer Widerstand des Sauerstoffreservoirbeutels bei 50
l/min. ohne Zufuhr von Sauerstoff: Ca. -0,1 kPa (-1,0 cmH2O)
Max. erreichbarer Ausgangsdruck bei 0,2 l/kPa:
ca. 10 kPa (100 cmH2O)
Druckbegrenzungssystem: Die Elastizität der äußeren Hülle begrenzt
den Atemwegsdruck beim normalen Zusammendrücken mit einer Hand,
wie in P gezeigt, auf einen Höchstwert von ca. 7 kPa (70 cmH2O).
Exspiratorischer Widerstand des Beatmungsbeutels bei 50 l/min:
Ca. 0,26 kPa (2,6 cmH2O)
Volumen des Sauerstoffreservoirs: Ca. 1.500 ml
Anwendungstemperatur: -18 °C bis 50 °C
Lagertemperatur: -40 °C bis 70 °C
Teile/Materialien
Innenbeutel Silikongummi
Außenhülle des Beutels Silikongummi
Patientenventilgehäuse PSU
O-Ring (innerer Teil des Patientenstutzens) Silikongummi
Patientenstutzen PSU
Klappe Silikongummi
Exspirationsstutzen Verstärktes PP
Sauerstoffreservoirbeutel (optionales Zubehör) PES/TPU
Anschluss für Reservoir einschl. Kappe und
Schraubkappe (optionales Zubehör) POM/verstärktes PP
Haltegurt Silikongummi
Sauerstoffzufuhrschlauch (optionales Zubehör) EPDM-Kautschuk
Schlauchadapter (optionales Zubehör) POM
Verlängerungsschlauch (optionales Zubehör) EPDM-Kautschuk
Auslaufschutz (optionales Zubehör) PSU
Namensschild Aluminium
Fenster mit Schnappverschluss PSU
Anschluss POM
Einlassventilgehäuse POM
Schraubkappe (zweiteilig) POM
0086

14
Deutsch
4. Funktion
Qzeigt, wie die Beatmungsluft sowohl bei manueller Betätigung des
Beatmungsbeutels als auch bei Spontantatmung des Patienten in den
Beutel und zu dem Patienten hin bzw. von dem Patienten weg fließt.
Der Luftstrom bleibt unverändert bei Spontanatmung des Patienten
durch das Gerät.
Q1.1: Luft, 1.2: Sauerstoffeinlass, 1.3: Patient, 1.4: Exspiration,
1.5: Auslasskappe (optionales Zubehör)
Der Führungsstift der Ventilklappe des Patientenventils ist ein sichtbarer
Indikator der korrekten Funktionsweise des Geräts. Die Benutzer
müssen immer – sowohl vor als auch nach der Verwendung – sicher-
stellen, dass sich die Ventilführung bei Einatmung nach vorne und bei
Ausatmung zurück bewegt. Siehe Abbildung W.
W2.1: Führungsstift (nach vorne), 2.2: Insufflation oder
Spontanatmung, 2.3: Führungsstift (zurück), 2.4: Exspiration
5. Bedienung
5.1. Beatmung mit Gesichtsmasken
– siehe Abbildung
E
Entfernen Sie sichtbare Fremdkörper aus Mund und Rachen.
Lagern Sie den Patienten korrekt, damit die Atemwege freigemacht
werden können.
Drücken Sie die Maske fest auf das Gesicht des Patienten, um eine
dichte Versiegelung zu erreichen. Drücken Sie die Maske fest auf das
Gesicht und überstrecken Sie dabei den Kopf des Patienten, um die
Atemwege frei zu halten.
WARNHINWEIS
Vor der Anwendung eines Beatmungsbeutels muss das korrekte
Aufsetzen der Gesichtsmaske ausführlich geübt werden. Andernfalls
kann es zu einem verringerten oder gar keinem Luftstrom kommen.
Drücken Sie den Beutel mit einer Hand zusammen. Beobachten Sie
während der Beatmung das Anheben des Thorax des Patienten.
Lassen Sie den Beutel mit einer abrupten Bewegung los. Kontrollieren
Sie das Ausströmen der Exspirationsluft am Patientenventil, und
beobachten Sie das Senken des Thorax. Falls ein andauernder
Widerstand gegen die Inspiration vorhanden sein sollte, untersuchen
Sie den Patienten auf verlegte Atemwege bzw. achten Sie auf eine
korrekte Kopfhaltung.
Die richtige Beatmungsfrequenz kann variieren. Beachten Sie die emp-
fohlene Beatmungsfrequenz nationaler oder internationaler Richtlinien.
Falls der Patient während der Maskenbeatmung erbricht, machen Sie
die Atemwege sofort frei. Komprimieren Sie mehrmals den Beutel vor
der weiteren Verwendung, wobei die Maske nicht mit dem Gesicht in
Kontakt sein darf.
Prüfen Sie, ob Inspiration und Exspiration ohne Widerstand auszu-
führen sind.
Das Patientenventil kann zerlegt und gereinigt werden, wenn das unbe-
hinderte Strömen der Luft im Ventil durch viel Erbrochenes blockiert ist.
Wenn Sie das Ventil zerlegt und gereinigt haben, führen Sie vor einer
weiteren Beatmung eine Funktionskontrolle durch. (Weitere Infor-
mationen finden Sie in Abschnitt 8.1.)
Die Sauerstoffzufuhr richtet sich nach der medizinischen Indikation.
Weitere Informationen finden Sie in den Abschnitten 5.2 bis 5.4.
5.2. Sauerstoffzufuhr ohne Reservoir
– siehe Abbildung
R
Durch Anschließen des O2-Schlauchstutzens auf dem Einlassventil kann
zusätzlicher Sauerstoff zugeführt werden.
Beispiele für O2-Prozentsätze, die mit unterschiedlichen Volumina
und Frequenzen erreicht werden, sind in Abbildung T dargestellt.
VT :Beatmungsvolumen, f : Frequenz

Deutsch
15
5.3 Sauerstoffzufuhr mit Reservoirbeutel
– siehe Abbildung
Y
Durch Anschließen des Sauerstoffreservoirbeutels ist die optimale
Verwendung des Sauerstoffes gewährleistet. Die Sauerstoff-
konzentration des Beatmungsgases liegt bei 100 % O2, wenn der
Sauerstofffluss dem Minutenvolumen entspricht oder überschreitet.
Y6.1: Gefüllt, 6.2: Leer (Sauerstoffschlauchstutzen am Sauerstoff-
reservoirbeutel = 6 mm).
UBeispiele für O2-Prozentsätze, die mit unterschiedlichen Volumina
und Frequenzen erreicht werden, sind in Abbildung Udargestellt.
VT :Beatmungsvolumen, f : Frequenz
Damit Sie die Werte auch im Notfall zur Hand haben, ist auf dem
Reservoirbeutel ein vereinfachtes Diagramm aufgedruckt. Siehe
Abbildung I. Die angegebene Sauerstoffkonzentration wird erreicht
und überschritten, wenn das Minutenvolumen gleich oder kleiner als
1.000 x 15 = 15 l/min bzw. 300 x 20 = 6 l/min ist.
Beispiele: Führen Sie einen Sauerstofffluss von 13 l/min über den
Einlass des Reservoirbeutels zu. Bei einem Beatmungsvolumen von
max. 1.000 ml und einer Kompressionsfrequenz von max. 15 pro
Minute erreicht ein Erwachsener eine Sauerstoffkonzentration von
mindestens 85 %.
Führen Sie einen Sauerstofffluss von 2 l/min über den Einlass des
Reservoirbeutels zu. Bei einem Beatmungsvolumen von max. 300 ml
und einer Kompressionsfrequenz von max. 20 pro Minute erreicht ein
Kind eine Sauerstoffkonzentration von mindestens 40 %.
6. Beschreibung
Der Ambu Mark IV Beatmungsbeutel basiert auf dem Ambu
Doppelwandprinzip.
Das Grundmodell des Ambu Mark IV Beatmungsbeutels setzt sich aus
den folgenden Teilen zusammen: Beutel mit Einlassventil und
Patientenventil.
6.1. Beutel – siehe Abbildung
O
9.1: Anschluss, 9.2: Dünne Außenhülle, 9.3: Innenbeutel, 9.4:
Einlassventilgehäuse (ISO 32-mm-Stutzen zum Anschluss des
Sauerstoffreservoirbeutels und des verwendeten Einlassstutzens, wenn
der Sauerstoffreservoirbeutel nicht verbunden ist), 9.5:
Flaschenverschluss. 9.9: Der Beutel ist mit einem Haltegurt zur
Unterstützung des Haltens des Beutels bei der Beatmung sowie einem
integrierten Aufhängeriemen ausgestattet, 9.10: Der Aufhängeriemen
hat ein Fenster mit einem Schnappverschluss mit einem Namensschild
Auf dem Namensschild kann gestempelt oder graviert werden.
Während der Bedienung des Beutels mit einer Hand verhindert die
Elastizität der Außenhülle, dass der Atemwegsdruck 7 kPa (70 cmH2O)
übersteigt. Dieser Druckbegrenzungseffekt ohne Hubverlust ist ein
einzigartiges Leistungsmerkmal des Ambu Mark IV Beatmungsbeutels.
6.2. Patientenventil – siehe Abbildung
{
Die Funktion des Ventils wird in Abschnitt 4 beschrieben.
{11.1: Auslaufschutz (optionales Zubehör),11.2: 30-mm-
Exspirationsstutzen, männlich (ISO), für den direkten Anschluss des
Ambu PEEP-Ventils,
11.3: 24-mm-Inspirationsstutzen (männlich),
11.4: 22/15 ISO Patientenstutzen.
6.3. Sauerstoffreservoirbeutel (optional)
– siehe Abbildung
O
Der Sauerstoffreservoirbeutel besteht aus einem PES/TPU-Beutel (9.8),
der an ein Reservoirgehäuse (9.6) mit Kappe (9.7) angeschlossen ist,
der in das Einlassventilgehäuse des Beatmungsbeutels passt.
Das Ventil enthält zwei Klappen aus Silikongummi. Dadurch kann
Umgebungsluft aufgenommen werden, wenn der Beutel leer ist. Wenn
der Beutel voll ist, kann überschüssiger Sauerstoff abgegeben werden.

16
Deutsch
7. Reinigung, Desinfektion und Sterilisation
In }ist der zur Reinigung, Desinfektion und Sterilisation
auseinandergenommene Beatmungsbeutel dargestellt.
Achtung: Nehmen Sie die Teile nicht weiter auseinander als in der
Abbildung dargestellt.
Nach jedem Patienteneinsatz oder nach den Regeln/Vorschriften des
betreffenden Krankenhauses reinigen, desinfizieren, sterilisieren.
}12.1: Patientenventil, einschl. Auslaufschutz, 12.2: Beutel, einschl.
Anschluss, 12.3: Sauerstoffreservoirbeutel, 12.4:
Verlängerungsschlauch, 12.5: Sauerstoffzufuhrschlauch
Beatmungsbeutel nach Verwendung bei Patienten bzw. in Umge-
bungen mit Infektionskrankheiten vollständig reinigen, desinfizieren,
sterilisieren.
Anwendbare
Methoden
●anwendbar
❍nicht anwendbar
Teile
12.1 ●●●●●●●
12.2 ●●●●●●●
12.3 ●●●●●●●
12.4 ●●●●●●●
12.5 ●●●●●●●
Handwäsche Spülmaschine Erhitzen Kochen Chemisch
Desinfektion 121 °C
(250 °F) 134 °C
(250 °F)
Reinigung Desinfektion – Sterilisation
Waschen Desinfektion Autoklavieren

Reinigungsmittel und chemische Desinfektionsmittel
Es gibt zahlreiche verschiedene Marken von Reinigungsmitteln und
chemischen Desinfektionsmitteln. Verwenden Sie nur Marken, die für
die Materialien des Beatmungsbeutels geeignet sind, um die Lebens-
dauer der Materialien nicht zu verkürzen. Eine Liste der Materialien
finden Sie in Abschnitt 3. Befolgen Sie die Anleitungen der Hersteller
der Reinigungsmittel und chemischen Desinfektionsmittel hinsichtlich
Verdünnung und Dauer der Anwendung. Phenolhaltige Substanzen
sind zu vermeiden.
Informationen zu ausgewählten Reinigungsmitteln und chemischen
Desinfektionsmitteln, die auf ihre Verträglichkeit mit den Materialien
des Beatmungsbeutels getestet wurden, können Sie bei Ihrem Ambu
Vertreter oder Ambu International A/S anfordern.
Achtung: Verwenden Sie keine phenolhaltigen Substanzen zum
Reinigen des Produkts. Phenol verursacht einen vorzeitigen Verschleiß
des Materials und/oder eine geringere Lebensdauer des Produkts.
Achtung: Entfernen Sie Rückstände von Reinigungsmitteln sofort vom
Beatmungsbeutel. Diese Rückstände können Oberflächen angreifen
oder die Lebensdauer des Produkts verkürzen.
Vorgehensweise für Reinigung, Desinfektion und Sterilisation
Im Allgemeinen sind die folgenden Schritte auszuführen. Wählen Sie
gemäß der oben abgebildeten Tabelle die korrekten Methoden für die
jeweiligen Teile des Beatmungsbeutels aus.
7.1. Zerlegen des Beatmungsbeutels
Der Beatmungsbeutel muss zum Reinigen wie in Abbildung }
dargestellt auseinandergenommen werden.
Achtung: Den Patientenanschluss nicht vom Patientenventil trennen
(permanent zusammengebaut).
Hinweis: Nehmen Sie die Teile nicht weiter auseinander als in der
Abbildung }dargestellt. Weitere Informationen dazu finden Sie in
Abbildung q.
Entfernung des Haltegurts: Den Gurt auf der Rückseite der trans-
parenten Namensschildhülle wie in Fig. egezeigt entfernen.
Die Kappe über den Gurt ziehen und das Namensschild entfernen.
Den Gurt durch die Nut ziehen. Danach den Gurt durch die Nut vor dem
Anschluss ziehen.
7.2. Reinigen der Teile
Handwäsche oder automatische Spülmaschine
Waschen Sie die Teile in Wasser mit einem für die Materialien des
Beatmungsbeutels geeigneten Reinigungsmittel. Siehe Abschnitt 3.
Spülen Sie alle Teile gründlich in klarem Wasser ab, um Rückstände des
Reinigungsmittels zu entfernen.
Achten Sie bei der Reinigung und/oder Desinfektion der Außenflächen
darauf, dass das Reinigungsmittel bzw. das Desinfektionsmittel für die
Materialien des Beatmungsbeutels geeignet ist. Entfernen Sie alle
Rückstände durch Abspülen mit klarem Wasser. Angetrocknete
Rückstände können die Lebensdauer der Materialien verkürzen.
Eine automatische Spülmaschine mit einem Programm zum Spülen von
Anästhesiezubehör kann ebenfalls verwendet werden.
7.3. Desinfizieren und/oder Sterilisieren
Führen Sie gemäß den örtlichen Bestimmungen und der Tabelle der
anwendbaren Methoden eine Desinfektion durch Erhitzen oder eine
chemische Desinfektion aus.
Spülmaschine – Programm zur Desinfektion durch Erhitzen:
Automatische Spülmaschinen für medizinisches Zubehör bieten im
Normalfall Programme zur Desinfektion durch Erhitzen.
Kochen: Verwenden Sie klares Wasser. Erhitzen und kochen Sie die
Teile für z. B. 10 Minuten, um sie zu desinfizieren.
Chemisches Desinfizieren (z. B.: Cidex, Chemikalie mit Natrium-
hypochlorit usw.): Befolgen Sie die Anleitungen der Hersteller der
Reinigungsmittel und chemischen Desinfektionsmittel hinsichtlich
Verdünnung und Dauer der Anwendung. Spülen Sie alle Teile des Beat-
mungsbeutels nach der Anwendung des chemischen Desinfektionsmittels
gründlich mit klarem Wasser ab, um alle Rückstände zu entfernen.
Deutsch
17

18
Deutsch
Hinweis: Der Sauerstoffreservoirbeutel sollte nicht in chemische
Desinfektionsmittel eingetaucht werden, da er nur schwer abgespült
werden kann.
Autoklavieren: Verwenden Sie Standardautoklaven für 121 °C bzw.
134 °C gemäß der oben dargestellten Tabelle für die entsprechenden
Teile des Beatmungsbeutels.
7.4 Trocknen und Abkühlen
Lassen Sie die Teile vollständig trocknen und/oder abkühlen, bevor Sie
den Beatmungsbeutel wieder zusammenbauen.
7.5. Überprüfen der Teile
Prüfen Sie nach der Reinigung, Desinfektion und/oder Sterilisation alle
Teile sorgfältig auf Beschädigungen oder übermäßigen Verschleiß.
Tauschen Sie die Teile gegebenenfalls aus. Einige Methoden können
Verfärbungen der Gummiteile verursachen, die sich jedoch nicht auf
die Lebensdauer auswirken. Bei Materialermüdung, z. B. Rissbildung,
sollten die Teile ausgetauscht werden.
Nach dem Waschen und Autoklavieren kann es beim Sauerstoffreser-
voirbeutel zu geringfügiger Faltenbildung kommen.
Dies wirkt sich auf die Lebensdauer oder Funktion jedoch nicht aus.
7.6. Zusammenbau und Funktionskontrolle
– siehe Abbildung
w
Achten Sie beim Einsetzen des Innenbeutels in die Außenhülle darauf
(siehe 14.1, 14.2 und 14.3), dass das Anschlussstück der Außenhülle in
den Auslassstutzen einrastet (14.4).
Kontrollieren Sie, dass die Außenhülle nicht verkehrt herum liegt (die
Art.-Nr. und das Ambu-Logo auf der Außenhülle müssen auf der
Außenseite sichtbar sein).
Der Anschluss rastet in den Auslassstutzen der Innenhülle ein (siehe 14.5
und 14.6). Das Einlassventilgehäuse rastet in den Anschluss der Innen-
hülle ein (14.7 und 14.8), und die Schraubkappe wird angeschraubt (14.9).
Beim Einsetzen der Patientenventilklappe soll geprüft werden, ob das
Ende des Führungsstifts durch das Loch in der Mitte des Patienten-
ventilgehäuses geführt ist, wonach der Exspirationsstutzen einge-
schraubt wird (siehe 14.10, 14.11 und 14.12). Beim Einsetzen der
Auslasskappe (optionales Zubehör) soll geprüft werden, ob die
Kappenöffnung dem Patientenanschluss zugewandt ist (siehe 14.12).
Führen Sie die Funktionskontrolle durch. Weitere Informationen finden
Sie in Abschnitt 8.
8. Funktionskontrolle
8.1 Beatmungsbeutel
1) Stecken Sie einen Atembeutel mit 1-1,5 Liter auf den Patienten-stutzen.
Komprimieren Sie den Beatmungsbeutel mehrmals, und lassen Sie
ihn wieder los. Der Atembeutel sollte sich mit Luft füllen.
Während der Beatmung muss das Füllen und Entlasten des
Atembeutel sichtbar sein. Siehe Abbildung r.
2) Drücken Sie den Beatmungsbeutel zusammen, und halten Sie ihn
gedrückt. Dadurch sollte in dem Atembeutel ein positiver Druck
entstehen und bis zu 10 Sekunden, oder bis der Beatmungsbeutel
entlastet wird, erhalten bleiben.
WARNHINWEIS
Führen Sie den folgenden Test unmittelbar vor jedem Einsatz des
Beatmungsbeutels aus. Andernfalls kann es zu einer verringerten
oder gar keiner Beatmung kommen.
3) Schließen Sie den Patientenanschluss mit einem Finger. Drücken Sie
den Beatmungsbeutel fest zusammen, um die Dichtigkeit und den
festen Sitz der Ventile zu prüfen. Siehe Abbildung t.

Deutsch
19
8.2. Sauerstoffreservoirbeutel
Führen Sie Sauerstoff mit einem Flow von ca.5 l/min über den Einlass-
stutzen zu. Schließen Sie den Auslass mit einer Hand. Der Beutel sollte
sich entfalten. Siehe Abbildung y.
Beenden Sie die Sauerstoffzufuhr. Drücken Sie den Beutel zusammen.
Prüfen Sie, ob das Gas über die Öffnungen des Überdruckventils in die
Umgebungsluft unbehindert abgegeben wird. Siehe Abbildung u.
9. Wartung
Für den Ambu Mark IV ist mit Ausnahme der regelmäßigen Reinigung,
Überprüfung und Funktionskontrolle keine planmäßige Wartung
erforderlich.
Nach dem Zerlegen für die Reinigung, Desinfektion oder Sterilisation
wird die sorgfältige Überprüfung aller Teile empfohlen.
Sollten Teile verloren gehen oder defekt sein, sind Ersatzteile erhältlich
(siehe Liste in Abschnitt 11).
Hinweis: Vor der erneuten Freigabe für die Verwendung muss der
Ambu Mark IV Beatmungsbeutel gemäß diesem Handbuch auf ein-
wandfreie Funktion überprüft werden (siehe Abschnitt 8).
10. Lagerung
Der Ambu Mark IV Beatmungsbeutel sollte nicht direkter Sonnen-
einstrahlung oder sehr hohen Temperaturen ausgesetzt werden.
Zur platzsparenden Aufbewahrung, z. B. in einem Notfallkoffer, kann
das Einlassende in den Beutel geschoben werden, wie in Abbildung i
dargestellt.
Achtung: Falten Sie den Beatmungsbeutel zur Aufbewahrung nur so
zusammen, wie in Abbildung idargestellt.
Achtung: Drücken Sie den Beutel während der Lagerung nicht über-
mäßig stark zusammen.
Den Beatmungsbeutel nie in unmittelbarer Nähe von Produkten,
die Öl oder Schmierstoffe enthalten, aufbewahren.
Lagertemperatur: -40 °C bis 70 °C
Für längere Zeiträume sollte der Beatmungsbeutel in einer ver-
schlossenen Verpackung, kühl und dunkel gelagert werden.

20
Deutsch
12. Zubehör – siehe Abbildung
p
Kat.-Nr. Siehe
230 000 001 Ambu Pack, mit transparentem Deckel,
ohne Inhalt, L x H x T: 350 x 280 x 140 mm
Leergewicht: 0,705 kg 22.1
230 000 051 Ambu Pack, mit orangefarbenem Deckel,
ohne Inhalt, L x H x T: 350 x 280 x 140 mm
Leergewicht: 0,705 kg 22.2
000 137 000 PEEP-Ventil 10 22.3
000 213 000 PEEP-Ventil 20 22.4
209 000 701 Verlängerungsschlauch, Länge 30 cm,
mit 2 Adaptern 22.5
209 000 702 Verlängerungsschlauch, Länge 90 cm,
mit 2 Adaptern 22.6
209 000 703 Verlängerungsschlauch, Länge 105 cm,
mit 2 Adaptern 22.7
000 059 274 28/32-mm-Schlauchadapter, 28-mm-Anschluss,
weiblich, zur Montage auf Einlassstutzen des
Mark IV Patientenventils 32-mm-Anschluss,
männlich, für Montage auf Einlassventil
des Mark IV Beutels 22.8
000 059 276 24-mm-Schlauchadapter, weiblich, für
Montage auf Auslassstutzen des
Mark IV Beutels 22.9
304 000 507 Sauerstoffreservoirbeutel, komplett 22.10
000 171 004 Sauerstoffzufuhrschlauch 22.11
11. Ersatzteile – siehe Abbildung
o
Kat.-Nr. Siehe
000 245 010 Auslaufschutz (optionales Zubehör) 21.1
000 245 009 Exspirationsstutzen 21.2
304 000 501 Ambu Mark IV Innenbeutel 21.7
304 000 502 Ambu Mark IV Außenhülle 21.6
304 000 503 Ambu Mark IV Anschluss, komplett 21.5
304 000 504 Ambu Mark IV Haltegurt, komplett
mit Namensschild 21.16 -21.17 -21.18
304 000 505 Ambu Mark IV Einlassventil, komplett
21.8 -21.9 -21.10
304 000 506 Namensschild 21.18
304 000 507 Sauerstoffreservoirbeutel, komplett
21.11-21.12 -21.13 -21.14
304 000 508 Sauerstoffreservoirbeutel 21.14
304 000 509 Gehäuse für Sauerstoffreservoirbeutel
21.11 - 21.12 - 21.13
245 000 514 Ventilklappe für Sauerstoffreservoirbeutel 21.12
245 000 509 Ventilklappe für Einmembran-Patientenventil
und Einlassventil 21.3
295 000 501 Einmembran-Patientenventil, komplett
21.2 - 21.3 - 21.4
295 000 502 Einmembran-Patientenventil, komplett
mit Auslaufschutz 21.1 - 21.2 - 21.3 - 21.4
295 000 503 Einmembran-Patientenventilgehäuse 21.4

Français
21
1. Avertissements et précautions
AVERTISSEMENTS
• Une ventilation insuffisante, réduite ou absente peut provoquer des
dommages cérébraux chez le patient en cours de ventilation.
• Usage strictement réservé au personnel formé à la réanimation.
Veillez à assurer un joint étanche entre le masque et le visage du
patient, faute de quoi la ventilation sera réduite ou totalement
absente. Veillez à ce que le personnel se familiarise avec le contenu
de la présente notice.
• Observez les mouvements de la poitrine et écoutez le débit d’air
expiratoire sortant de la valve de manière à vérifier l’efficacité de la
ventilation, faute de quoi vous risqueriez de ventiler insuffisamment
le patient.
• Passez IMMÉDIATEMENT à une ventilation bouche-à-nez ou bouche-à-
bouche conforme aux prescriptions en vigueur s’il n’est pas possible
d’assurer une ventilation efficace avec cet appareil, faute de quoi
vous risqueriez de ventiler insuffisamment le patient.
• Ne fumez pas et n’utilisez pas de flammes nues lorsque vous utilisez
de l’oxygène, au risque de provoquer un incendie.
• Evitez d’utiliser l’insufflateur dans une atmosphère toxique ou
dangereuse, au risque de provoquer des lésions. Voir le point 5.4
pour des détails complémentaires.
PRÉCAUTIONS
• Conformément à la législation fédérale américaine, cet appareil ne
peut être vendu que par un médecin ou sur ordonnance délivrée par
celui-ci (USA et Canada uniquement).
• Il est important de s’assurer que tous les éléments de l’insufflateur sont
en parfait état, que celui-ci est correctement assemblé et qu’un test de
bon fonctionnement complet est effectué chaque fois que l’appareil
est désassemblé et avant qu’il soit utilisé pour la première fois.
• En outre, ce test fonctionnel, qui est décrit au paragraphe 8.1, doit
être effectué avant chaque utilisation.
• Si l’insufflateur et ses accessoires sont laissés en attente en prévision
d’une urgence, l’ensemble doit être contrôlé régulièrement de
manière à garantir son fonctionnement.
• Évitez l’utilisation ou tout contact avec des huiles et des graisses.
Ces produits peuvent compromettre l’intégrité des matériaux de
l’insufflateur. En cas de contact, nettoyez la surface avec le plus
grand soin.
• Évitez d’utiliser des huiles ou des graisses à proximité d’un matériel
employant de l’oxygène, au risque de provoquer un incendie.
• L’enveloppe extérieure du ballon ne doit pas être forcée jusqu’à
présenter un gonflement localisé en fermant le raccord patient et en
comprimant le ballon très fortement avec la totalité de la main au
point de former localement une bulle, au risque de solliciter
exagérément le matériau.

22
Français
2. Domaine d’application
L’insufflateur Ambu Mark IV est destiné à la réanimation pul-
monaire des adultes et enfants dont le poids corporel est supérieur à
15 kg environ (à partir de 3 ans).
3. Caractéristiques techniques
L’insufflateur Ambu Mark IV est conforme aux normes
suivantes : ASTM F 920-93 et EN ISO 10651-4:2002.
L’insufflateur Ambu Mark IV est conforme à la directive
européenne 93/42/CEE relative aux dispositifs médicaux.
Domaine d’application : Adultes et enfants dont le poids
corporel est supérieur à 15 kg environ (à partir de 3 ans).
Volume maximum par compression : Environ 1300 ml
Longueur x diamètre (valve patient incluse) : 275 mm x 135 mm
Poids de l’insufflateur avec valve patient
(sans ballon réservoir ni masque) : Environ 415 g
Fréquence de ventilation maximum: Dépend du volume d’insufflation
utilisé. Le taux de dilatation du ballon est suffisamment rapide pour
toutes les fréquences de ventilation recommandées dans la pratique.
Raccord patient : 22 /15 mm (ISO)
Raccord expiratoire : 30 mm mâle (ISO)
Raccord inspiratoire : (EN ISO 10651-4) femelle 32 mm pour
fixation du ballon réservoir d’oxygène Ambu ou de la bague de
remplissage de ballon ISO
Volume mort : < 5 ml
Fuites (dans les deux sens) : Non mesurable
Résistance inspiratoire de l’insufflateur à 50 l/min :
Environ -0,35 kPa (-3,5 cmH2O)
Résistance inspiratoire du ballon réservoir d’oxygène à 50 l/min
sans admission d’oxygène : Environ -0,1 kPa (-1,0 cmH2O)
Pression maximale par compression à 0,2 l/kPa :
Environ 10 kPa (100 cmH2O)
Système de limitation de pression : L’élasticité de l’enveloppe
extérieure du ballon limite la pression dans les voies aériennes à un
maximum d’environ 7 kPa (70 cmH2O) pendant la compression
normale du ballon à une main, comme illustré en P.
Résistance expiratoire à 50 l/min : Environ 0,26 kPa (2,6 cmH2O)
Volume du ballon réservoir d’oxygène : Environ 1500 ml
Température d’utilisation : -18° C à 50° C
Température de stockage : -40° C à 70° C
Composants / matériaux
Ballon interne Caoutchouc silicone
Ballon extérieur Caoutchouc silicone
Corps de la valve patient PSU
Joint torique (partie interne du raccord patient) Caoutchouc silicone
Raccord patient PSU
Clapet de valve Caoutchouc silicone
Raccord expiratoire PP renforcé
Ballon réservoir d’oxygène (option) PES/TPU
Corps du réservoir, y compris le capuchon
et le capuchon à visser (option) POM/PP renforcé
Dragonne Caoutchouc silicone
Tuyau spiral (option) Caoutchouc EPDM
Adaptateur pour tuyau (option) POM
Tube prolongateur (option) Caoutchouc EPDM
Capsule anti-projection (option) PSU
Plaque signalétique Aluminium
Fenêtre avec bouton à pression PSU
Raccord POM
Corps de valve d’admission POM
Capuchon à visser (deux pièces) POM
0086
Other manuals for Mark IV
2
Table of contents
Languages:
Other Ambu Medical Equipment manuals

Ambu
Ambu Mark IV User manual

Ambu
Ambu Redi-ACE Adult User manual

Ambu
Ambu BronchoSampler 60 User manual

Ambu
Ambu aBox 2 User manual

Ambu
Ambu aBox 2 User manual

Ambu
Ambu aBox 2 Operating and safety instructions

Ambu
Ambu aScope 5 User manual

Ambu
Ambu AuraGain User manual

Ambu
Ambu Mark IV User manual

Ambu
Ambu aScope Duodeno User manual

Ambu
Ambu AuraOnce Single Use Laryngeal Mask User manual

Ambu
Ambu aScope 3 5.0/2.2 User manual

Ambu
Ambu AmbuMan I Manual

Ambu
Ambu Perfit ACE Manual

Ambu
Ambu aScope Gastro User manual

Ambu
Ambu AmbuMan Operating instructions

Ambu
Ambu SPUR II User manual

Ambu
Ambu VivaSight 2 DLT User manual

Ambu
Ambu AuraOnce User manual

Ambu
Ambu MultiMan Manual