Ameda Mya Joy User manual

Instructions for use
Ameda.com || 866.992.6332 || ParentCare@ameda.com
Double Electric Breast Pump
Mya Joy


3
Congratulations on joining the Ameda family!
We are excited to help you meet your breastfeeding goals along your breastfeeding journey
with your baby. With our Ameda breast pump and HygieniKit ®Milk Collection System, you
can express and collect your breast milk safely and effectively.
The Ameda HygieniKit is a closed system that contains a diaphragm that keeps the air from
the pump and tubing separate from the pump parts that are exposed to your breast milk, so
your tubing stays dry. This diaphragm helps prevent milk backup into tubing.
If you have any questions regarding your Ameda breast pump or HygieniKit, we have a certified
customer service ParentCare team available to help you. Have your breast pump and parts
nearby when you call. ParentCare is available by phone during business hours on weekdays at
1.866.992.6332. Please check www.ameda.com for up-to-date available times.
For more information about breastfeeding, breast pumping or Ameda products visit
www.ameda.com. For more product information or feedback in other countries, visit
www.ameda.com for a list of distributors outside of the United States.

4
TABLE OF CONTENTS
1. WARNINGS & CAUTIONS ...................................................................................... 7
2. INTENDED USE ......................................................................................................... 9
3. CONTRADICTIONS FOR USE ............................................................................. 10
4. PRODUCTDESCRIPTION.............................................................................................. 10
5. ................................................................................................. 11
5.1 Before First Use: Cleaning The HygieniKit ................................................. 11
5.2 Assembling the HygieniKit Milk Collection System ................................... 12
6. INSPECTING BEFORE PUMPING ............................................................................... 14
7. OPERATING INSTRUCTIONS....................................................................................... 14
7.1 Plug into Power Source ................................................................................... 14
7.2 Button Control .................................................................................................. 15
7.3 LCD Icons & Modes .......................................................................................... 16
7.4 To Begin Pumping ............................................................................................. 17
7.5 How to Fit Your Flange .................................................................................... 19
7.6 Breast Milk Storage Guidelines ...................................................................... 19
8. CLEANING THE HYGIENIKIT........................................................................................ 20
9. MAINTENANCE................................................................................................................ 21
9.1 Breast Pump Valve Check ............................................................................... 21
9.2 Storing & Transporting ..................................................................................... 21
10. TROUBLESHOOTING ..................................................................................................... 22
11. WARRANTY....................................................................................................................... 24
12. TECHNICAL DATA............................................................................................................ 25
12.1 Specifications .................................................................................................. 25
12.2 Electromagnetic Compatibility .................................................................... 26
12.3 Product Disposal ............................................................................................ 29
13. OPERATIONAL& STORAGE CONDITIONS ............................................................. 30
14. TRAVEL ORINTERNATIONAL USE ............................................................................ 30
15. AMEDA ACCESSORIES & SPARE PARTS ................................................................... 31
Waste Electrical and
Electronic Equipment
Storage
Storage
Icon Glossary
!
Fragile
Protect from
sunlight
Keep Dry
Warning
!
!
Important
!
Manufacturer
Catalogue Number
Unit of Measure
REF
UoM
Serial Number
106
70 kPa
104ºF
40ºC
41ºF
5ºC
Type BF Applied Part
Washing
Yes
No
Consult
for Use
EC REP
This product meets the applicable
in the European Community
IP22
%
90
15
%

7
1. WARNINGS & CAUTIONS
IMPORTANT SAFEGUARDS
When using electrical products, especially if children are present, the following
basic safety precautions should always be followed.
READ ALL INSTRUCTIONS BEFORE USING THIS
PRODUCT
DANGER: To reduce the risk of electrocution:
• Always unplug electrical product immediately after use.
• DO NOT use while bathing, showering or swimming.
• DO NOT place or store where product can fall or be pulled into a bathtub,
shower, sink, or pool.
• DO NOT place or drop product into water or other liquid.
• DO NOT reach for electrical product that has fallen into water.
Immediately unplug from electrical outlet.
WARNING: To avoid fire, electrocution, serious
burns or injury:
• NEVER leave product unattended when plugged into an electrical outlet.
• Close supervision is necessary when product is used near children or
persons with disabilities.
• Use product for its intended use ONLY, as described in this manual.
• DO NOT use parts that are not recommended by the manufacturer.
• Prior to use, always inspect power adapter for damage or exposed wires. If
Ameda Customer Service ParentCare at 1.866.992.6332.
!
The WARNING symbol identifies important safety instructions that if not
followed can lead to injury or damage to the breast pump. The warning
symbols when used with the following words stand for:
WARNING Can lead to serious injury or death.
CAUTION Can lead to minor injury.
IMPORTANT Can lead to material damage.
!
!
!

8
WARNING: To avoid health risk and reduce
the risk of injury:
This product is a personal care item and intended for use by only one user. This
product should not be shared between users or resold or given from one user
to another. Pumping does not prevent transmission of substances or infections
carried via breast milk to baby.
Note: Do not use product if damaged. Use product only for intended
use as described in this manual.
• DO NOT use pump while driving.
• Pumping can induce labor, DO NOT use while pregnant unless approved by
your breastfeeding specialist or healthcare professional.
• Prior to first use and after every use, clean all parts (flange, diaphragm, valve
and bottle) that come in contact with your breast and breastmilk.
• DO NOT use attachments other than those recommended by
manufacturer
• DO NOT make mechanical or electrical modifications to breast pump base.
• Inspect all appropriate pump components before each use. Check the parts
for cracks, chips, tears or wear. DO NOT use, contact Ameda Customer
Service ParentCare at 1.866.992.6332 immediately.
• DO NOT continue pumping for more than 2 consecutive pumping sessions
if no results are achieved.
• DO NOT heat or thaw frozen breastmilk in a microwave or boiling water.
Microwaving can heat liquids unevenly. Both microwaving and boiling water
can result in possible burns.
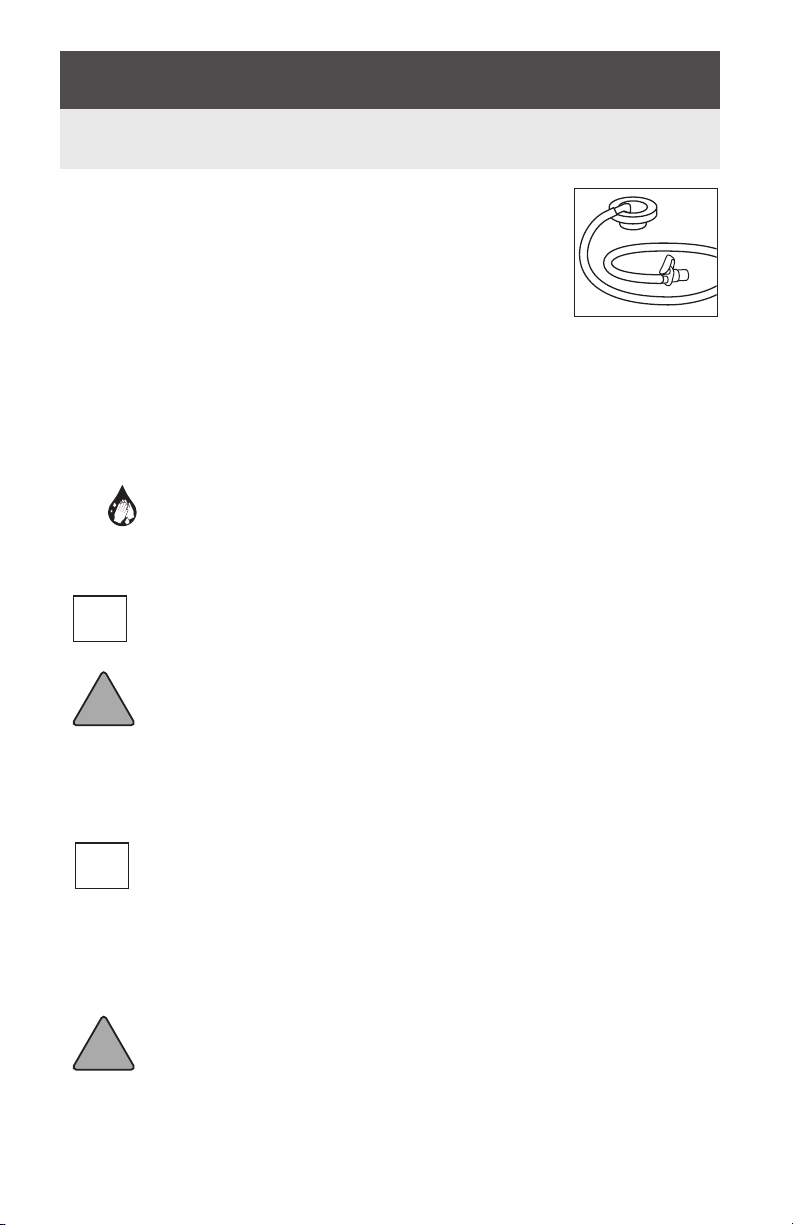
STRANGULATION HAZARD: Keep tubing and cords out of reach of children.
CHOKING HAZARD: Small parts, NOT for children under 3 years.
!
• NEVER operate electrical product: if it has a damaged cord or plug; if it is
not working properly; if it has been dropped, damaged, or becomes wet.
• Keep cord away from heated surface.
• DO NOT install batteries backwards, charge, put in fire, or mix with other
battery types. May explode or leak causing injury. Replace all batteries at
the same time.
• NEVER use while sleeping or when drowsy.
• NEVER insert or drop any object into any opening or into tubing.
Environmental Conditions That Affect Use
• DO NOT use outdoors with electrical cord.
• DO NOT operate where oxygen or aerosol spray products are being used.

9
CAUTION: Can lead to minor injury:
• If batteries are in pump base, remove batteries before using the power adapter.
• DO NOT wrap cord around the body of the adapter.
• Use ONLY the AC power adapter that is recommended for the Ameda Mya Joy
Breast Pump.
• DO NOT shorten tubing or modify the breast pump kit.
• Make sure the voltage of the power adapter is compatible with the power
source.
• Plug the AC power adapter into the pump base prior to plugging into the wall
socket.
• Remove AC power adapter from power source and remove batteries before
wiping outside of pump base clean with a damp cloth.
• Keep away from dust, lint and direct sunlight, as damage may occur to breast
pump where speed and suction may be reduced.
• DO NOT attempt to remove the breast flange from your breast while pumping.
Turn the breast pump off and with your finger, break the seal between your
breast and breast flange, then remove breast flange from your breast.
• ALWAYS place pump on a horizontal flat surface when using product.
• DO NOT change batteries or open battery cover when pump is on.
• Remove batteries before storing product for long periods of time.
!
IMPORTANT: Can lead to material damage.
• NEVER put electrical product in water or a sterilizer, as you can cause
permanent damage to the breast pump.
• DO NOT
pump or breast pump parts.
• When plastic bottles and plastic breast pump kit parts are frozen, they can
become brittle and may break when dropped.
• DO NOT over-fill bottles. Replace bottles before they overflow.
• Bottles and breast pump kit parts may become damaged if mishandled, e.g.
dropped, overtightened, or knocked over.
• Always check bottles or breast pump kit parts prior to pumping. Discard
breastmilk if bottles or breast pump kit parts are damaged.
SAVE THESE INSTRUCTIONS
2. INTENDED USE
The Ameda Mya Joy Breast Pump is intended to express and collect the mother’s
milk from the breasts of a nursing woman for the purpose of feeding the
collected milk to a baby.
!

10
4. PRODUCT DESCRIPTION
Ameda Mya Joy & HygieniKit
Milk Collection System
3. CONTRADICTIONS FOR USE
There are no known contradictions for use with this product.
Pump parts may vary
Contents
1. Ameda Joy Pump Unit
2. Power Adapter
Ameda HygieniKit Milk Collection
System
3. Tubing Adapter
4. Tubing
5. Adapter Cap
6. Diaphragm
7. Breast Flange (25.0mm)
8. Silicone Valve
9. Bottle
10. Bottle Locking Ring Cap
11. Bottle Locking Disc

11
5. SET-UP INSTRUCTIONS
5.1 Before First Use: Cleaning The HygieniKit
Before first use, unless otherwise directed by your
healthcare provider, prepare the product for use as follows:
1. POP OFF the adapter cap from the flange.
2. SET ASIDE adapter cap, tubing and tubing
adapter— you do not need to take these apart from
each other. These 3 parts DO NOT need to be
washed before first use or after each use — milk does
not come into direct contact with these parts.
Take apart the remaining parts, the diaphragm, flange, valve and milk storage
bottles, including locking ring and locking disc, since these are the parts that can
touch the breast milk once you begin pumping.
ALWAYS wash hands well with soap and water.
SANITIZE by Boiling
IMPORTANT: Set aside tubing, adapter cap and tubing adapter. These
parts DO NOT need to be washed. DO NOT allow boiling parts to
contact bottom of pot. It may cause damage to parts.
WARNING: DO NOT leave boiling parts unattended. Remove parts
carefully from boiling water to avoid burning. Boiled water and steam
from boiled water can cause severe skin burns, so use caution when boiling
parts in water and removing parts from boiling water.
SANITIZE in Microwave: Follow steam bag manufacturers' instructions.
IMPORTANT: Set aside tubing, adapter cap and tubing adapter. These
parts DO NOT need to be washed.
• Properly clean pump parts first or the milk residuals will be "cooked" onto the
parts and provide a medium for bacterial growth.
• Please check pump kit parts for cracks, chips, tears or deformation before and
after sanitization process.
WARNING: Please use precaution. The major risk with steam bags is
scalding so moms and caregivers should be very careful when they take
the bag out of the microwave.
!
!
!
!
DO NOT wash
adapter cap, tubing
and tubing adapter.

12
5.2 Assembling the HygieniKit Milk Collection System
Milk Collection System (Pump Kit).
HOLD by the rim or thicker
sides of the valve. PUSH the valve onto the
bottom of the flange.
Tubing
Adapter
Tubing
Adapter Cap
Diaphragm
Breast Flange
Valve
Bottle
1
2 3

13
8a
Pump parts may vary.
ASSEMBLED HYGIENIKIT
for single pumping.
8b
ASSEMBLED HYGIENIKIT
for double pumping.
ATTACH the adapter cap(s)
by pressing it onto the top of
the flange(s) until you hear a
pop.
The tubing should still be
CONNECTED to the adapter
cap(s) and tubing adapter.
If you have taken these apart,
attach tubing to adapter cap(s)
and the tubing to the tubing
adapter.
7
6
4
ATTACH and TIGHTEN the
bottle or attach milk storage
bag.
5
INSERT the diaphragm into
the top of the flange.
It is important that the inside
of the diaphragm is completely
DRY to avoid moisture from
forming in the tubing.

14
6. INSPECTING BEFORE PUMPING
IMPORTANT: Before using the Ameda Mya Joy and HygieniKit
system, check the parts for cracks, chips, tears, or wear. They can affect the
function of the kit. If parts need replacing due to defects, please call your
local distributor or the location where you purchased the pump. Do not use
damaged parts. For a listing of distributors in your country, please visit www.
ameda.com.
7. OPERATING INSTRUCTIONS
7.1 Plug into Power Source
Choosing and checking your electrical source
AC POWER ADAPTER
WARNING: Use ONLY the
AC power adapter recommended
for the Ameda Mya Joy. AC power adapters
with Australia, United Kingdom or Europe or
other international plug configurations are
not intended for use in the USA or Canada.
WARNING: Always inspect the AC power adapter for
damage such as kinking or twisting of cords or frayed or exposed
wires. If damaged, discontinue use immediately and call customer service at
1.866.992.6332.
1. If batteries are in pump base, REMOVE batteries before using AC power
adapter plug.
2. PUSH small end of AC power adapter into left side of the pump base as
shown.
3. PLUG other end into AC outlet.
!
!
!

15
BATTERIES
WARNING: DO NOT install backwards,
charge, put in fire, or mix with other battery
types. May explode or leak causing injury.
Replace all batteries at the same time.
1. OPEN battery compartment on the bottom
of the pump base.
2. INSERT four new AA batteries as shown.
3. CLOSE the battery compartment.
Low Battery Notification
When batteries are low, the LCD screen will display "Lo" notification. You may
then replace all batteries or use the AC Power Adapter.
A. POWER ON/OFF BUTTON
B. MODE SELECTION BUTTON
Switches between Stimulation Mode
and Expression Mode
C. - / + VACUUM LEVEL
Decreases or increases suction
strength during pumping
!
TIP: USE new premium batteries (such as Energizer, Duracell), insert correctly
as shown.
7.2 Button Control
A
BC

16
A. TIMER DISPLAY
Tracks pumping time. Automatically shuts-off after 45 minutes.
B. STIMULATION MODE
Mimics baby’s fast suction pattern with fast speed and low suction to start milk
flowing. This icon will disappear when in Expression Mode.
NOTE: After two minutes, the pump will automatically switch to Expression
Mode unless you manually adjust prior.
C. SUCTION STRENGTH LEVEL
Level of suction strength during pumping. The Ameda Mya Joy has 2-phase
adjustable suction modes:
- Stimulation Mode: 1 - 6 levels
- Expression Mode: 1 - 12 levels
Adjust the suction level by pressing the or button to decrease and
increase levels.
D. EXPRESSION MODE
Mimics baby’s slow, steady suction pattern with slower speed and higher suction
to express more milk gently and efficiently. This icon will disappear when in
Stimulation Mode.
7.3 LCD Icons & Modes
A
BCD

17
3
1
2
7.4 To Begin Pumping
STEP 1: CONNECT THE POWER ADAPTER
Insert the power adapter into LEFT side of
pump base.
STEP 2: INSERT TUBING
Insert the tubing into the adapter into RIGHT
side of pump base, then turn slightly to the
right while pushing in firmly.
A. For DOUBLE PUMPING: Both
tubes should be attached to the
tubing adapter.
B. For SINGLE PUMPING:
Remove one tube from the tubing
adapter and close one side.
STEP 3: PLACE THE FLANGE ON BREAST
Center flange on breast to create seal.
Check breast flange fit, if pumping causes
discomfort a larger or smaller breast flange size
may be needed. See section on how to properly
fit your flange.
STEP 4: POWER ON THE PUMP
Press the Power button to turn on the device.
It will begin in Stimulation Mode. 4

18
STEP 5: ADJUST VACUUM LEVEL
Adjust the Stimulation Vacuum Level between 1
and 6 to your preferred comfort level. Never set
to uncomfortable level.
TIP: Start off with the suction low, and then
gradually increase the suction setting to your
comfort level. You may find that the level of
suction that you are comfortable with varies
from day to day, during the day and even
during the same expression session.
NOTE: After two minutes, the pump will
automatically switch to Expression
Mode unless you manually adjust prior.
STEP 6: CHANGE MODE
button to switch into Expression Mode.
STEP 7: ADJUST VACUUM LEVEL
Adjust the Expression Vacuum Level between
1 and 12 to your preferred comfort level. Never
set to uncomfortable level.
TIP: Start off with the suction low, and then
gradually increase the suction setting to your
comfort level. You may find that the level of
suction that you are comfortable with varies
from day to day, during the day and even
during the same expression session.
STEP 8: END PUMPING SESSION
When you wish to stop expressing, first press
the Power button, then remove milk collection
kit from your breast.
TIP: Aer pump is o, if necessary, INSERT a
nger between breast and breast ange to
break sucon.
7
6
5
8

19
7.6 Breast Milk Storage Guidelines
7.5 How to Fit Your Flange
Check breast flange fit, if pumping causes discomfort a larger or smaller breast
flange size may be needed.
Human Milk Room Temperature Time in
Refrigerator Time in Freezer
Freshly Expressed Less than 6 hours Less than 5 days Ideal: 3 months
months
Acceptable: less
than 12 months in
a deep freezer (-20
or lower)
Previously frozen, thawed in
refrigerator but not warmed
Less than 4 hours Less than 24 hours Do not refreeze
Previously frozen and brought
to room temperature
For completion of
feeding - up to an
hour at room temp
and then discard
Less than 4 hours Do not refreeze
Infant has started feeding For completion of
the feed and then
refrigerate less than
4 hours
Less than 4 hours Do not refreeze
Thawed previously frozen
pasteurized donor human milk
Less than 4 hours Less than 48 hours Do not refreeze
Frozen pasteurized donor
human milk in a deep freeze
9-12 months from
pumping date
NOTE: when thawing frozen milk, label as thawed when completely thawed (i.e. no ice crystals present). Use the time
when completely thawed to base acceptable time limits for use rather than when it is taken from the freezer.
Source: Jones, F. Best Practice for Expressing, Storing and Handling Human Milk in Hospitals, Homes and Child Care
Settings. Forth Worth, TX: Human Milk Banking Association of North America, 2019
GOOD FIT
During pumping, your nipple
moves freely in the breast
flange tunnel. You see space
around the nipple. Not much
areola is drawn into the tunnel
with the nipple.
FLANGE TOO SMALL
During pumping, some or all
of your nipple rubs against
the sides of the breast flange
tunnel.
FLANGE TOO LARGE
During pumping, more areola
is drawn into the breast flange
with your nipple. Your areola
may rub against the side of the
breast flange tunnel.

20
8. CLEANING THE HYGIENIKIT
After Every Use: Cleaning The HygieniKit
1. POP OFF the adapter cap from the flange.
2. SET ASIDE adapter cap, tubing and tubing
adapter— you do not need to take these apart
from each other. These 3 parts DO NOT need to
be washed before first use or after each use— milk
does not come into direct contact with these parts.
Take apart the remaining parts, the diaphragm(s), the
flanges, valve and milk storage bottles, including locking
ring and locking disc, since these are the parts that can
touch the breast milk once you begin pumping.
ALWAYS wash hands well with soap and water.
CLEANING: Cleaning with warm, soapy water
After every use, unless otherwise directed by your healthcare provider, prepare
the product for use as follows:
Set aside tubing, adapter cap and tubing adapter. These
parts need to be washed.
!
2 3 4
Hand WASH all
parts - except for
tubing, adapter
cap and tubing
adapter - with
warm, soapy
water. Do not
insert anything
into valve while
cleaning.
RINSE well with
warm, clean
water.
Air DRY each
part on a clean
surface.
RINSE any milk
from pump parts
with cool water.
1
*Ameda does not recommend
inserting anything into the
valves and backflow protectors
for cleaning but if you want to
use a brush or sanitizing steam
bags, then it is very important
to check for cracks, chips. tears
or deformation before and
after use.
Pump parts may vary.
DO NOT wash
adapter cap, tubing
and tubing adapter.

21
IMPORTANT: the flanges and milk storage containers can also be
washed on upper rack of a standard, household dishwasher. DO NOT use
solvents or abrasives. Allow to air dry on a clean surface. DO NOT put parts in
Steam Bottle Sterilizers or Microwave Sterilizer Bags.
Cleaning the pump: Make sure it is unplugged prior to wiping the breast pump
and power adapter with clean, damp cloth.
!
9. MAINTENANCE
The breast pump base does not require service or maintenance except for
changing batteries, if applies.
9.1 Breast Pump Valve Check
Inspect the valves for tears or holes. Replace any damaged valves
prior to pumping. Wash valves per cleaning section. Do not insert
bottle brush or something similar into valves. We recommend
replacing valves approximately every 8-12 weeks but this can vary
depending on cleaning and use.
9.2 Storing & Transporting
Disconnect HygieniKit and power adapter from pump before transporting or
storing the product. When storing product, store in conditions as described in
these instructions. Remove batteries before storing product for long periods of
time. Handle with care when transporting product.

22
10. TROUBLESHOOTING
SLOW MILK FLOW,
UNEVEN OR NO
SUCTION
VALVE CHECK
Inspect the valves for tears or holes. Replace any
damaged valves prior to pumping.
Wash valves per cleaning section. Do not insert bottle
brush or something similar into valves.
We recommend replacing valves approximately every
8-12 weeks but this can vary depending on cleaning and
use.
CONNECTION CHECK
Check assembly is correct and connection points are
securely attached.
• Tubing adapter to tubing port
• Tubing adapter to tubing
Check adapter cap is attached to breast flange. It may
be useful to remove adapter cap and reattach to breast
flange.
DIAPHRAGM AND FLANGE/BOTTLE CHECK
Inspect the diaphragms for tears or holes. Replace any
damaged diaphragms prior to pumping.
Check flanges, adapter cap or bottles for chips, cracks,
BREAST FLANGE FIT CHECK
• Good Fit: Nipple is moving freely in tunnel of flange.
• Too Small: Nipple is rubbing against tunnel of
flange.
• Too Large: Areola is being pulled into tunnel of
flange.
AUDIBLE, HISSING
NOISE OR AIR
LEAKAGE
VALVE CHECK
Inspect the valves for tears or holes. Replace any
damaged valves prior to pumping.
Wash valves per cleaning section. Do not insert bottle
brush or something similar into valves.
We recommend replacing valves approximately every
8-12 weeks but this can vary depending on cleaning and
use.
CONNECTION CHECK
Check assembly is correct and connection points are
securely attached.
• Tubing adapter to tubing port
• Tubing adapter to tubing
Check adapter cap is attached to breast flange. It may
be useful to remove adapter cap and reattach to breast
flange.
If there are still questions or issues please call Ameda's certified customer
service ParentCare team at 1.866.992.6332.
Table of contents
Other Ameda Breast Pump manuals

Ameda
Ameda HygieniKit User manual

Ameda
Ameda Finesse User manual

Ameda
Ameda Pearl User manual

Ameda
Ameda Elite Series Configuration guide

Ameda
Ameda MyaJoyPlus User manual

Ameda
Ameda Platinum 17803 User manual

Ameda
Ameda Purely Yours User manual

Ameda
Ameda Elite User manual

Ameda
Ameda Mya Breast Pump User manual

Ameda
Ameda Elite User manual

Ameda
Ameda Elite User manual

Ameda
Ameda MyaJoy User manual

Ameda
Ameda HygieniKit User manual

Ameda
Ameda Elite User manual

Ameda
Ameda Elite Configuration guide

Ameda
Ameda Purely Yours User manual

Ameda
Ameda Lactaline Personal User manual

Ameda
Ameda Pearl User manual

Ameda
Ameda Elite User manual

Ameda
Ameda Platinum User manual