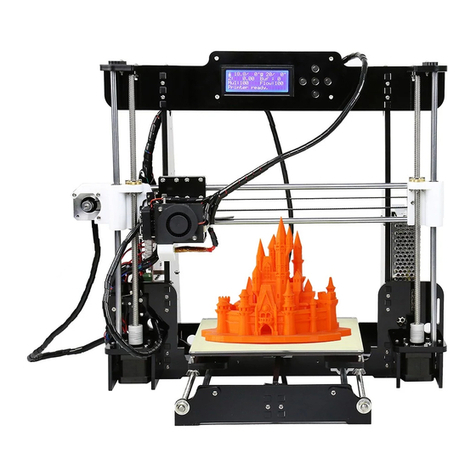
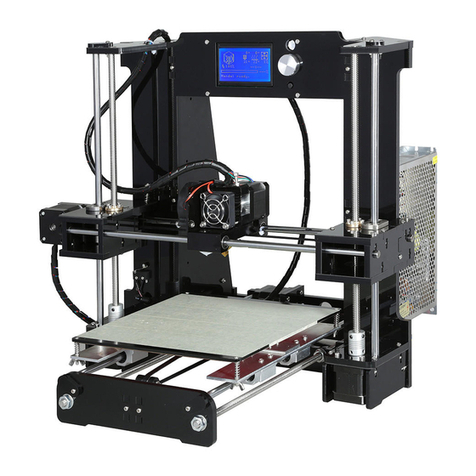
Anet A8 User manual

A8 3D Printer Instructions
After sales support
Address: No. 341 Xiangli Ind Zone, Huaqing Road,
Qinghu Community, Longhua District, Shenzhen,
Guangdong, China
Telephone: +86 755 2373 6621
Email: [email protected]
Website: www.anet3d.com
Facebook: www.facebook.com/anet3dtech
YouTube: www.youtube.com/c/anet3dprinter

Welcome to Anet Facebook and Twitter Page
The latest news, products etc information from Anet would be published in Facebook, Twitter.
And we have after-sales service team in Facebook to help you solve using
issues. Let’s have a look how to join us:
1. You can visit following links to find Anet and join us:
Facebook: facebook.com/anet3dtech
Twitter: twitter.com/anet3dprinter
In Anet Facebook page(@anet3dtech), click “ Like ”;
In Anet Twitter page(@anet3dprinter), click “ Follow ”;
2. In Facebook and Twitter, You can search keywords to find Anet:
In Facebook search box, please search “ anet3dtech ” ; Find Anet page and “Like” us;
In Twitter search box, please search “anet3dprinter”; Find Anet page and “Follow” us;
3. In Anet Facebook page, you can also join our after-sales group: Follow above two methods,
you can find Anet Facebook page, then on the left side click “ Groups ”, you would see “ Official
Anet 3D Printer After-sales Group ”, click “ Join Group ” to join us;
4. Scan QR code to find Anet Facebook and Twitter page:
Twitter: com/anet3dprinter Facebook: com/anet3dtech

1. A8 Assembly Instructions
2. A8 Quick User Guide
1.1 A8 assembly parts list
2.1 User instruction
2.2 Specification
2.3 Specification
2.4 Quick Operation Guide
1.2 Name of each printer part
1.3 Assembly Step
Contents
Attention:
1.Please make sure the package not broken when you receive it.
2.Please check the printer parts according to the packing list.
3. Please contract your supplier if any questions.
Item
1-1
1-2
1-3
1-4
1-5
1-6
1
1
1
1
1
1
page 1
1
1
12
13
28
28
29
29
29
1700100001 Hot bed fixed
aluminum plate
220*200*3mm
Hot bed
Plastic nippers
1.5M Power line
5*160mm
Screwdriver
Four parts below
in this bag
1700200001
1101900001
/
1101900008
1700200002
Picture Name QTYMaterial number

2-1
2-2
2-3
2-4
2-5
2-6
page 2 page 3
1
1
1
1
1
1
Mainboard
Left Z axis nut
support
Right Z axis nut
support
Wind mouth
1.7M Belt
8GB TF card
and card reader
1700200004
1700300005
1700300006
1700300001
1300300001
1700200007
Item Picture Name QTYMaterial number Item
1-6-1
1-6-2
1-6-3
1-6-4
1-7
1-7-1
1
1
1
1
1
1
1700200003 40*10 Fan
40*11 Cooling fin
Fan cover
M3*45 Screw 2pcs
M3*18 Screw 50pcs
M3 Spacer 8pcs
Screw bag include
below screws
1101200002
1101700001
1700100003
1700100004
1700100005
Picture Name QTYMaterial number
1-7-2 1
M3 Nut 64pcs
1700100006

2-7
2-8
2-9
2-9-1
2-9-2
2-9-3
1
1
1
2
1
1
5015 Air blower
Y axis belt
bearing support
Five parts below
in this bag
Z axis Limit
switch fixed plate
Y axis motor
support
Y axis Limit
switch fixed plate
1700200005
1700300002
1700300003
1300100004
1300100009
1300100007
Item Picture Name QTYMaterial number
2-9-4 4
Y axis belt
fixation clamp
1300100005
Item
1-7-3
1-7-4
1-7-5
1-7-6
1-7-7
1-7-8
1
1
1
1
1
1
1700100007 M8 Nut 16pcs
M8 Spacer 12pcs
M4*8 Screw 28pcs
M4*14 Screw 4pcs
M3*30 Screw 14pcs
M3*12 Screw 15pcs
M2*12 Screw 2pcs
Wing nut 4pcs
Spring 4pcs
M3*20 Screw 4pcs
M2.3*10 Screw 2pcs
M3*25 Screw 2pcs
1700100008
1700100009
1700100010
1700100011
1700100012
Picture Name QTYMaterial number
1-8 1
Three parts below
in this bag
1700200006
page 4 page 5

2-9-5
2-10
2-11
2-12
2-13
2-14
8
2
2
2
1
4
Guide rod back
up plate
Slide support
plate
Filament support
plate
Filament support
plate connecting
plate
Screen baffle
plate
Z axis motor
support plate
1300100010
1300100020
1300100012
1300100014
1300100013
1300100008
Item Picture Name QTYMaterial number Item
1-8-1
1-8-2
1-8-3
1-9
1-9-1
1-9-2
1
3
8
1
1
4
1202100006 Wire 65CM
Z Limit switch A 20CM
X Limit switch B 50CM
Y Limit switch C 50CM
Pillar washer
M3*7 4pcs
Pillar washer
M3*15 4pcs
3*130mm
Screwdriver
Hex wrench M1.5
Hex wrench M2
Hex wrench M2.5
Hex wrench M3
1700200013
1700200014
1700200014
1300400003
1300400004
1700100013
1101900010
1101900004
1101900006
1101900005
1101900007
Picture Name QTYMaterial number
1-9-3 1Open spanner
Three parts below
in this bag
1101900002
page 6 page 7

3-1
3-2
3-3
3-4
3-5
3-6
3-7
1
1
1
1
1
2
2
Botton support
plate
Top support
plate
Back plate
Front plate
Support plate
lock plate
Z axis motor
fixed plate
Y axis motor
fixed plate
1300100017
1300100016
1300100011
1700300024
1300100015
1300100019
1300100003
Item Picture Name QTYMaterial number Item
1-10
1-10-1
1-10-2
1-10-3
1-10-4
1
1
10
3
2
1300500005 Four parts below
in this bag
4.5M Winding
pipe
Belting
R clip
Locating piece
1300500001
1300900001
1300400006
1300400005
Picture Name QTYMaterial number
page 8 page 9

3-8
3-9
3-10
3-11
3-12
1
1
1
2
7
Extruder
X axis motor
Y axis motor
Z axis motor
Linear bearing
1700100016
1700200008
1700200009
1101300008
1700200010
Item Picture Name QTYMaterial number
1-11
1-12
1-13
1-14
3-13
1
5
1
1
6
LCD 2004 screen
X Motor line 40cm
Y Motor line 40cm
Left Z Motor line 40cm
Right Z Motor line 90cm
Extruder Motor line 90cm
Heat bed line 90cm
Finger sleeve
accessories bag
Guide rod 436mm 2pcs
Guide rod 380mm 4pcs
1700200011
1202100031
1700200027
1700100014
3-14 5
T type lead screw
M8*345mm 2pcs
Threaded rod:
M8*400mm 2pcs
Threaded rod:
M8*150mm 1pcs
1700100015
3-15 1Power supply1200100002
1501500001
Item Picture Name QTYMaterial number
page 10 page 11

Screen
1.2 Name of each printer part 1.3 Assembly Step
Step 1
Step 2
Item
1
2
3
4
5
1
1
2
12
12
QTY.Name of parts
Bottom support plate
Top support plate
Side support plate
M3*18 Screw
M3 Nut
Z Leading Rod
Z Threaded Rod
X Limit Switch
X Motor
Extruder
Z Limit Switch
Mainboard
Z Left Motor
40 Fan
50 Soprador
X Leading Rod
Before Assembly
Please be aware the screw holes is in orange circles.
After Assembly
Before Assembly After Assembly
Extruder Motor
Y Motor
Y Limit Switch
Hotbed
Z Right Motor
Y Threaded Rod
Y Leading Rod
Power
Item
1
2
3
4
1
2
4
4
QTY.Name of parts
Step 1
support plate lock plate
M3*18 Screw
M3 Nut
M3
M3*18
M3
M3*18
Step 1
Step 2
page 12 page 13

Step 3
Step 4
Item
1
2
3
4
5
1
1
1
1
1
QTY.Name of parts
Back plate
Y axis motor
Y axis motor support
Y axis motor fixed plate
Y axis Limit switch fixed plate
Before Assembly After Assembly
Item
6
7
8
9
10
1
4
2
4
4
QTY.Name of parts
Y axis Limit switch C50 CM
M3*12 screw
M2*12 screw
M3*18 screw
M3 Nut
Item
1
2
3
4
1
1
4
4
QTY.Name of parts
Step 2
Step 3
M3*18 Screw
M3 Nut
M3
M3*18
M2*12
M3*12
M3
M3*18
Step 3
Step 3
Step 2
Step 5
Step 6
Item
1
2
3
4
1
1
2
2
QTY.Name of parts
Y axis belt bearing support
Front plate
M3*18 screw
M3 Nut
Before Assembly
After Assembly
Item
1
2
3
4
5
1
1
2
12
12
QTY.Name of parts
Step 4
Step 5
Threaded rod 400mm
M8 Nut
M8 spacer
M3
M3*18
M3
M3*18
Before Assembly After Assembly
Threaded rod 400mm
page 14 page 15

Attention:Leave vacancy between belt fixation clamp and
hot bed fixed plate for belt positioning.
Before Assembly After Assembly
Step 7
Step 8
Item
1
2
3
4
5
6
1
2
4
4
4
4
QTY.Name of parts
Step 6
Y axis Guide rod
Guide rod back up plate
Front plate
M3*18 screw
M3 Nut
Item
1
2
3
1
2
4
QTY.Name of parts
Hot bed fixed aluminum plate
Y axis belt fixation clamp
M4*14 screw
M3
M3*18
M4*14
Before Assembly After Assembly
Y Guide rod 380mm
Attention: Belt is for X&Y axis transmitting .Cut the length you need
to each transmission shaft. The belt is 1.5m in total and 10-20cm left
after installation.
Attention: Please diagonally tighten the screws when
all are in there place.
Before Assembly After Assembly
Step 9
Step 10
Item
1
2
3
1
1
16
QTY.Name of parts
Step 7
Step 8
M4*8 screw
Item
1 1
QTY.Name of parts
Belt
M4*8
Before Assembly
After Assembly
page 16 page 17

Item
1
2
3
4
5
1
2
2
4
2
QTY.Name of parts
Step
Z axis motor
Z axis motor fixed plate
Z axis motor support plate
Z axis Limit switch fixed plate
6 1Z axis Limit switch A 20CM
Item
7
8
9
10
11
10
10
8
2
2
QTY.Name of parts
M3*18 screw
M3 Nut
M3*12 screw
M3*20 screw
M2*12 screw
M2*12
M3*30
M3*12
M3
M3*18
M3
M3*18
M2.3*10
Before Assembly
After Assembly After Assembly
Attention: This hole is for Z axis guide rod positioning.
Attention: Hot bed screws should be in the bottom, and wing nuts
will keep the height of hot bed level as well as firming the hotbed.
Step 11
Step 12
Item
1
2
3
1
1
4
QTY.Name of parts
Step 9
Hot bed
M3*30 screw
4
5
4
4
Spring
M3 wing nut
Before Assembly
Before Assembly
After Assembly
Step 13
Item
1
2
3
1
1
1
QTY.Name of parts
Step 11
Step 12
Right Z axis nut support
4
5
2
2
Guide rod back up plate
Z axis Guide rod 380mm
Item
6
7
8
2
2
2
QTY.Name of parts
M3*18 screw
M3 Nut
M2.3*10 screw
Z axis Guide rod 380mm
page 18 page 19

Before Assembly After Assembly
After Assembly
Before disassembly After disassembly
After disassembly
Attention: loose the jackscrew of elastic coupling to place T lead
screw to the bottom, then tighten the jackscrew.
Before Assembly
Step 14
Item
1
2
1
2
QTY.Name of parts
Step 13
T type lead screw 345mm
T lead screw 345mm
Attention: Please keep A&B at the same level during X rods installation.
Knock the guide rods with a hammer slightly if it’s hard to place.
Loose M4*6 screws first, then
separate extruder from L black
aluminum parts, remember to
keep the screws.
Step 15
Item
1
2
1
2
QTY.Name of parts
Step 14
X axis Guide rod
3 3Linear bearing
X axis Guide rod 436mm
M3*45 Screw holes
Before Assembly After Assembly
Step 17
Item
1
2
1
1
QTY.Name of parts
Extruder taken from step 16
3 140*11 Cooling fin
40*10 Fan
Item
4
5
1
2
QTY.Name of parts
Fan cover
M3*45 Screw
6 6-8M3 Spacer
Step 16
Replace M3*20
screw with M3*45 screw
page 20 page 21

M3*18
M3*20
Attention: Install M4*6 screw. Tighten M6 Screw on the throat with
spanner till extruder is not loose.
Item
1
2
1
1
QTY.Name of parts
Step 15
The black aluminum removed from step 16
3 12M4*8 screw
Before Assembly After Assembly
Step 18
Item
1
2
1
1
QTY.Name of parts
Step 17
Step 18
3 1M4*6 We taken from step 16
Step 19
Item
1
2
1
1
QTY.Name of parts
Step 19
5015 Air blower
3 1Wind mouth
4 2M3*18 screw
Before Assembly After Assembly
Step 20
Item
1
2
1
1
QTY.Name of parts
X axis motor
Left Z axis nut support
3 4M3*20 screw
Step 21
page 22 page 23

Item
1
2
3
1
4
1
QTY.Name of parts
LCD 2004 screen
Pillar washer M3*7
Screen baffle plate
4
5
4
8
M3*30 screw
M3 Nut
Attention: Belt is for X,Y axis transmitting . The length of belt is 1.5m
in total. Normally there’ll be 10-20cm left after installation.
Attention This is the wiring diagram of power supply. 1, 2, 3
seperately represent the line of fire (black),Zero line (white),
ground wire (green). 4,5, 6 represent negative pole (black)
(-);7,8,9 represent the positive pole (red) (+).To avoid danger ,
please assure the installation is correct .
M3*18 Screw Before Assembly After Assembly
Item
1
2
1
2
QTY.Name of parts
Belt
M3*18 screw
3 4M3 Nut 4
Step 22
Step 23
M3 Nut
Step 25
Step 24
M3*30
M3*7 M3
black black redwhite green
page 22 page 23
brown black redblue yellow
EU-standard Ways of Wire Connection US-standard Ways of Wire Connection

Before Assembly After Assembly
Length of A8 Components Wire
Orange circles stand for the power screw holes.
Attention: Please use the corresponding wire , especially motor
wire & limited switch wire.
Item
1
2
1
1
QTY.
NO. Option Length(mm)
650mmPower supply wire
X motor wire
Y motor wire
Left Z motor wire
Right Z motor wire
X limited switch wire
Y limited switch wire
Z limited switch wire
Extruder motor wire
4010 Fan wire
5015 Blower wire
Heating pipe wire
Extruder thermistor
Hotbed wire
X Belt
Y Belt
Screen wire
400mm
400mm
400mm
900mm
900mm
1100mm
1100mm
1000mm
1000mm
900mm
1700mm
500mm
500mm
500mm
200mm
Name of parts
Step 25
Power supply 12V
3
1
2
3
4
5
6
7
8
9
10
11
12
13
14
15
16
17
3M3*12 screw
Step 26 Step 28
Item
1
2
3
1
1
4
QTY.Name of parts
Step 26
Mainboard
M3-30 screw
4
5
4
4
M3 Nut
Pillar washer M3*15
Step 27
M3*30
M3*15
M3
Power Supply
Mainboard
M3*12
page 24 page 25

X axis motor
Y axis motor
Z1 axis motor
Z2 axis motor
Extruder
Step 29
Attention: Please connect the electronics wire to each
components correspondingly.
Note: Please make sure the wire of the power supply connect the
connector in Max.
Step 30
Installation picture
Item
1
2
3
4
5
6
2
2
1
4
4
4
QTY.Name of parts
Filament support plate
connecting plate
Threaded rod 150mm
M8 Screw
M3*18 screw
M3 Nut
M3
M3*18
40*10 Fan
There is no
need to separate
positive and
negative electrodes
(+red line,
-black line)
Hotbed
line
Extruder
line
Power
input line
+
-
50-15 Air
blower
SD card port
USB port
LCD display screen
X axis limit switch
Y axis limit switch
Z axis limit switch
Heating thermistor
Nozzle thermistor
J3 display screen
(J3: NO connection
required)
page 26 page 27

2. A8 Quick User Guide
2.1 User instruction
2.2 Specification
2.3 Specification
2.4 Quick Operation Guide(More details please check TF card)
Dear customer:
Thanks for choosing and using Anet 3D printer. For your convenience, please read the
instructions carefully before using them and follow the instructions strictly.
Special Version:
1. All the contents in this manual have been checked carefully. If there is any misprint or
misunderstanding of them, Anet reserves the right to interpret it.
2. This user manual is for reference only and does not constitute any form of commitment.
3. It is recommended to use Anet original filament.
In order to prevent damage to you and others in the process of
using, Please be aware of the following:
● Please do not attempt to use the machine in any way undescribed in the instructions to avoid
accidental personal injury and property damage.
● Please do not place this machine near inflammable and explosive materials or high heat
sources. Please place this machine in a ventilated, cool and dust free environment.
● Please do not place the printer on a larger vibrating or other unstable platform. The shaking of
the machine will affect the printing quality.
● Please do not replace the power line of other products during installation. Please use the
original power line supplied with the machine. The working power supply uses 110V/220V AC. The
power plug must be plugged into the three holes socket with ground wire to avoid damage to
components or accidents such as fire and electric shock.
● Please do not touch the nozzle and heating bed during the printer working to prevent high
temperature burns and personal injury.
● Please do not wear gloves or wrappers when operating the machine in case the movable parts
cause entanglement and cutting damage on the human body parts.
● After printing, please use the remaining temperature of the nozzle to clean up the filament on
the it with the help of tools. Do not touch the nozzle directly with your hands during cleaning to
prevent scalding.
● Please often do product maintenance. In the circumstance of power off, please regularly clean
the printer body with dry cloth to wipe away dust and bonded printing materials, foreign objects
on guide rails, and lubricating oil is recommended for sliding parts, screw rods and bearing parts.
● Children under 14 years old or people above 60 years old, please use this machine under the
adult people to avoid personal injury.
●Some filaments will produce slight odor but it won't make people feel uncomfortable , so it is
recommended that you use A8 Plus in a well-ventilated environment.
●Self-disassembly or modification may cause damage or abnormal performance, and your
machine will no longer enjoy warranty service.
●It is recommended to use A8 in a well-ventilated environment. Please cut off the power supply
after using.
Model: A8
Layer thickness: 0.1-0.3mm
Printing speed: 10-120mm/s
X Y axis position accuracy: 0.012m
Z axis position accuracy: 0.004m
Printing material: ABS,PLA
Material tendency: PLA
Software Ianguage: English
Function of support: automatically
Software: Cura
Filament diameter: 1.75mm
Nozzle diameter: 0.4mm
Machine size: 500*400*450mm
Machine weight: 7.5KG
Packing size: 510*310*208mm
Gross weight: 8.7KG
Build size: 220*220*240mm
LCD screen: Yes
File format: STL、G-Code、OBJ
OS: windows(linux、mac)
Working condition: 10-30°C, Humidity 20-50%
Offline printing: TF CARD
Machine Installation:
More instructions can be obtained as below:
●Manual guide in TF card
●Video guide in www.anet3d.com
●Email support [email protected]om
Software Installation:
Software and configuration files in TF card, more detail about software using
guide please visit website.
2.4.1 Operating Interface Introduction
Extruder Temp Estimated hotbed temp
Hotbed temp
Hot bed icon
Extruder icon
Height of Z axis
Printing speed
Status Cache
Instruction
Back
Down
Enter
Menu
up
Current extrusion rate
Estimated
extruder temp
Attention:this is the interface befor printing
page 28 page 29

2.4.2 First Print
2.4.2.1 Leveling
2.4.2.2 Filament Installation(take PLA for example)
(2) Turn off Step Motor:After turn to zero,main menu“Quick Settings”
→“Disable stepper”
(3).Leveling:Adjust the distance between nozzle and hotbed to 0.1mm.
(1)Turn to zero:Main Menu“Position”→“Auto
home”.
1
2 3
4
(1) Peheating::Main Menu“Quick Settings” →“Preheat PLA”.Enter preheating state.
(2)Install Filament:When the preheating temperature reaches the setting data, push the filament into
tube as below. It means installation successes if the material overflows from nozzle.
(Also need preheat the nozzle when pull out the filament from extruder.)
The thumb presses the screw
head of the extrusion head, and
the index finger holds the air
guide. Quickly push the consum-
ables down until the nozzles are
spitting out.
Warning,Do not toch hot surface
Be careful with hot
hands
2.4.2.3 Print Operation
Choose Print File:Main Menu“SD Card” →“Print file”→“Model File”Confirm.
After the extruder and hot bed reach the setting temperature,the extruder starts moving and print.
More details about operation and user guide, welcome to visit www.anet.com.
page 30 page 31
Other manuals for A8
4
Table of contents
Other Anet 3D Printer manuals