manuals.online logo
Brands
  1. Home
  2. •
  3. Brands
  4. •
  5. ARB
  6. •
  7. Automobile Accessories
  8. •
  9. ARB 3444070 User manual

ARB 3444070 User manual

27/10/05 Page 1 of 4 3782586
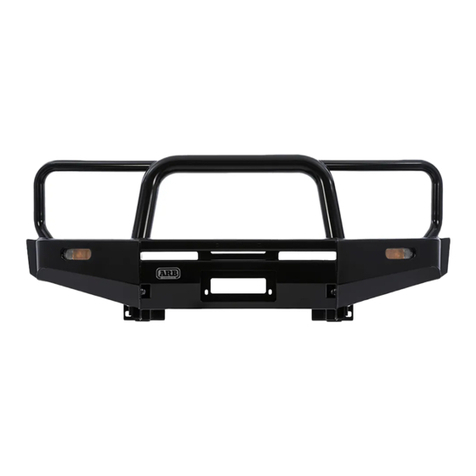
ARB WINCH BULL BAR TO SUIT
HOLDEN JACKAROO STD, SE & MONTEREY 1998-2001
HOLDEN JACKAROO STD 2001 ON No 3444060
ARB WINCH BULL BAR TO SUIT
HOLDEN JACKAROO WIDE BODY SE & MONTEREY 2001 ON No 3444070
WARNING
FOR VEHICLES EQUIPPED WITH SRS AIRBAG
WHEN INSTALLED IN ACCORDANCE WITH THESE INSTRUCTIONS, THE FRONT
PROTECTION BAR DOES NOT AFFECT OPERATION OF THE SRS AIRBAG.
TAKE NOTE OF THE FOLLOWING:
•THIS PRODUCT MUST BE INSTALLED EXACTLY AS PER THESE INSTRUCTIONS USING ONLY THE
HARDWARE SUPPLIED.
•DO NOT USE THIS PRODUCT FOR ANY VEHICLE MAKE OR MODEL, OTHER THAN THOSE SPECIFIED
BY ARB.
•DO NOT REMOVE LABELS FROM THIS BULL BAR.
•THIS PRODUCT OR ITS FIXING MUST NOT BE MODIFIED IN ANY WAY.
6-5-99 Page 2 of 4 3782586
BULL BAR FITTING KIT No 6171299
USE
PART No
QTY
DESCRIPTION
CHASSIS BRACKET TO
3751747R
1
CHASSIS BRACKET (RHS)
VEHICLE
3751747L
1
CHASSIS BRACKET (LHS)
6151096
4
M12 X 40mm BOLT
4581050
4
M12 SPRING WASHER
4581049
4
M12 FLAT WASHER
6151135
2
M12 NUT
4581057
2
CRESCENT MOON WASHER
4581008
2
OFFSET WASHERS
5846277
4
PACKER
PIN BULL BAR TO VEHICLE
6151087
2
M10 X 25mm BOLT
4581040
4
M10 FLAT WASHER
4581048
2
M10 SPRING WASHER
6151133
2
M10 NUT
BULL BAR TO CHASSIS
6151094
6
M12 X 30mm BOLT
BRACKETS
4581050
6
M12 SPRING WASHER
4581049
12
M12 FLAT WASHER
6151135
6
M12 NUT
6151087
2
M10 X 25mm BOLT
4581040
4
M10 FLAT WASHERS
4581048
2
M10 SPRING WASHERS
6151133
2
M10 NUT
CONTROL BOX BRACKET
3751581
1
CONTROL BOX BRACKET
6151200
2
M6 X 20mm DOMED HEAD BOLT
4581072
2
M6 X 20OD FLAT WASHER
6151128
2
M6 FLANGE NUT
NUMBER PLATE TO BAR
6151017
2
M6 X 16mm BOLT
6151128
2
M6 FLANGE NUT
4581035
4
M6 X 16OD FLAT WASHER
WINCH TO BAR
4581040
4
M10 FLAT WASHER
3500080
1
ARB INDICATOR KIT
180302
4
CABLE TIES
3500200
1
BUFFER KIT
TOOLS REQUIRED
Basic tool kit, drill, 10mm and 12mm drill bits.
FITTING THE 9,000lb WINCH
1. Place the bull bar on a suitable stand.
2. To place the winch clutch handle in a convenient location the winch gearbox must be rotated 4 hole spacings,
144 degrees, in an anti-clockwise direction when viewed from the gearbox end. Place the winch on its end and
remove all gearbox bolts. Gently raise the gearbox just enough to rotate it. Do not completely remove the
gearbox and avoid damaging the gasket. Refit all bolts and tighten. (Refer to diagram 1.)
NOTE: The winch handle is positioned near the bottom of the bull bar. The gearbox is situated on the left hand side
of the bull bar (as viewed from inside the vehicle). The cable spools from the bottom.
25/1/02 Page 3 of 4 3782586
DIAGRAM 1 DIAGRAM 2
3. To place the winch motor in the correct location the winch motor must be rotated 90 degrees, in a clockwise
direction when viewed from the motor end. Place the winch on its end and remove the two motor retaining
bolts. Gently raise the motor just enough to rotate it. Do not completely remove the motor and avoid damaging
the gasket. Refit all bolts and tighten. (Refer to diagram 2.)
4. The roller fairlead must have new holes drilled to allow for correct wire rope angle. Using a 12mm diameter
drill bit, redrill the roller fairlead as shown. (Refer to diagram 3.)
DIAGRAM 3
5. Fit the control box to the control box bracket using the two 1/4” nuts, flat washers and spring washers (supplied
in Warn kit). Centralise the control box in the cut-out then tighten nuts firmly.
6. Fit the control box bracket to the bull bar using two M6 x 20mm dome head bolts, flat washers and flange nuts.
7. Fit the winch and roller fairlead into the bull bar using bolts from the winch kit and four M10 washers from the
ARB bolt kit.
8. Connect the winch control box cables to the winch motor. Refer to the Warn handbook for additional
information. Connect the long winch + & - cables to the vehicle after the bull bar is installed. Refer to the
Warn winch manual for vehicle wiring instructions.
9. NOTE: Ensure that these cables are installed well clear of sharp, hot or moving objects. Secure the winch
cables to the bull bar with the cable ties supplied.
25/1/02 Page 4 of 4 3782586
FITTING THE BULL BAR TO THE VEHICLE
10. Remove the bumper from the vehicle.
11. Fit the chassis brackets (Part No. 3751747 L&R) to both sides of the vehicle using two M10 x 25mm bolts and four M12 x
40mm bolts, crescent moon washers, offset washers, flat washers, spring washers and nuts. (Refer to diagram 4.) Fit two
6mm spacers between inside of chassis bracket and on outside of vehicle chassis rail and align with 12mm captive nut and
secure using 12mm hardware. Finger tighten only
12. Assemble the two buffers on to the bull bar using the four M8 flange nuts supplied.
13. Lift the bull bar between the chassis bracket and bolt up using the M12 x 30mm bolts, flat washers, spring
washers and nuts. Align the bar horizontally and vertically. Make sure there is a gap between 20 and 25mm
between the bull bar and the vehicle grill and guards.
14. When correctly aligned, tighten all the bolts firmly.
15. Drill and pin using the M10 x 25mm bolts, flat washers, spring washers and nuts. (Refer to diagram 5.)
16. Fit the number plate to the bull bar using the two M6 x 16mm bolts, flat washers and flange nuts.
17. Fit the indicators into the cut outs in the bull bar and connect the indicator looms to the existing indicator loom.
NOTE: Fitting the indicators will be accessed from underneath the bar. Test to ensure the indicators function
correctly.

This manual suits for next models

3

Other ARB Automobile Accessories manuals

ARB AIRLOCKER RD132 User manual

ARB

ARB AIRLOCKER RD132 User manual

ARB Airlocker RD214 User manual

ARB

ARB Airlocker RD214 User manual

ARB 2237010 User manual

ARB

ARB 2237010 User manual

ARB 3450080 User manual

ARB

ARB 3450080 User manual

ARB AIRLOCKER RD128 User manual

ARB

ARB AIRLOCKER RD128 User manual

ARB 3432090 User manual

ARB

ARB 3432090 User manual

ARB RD177 User manual

ARB

ARB RD177 User manual

ARB ESPERANCE 802200 User manual

ARB

ARB ESPERANCE 802200 User manual

ARB Airlocker RD152 User manual

ARB

ARB Airlocker RD152 User manual

ARB AC08C User manual

ARB

ARB AC08C User manual

ARB AIRLOCKER RD189 User manual

ARB

ARB AIRLOCKER RD189 User manual

ARB RD246 Product information sheet

ARB

ARB RD246 Product information sheet

ARB Airlocker RD143 User manual

ARB

ARB Airlocker RD143 User manual

ARB AIRLOCKER RD145 User manual

ARB

ARB AIRLOCKER RD145 User manual

ARB Airlocker RD149 User manual

ARB

ARB Airlocker RD149 User manual

ARB RD121 Operating and maintenance instructions

ARB

ARB RD121 Operating and maintenance instructions

ARB Airlocker RD167 User manual

ARB

ARB Airlocker RD167 User manual

ARB 3434040 User manual

ARB

ARB 3434040 User manual

ARB LINX LX100 User manual

ARB

ARB LINX LX100 User manual

ARB Airlocker RD140 User manual

ARB

ARB Airlocker RD140 User manual

ARB 341 4460 User manual

ARB

ARB 341 4460 User manual

ARB 3917140 User manual

ARB

ARB 3917140 User manual

ARB RD166 User manual

ARB

ARB RD166 User manual

ARB 3424010 User manual

ARB

ARB 3424010 User manual

Popular Automobile Accessories manuals by other brands

Metra Electronics 95-5818 installation instructions

Metra Electronics

Metra Electronics 95-5818 installation instructions

FORWODE DB-HMS32 instructions

FORWODE

FORWODE DB-HMS32 instructions

Pelican UNIVERSAL SDDLMT2A quick start guide

Pelican

Pelican UNIVERSAL SDDLMT2A quick start guide

Crux RVCCH-75 manual

Crux

Crux RVCCH-75 manual

WIX WP9240 Installation instruction

WIX

WIX WP9240 Installation instruction

Prime Design FBM-1026-BLK Assembly instructions

Prime Design

Prime Design FBM-1026-BLK Assembly instructions

Webasto Thermo Pro 50 Eco installation instructions

Webasto

Webasto Thermo Pro 50 Eco installation instructions

APA 16156 operating instructions

APA

APA 16156 operating instructions

ViseeO MB-2 user manual

ViseeO

ViseeO MB-2 user manual

Whelen Engineering Company SAK23 installation guide

Whelen Engineering Company

Whelen Engineering Company SAK23 installation guide

Cruz Evo Rack Alu A23-126 Assembly instructions

Cruz

Cruz Evo Rack Alu A23-126 Assembly instructions

Thule EXPRESSWAY 995 Assembly

Thule

Thule EXPRESSWAY 995 Assembly

Cruz 907-402 Assembly instructions

Cruz

Cruz 907-402 Assembly instructions

Thule Parkway 956 manual

Thule

Thule Parkway 956 manual

SCA 585722 instruction manual

SCA

SCA 585722 instruction manual

Whispbar K496W Fitting instructions

Whispbar

Whispbar K496W Fitting instructions

Phonocar VM545 instruction manual

Phonocar

Phonocar VM545 instruction manual

Edscha Trailer Systems TailWing quick guide

Edscha Trailer Systems

Edscha Trailer Systems TailWing quick guide

manuals.online logo
manuals.online logoBrands
  • About & Mission
  • Contact us
  • Privacy Policy
  • Terms and Conditions

Copyright 2025 Manuals.Online. All Rights Reserved.