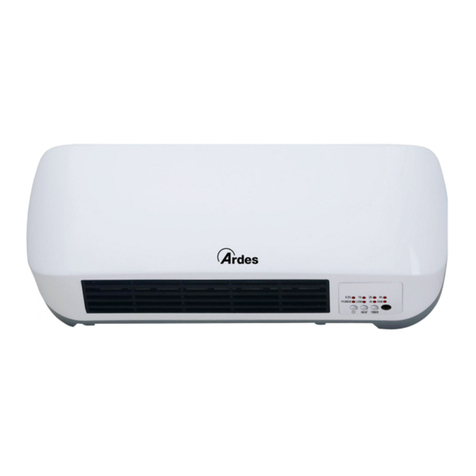
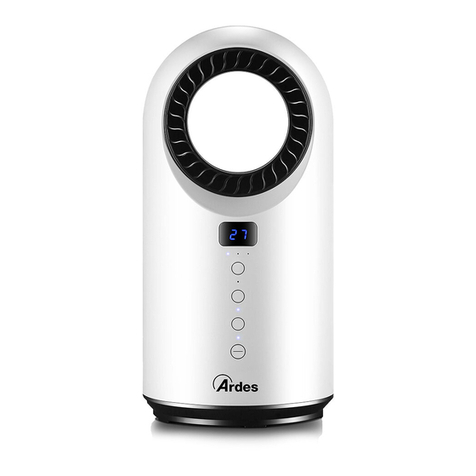
ARDES AR4W08P User manual

1/90
(EN) INSTRUCTIONS FOR USE
HU) HASZNÁLATI ÚTMUTATÓ
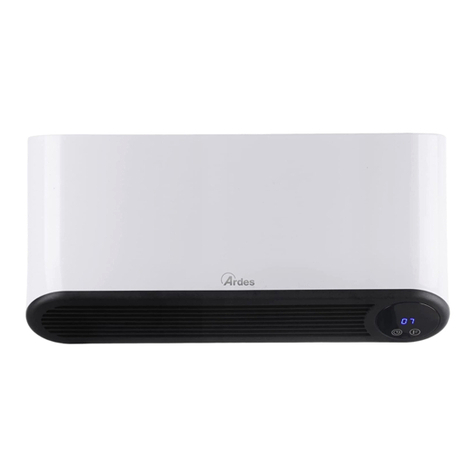
(EN) CERAMIC HEATER FOR WALL MOUNTING
(HU) VENTILÁTOROS H SUGÁRZÓ
AR4W08P

13/90
EN
ATTENTION : read this booklet carefully it contains important instructions
for a safe installation, use and maintenance.
Important instructions to be kept for future reference.
(EN) WARNINGS
This appliance can be used by children aged from 8
years and above and persons with reduced
physical, sensory or mental capabilities or lack of
experience and knowledge if they have been given
supervision or instruction concerning use of the
appliance in a safe way and understand the hazards
involved.
Children shall not play with the appliance.
Cleaning and user maintenance shall not be made
by children without supervision.
Children of less than 3 years should be kept away
unless continuously supervised.
Children aged from 3 years and less than 8 years
shall only switch on/off the appliance provided that
it has been placed or installed in its intended normal
operating position and they have been given
supervision or instruction concerning use of the
appliance in a safe way and understand the hazards
involved. Children aged from 3 years and less than
8 years shall not plug in, regulate and clean the
appliance or perform user maintenance.
CAUTION — Some parts of this product can
become very hot and cause burns. Particular
attention has to be given where children and
vulnerable people are present.

14/90
If the power cable gets damaged, it has to be
replaced only at a service centre approved by the
manufacturer in order to prevent any risks.
DO NOT COVER
WARNING: In order to avoid overheating, do not
cover the heater.
Do not place the appliance immediately below a
socket outlet.
Do not use this heater in the immediate
surroundings of a bath, a shower or a swimming
pool.
WARNING: Do not use this heater in small rooms
when they are occupied by persons not capable of
leaving the room on their own, unless constant
supervision is provided.
The appliance must be installed at least 1.80m
above ground and 15 cm from the ceiling.
This heater is to be installed in fixed position (see
ASSEMBLY INSTRUCTION) so that switches and
other controls cannot be touched by a person in the
bath or shower.
WARNINGS ABOUT BATTERIES
Remote control is supplied with battery inside (CR2025 type, 3V); remove the
transparent sheet from the battery cover before use remote control.
When the battery is over, it must be replaced with the same type.
To remove battery, follow the drawing on the back of remote control.
1. KEEP BATTERIES OUT OF THE REACH OF CHILDREN. Swallowing can
lead to chemical burns, perforation of soft tissue, and death. Severe burns
can occur within 2 hours of ingestion. Seek medical attention immediately.
2. Do not allow children to replace batteries.

15/90
3. Always insert batteries correctly with regard to polarity (+ and -) marked on
the battery and the equipment.
4. Do not short-circuit batteries.
5. Do not charge batteries.
6. Do not force discharge batteries.
7. Do not mix new and used batteries or batteries of different types or brands.
8. Exhausted batteries should be immediately removed from equipment and
properly disposed of.
9. Do not heat batteries
10. Do not weld or solder directly to batteries.
11. Do not dismantle batteries.
12. Do not deform batteries.
13. Do not dispose of batteries in fire.
14. A lithium battery with a damaged container should not be exposed to water.
15. Do not encapsulate and/or modify batteries.
16. Store unused batteries in their original packaging away from metal objects.
If already unpacked, do not mix or jumble batteries.
17. Remove batteries from equipment if it is not to be used for an extended
period of time unless it is for emergency purposes.
18. Clean the battery contacts and also those of the equipment prior to battery
installation.
19. In case of leak from batteries, avoid any contact with it; in case of contact,
wash the affected part with water and seek medical attention.
Keep handy the guarantee, receipt of payment and these instructions for future
use and reference.
After removing the packaging, check the appliance for any signs of damage.
In case of visible damage, do not use it and contact a qualified technician.Do not
leave parts of the packaging with in the reach of children.This appliance is not a
children’s toy: it is an electrical device and must be treated with the necessary
caution.
Before connecting the appliance, make sure that the power supply voltage
matches the indication on the data plate.
If the plug and socket are not compatible, the socket has to be replaced with a
suitable type by skilled persons.
Do not use adapters or extension cables which do not meet current safety
standards or that exceed the current carrying capacity limits.
When you don’t use the appliance disconnect it from the power supply and assure
that the interruptor is off.
Do not tug on the power cable or on the appliance itself to remove the plug from
the socket.
The use of any electrical appliance requires that a number of basic rulesare
observed, namely:
- Never touch the appliance with wet or humid hands.
- Do not leave the appliance exposed to weathering (rain, sunlight).
- Do not subject it to rough handling.
In case of a breakdown or malfunctioning of the appliance, disconnect it at once.
Do not attempt to repair it, but take it to a service centre approved by the
manufacturer.

16/90
If you decide you do not want to use this appliance any longer, disable it by cutting
the power cable - of course, after disconnecting it from the socket.
The power cable should be extended to its full lenght to avoid over heating.
For safety reasons, the appliance should never be opened.
The appliance has been designed and manufactured to operate in the home.
Any other use is considered inappropriate and dangerous.
Do not insert objects through the safety grill or the air inlets.
Do not use this heating appliance with programmers, timers, separate remote
control systems (different to the ones provided with the appliance) or any other
device that automatically turns on the appliance, as there is a risk of fire in the
event the appliance is covered or positioned incorrectly.
Do not use the heater in presence of flammable substances (petrol,paints, etc.).
Do not place the cord near sources of heat.
WARNING: DO NOT COVER THIS PRODUCT NEAR CURTAINS OR OTHER
COMBUSTIBLE MATERIAL.
WARNING: DO NOT COVER THE APPLIANCE OR OBSTRUCT THE AIR
INLETS TO AVOID OVERHEATING.
(EN) TECHNICAL INFORMATIONS
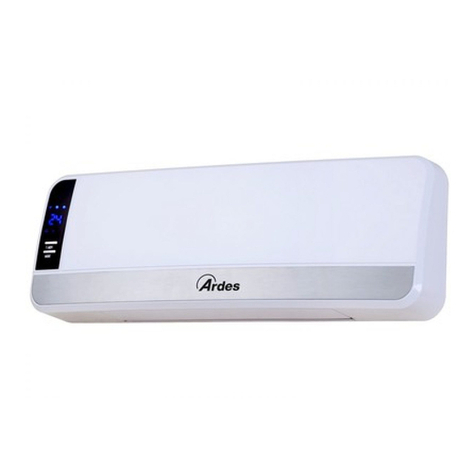
1 - Main switch On/Off
2 - Air outlet grid
3 - Control panel and indicator light
4 - Remote control
Technical data indicated on the appliance.
(EN) INSTRUCTIONS FOR USE
ASSEMBLY INSTRUCTIONS
Assembly kit composed of: 2 screws Ø 4 mm - 2 wall plugs Ø 8mm
WALL INSTALLATION
Fix the two plugs to the wall with the respective screws, taking into consideration
that the distance between them must correspond to that between the two hanging
holes on the back of the appliance. Leave the heads of the screws protruding out
from the wall enough so that the appliance can be hung on the screws. Once the
appliance has been hung on the screws, push it to the right so that the screws go
into the guide above the hole, thus improving the stability of the appliance.
The appliance must be installed at least 1,80m above the ground and 15 cm
from the ceiling.
OPERATION.
The appliance can emit both cold and hot air, depending on hot it is set.
Before connecting or disconnetting the appliance, make sure the main switch
On/Off (1) is in Off position (O).

17/90
To turn the appliance on put the plug in the socket and position the switch (1) to
“I”. The appliance will emit a “beep” sound and the display will show “S” to indicate
stand-by mode.
CONTROL PANEL OPERATION:
-Push speed pushbutton “MODE” repeatedly to select: fan mode only (the display
will show “- -”), minimum power (the display will show “- -” and the indicator light
will be on in the display), maximum power (the display will show “- -” and the
indicators light will be on in the display), maximum power + SWING, OFF
(the display will show “S”, wait 30 seconds until the fan will stop);
-Push Timer pushbutton when unit is on to set the automatic shutdown (timer
off function) from 1 to 12 hours. Each pressing increase 1 hour time. If the timer
off function is activated the indicator light will be on in the display. To deactive
timer off function, push timer button till the display show “0 0”.
-Push Timer pushbutton when unit is in stand-by mode (“S” on the display)
to set the automatic on from 1 to 12 hours (timer on function). Each pressing
increase 1 hour time. If the timer on function is activated the display shows the
appointment turn-on time and the indicator light will be on in the display. After the
setting time the unit fill turn on automatically.
The default setting temperature is 23°C and the indicator light related to the timer
will turn off in display. To deactive timer on function, push timer button till the
display show “0 0”.
- Attention: after timer on, the unit will turn into stand-b mode after 12
hours of continuous work if the temperature and weekl program has
not been set.
REMOTE CONTROL OPERATION:
Batteries
Remote control is supplied with battery inside (CR2025 type, 3V); remove the
transparent sheet from the battery cover before use remote control.
When the battery is over, it must be replaced with the same type.
To remove battery, follow the drawing on the back of remote control.
-Push On/Off pushbutton: the appliance will start to work in fan mode and the
display will show “- -”.Push this button when unit is On to turn it Off; the display
will show “S” (wait 30 seconds until the fan will stop);
-Push speed pushbutton repeatedly to select: fan mode only (the display
will show “- -”), minimum power (the display will show “- -” and the indicator light

18/90
will be on in the display) or maximum power (the display will show “- -” and
the indicators light will be on in the display).
The timer ( ) pushbutton of the remote control has the same function of the
pushbutton in the control panel.
Press the swing button to activate the oscillation and direct the air flow as
desired. Press again to deactivate the automatic swing.
Set the current time and day (if unit is in stand-by mode or working status):
1. Press “SET” pushbutton: the display show “12” as default hour.
2. Press + or - pushbuttons to select the current time (hours).
3. Press “SET” pushbutton again: the display show “30” as default minutes.
4. Press + or - pushuttons to select the current time (minutes).
5. Press “SET pushbutton” for the third time: the display show “d7” as default
day of the week.
6. Press + or - pushbuttons to select the current day: d1 (Monday), d2
(Tuesday), d3 (Wednesday).....d7 (Sunnday).
7. Press “OK” pushbutton to confirm the settings.
- Attention: the settings of time and da will be stored till the unit is in
stand-b mode or working status. In case of power failure, removing
the plug from the wall socket, or switching off the appliance using the
On / Off switch (1), all settings will be lost.
Set the automatic working mode (if unit is in working status):
- Push + or - pushbuttons to set the desired room temperature (from 10°C to
49°C). The display will show 23°C as default. Each pressure the temperature
increases or decreases by 1 ° C. If the automatic mode is set, the °C indicator
lights up in the display.
During automatic working mode, the unit select automatically the power
according to the difference between the desired room temperature and the
ambient temperature. In this working mode the appliance can switch between the
different power levels (ventilation, power I and II) and standby even repeatedly.
The selected power level is always shown on the display.
-To deactivate this function, press the speed ( ) pushbutton and select the
desired function (fan only, power I or power II). Once the automatic working mode
is deactivated the °C indicator light will turn off in the display.
- Warning: the unit switch in stand-b mode after 12 hours of continuous
operation.
Set the weekly program (if unit is in working status):
The weekly program allow to set 6 working period (from P1 to P6) per day. For
each working period is possible set the time when unit should turn on (Time/On)
and when the unit should be in stand-by mode (Time/Off).

19/90
Furthermore, the desired temperature can be set for each day.
1. Push “P” pushbutton; the light of P light up in the display
2. Push “DAY pushbutton repeatedly to select the day of the week that
should be setted - d1 (Monday), d2 (Tuesday), d3 (Wednesday).....d7
(Sunday)
3. Once the day has been selected, press “EDIT” pushbutton repeatedly to
select the working period (from P1 to P6).
4. Once the period has been selected, press “TIME/ON” pushbutton
repeatedly to set at what time the working period should start and
afterwards press “TIME/OFF” pushbutton repeatedly to set at what time
the working period should end.
5. Press “EDIT” pushbutton to confer and select the next working period.
After repeat point 4.
6. Repeat steps 2 to 5 to set the desired days/time. Unplanned days and time
are equivalent to stand-by periods.
Once the working period has been set, it’s possible set the desired temperature
for each period:
1. Push “DAY” pushbutton to select the day
2. Once the day has been selected, press “EDIT” pushbutton repeatedly to
select the working period (from P1 to P6).
3. Push + o - pushbuttons to select the desired temperature
4. Press “EDIT” pushbutton to confer and select the next working period.
After repeat point 3.
5. Push “DAY” pushbutton to confirm the settings and select the next day;
6. Repeat steps 2 to 5 to set the desired days/periods.
7. Push “OK” pushbutton to save the settings.
- WARNING: the weekl programming will work correctl onl if the time
and da of the week have been set and if the working period P1-P6
have been set.
To deactivate the weekly program and the related temperature press “P”
pushbutton; the “P” indicator light will turn off in the control panel.
- Warning: the weekl settings will be stored till the unit is in stand-b
mode or working status. In case of power failure, removing the plug
from the wall socket, or switching off the appliance using the On / Off
switch (1), all settings will be lost.
Set open-window detection (if unit is in working status):
This function shut off the appliance if the ambient temperature deviates from the
desired temperature of 5 ° C-10 ° C, in less than 10 minutes.
When this function is activated, the unit also activates the automatic working
mode.
To set the open-window detection:
1. Push open-window pushbutton ( ). The related indicator light and the
automatic working mode indicator light will lights up in the display. The
display will show the desired temperature (23°C as default).
2. Push + o - pushbutton to set the desired temperature (from 10°C to 49°C).
3. Push “OK” pushbutton to confirm.

20/90
To deactivate this function, push the open-window detection ( ) pushbutton:
the indicator light related to the automatic working mode and the indicator light
related ot the open-window detection will turn off in the display.
- Warning: the unit switch in stand-b mode after 12 hours of continuous
operation.
- N.B! If open-window detection and weekl program are activated
simultaneousl :
- during period that has not be setted the appliance will be in stand-by
mode.
- during working period the unit working as the setting temperature
under open-window detection.
WARNING: on first use or when turning on after a long period of inactivit , it is
normal for the unit to emit a bad smell or a trace of smoke: this will disappear
after a short working time.
(EN) MAINTENANCE
This appliance does not require any special maintenance.
Disconnect the plug from the socket and let the appliance cool down well before
cleaning it.
In order to clean the appliance, use a soft or slight damp cloth.
Never use abrasives or chemical solvents.
Do not use very wet substances, liquids or cloths to prevent water from entering
into the apparatus and irreparably damaging it.
NEVER IMMERSE THE APPLIANCE INTO THE WATER.
(EN) DISPOSAL
BATTERIES - Remove the batteries from the appliance before its
disposal. Do not dispose the batteries with domestic waste. The
batteries must be disposed of in the appropriate containers or in the
specific collecting centre. Suitable segregated collection helps
prevent damage to the environment and to human health.
To remove batteries, refer to Instructions for use.
USER INFORMATION
“Implementation of Directive 2012/19/EU on Waste Electrical and
Electronic Equipment (WEEE)”, pertaining to reduced use of
hazardous substances in electrical and electronic equipment, as well as
to waste disposal”.
The symbol of the crossed-out wheelie bin on the equipment or on its packaging
indicates that the product must be disposed of separately from other waste at the
end of its service life.

21/90
The user must therefore take the dismissed equipment to suitable separate
collection centres for electrical and electronic waste.
For more details, please contact the appropriate local authority.
Suitable segregated collection of the equipment for subsequent recycling,
treatment or environmentally-friendly disposal helps prevent damage to the
environment and to human health, and encourages the re-use and/or recycling
of the materials that make up the equipment.
Abusive disposal of the product by the user shall result in the application of
administrative fines in accordance with the laws in force.

22/90
EN
Item Symbol Value Unit Unit
Nominal heat output P
no m
2,0 kW N.A.
Minimum heat output
(indicative) P
min
,0 kW N.A.
Maximum continuous
heat output P
max,c
2,0 kW N.A.
N.A.
At nominal heat output el
max
N.A. kW
At minimum heat
output el
min
N.A. kW no
In standby mode el
SB
0,00 kW no
no
no
no
yes
no
yes
no
no
yes
no
Contact details
room temperature control, with open
window detection
with distance control option
with adaptive start control
with working time limitation
with black bulb sensor
POLY POOL S.p.A. - via Sottocorna 2 /B, 24020 Parre (BG) - Italy
Type of heat output/room temperature control
(select one)
single stage heat output and no room
temperature control
Two or more manual stages, no room
temperature control
with mechanic thermostat room
temperature control
with electronic room temperature control
electronic room temperature control plus
day timer
electronic room temperature control plus
week timer
ther control options (multiple selections possible)
room temperature control, with presence
detection
Heat output Type of heat input, for electric storage local space
heaters only (select one)
manual heat charge control, with integrated
thermostat
manual heat charge control with room
and/or outdoor temperature feedback
electronic heat charge control with room
and/or outdoor temperature feedback
Auxiliary electricity consuption fan assisted heat output
Information requirements for electric local space heaters - REGULATI N (EU) 2015/1188
Model identifier(s): AR4W08P
Item

23/90
(EN) GUARANTEE
Terms and Conditions
The guarantee is valid for 24 months.
This guarantee applies only if it has been duly filled in and is submitted with the
receipt showing the date of purchase.
The guarantee covers the replacement or repair of parts making up the appliance
which were faulty at source due to manufacturing faults.
After the guarantee has expired, the appliance will be repaired against payment.
The manufacturer declines any responsibility for damage to persons, animals or
property due to misuse of the appliance and failure to observe the directions
contained in the instructions.
Limits
All rights under this guarantee and any responsibility on our part will be voided if
the appliance has been:
- mishandled by unauthorized persons
- improperly used, stored or transported.
The guarantee does not cover damage to the outward appearance or any other
that does not prevent regular operation.
If any faults should be found despite the care taken in selecting the materials and
in creating the product, or if any information or advice are required, please contact
your local dealer.

57/90
HU
FYGYELEM : olvassa el figyelmesen a mellékelt használati útmutatót a
készülék biztonságos használatához és a megfelelő karbantartás
érdekében ez az útmutató fontos információkattartalmaz kérjük őrizze meg.
(HU) Figyelmeztetés
A k szül ket 8 vn l idősebb gyermekek s
csökkent fizikai, rz ki vagy szellemi
k pess gű, vagy tapasztalattal illetve a
szüks ges ismeretekkel nem rendelkező
szem lyek is használhatják, ha felügyelet alatt
állnak vagy oktatásban r szesültek a k szül k
biztonságos használatáról s meg rtett k a
használattal járó kockázatokat.
Gyermekek ne játsszanak a k szül kkel. A
felhasználó által elv gzendő tisztítást s
karbantartást nem v gezhetik gyermekek,
hacsak nem állnak felügyelet alatt.
A 3 vn l fiatalabb gyermekeknek megfelelő
távolságban kell tartózkodniuk a k szül ktől, ha
nem állnak folyamatos felügyelet alatt.
A 3 s 8 v közötti gyermekek számára csak a
k szül k be/kikapcsolása enged lyezett,
amennyiben az normál üzemi helyzetben lett
telepítve, illetve ha a gyermekek felügyelet alatt
állnak vagy oktatásban r szesültek a k szül k
biztonságos használatával kapcsolatban s
meg rtett k az azzal járó kockázatokat. A 3 s
8 v közötti gyermekek nem illeszthetik a
villásdugót a fali csatlakozóaljba, nem
v gezhetnek beállítást, illetve nem tisztíthatják

58/90
meg a k szül ket, nem v gezhetik el a
felhasználóra váró karbantartást.
FIGYELEM - Jelen termék egyes részei
felhevülhetnek és égési sérüléseket
okozhatnak. Különösen körültekintően kell
eljárni ott, ahol gyermekek és sérülékeny
személyek tartózkodnak.
Ha a hálózati csatlakozó megs rült annak cser je,
csak szakember általa megfelelő szervizben
lehets ges.
LETAKARNI TILOS
FIGYELEM: A túlmeleged s megelőz se rdek ben
ne takarja le a k szül ket.
Ne helyezze a k szül ket közvetlenül alatta egy fali
aljzatba.
Ne használja a k szül ket mosogató, zuhanyzó,
kád vagy medenceközel ben!
FIGYELEM: Ne használja kis m retű
helyis gekben, ha azokban olyan szem lyek
tartózkodnak, akik nem k pesek önállóan elhagyni
a helyis get, hacsak nem állnak felügyelet alatt.
A k szül ket a talajtól legalább 1.80 m, a
mennyezettől legalább 15 cm távolságra kell
elhelyezni.
A k szül ket rögzítve stabilan kell elhelyezni (lásd
az összeszerel si útmutatót), úgy, hogy a
felhasználó a fürdőkádból vagy a zuhanyzóból ne
tudja meg rinteni.

59/90
FIGYELMEZTETÉS AZ ELEMEKHEZ:
1. TARTSA AZ ELEMEKET GYERMEKEKT L TÁVOL. A lenyel se k miai
g st, a lágy r szek perforációját s halált okozhat. Súlyos g si s rül sek
következhetnek be a lenyel s utáni 2 órán belül. Azonnal forduljon orvoshoz.
2. Ne engedje, hogy gyermekek cser lj k ki az elemeket.
3. Megfelelően helyezze be az elemeket, ügyelve az elemeken s a k szül ken
feltüntetett polaritásra (+ s -).
4. Az elemeket ne helyezze rövidzárlat alá.
5. Ne töltse az elemeket.
6. Ne erőltesse az elemek lemerül s t.
7. Ne használjon új s használt vagy különböző típusú vagy elt rő gyártó általi
elemeket.
8. A lemerült elemeket azonnal el kell távolítani a k szül kből s megfelelően
ártalmatlanítani kell a hatályos jogszabályok szerint.
9. Ne melegítse az elemeket, s ne tegye ki őket hőforrásnak.
10. Ne hegessze közvetlenül az elemeket.
11. Ne szedje sz t az elemeket.
12. Ne deformálja az elemeket.
13. Ne dobja s ne ártalmatlanítsa az elemeket a tűzben.
14. Ne rintkezzen vízzel vagy nedvess ggel, különösen ha az elem tartálya
s rült.
15. Ne burkolja be s ne módosítsa az elemeket.
16. Tárolja a nem használt elemeket az eredeti csomagolásukban, f m tárgyaktól
távol. Ha már eltávolította a csomagolásból, ne keverje vagy össze az elemeket.
17. Ha hosszabb ideig nem kívánja használni a k szül ket, távolítsa el az
elemeket.
18. Tisztítsa meg az elemek s a k szül k csatlakozásait, mielőtt behelyezi az
elemeket.
19. Az elemek szivárgása eset n kerülje az rintkez st a kifolyt anyaggal;
rintkez s eset n vízzel öblítse le az rdekelt r szt, s forduljon orvoshoz.
A vásárláskor kapott számlát, a jótállást s a használati útmutatót őrizze meg
esetleges k sőbbi felhasználásra.
A csomagolás eltávolítása után győződjön meg arról, hogy a k szül ken nem
található s rül s.
Látható s rül s eset n,ne használja azt, minden esetben forduljon
szakemberhez.
A csomagolás egyes r szeit ne hagyja kisgyermek számára el rhető helyen.
A k szül k nem gyerekját k, elektromos berendez s, ez rt fontos a biztonsági
előírások betartása.
A csatlakoztatás előtt győződjön meg arról, hogy a hálózati feszülts g
megegyezik-e a k szül k adattábláján található adatokkal.
Ha a hálózati csatlakozó nem megfelelő, ezt csak hozzá rtő, k pzett szakember
által lehet kicser lni. Ne használjonolyan adaptert vagy
hosszabbító kábelt, amely nem felel meg a biztonsági előírásoknak vagy nem
rendelkezik a k szül k áramellátáshoz szüks ges kapacitással.

60/90
A k szül k esetleges meghibásodása eset n, elsők nt húzza ki a dugót a
csatlakozó aljzatból. Ne próbálja megjavítani a k szül ket, minden esetben
forduljon a gyártó által megjelölt szervizhez.
Ha a megfelelő s rendeltet szerű használat ellen re a k szül k meghibásodna
soha ne próbálja megjavítani, minden esetben forduljon a gyártó által megjelölt
szervizhez, ahol megfelelő szakembereket talál a hiba mielőbbi szakszeru
kijavítására.
Az elektromos k szül kekre vonatkozóan vannak bizonyos általános szabályok,
melyek betartása minden esetben kötelező:
- Soha ne rintse a k szül ket vízes vagy nedves k zzel!
- Ne tegye ki a k szül ket sz lsős ges időjárásnak! (erős napsüt s, eső).
- Ne tegye ki a berendez st erős üt snek vagy más durva fizikai behatásoknak!
Amennyiben meghibásodást tapasztal, ne próbálja megjavítani ak szül ket,
minden esetben forduljon szakemberhez a gyártó általmegjelölt szervizben.
Ha a k szül ket már soha többet nem használja, húzza ki a dugót azelektromos
hálózatból, majd vágja le a csatlakozó kábelt.
Húzza ki a kábelt a teljes hosszában a túlmeleged s elkerül se rdek ben.
Biztonsági okokból soha ne nyissa fel a k szül ket.
A k szül k háztartási használatra k szült, minden egy b felhasználásavesz lyes
s tilos!
Ne helyezzen semmilyen tárgyat a k szül ken található szellőzőrácsokba.
Ne használja ezt a fűtőberendez st programozókkal, időkapcsolókkal, külön
távirányító rendszerekkel vagy más egy b k szül kkel amely esetleg
automatikusan bekapcsolhatja a hősugárzót, mivel ha a k szül k ppen letakart
állapotban van, vagy nem megfelelő pozícióban, helyen áll ez tűzvesz lyes lehet.
Ne használja a k szül ket gyúl kony anyagokat tartalmazó helys gben. (benzin,
fest k...stb)
Ügyeljen arra, hogy a hálózati kábel ne legyen a forró r szek közel ben.
FIGYELEM: NE HASZNÁLJA A KÉSZÜLÉKET FÜGGÖNY VAGY EGYÉB
MÁS GYÚLÉKONY ANYAG MELLETT.
FIGYELEM: A TÚLMELEGEDÉS MEGEL ZÉSÉNEK ÉRDEKÉBENE
TAKARJA LE A KÉSZÜLÉKET!
(HU) MŰSZAKI ADATOK
1 - Főkapcsoló
2 - Szellőző rács
3 - Funkció gomb s LED kijelző
4 – Távirányító
A műszaki adatok a k szül ken vannak feltüntetve.
(HU) HASZNÁLATI UTASÍTÁS
ÖSSZESZERELÉSI UTASÍTÁS
Szerelők szlet, amely a következőkből áll: 2 db csavari Ø 4 mm - 2 db rögzítő k
Ø 8 mm.

61/90
FALRA SZERELÉS
Rögzítse a falra a k t rögzítő ket a hozzá tartozó csavarral, ügyelve, hogy a
távolság megegyezzen a k szül k hátulján l vő akasztólyuk közötti távolsággal.
Hagyja, hogy a csavarok feje kiálljon a falból annyira, hogy lehetőv tegye a
k szül k felakasztását. Miután felakasztotta, tolja jobbra úgy, hogy a csavarok
kövess k a lyuk feletti sínt, nagyobb stabilitást biztosítva a k szül knek.
A készüléket a földtől minimum 1,80 m-re, a mennyezettől minimum 15 cm-
re kell felszerelni.
MŰKÖDÉS.
A k szül k hideg s meleg levegőt is bocsáthat ki, attól függően, hogy hogy állítja
be.
A k szül k csatlakoztatása vagy lecsatlakoztatása előtt győződjön meg, hogy az
On/Off főkapcsoló kikapcsolt állapotban legyen (O).
A k szül k bekapcsolásához helyezze a csatlakozót az aljzatba, s a kapcsolót
(1) helyezze „I” állásba. A k szül k egy rövid sípszót hallat, s a kijelzőn
megjelenik az „S”, ami azt jelenti, hogy a term k k szenl ti állapotban van.
HASZNÁLAT A KEZEL PANELEN KERESZTÜL:
-Nyomja meg a
(MODE)
Sebess g gombot többször, hogy kiválassza: a
ventiláció módot (a kijelzőn megjelenik a „- -”), a minimális teljesítm nyt (a
kijelzőn megjelenik a „- -” s az „ ” jelzőf ny világít), a maximális teljesítm nyt
(a kijelzőn megjelenik a „- -” s az „ ” jelzőf nyek világítanak), a maximális
teljesítm nyt + oszcilláció, a k szül k ki van kapcsolva (a kijelzőn megjelenik a
„S”, Várjon 30 másodpercet, amíg a ventilátor leáll).
-Működő k szül ken nyomja meg a Időzítő gombot, hogy beprogramozza az
automata kikapcsolást (timer off funkció) a programozástól számított 1 s 12 óra
közötti időintervallumban. Minden megnyomással az idő növekszik egy órával.
Amikor a timer off funkció aktív, az időzítőre vonatkozó jelzőf ny kivilágít a
k pernyőn. A timer off funkció kikapcsolásához nyomja meg az időzítő gombot
többször, míg a kijelzőn meg nem jelenik a „0 0”.
-Nyomja meg a Időzítő gombot, amikor a k szül k k szenl ti állapotban van
(a kijelzőn megjelenik az „S”), hogy beprogramozza az automata bekapcsolást
(timer on funkció) a programozástól számított 1 s 12 óra közötti
időintervallumban. Minden megnyomással az idő növekszik egy órával. Amikor a
timer on funkció aktív a kijelzőn megjelenik az órák száma, amelyek eltelt vel a
term k automatikusan bekapcsol s az időzítőre vonatkozó jelzőf ny kivilágít a
kijelzőn. A beállított idő eltelt vel a term k bekapcsol 23°C-on álló termosztáttal,
s az időzítőre vonatkozó jelz s kikapcsol a kijelzőn. A timer on funkció
kikapcsolásához nyomja meg az időzítő gombot többször, míg a kijelzőn meg
nem jelenik a „0 0”.
Figyelem: a timer on letelt vel a k szül k k szenl ti állapotba l p 12 óra
folyamatos működ s után, ha a hőm rs kletet s a heti programozást nem
állította be.

62/90
HASZNÁLAT TÁVIRÁNYÍTÓVAL:
Elemek
A távirányítót CR2025 3V elemmel szállítják; használat előtt távolítsa el a
távirányító elemrekesz nek v dő műanyagát.
Amikor az elem lemerült, le kell cser lni egy ugyanolyan típusúval.
Az elem eltávolításával kövesse a távirányító hátulján l vő rajzokat.
-Nyomja meg a On/Off gombot: a k szül k csak ventiláció módba l p, s a
kijelzőn megjelenik „- -”. Bekapcsolt g pen nyomja meg ezt a gombot, hogy
kikapcsolja; a kijelzőn megjelenik a „S” (Várjon 30 másodpercet, amíg a ventilátor
leáll).
-Nyomja meg a Sebess g gombot többször, hogy kiválassza: a ventiláció
módot (a kijelzőn megjelenik a „- -”), a minimális teljesítm nyt (a kijelzőn
megjelenik a „- -” s az „ ” jelzőf ny világít) vagy a maximális teljesítm nyt (a
kijelzőn megjelenik a „- -” s az „ ” jelzőf nyek világítanak).
A távirányítón l vő ( ) gomboknak ugyanaz a funkciója, mint a kezelőpanelen
l vő, előzőleg leírt funkciók.
Nyomja meg a lengő gombot az oszcilláció aktiválásához s a levegő
áramlásának kívánt irányításához. Nyomja meg ism t az automatikus leng s
kikapcsolásához.
A hét napjának és az idő beállítása (működő készüléken vagy készenléti
állapotban):
1. Nyomja meg a „SET” gombot: a kijelzőn megjelenik villogva a jelenlegi óra
(alap rtelmezett beállítás a „12”).
2. Nyomja meg a + vagy - gombot a jelenlegi óra megadásához (a formátum
24 órás).
3. Ism t nyomja meg a „SET” gombot: a kijelzőn megjelenik villogva a jelenlegi
perc (alap rtelmezett beállítás a „30”).
4. Nyomja meg a + vagy - gombot a jelenlegi perc beállításához
5. Nyomja meg harmadszor a „SET” gombot: a kijelzőn megjelenik a h t napja
(alap rtelmezett beállítás „d7”).
6. Nyomja meg a + vagy - gombot, hogy beállítsa a h t jelenlegi napját. A nap
d1 (H tfő), d2 (Kedd), d3 (Szerda)...d7 (Vasárnap) formátumban van
kifejezve.
7. Nyomja meg az „OK” gombot a megerősít shez.
Figyelem: a beállítások megmaradnak, amíg a készülék készenléti
állapotban vag működésben van. Az elektromos ellátás megszakadása
esetén, a dugó kihúzása esetén az aljzatból vag a készülék
lekapcsolásakor az On/Off (1) gombbal, elveszti az összes beállítást.

63/90
Az automata üzemmód beállítása (működő készülékkel):
- Nyomja meg a + vagy - gombot működő k szül kkel, hogy beállítsa a kívánt
környezeti hőm rs kletet 10 s 49°C között (alap rtelmezett beállítás 23 °C).
Minden megnyomáskor a hőm rs klet nő vagy csökken 1°C-kal. Ha beállította
az automata üzemmódot, a °C jelzőf ny kivilágít a kijelzőn.
Automata üzemmódban a k szül k automatikusan szabályozza a hűtő
teljesítm nyt a környezeti s a kívánt hőm rs klet különbs ge alapján. Ebben az
üzemmódban a k szül k átkapcsolhat a különböző teljesítm nyszintek
(ventiláció, teljesítm ny I s II) s a k szenl ti állapot között akár többször is. A
kiválasztott teljesítm nyszint mindig megjelenik a kijelzőn.
-E funkció kikapcsolásához nyomja meg a ( ) sebess g gombot, s
manuálisan válassza ki a kívánt funkciót (csak ventiláció, I-es vagy II-es
teljesítm ny). Ha az automata üzemmód ki van kapcsolva, a °C jelzőf ny
lekapcsol a kijelzőn.
Figyelem: a k szül k k szenl ti állapotba l p 12 óra folyamatos működ s után.
Heti program beállítása (működő készüléken):
A heti program lehetőv teszi, hogy legfeljebb 6 működ si blokkot állítson be (P1-
től P6-ig) naponta. Minden blokkhoz be lehet állítani az időpontot, amikor a
k szül knek be kell kapcsolnia (Time/On) s amikor vissza kell t rnie k szenl ti
állapotba (Time/Off).
Továbbá minden napra be lehet állítani a kívánt hőm rs kletet.
1. Nyomja meg a „P” gombot, hogy aktiválja a heti program beállítását. Az
erre vonatkozó ikon kigyullad a kijelzőn.
2. Nyomja meg a „DAY” gombot többször, hogy kiválassza a h t beállítani
kívánt napját - d1 (H tfő), d2 (Kedd), d3 (Szerda) ....d7 (Vasárnap).
3. Miután kiválasztotta a napot, nyomja meg az „EDIT” gombot többször,
hogy kiválassza a kívánt intervallumot (P1-től P6-ig).
4. Miután kiválasztotta a beprogramozni kívánt intervallumot, nyomja meg a
„TIME/ON” gombot többször, hogy beállítsa az intervallum kezdeti
időpontját, majd nyomja meg a „TIME/OFF” gombot többször, hogy
beállítsa az intervallum időpontjának v g t.
5. Nyomja meg az „EDIT” gombot, hogy megerősítse s kiválassza a
következő időintervallumot. Ezután ism telje meg a 4. pontot.
6. Ism telje meg a 2-5 l p seket, hogy beállítsa a kívánt napokat. A nem
beprogramozott napok s intervallumok az alap rtelmezett időszakoknak
felelnek meg.
Miután minden napra beállította az intervallumokat, beállíthatja a kívánt
hőm rs kletet az egyes beállított intervallumokat:
1. Nyomja meg a „DAY” gombot, hogy kiválassza a napot
2. Miután kiválasztotta a napot, nyomja meg az „EDIT” gombot többször,
hogy kiválassza a kívánt intervallumot (P1-től P6-ig).
3. Nyomja meg a + vagy - gombot, hogy kiválassza a kívánt hőm rs kletet
4. Nyomja meg az „EDIT” gombot, hogy megerősítse s kiválassza a
következő időintervallumot. Ezután ism telje meg a 3. pontot.
5. Nyomja meg a „DAY” gombot, hogy megerősítse a jelenlegi beállítást, s
kiválassza a következő napot.

64/90
6. Ism telje meg a 2-5 l p seket, hogy beállítsa a kívánt napokat.
7. Nyomja meg az „OK” gombot, hogy mentse a beállításokat s befejezze a
programozást.
- FIGYELEM: a heti programozás csak akkor működik hel esen, ha a
hét napja és az időpont be lettek állítva, és ha beállította a P1-P6
működési blokkokat.
A heti programozás s a vonatkozó hőm rs kletek kikapcsolásához nyomja meg
a „P” gombot. A kijelzőn l vő P ikon kiaszik.
- FIGYELEM: a beállítások megmaradnak, amíg a készülék készenléti
állapotban vag működésben van. Az elektromos ellátás
megszakadása esetén, a dugó kihúzása esetén az aljzatból vag a
készülék lekapcsolásakor az On/Off (1) gombbal, elveszti az összes
beállítást.
Nyitott ablak felismerés beállítása (működő készüléken):
Ez a funkció megszakítja a k szül k működ s t, amennyiben a környezeti
hőm rs klet kevesebb mint 10 perc alatt 5°C-10°C-kal elt r a kívánt
hőm rs klettől.
Amikor ez a funkció be van kapcsolva, a k szül k aktiválja az automata
üzemmódot is.
A nyitott ablak felismer se funkció beállításához:
1. Nyomja meg a nyitott ablak felismer se gombot ( ). Az automata
üzemmód jelzőf nye (°C) s a nyitott ablak felismer se jelzőf nye
kigyulladnak a kijelzőn. A kijelzőn megjelenik a kívánt környezeti
hőm rs klet (alap rtelmezett 23°C).
2. Nyomja meg a + vagy - gombot, hogy kiválassza a kívánt környezeti
hőm rs kletet (10°C s 49°C között).
3. Nyomja meg az „OK” gombot, hogy megerősítse a beállítást.
A funkció kikapcsolásához nyomja meg a ( ) gombot: az automata üzemmód
jelzőf nye (°C) s a nyitott ablak felismer se jelzőf ny kialszik a kijelzőn, s a
k szül k ism t a nyitott ablak felismer se bekapcsolása előtt utoljára beállított
állapotban működik.
- FIGYELEM: a készülék készenléti állapotba lép 12 óra fol amatos
működés után.
- MEGJEGYZÉS! Ha a n itott ablak felismerés funkció és a heti program
eg idejűleg aktív:
-a heti program nem beállított időszakaiban a készülék nem működik
(készenléti állapotban marad).
-a beállított időszakokban a hőmérséklet függ a n itott ablak
felismerése módban beállított körn ezeti hőmérséklettől.
- FIGYELEM: az első használat alkalmával vag eg hosszabb idejű
inaktivitás utáni bekapcsoláskor normális, ha a készülék kellemetlen
szagot vag némi füstöt bocsát ki: ez eltűnik a bekapcsolás után kis
idővel.
(HU) Karbantartás
Ez a k szül k nem ig nyel semmilyen különleges karbantartást.
Table of contents
Languages:
Other ARDES Heater manuals