manuals.online logo
Brands
  1. Home
  2. •
  3. Brands
  4. •
  5. Argos
  6. •
  7. Indoor Furnishing
  8. •
  9. Argos Osaka Dressing Table 2273237 User manual

Argos Osaka Dressing Table 2273237 User manual

Assembly Instructions - Please keep for future reference
If you need help or have damaged or missing parts, call the Argos Customer Helpline: 0845 640 30 30
White 2273237
Black 2281511
Issue 1 - 23-05-2014
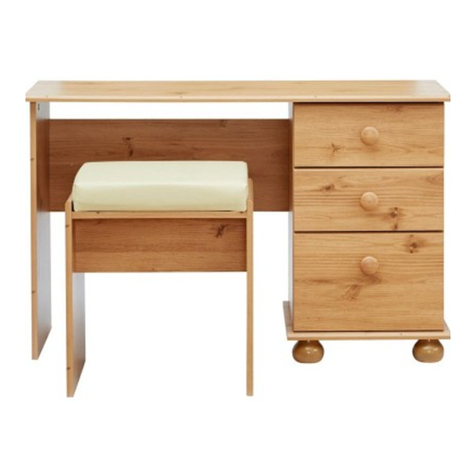
Osaka Dressing Table
Dimensions
Width
Depth
Height
:
:
:
350265
101.2 cm
40.0 cm
76.0 cm
!Safety and Care Advice
Important - Please read these instructions fully before starting assembly
Care and maintenance
1
• Check you have all the
components and tools listed on
pages 2 and 3.
• Remove all fittings from the
plastic bags and separate them
into their groups.
• Keep children and animals
away from the work area, small
parts could choke if swallowed.
• Make sure you have enough
space to layout the parts before
starting.
• Do not stand or put weight on
the product, this could cause
damage.
• Assemble the item as close to
its final position (in the same
room) as possible.
• Assemble on a soft level
surface to avoid damaging the
unit or your floor.
• Parts of the assembly will be
easier with 2 people.
• We do not recommend the use
of power drill/drivers for
inserting screws, as this could
damage the unit. Only use hand
screwdrivers.
• Dispose of all packaging
carefully and responsibly.
• Only clean using a damp cloth
and mild detergent, do no use
bleach or abrasive cleaners.
• From time to time check that
there are no loose screws on
this unit.
• This product should not be
discarded with household waste.
Take to your local authority
waste disposal centre.
Note: if required the next
page can be cut out and used
as reference throughout the
assembly. Keep this page
with these instructions for
future reference.
Components - Panels
Please check you have all the panels listed below
If you have damaged or missing components, call
the Argos Customer Helpline: 0845 640 30 30
2
350265-03
2
(15 cm x 30,6 cm)
Side, left
9
(31 cm x 9,8 cm)
Drawer side, right/left
2
x
1
(101,2 cm x 40 cm)
Top
3
(15 cm x 30,6 cm)
Side, right
7
(88,2 cm x 6 cm)
Front rail
6
(88,2 cm x 15 cm)
Back rail
6
x
8
(29,0 cm x 12,5 cm)
Drawerfront
10
(24,5 cm x 9,8 cm)
Drawer back
11
(25,3 cm x 30,7 cm)
Drawer bottom
3
x
3
x
3
x
4
(74,5 cm x 5,0 cm)
Leg, left
5
(74,5 cm x 5,0 cm)
Leg, right
2
x
12
(11,9 cm x 29,1 cm)
Divider
2
x
Components - Fittings
Please check you have all the panels listed below
Note: The quantities below are the correct amount to complete the assembly. In some cases more ttings
may be supplied than are required.
3350265-04
26
ø8 x 40mm Wooden dowel x
Aa Ab
ø6 x 30mm Wooden dowel x
12
Cp
ø5 x 11, cc34mm Bolt x
28
Ca
ø15 x 10.5mm Cam x
28
Hk
6
M4 x 9mm Screw x
Kb
ø5.8 x 8mm Screw x
8
Sk
12
245 x 17 x 10mm Drawer runner x
17060 16040 90 15013070 120100 14011050 803020100
Ruler - Use this ruler to help correctly identify the screws
Tools required
Flatblade screwdriver
(Medium)
Hammer
Phillips screwdriver
(Medium & large)
Back fitting w. ø3.5 x 15mm Screw x
Fi
6
ø3 x 35mm Screw x
Bp
12
Ge
3
ø27 x 24mm Metal Knob x
M4 x 20mm Screw x
Hd
3
Wall strap and instruction x 1
Fh
ø10 x 9mm Spacer x
Nu
6
Kf
6
ø5.8 x 19mm Screw x
ø5 x 38mm Screw x
Dj
4
Assembly Instructions
Place the legs 4and
5onto the sides 2
and 3.
Push cams
Ca
into the
holes indicated on the
sides 2and 3.
Arrows pointing towards
the legs 4/5.
Turn the cams
Ca
to the
right to x the legs 4
and 5.
Step 1.3
Assembly of the table.
Step 1
Knock the dowels
Aa
into the holes indicated
on the sides
2
and
3
using a small hammer.
Step 1.1
Screw the bolts
Cb
into
the holes indicated on the
legs
4
and
5
.
Step 1.2
4
350265-05
16
ø8 x 40mm Wooden dowel x
Aa
3
5
4
2
4
2
5
1
3
5
Cp
ø5 x 11, cc34mm Bolt x
8
Ca
ø15 x 10.5mm Cam x
8
3
2
6
7
4
5
4
5
4
Ca
Ca
Ca
Ca
Cp
Cp
Aa
Aa Aa
Aa
Aa
Aa
Aa
2
x
2
x
12 12
Assembly Instructions
Slide the top of the
drawer runners
Sk
backwards. You can
identify the front end of
the drawer runner
Sk
by
the two M4 holes. See
details.
Place the Spacers
Nu
as shown, and x the
front end of the drawer
runners
Sk
to the sides
2and 3using screws
Kf
through the holes
number 2 and 8 as
indicated.
See details.
Step 1.5
Screw the bolts
Cb
into
the holes indicated on the
sides
2
and
3
.
Step 1.4
350265-06
5
Front end
Sk
Sk
2
245 x 17 x 10mm Drawer runner x
2
ø10 x 9mm Spacer x
Nu
4
Kf
4
ø5.8 x 19mm Screw x
Sk
Sk
3
2
Cp
ø5 x 11, cc34mm Bolt x
6
Cp
Cp Cp
Cp Cp
Cp
Kf
Kf
Sk
Sk
Kf
Kf
Nu
Nu
Nu
Nu
Front end
3
Hole no.
8
Hole no.
2
Hole no.
2
Hole no.
8
Assembly Instructions
Slide the top of the draw-
er runners
Sk
forwards.
Place the Spacers
Nu
as shown, and x the
back end of the drawer
runners
Sk
to the sides
2and 3using screws
Kf
through the holes
indicated.
See details.
Step 1.6
Knock the dowels
Aa
into
the holes indicated on
the dividers
12
using a
small hammer.
Step 1.8
Knock the dowels
Aa
into
the holes indicated on
the back rail
6
and
the
front rail
7
using a small
hammer.
Step 1.7
6
350262-07
2
ø10 x 9mm Spacer x
Nu
2
Kf
2
ø5.8 x 19mm Screw x
Kf
Nu
Nu
Kf
3
6
Aa
Aa
Aa
Aa
7
6
ø8 x 40mm Wooden dowel x
Aa
4
ø8 x 40mm Wooden dowel x
Aa
2
x
12
Aa
Aa
Assembly Instructions
Slide the top of the drawer
runner
Sk
backwards.
Identify the front end of the
drawer runner
Sk
by the two
M4 holes.
Fix the front end of the
drawer runner
Sk
to the
dividers
12
using screws
Kb
through the holes
number 2 and 8 as
indicated.
Step 1.9
Slide the top of the drawer
runner
Sk
forwards.
Fix the back end of the
drawer runner
Sk
to the
dividers
12
using screw
Kb
through the hole indicated.
Step 1.10
Turn the dividers
12
upside
down.
Slide the top of the drawer
runner
Sk
forwards.
Fix the front end of the
drawer runner
Sk
to the
dividers
12
using screws
Kb
through the holes
number 2 and 8 as
indicated.
Step 1.11
Slide the top of the drawer
runner
Sk
forwards.
Fix the back end of the
drawer runner
Sk
to the
dividers
12
using screw
Kb
through the hole indicated.
Step 1.12
350265-08
7
Sk
2
245 x 17 x 10mm Drawer runner x
Kb
ø5.8 x 8mm Screw x
4
Kb
ø5.8 x 8mm Screw x
2
Sk
Front end
Sk
2
245 x 17 x 10mm Drawer runner x
Kb
ø5.8 x 8mm Screw x
2
Kb
ø5.8 x 8mm Screw x
4
12
12
12
12
Kb
Kb
Sk
Sk
Kb
Kb
Sk
Sk
Kb
Kb
Hole no.
2
Hole no.
8
Hole no.
2
Hole no.
8
Assembly Instructions
Place the sides 2and
3onto the back rail 6
and the front rail
7.
Push cams
Ca
into the
holes indicated on the
back rail 6and the front
rail
7.
Arrows pointing towards
the sides 2/3.
Turn the cams
Ca
to the
right to x the sides 2
and 3.
Step 1.15
Screw the bolts
Cb
into
the holes indicated on the
top
1
.
Step 1.13
Place the dividers 12
onto the top
1.
Push cams
Ca
into the
holes indicated on the
dividers 12 , arrows
pointing towards
the top 1.
Turn the cams
Ca
to the
right to x the
dividers 12 .
Step 1.14
8
350265-09
Ca
ø15 x 10.5mm Cam x
6
Ca
Ca
Ca
Ca
Ca
3
7
6
2
Cp
Cp
Cp
Cp
1
Cp
Cp
Cp
Cp
Ca
ø15 x 10.5mm Cam x
4
Cp
ø5 x 11, cc34mm Bolt x
8
12
12
1
Ca
Ca
Ca
Ca
Assembly Instructions
Step 1.18
!
Important!
The dressing table
is heavy.
Lift with care.
Its recommended that the
dressing table is xed to the
wall.
Use the ttings
Fh
. Follow
the instructions included
with the ttings.
Place the sides 2and
3onto the top 1.
Push cams
Ca
into the
holes indicated on the
sides 2and 3.
Arrows pointing towards
the top 1.
Turn the cams
Ca
to the
right to x the top 1.
Step 1.16
Fix the back rail 6and
the front rail 7to the
dividers 12 as shown,
using screws
Dj
.
Step 1.17
350265-10
9
Wall strap and instruction x 1
Fh
Ca
ø15 x 10.5mm Cam x
4
1
3
2
Ca
Ca
Ca
ø5 x 38mm Screw x
Dj
4
6
7
12 12
Dj
Dj
Dj
Dj
Assembly Instructions
Knock the dowels
Ab
into the holes indicated
on the drawer sides 9
using a smal hammer.
Step 2.2
Slide the drawer bottom
11 into the drawer
sides 9.
Step 2.3
Fix the drawer sides 9
to the drawer back 10 as
shown, using screws
Bp
.
Step 2.1
Assembly of the drawers.
Step 2
Step 2.4
Screw the bolts
Cb
into
the holes indicated on
the drawer front 8.
350265-10
9
Wall strap and instruction x 1
Fh
Ca
ø15 x 10.5mm Cam x
4
1
3
2
Ca
Ca
Ca
ø5 x 38mm Screw x
Dj
4
6
7
12 12
Dj
Dj
Dj
Dj
10
350265-11
3
x
3
x
Bp
Bp
ø3 x 35mm Screw x
Bp
12
10
9
9
11
10
9
9
Ab
ø6 x 30mm Wooden dowel x
12
3
x
3
x
9
9
11
9
9
3
x
8
Cp
ø5 x 11, cc34mm Bolt x
6
Cp
Cp
Ab
Ab
8
Assembly Instructions
Step 2.6
!
Important!
Make sure the
angle between
the drawer front
8
and
the drawer sides
9
is 90°
before the drawer bottom
11
is xed using
Fi
as
shown.
To adjust the angle between
the sides and the front push
the tting
Fi
sidewards.
Step 2.5
Push the drawer front
8
onto the drawer sides
9
.
Place cams
Ca
into the
holes indicated. Arrow
pointing towards the front.
Turn the cams
Ca
to the
right to x the front.
Step 2.7
Fix the metal knobs
Ge
to the drawer front 8
using screws
Hd
.
Pull out the drawer
runners. Slide the
drawers onto the runners.
Fix drawers to the drawer
runners using screws
Hk
.
Step 2.8
90°
350265-12
11
Fi
Fi
Fi
Back fitting w. ø3.5 x 15mm Screw x
Fi
6
8
9
9
3
x
Ca
ø15 x 10.5mm Cam x
6
Ca
Ca
3
x
8
Ge
Hd
Fi
Fi
Ge
3
ø27 x 24mm Metal Knob x M4 x 20mm Screw x
Hd
3
Hk
6
M4 x 9mm Screw x
Hk
Hk
3
x

This manual suits for next models

1

Other Argos Indoor Furnishing manuals

Argos TC Marston White Shake XL Blanket Box... User manual

Argos

Argos TC Marston White Shake XL Blanket Box... User manual

Argos Hallingford 802/6622 User manual

Argos

Argos Hallingford 802/6622 User manual

Argos Franklin Recliner 2493567 User manual

Argos

Argos Franklin Recliner 2493567 User manual

Argos Foley 333/7976 Datasheet

Argos

Argos Foley 333/7976 Datasheet

Argos Brooklyn Wardrobe White 8106951 User manual

Argos

Argos Brooklyn Wardrobe White 8106951 User manual

Argos Summerton 137/6300 User manual

Argos

Argos Summerton 137/6300 User manual

Argos Marlow 424/1195 User manual

Argos

Argos Marlow 424/1195 User manual

Argos Denver 355/8463 User manual

Argos

Argos Denver 355/8463 User manual

Argos Home Venetia User manual

Argos

Argos Home Venetia User manual

Argos 608/0811 User manual

Argos

Argos 608/0811 User manual

Argos Brooklyn 8529198 User manual

Argos

Argos Brooklyn 8529198 User manual

Argos SWIVEL User manual

Argos

Argos SWIVEL User manual

Argos Retro Pedestal 343/7395 User manual

Argos

Argos Retro Pedestal 343/7395 User manual

Argos Verona 609/5057 User manual

Argos

Argos Verona 609/5057 User manual

Argos AVR 4 Seater Patio Set User manual

Argos

Argos AVR 4 Seater Patio Set User manual

Argos White Toddler bed 4277891 User manual

Argos

Argos White Toddler bed 4277891 User manual

Argos avignon 544/2687 User manual

Argos

Argos avignon 544/2687 User manual

Argos SKYE WOOD Datasheet

Argos

Argos SKYE WOOD Datasheet

Argos TOBY 8559230 User manual

Argos

Argos TOBY 8559230 User manual

Argos Fabric Ottoman With 2 Small Stools 755/2238 User manual

Argos

Argos Fabric Ottoman With 2 Small Stools 755/2238 User manual

Argos Aruba 617/2602 User manual

Argos

Argos Aruba 617/2602 User manual

Argos Maximus 606/5472 User manual

Argos

Argos Maximus 606/5472 User manual

Argos 346/0348 User manual

Argos

Argos 346/0348 User manual

Argos 1926925 User manual

Argos

Argos 1926925 User manual

Popular Indoor Furnishing manuals by other brands

FourStarGroup 11213619 manual

FourStarGroup

FourStarGroup 11213619 manual

Ameriwood HOME 3700339COM manual

Ameriwood HOME

Ameriwood HOME 3700339COM manual

SEI HF0135 Assembly instructions

SEI

SEI HF0135 Assembly instructions

Next 685584 Assembly & instruction manual

Next

Next 685584 Assembly & instruction manual

MDB Family 14101 Assembly and operation manual

MDB Family

MDB Family 14101 Assembly and operation manual

Seconique Furniture Corona Dressing Table Assembly instructions

Seconique Furniture

Seconique Furniture Corona Dressing Table Assembly instructions

Lightolier Calculite ProSpec Linear Downlight PE4M1675 Specifications

Lightolier

Lightolier Calculite ProSpec Linear Downlight PE4M1675 Specifications

Next MURPHY 104343 Assembly instructions

Next

Next MURPHY 104343 Assembly instructions

Home Decorators Collection LOFTEN SK17755A Assembly instructions

Home Decorators Collection

Home Decorators Collection LOFTEN SK17755A Assembly instructions

Linon 98518WHT01 manual

Linon

Linon 98518WHT01 manual

Keter TITAN-BASE Assembly instructions

Keter

Keter TITAN-BASE Assembly instructions

WIEMANN Lissabon manual

WIEMANN

WIEMANN Lissabon manual

hygena Berkeley Assembly instructions

hygena

hygena Berkeley Assembly instructions

italor Carrito Sigma C0175 Assembly instructions

italor

italor Carrito Sigma C0175 Assembly instructions

PURPLE LEAF ZY05PRG1123-733E Assembly manual

PURPLE LEAF

PURPLE LEAF ZY05PRG1123-733E Assembly manual

Next SLOANE 437640 Assembly instructions

Next

Next SLOANE 437640 Assembly instructions

Futureglass Lasered Desk Assembly instructions

Futureglass

Futureglass Lasered Desk Assembly instructions

Riverside Furniture Falls Creek Entertainment 16146 Assembly instructions

Riverside Furniture

Riverside Furniture Falls Creek Entertainment 16146 Assembly instructions

manuals.online logo
manuals.online logoBrands
  • About & Mission
  • Contact us
  • Privacy Policy
  • Terms and Conditions

Copyright 2025 Manuals.Online. All Rights Reserved.