manuals.online logo
Brands
  1. Home
  2. •
  3. Brands
  4. •
  5. Aseptico
  6. •
  7. Dental Equipment
  8. •
  9. Aseptico ADU-22 Manual

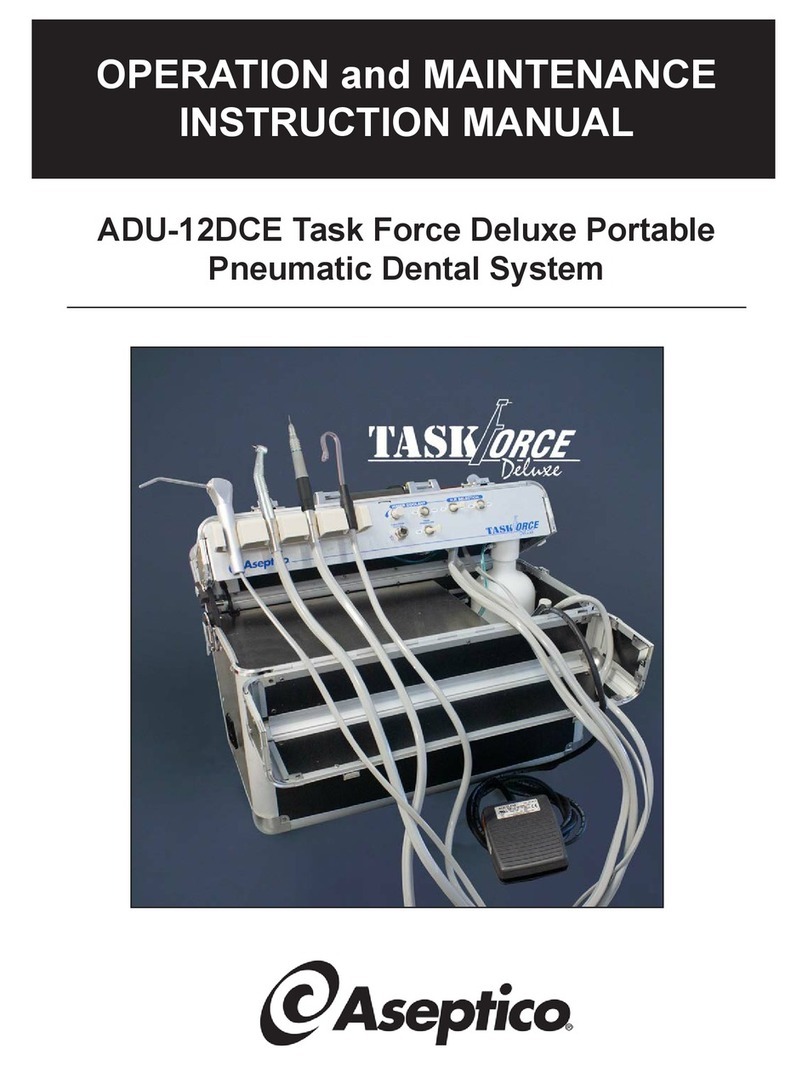
Aseptico ADU-22 Manual

OPERATION and MAINTENANCE
INSTRUCTION MANUAL
ADU-22 DENTAL CART SYSTEM
To prevent injury to people and damage to
property, please heed relevant warnings and
remarks. They are marked as follows:
WARNING: Serious injury or death
may result if ignored.
CAUTION: Damage to property or the
environment may result if
ignored.
NOTE: Important additional
information and hints.
TABLE OF CONTENTS:
Introduction . . . . . . . . . . . . . . . . . . . . . . . . .1
Package Contents . . . . . . . . . . . . . . . . . . . .1
Setting Up the Unit . . . . . . . . . . . . . . . . . . .2
- Fig. 1 - ADU-22 Cart System . . . . . . . . .2
- Fig. 2 - Air Supply Connector . . . . . . . . .2
- Fig. 3 - AA-21 HVE Vacuum System . . .3
- Fig. 4 - Water Supply Tank . . . . . . . . . . .3
Operation Functions . . . . . . . . . . . . . . . . . .4
- Fig. 5 - TA-90D Air/Water Syringe . . . . .4
- Fig. 6 - Handpiece Controls . . . . . . . . . .4
- Fig. 7 - Foot Control . . . . . . . . . . . . . . . .4
- Fig. 8 - Control Console . . . . . . . . . . . . .5
- Fig. 9 - Water Tank Removal . . . . . . . . .5
- Fig. 10 - AA-21 HVE Vacuum System . .6
System Adjustments . . . . . . . . . . . . . . . . . .7
- Fig. 11 - Handpiece Pressure Controls .7
aintenance . . . . . . . . . . . . . . . . . . . . . . . .8
Warranty . . . . . . . . . . . . . . . . . . .Back Cover
SPECIFICATIONS:
Dimensions:
Tray: 9.8” W x 13” L
(25 cm W x 34 cm L)
Chassis Height: 23.0” min., adjustable to
38.0” max.
(60 cm min., adjustable to
97 cm max.)
Weight: 15 lbs (7 kg)
Air Supply: 60 - 90 PSI, filtered
P.O. Box 1548, Woodinville, WA 98072
8333 216 th Street S.E. Woodinville, WA 98072
International (425) 487-3157 • Toll Free(800) 426-5913
www.aseptico.com • [email protected]
1
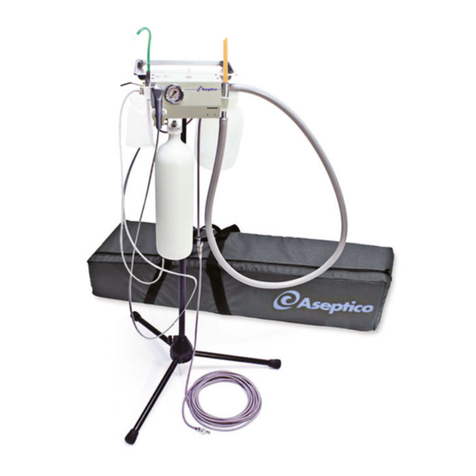
The compact and economical ADU-22 cart system is an ideal solution as
an extra delivery cart or as a backup system. High and low-speed
connections accept existing, air-driven handpieces. Casters allow smooth
mobility between operatories. An air source is required for operation.
Should a compressor be unavailable due to a lack of power, nitrogen tanks
may be used to drive the system. Powerful venturi suction effectively
removes waste without the need for a central vacuum pump.
Congratulations!
This Aseptico ADU-22 system is engineered to provide many years of
reliable service. Please read the instructions provided in this manual to
receive the best and longest service from your Aseptico equipment.
Separate manuals may be provided to cover the operation and
maintenance of hand-held pieces or other accessories for your unit.
PACKAGE CONTENTS:
• anual Highspeed Handpiece Control
• anual Lowspeed Handpiece Control
• TA-90D Three-Way Air/Water Syringe
• AA-21 High Volume Evacuator System
• NWS-8 Water Supply System
• Foot Control
• AA-50 Instrument Tray
• ATC-08 Wheeled Cart w/Telescoping Stand
2
1. Place the ADU-22 Cart in an upright
position on a flat, stable surface. Loosen
the center column retaining knob and
extend the telescoping upper portion.
Tighten the knob at the desired height
(Fig. 1).
2. Check to make sure the syringe, highspeed
and lowspeed handpieces are hanging in
their proper holder. Locate the foot control
on the floor (Fig. 1).
AA-21
HIGH VOLUME
VACUUM
SYSTEM
TH EE-WAY
SY INGE
NWS-8 HDPE
WATE SUPPLY
TANK
HIGHSPEED
HANDPIECE
CONT OL
EMOVABLE
INST UMENT
T AY
3. The ADU-22 unit must be connected to a
dry, filtered, 60-90 psi air source. Simply
extend the 1/4" grey air supply line exiting
from beneath the ADU-22 console and
connect the quick-disconnect into the
compressed air source (Fig. 2)
LOWSPEED
HANDPIECE
CONT OL
TELESCOPING
CENTE
COLUMN WITH
ETAINING
KNOB
FOOT
CONT OL
Figure 1.- ADU-22 Cart System
SETTING UP THE SYSTEM:
Figure 2 - Air Supply Connector
CONNECT TO
60-90 PSI
AI SOU CE
3
4. Remove the AA-21 high volume vacuum
(HVE) system and High-Density
Polyethylene (HDPE) water supply tank from
packing and install on proper quick
disconnects on the console (Fig. 1)
5a.To install the HVE vacuum bottle, press on
locking-ring tab (Fig. 3a), push bottle into
quick coupler, and release tab.
5b.Hang the
vacuum head in
the holder at the
right-hand side
of the chassis
(Fig. 3b).
6. To install water supply bottle, thread it into
the white plastic fitting at the left rear
corner of the chassis (Fig. 4).
QUICK
DISCONNECT
VACUUM BOTTLE
LOCKING
ING TAB
Figure 3a
Figure 3b
Figure 4
2. HANDPIECE SELEC OR (Fig. 6) - The
Aseptico ADU-22 includes a handpiece
selector toggle on the front of the console
which selects either highspeed (HP1) or
lowspeed (HP2) handpiece operation.
Connect the proper highspeed and
lowspeed handpieces to their appropriate
connector. Switch the handpiece selector
to the desired handpiece. Depress foot
control to activate handpiece.
The amount of air pressure supplied to
each handpiece may be adjusted by
turning the drive air-pressure control
screws underneath the console (See
page 7).
3. FOO CON ROL (Fig. 7) - The foot
control applies air pressure to the selected
handpiece
Position the foot control on the floor. For
handpiece operation, apply foot pressure
to any part of the center disk.
4
OPERATION FUNCTIONS:
1. HREE-WAY AIR/WA ER SYRINGE -
Depress the right button for air operation,
and the left button for water operation.
Depressing both buttons will create a mist.
The syringe features quick-change
autoclavable tips: To remove a tip, press
on the locking collar surrounding the tip
socket and pull the used tip straight out of
the socket (see Fig.5). To insert a new tip,
press locking collar and push tip into
socket as far as it will go. Release collar
and gently tug on tip before using to
ensure that tip is securely locked into
socket.
Syringe ip Sterilization:
1) Remove contaminated syringe tip.
2) Remove all visible signs of contamination
before autoclaving.
3) Autoclave tip at 132° C (270° F) for ten
minutes.
4) Sterilize between each patient use.
NO E: Since only the tips can be
autoclaved, it is recommended that the
air/water syringe be bagged with a
disposable, single-use plastic sleeve
between each patient use.
APPLY
P ESSU E TO
ACTIVATE
HANDPIECE
Figure 7 - Foot Control
Figure 6
LOWSPEED
CONT OL
HIGHSPEED
CONT OL
3-WAY
AI /WATE
SY INGE HANDPIECE
SELECTO
Figure 5 DEP ESS
LOCKING COLLA
5
4. WA ER ON/OFF OGGLE (Fig. 8) -
Controls the on/off flow of water coolant to
the highspeed (HP1) handpiece.
5. WA ER SUPPLY ANK - The Aseptico
ADU-22 incorporates a self contained
pressurized water system (Fig. 9). This
consists of a 1-liter HDPE tank dispensing
water through the 3-way syringe and
handpiece control. The water tank is
pressurized to a constant 35 pounds per
square-inch gauge (PSIG) during use.
Before removing the tank for refilling, it
must be depressurized by turning the tank
1/4 turn counterclockwise. The tank is
removed by unscrewing it from its mount
at the bottom right rear of the chassis After
the tank is filled, screw it back onto the
mount. Cleaning and sanitization of the
tank is recommended between uses.
TU N WATE SUPPLY
TANK 1/4 TU N
COUNTE CLOCKWISE
TO ELEASE
P ESSU E BEFO E
UNSC EWING
Figure 9 - Water Tan Removal
HANDPIECE
P ESSU E
GAUGE
HANDPIECE
SELECTO
D IVE AI P ESSU E
CONT OLS
(Underneath Console)
WATE
ON/OFF
TOGGLE
WATE FLOW
CONT OL
Figure 8 - Control Console
HP1
HOLDE
HP2
HOLDE
6
6. PRESSURE GAUGE (Fig. 8) - The
pressure gauge on the front of the control
console gives you a visual indication of the
drive air pressure to the handpiece in use.
7. WA ER COOLAN FLOW CON ROL
(Fig. 8) - Adjusts the flow of water coolant
to the highspeed (HP1) handpiece.
8. AA-21 HIGH VOLUME VACUUM
SYS EM - The AA-21 Steri-Vac is an air
powered, self contained oral evacuator
system. It is supplied with a plastic waste
container and a single high-velocity hose.
(Fig. 10)
To operate, remove the vacuum head from
holder and insert a standard oral
evacuator tip into end of head extension.
Depress the on/off switch on the side of
the hose end for vacuum.
Waste from the vacuum system will collect
in the attached plastic bottle. When the
waste container is 3/4 full it should be
emptied. After each use, the vacuum
system should be cleaned by running
clean water or a vacuum system cleanser
through the evacuator hose and
thoroughly cleaning waste bottle.
CAU ION: Use only NON-foaming
cleansers in the vaccum lines.
QUICK
DISCONNECT
VACUUM
ON/OFF
WASTE
CONTAINE
Figure 10 - AA-21 HVE Vacuum
OPERATION FUNCTIONS
Cont’d
:
SYSTEM ADJUSTMENTS:
1. HANDPIECE PRESSURE ADJUS MEN
(Fig. 11) - The amount of air pressure
supplied to each handpiece may be
adjusted by turning the flow-control screw
for that handpiece. The control screws are
located underneath the console, next to
the HP1 and HP2 handpiece holders.
Figure 11- Handpiece Pressure Controls
LOWSPEED HANDPIECE
P ESSU E ADJUSTMENT
SC EW
HIGHSPEED
HANDPIECE
P ESSU E
ADJUSTMENT
SC EW
7
8
MAINTENANCE:
Because of its simple design, the Aseptico
ADU-22 Cart requires very little
maintenance. Any maintenance that is
needed can be performed in minutes.
1. BLEEDING HE SYS EM - If the unit will
not be used for an extended period of
time, or the unit might be subjected to
freezing conditions, you should bleed the
system.
Simply empty the contents of the water
supply tank and install the tank back onto
the quick disconnect. Operate the air/water
syringe and highspeed handpiece with
water coolant 'ON' until just air comes
through the water lines. Pack unit and
store as normal.
2. HANDPIECE FLUSH - Flush the
handpieces for about 5 seconds after
every patient, and about 20 seconds at the
beginning of each day.
3. GENERAL CLEANING - The cart exterior
is designed to make cleaning and the use
of prophylactic barriers as easy as
possible. The external surfaces of the cart
should be cleaned using a mild solution of
liquid detergent and water. Any external
surfaces of the unit that are contacted
during use should carefully be wiped down
with a disinfectant at the beginning of each
day and between each patient.
As described in the vacuum section the
high volume vacuum system should
always be thoroughly cleaned after use.
4. PACKING HE UNI FOR
RANSPOR A ION - If the ADU-22 unit is
going to be transported, it is recommended
that the original or similar packing material
be put into place to avoid dents and
scratches from parts inside of the box
shifting.
9
NOTES:
P/N: 420445
Rev. I
ECO 14684
03/2019
PRINTED IN
THE U.S.A.
P.O. Box 1548 Woodinville, WA 98072
8333 216th Street SE Woodinville, WA 98072
(425) 487-3157 (800) 426-5913
www.aseptico.com • [email protected]
Aseptico warrants its products against defects in material or workmanship for
a period of two (2) years, from date of original invoice. Some handpieces are
warranted for one year under the same conditions. Other handpieces and
expendable components, such as air turbines and light bulbs, are covered by
shorter warranty periods, or have no warranty. Aseptico's sole obligation
under product warranty is (at its sole option and discretion) to repair or replace
any defective component or product in part or whole. Aseptico shall be the
sole arbiter of such action.
In the event of alleged defect under warranty, the purchaser is to notify
Aseptico's Customer Service Department promptly. Customer Service will
provide instructions, usually directing that the product be returned for service.
Shipment to Aseptico and the cost thereof is always the responsibility of the
purchaser.
Accidental misuse, inappropriate installation, or failure to perform directed
maintenance voids the warranty. Deliberately defacing, modifying, or removing
the serial number voids the warranty.
Aseptico does not assume, under this warranty, any risks or liabilities arising
from the clinical use of its products, whether or not such use involves
coincidental utilization of products manufactured by others.
WARRANTY:.

Other Aseptico Dental Equipment manuals

Aseptico AEU-16C TORQUE PLUS+ Manual

Aseptico

Aseptico AEU-16C TORQUE PLUS+ Manual

Aseptico AEU-425FO Transport II Manual

Aseptico

Aseptico AEU-425FO Transport II Manual

Aseptico ADU-17A2 Express Air 2 Manual

Aseptico

Aseptico ADU-17A2 Express Air 2 Manual

Aseptico ADU-17A2 Express Air 2 Manual

Aseptico

Aseptico ADU-17A2 Express Air 2 Manual

Aseptico ADC-08-RED Manual

Aseptico

Aseptico ADC-08-RED Manual

Aseptico ADU-03 Manual

Aseptico

Aseptico ADU-03 Manual

Aseptico ADU-40CF Command Air Manual

Aseptico

Aseptico ADU-40CF Command Air Manual

Aseptico AEU-1070-70V User manual

Aseptico

Aseptico AEU-1070-70V User manual

Aseptico ALU-40LED Manual

Aseptico

Aseptico ALU-40LED Manual

Aseptico AEU-25 User manual

Aseptico

Aseptico AEU-25 User manual

Aseptico ADU-03ST Manual

Aseptico

Aseptico ADU-03ST Manual

Aseptico ADC-02CF User manual

Aseptico

Aseptico ADC-02CF User manual

Aseptico AEU-1000-70V User manual

Aseptico

Aseptico AEU-1000-70V User manual

Aseptico TRANSPORT II Troubleshooting guide

Aseptico

Aseptico TRANSPORT II Troubleshooting guide

Aseptico AEU-525CF Transport III Troubleshooting guide

Aseptico

Aseptico AEU-525CF Transport III Troubleshooting guide

Aseptico AEU-350 User manual

Aseptico

Aseptico AEU-350 User manual

Aseptico ADU-25 Manual

Aseptico

Aseptico ADU-25 Manual

Aseptico ALU-40TC Manual

Aseptico

Aseptico ALU-40TC Manual

Aseptico Task Force Deluxe Manual

Aseptico

Aseptico Task Force Deluxe Manual

Aseptico AEU-26OS Manual

Aseptico

Aseptico AEU-26OS Manual

Aseptico ECONO AIR SYSTEM ADU-07 Administrator Guide

Aseptico

Aseptico ECONO AIR SYSTEM ADU-07 Administrator Guide

Aseptico ADU-07A Administrator Guide

Aseptico

Aseptico ADU-07A Administrator Guide

Aseptico ADU-03ST Manual

Aseptico

Aseptico ADU-03ST Manual

Aseptico AMC-20 Manual

Aseptico

Aseptico AMC-20 Manual

Popular Dental Equipment manuals by other brands

3M ESPE Pentamix Lite operating instructions

3M ESPE

3M ESPE Pentamix Lite operating instructions

ENBIO Enbio S user manual

ENBIO

ENBIO Enbio S user manual

Vatech EzRay Air VEX-P300 user manual

Vatech

Vatech EzRay Air VEX-P300 user manual

KaVo GENTLEpower LUX Contra-angle 25 LP Technician's Instructions

KaVo

KaVo GENTLEpower LUX Contra-angle 25 LP Technician's Instructions

DENTSPLY SmartLite Focus Instructions for use

DENTSPLY

DENTSPLY SmartLite Focus Instructions for use

LM ProPower CombiLED quick guide

LM

LM ProPower CombiLED quick guide

Owandy Radiology RX-AC user manual

Owandy Radiology

Owandy Radiology RX-AC user manual

mectron Piezosurgery Cleaning and sterilization manual

mectron

mectron Piezosurgery Cleaning and sterilization manual

Belmont CREDIA G1 operating instructions

Belmont

Belmont CREDIA G1 operating instructions

Planmeca Sovereign Classic user manual

Planmeca

Planmeca Sovereign Classic user manual

Bego Fornax T operating instructions

Bego

Bego Fornax T operating instructions

Renfert SYMPRO Operating and safety instructions

Renfert

Renfert SYMPRO Operating and safety instructions

Nevadent NZPS 3 A1 operating instructions

Nevadent

Nevadent NZPS 3 A1 operating instructions

Dentatus Nyström instruction manual

Dentatus

Dentatus Nyström instruction manual

OMS DUKE EASY Instruction handbook

OMS

OMS DUKE EASY Instruction handbook

OMS LINEA PATAVIUM Instruction handbook

OMS

OMS LINEA PATAVIUM Instruction handbook

BRYANT DENTAL Ignis Gesture A-494322 manual

BRYANT DENTAL

BRYANT DENTAL Ignis Gesture A-494322 manual

Renfert Basic classic instruction manual

Renfert

Renfert Basic classic instruction manual

manuals.online logo
manuals.online logoBrands
  • About & Mission
  • Contact us
  • Privacy Policy
  • Terms and Conditions

Copyright 2025 Manuals.Online. All Rights Reserved.