manuals.online logo
Brands
  1. Home
  2. •
  3. Brands
  4. •
  5. Assa Abloy
  6. •
  7. Door Opening System
  8. •
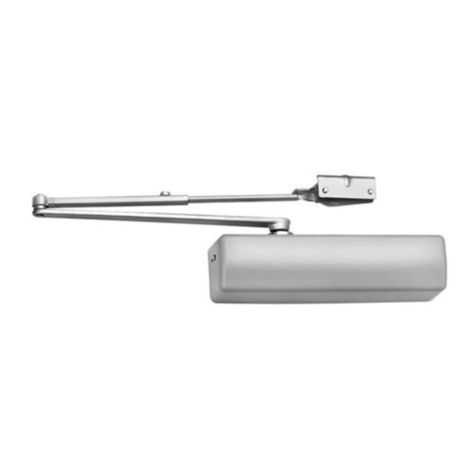
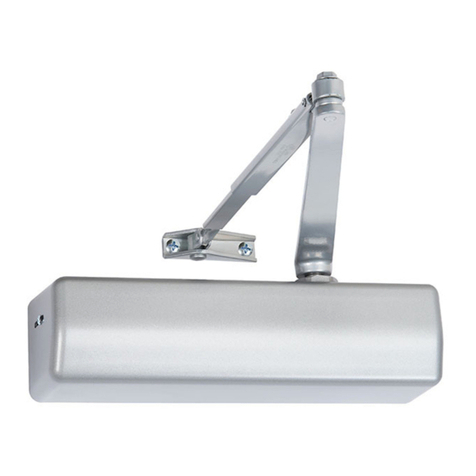
  9. Assa Abloy SARGENT 281 Series User manual

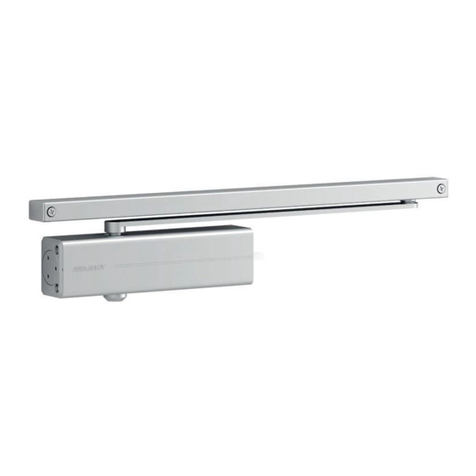
Assa Abloy SARGENT 281 Series User manual

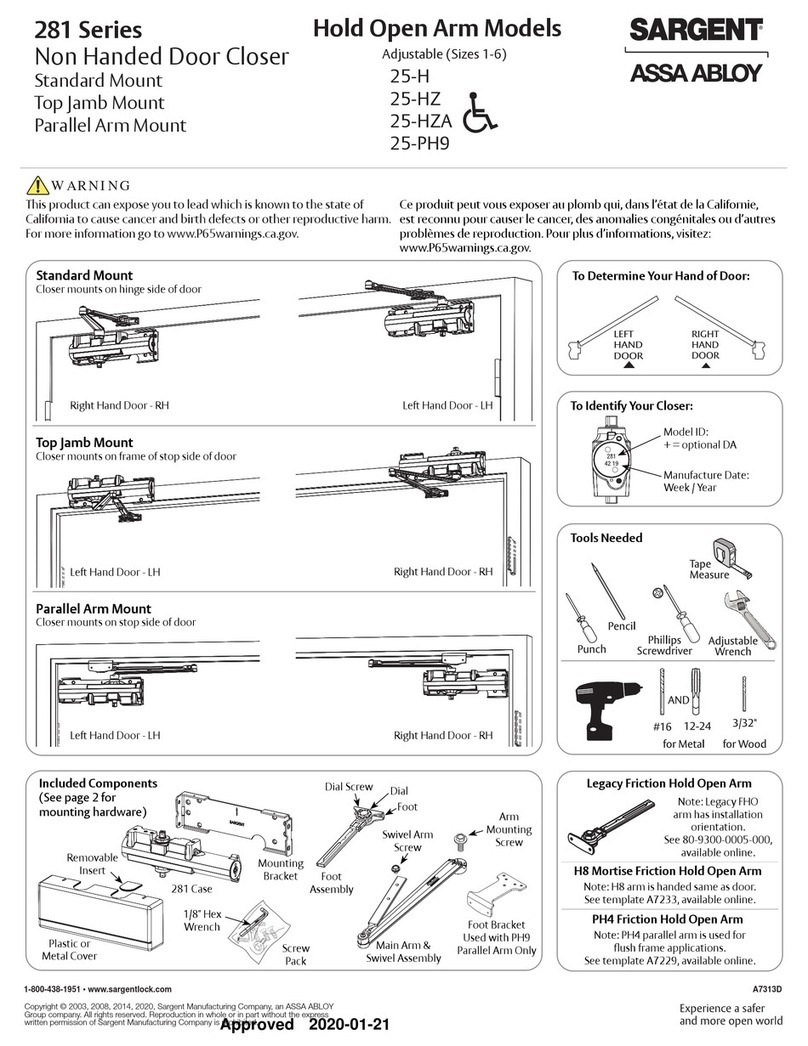
Install the closer
with spring
adjustment screw
towards hinge.
Install the mounting
bracket with the arrow
pointing up for both
RH and LH doors
Right Hand
Door Shown
Drill & Tap, use screws provided or use
Mortise Nuts when required.
2. Install mounting bracket and closer.
Use information provided in Step 1 above and the template provided on page 4 to locate and drill holes.
3A. Alternate Option:
Pre-assemble arm prior to
attaching stop.
B
1"
(From Stop)
3"
10-3/8"
Centerline
of
Hinge
A
Centerline
of Hinge
13/16"
2-11/16"
1-7/8"
5/16"
13/16"
1-15/16"
3-1/16"
3-7/8"
IMPORTANT NOTICE
Pre-drill 3/32" holes
for self-tapping
screws or tap #12-24
for machine screws.
1. Prepare door and frame.
yDetermine maximum degree of door opening or
hold open (PSH) required.
yDrill and tap door and frame for #12-24 machine screws.
When using self tapping screws provided, pre-drill with
3/32" drill. .
LEFT
HAND DOOR
RIGHT
HAND DOOR
PULL
HINGE SIDE PULL
HINGE SIDE
STOP (PUSH) SIDE STOP (PUSH) SIDE
Closers are non-handed
PSH Arm Shown
PS Arm is similar
1/2"
7/8"
5/8"
Use fifth hole
spacer when
required.
IMPORTANT: Use a minimum of 5 screws.
3. Assemble foot bracket assembly and attach to door stop.
1/4" Hex
Wrench
Stop
Plug
Install Stop with 1/4" Hex wrench in
hole to match hand of door (R for
right hand, L for left hand). Turn stop
counterclockwise until seated tight.
Install plug in unused hole.
Mount foot bracket to door stop.
Degree of Door Opening at Hold Open n
85° 90° 95° 100° l105° l110° l
Dim A 10-1/2" 9-13/16" 9-3/16" 8-9/16" 8-1/16" 7-9/16"
Dim B 5-11/16" 5" 4-3/8" 3-3/4" 3-1/4" 2-3/4"
lDo not use with swing clear hinge for door openings greater than 95°. Use
alternate type of hinges.
nDead Stop occurs 3° beyond Hold Open
Spring Power
Adjusting Screw
Right Hand Door Shown
Left Hand Door Opposite
1-800-727-5477 • www.sargentlock.com
A7315G 12/22 Rev 7
Installation Instructions
281 Series
Door Closer with PS/PSH Arms
281 Series Adjustable from Sizes 1 thru 6
Copyright © 2003, 2008, 2014, 2020, 2022, SARGENT Manufacturing Company. All rights reserved. Reproduction in whole or in part without the
express written permission ofSARGENT Manufacturing Company is prohibited. Patent pending and/or patent www.assaabloydss.com/patents.
Approved 2022-12-08
4. Attach Arm to Spindle
WARNING: If not properly indexed, door closer will not
function properly.
A. Rotate bottom spindle with wrench.
B. Assemble main arm with index mark positioned as shown.
C. Secure with screw and washer
4A. Alternate Option:
Attach Pre-Assembled Arm to Spindle
Left Hand
Door
Index Mark
on Spindle
45° 45°
Right Hand
Door
Index Mark
on Spindle
5. Install Pivot
A. Open door and install pivot as shown.
B. Use screw to secure pivot and arms.
Accessories
281 Drop Plate
Used with narrow top rails
125 V Bracket
For narrow frame conditions
Frame
Door
Stop
Mortise Nut
Drill 3/8" dia.
hole for Mortise
Nut body
Unreinforced
Door
Drill 1/4" dia. hole for
mounting screws
Optional: Mortise Nut Mounting
Use Mortise Nuts (#4TB)
when thru-bolting is required.
Refer to pages
1 and 4
for templating
dimensions
281-D DROP PLATE
Window
125 VF Bracket
For flush frame and
door conditions Flush
Frame
Door
Door
Main
Arm
Main
Arm
2
1-800-727-5477 • www.sargentlock.com A7315G 12/22 Rev 7
281 Series
Installation Instructions
Door Closer with PS/PSH Arms
Copyright © 2003, 2008, 2014, 2020, 2022, SARGENT Manufacturing Company. All rights reserved. Reproduction in
whole or in part without the express written permission ofSARGENT Manufacturing Company is prohibited. Patent
pending and/or patent www.assaabloydss.com/patents.
Approved 2022-12-08
Final Adjustment and Regulating Procedures
Install Cover
Install cover with two (2) security screws as shown.
Latching
Speed Range
Closing Speed
Range
Delayed
Action Range
Backcheck
Range
Latching
Speed Valve
Closing Speed
Valve Delayed
Action Valve
(Optional)
Backcheck
Valve
1/4" Spring Power
Adjustment Screw
+-
Increase
Power Decrease
Power
Counterclockwise
(CCW)
Clockwise
(CW)
1/4" Allen Spring Power
Adjusting Screw
Adjust closing power to the minimum force required to reliably close and latch door.
yIf door is hard to open, decrease power slightly.
yIf door does not latch, increase power as required.
yUse chart below as a starting point.
yDoors adjusted with high closing power to overcome strong
draft conditions may exceed ADA standards.
Door Width
in inches
Exterior Doors Interior
Doors *
24 - 30 2 - 7 turns CW 1-5 turns CCW
30 - 36 7 - 11 turns CW 3-6 turns CCW
36 - 44 11 - 15 turns CW Factory Set
44 - 48 15 -17 turns CW 8 turns & Up CW
* If interior doors do not have to comply with ADA requirements, exterior settings
are recommended. Where strong drafts exist, increase spring power as needed.
NOTES:
‒Adjusting door to close due to high draft conditions may
exceed ADA standards.
‒Consult local ordinances when fire doors are involved.
To Adjust Holder Arm (PSH Arm ONLY)
Adjusting Nut
All PSH arms are shipped in Non-Hold Open from the factory.
To set in Hold Open, turn the adjusting nut approximately
1-1/2 turns clockwise.
yRecommend 6 second minimum from 90° to the closed position.
yClosing and Latching Speeds: Turn valves clockwise to slow down or counterclockwise to speed up door movement.
yBackcheck: To regulate the intensity of backcheck action, turn valve clockwise to increase or counterclockwise to decrease check-
ing. CAUTION: Set valve for slight cushioning effect; Closer can be damaged if the checking action is too abrupt. Never use the
backcheck as a door stop. Always use a door stop to stop the door.
yDelayed Action Feature (Optional on some models): Delayed action provides slow door closing through the delayed action range.
Turn valve clockwise to slow down or counterclockwise to speed up door movement.
Insert is
removable.
Place in unused
opening.
Decrease
( – )
Increase
( + )
Faster
( + )
Slower
( – )
Use hex socket (1/8” Allen) wrench to adjust Latching Speed,
Closing Speed, and Delayed Action valves.
To regulate the intensity of backcheck action, use hex
socket (1/8" Allen) to turn valve clockwise to increase or
counterclockwise to decrease checking
3
1-800-727-5477 • www.sargentlock.com
281 Series
Installation Instructions
Door Closer with PS/PSH Arms
Copyright © 2003, 2008, 2014, 2020, 2022, SARGENT Manufacturing Company. All rights reserved. Reproduction in
whole or in part without the express written permission ofSARGENT Manufacturing Company is prohibited. Patent
pending and/or patent www.assaabloydss.com/patents.
A7315G 12/22 Rev 7
Approved 2022-12-08
     
     



 


           
           u
-
 

  
6 •
- 1 7 /8 •
 
        
    x  
 
-  

1 0  O 
t
j

l J
- 
I
 
 
0/
 

 
5 1 /2 • 
 / () 
  :�
©    

 



   
l �



�
 

 I ' 
1 

I
 
 x 5/   
 t @        
         
: t  
 @ 
1        
 
 
    

      
 
       
         

I


y
 
I
n
 
I
  
  
   
 
l
  

, -
_/
6 
    
        
6.

   
  &           
          
    
       
         
    
ufacti 
      
    
     
 


     
 
Template
A7315G 12/22 Rev 7
Attention Installer: Improper installation
may result in damage to the product and
void the factory warranty.
WARNING
WARNING
This product can expose you to lead which is known to the state of California to
cause cancer and birth defects or other reproductive harm. For more information
go to www.P65warnings.ca.gov.
Copyright © 2003, 2008, 2014, 2020, 2022, SARGENT Manufacturing Company. All rights reserved. Reproduction in
whole or in part without the express written permission ofSARGENT Manufacturing Company is prohibited.
Patent pending and/or patent www.assaabloydss.com/patents.
Approved 2022-12-08

Other Assa Abloy Door Opening System manuals
Assa Abloy SW200 User manual

Assa Abloy

Assa Abloy SW200 User manual

Assa Abloy MAB 609 + AC593 Instruction Manual

Assa Abloy

Assa Abloy MAB 609 + AC593 Instruction Manual

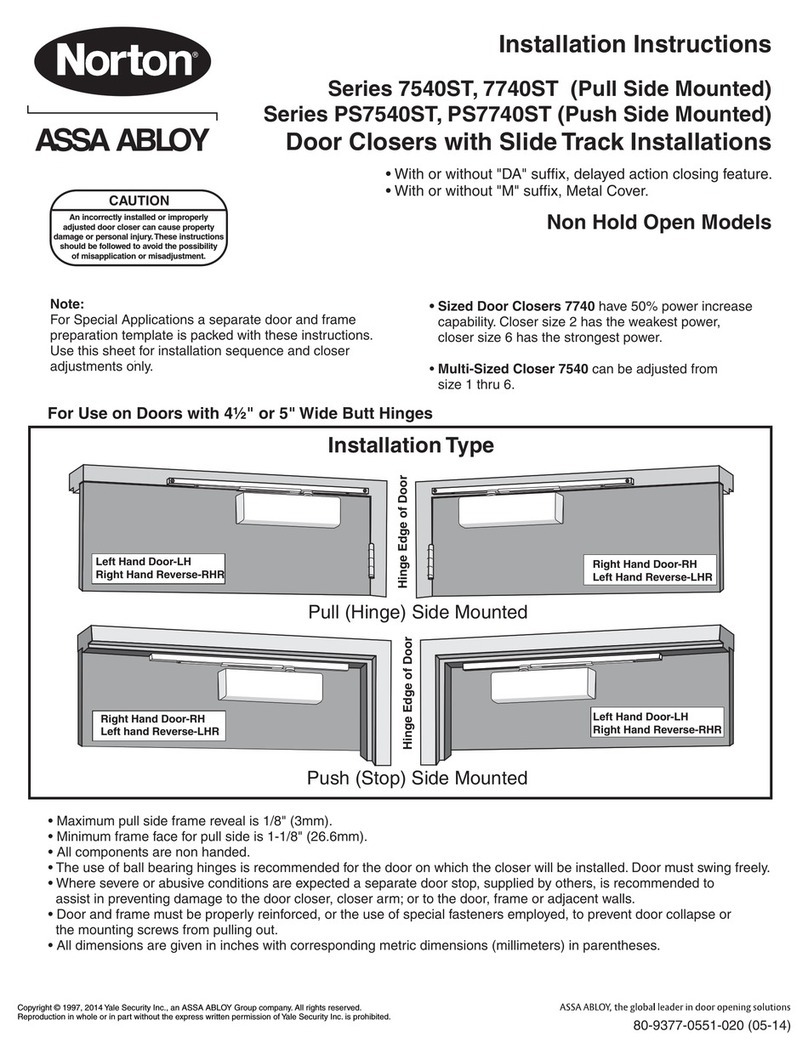
Assa Abloy Norton 5900 Series Quick guide

Assa Abloy

Assa Abloy Norton 5900 Series Quick guide

Assa Abloy Corbin Russwin DC8210 Series User manual

Assa Abloy

Assa Abloy Corbin Russwin DC8210 Series User manual

Assa Abloy effeff 828 User manual

Assa Abloy

Assa Abloy effeff 828 User manual

Assa Abloy G-FMS User manual

Assa Abloy

Assa Abloy G-FMS User manual

Assa Abloy ABLOY DA401 User manual

Assa Abloy

Assa Abloy ABLOY DA401 User manual

Assa Abloy NORTON RIXSON 6200 Series User manual

Assa Abloy

Assa Abloy NORTON RIXSON 6200 Series User manual

Assa Abloy Norton J1600 UniTrol User manual

Assa Abloy

Assa Abloy Norton J1600 UniTrol User manual

Assa Abloy Corbin Russwin PED4800 Series User manual
Assa Abloy

Assa Abloy Corbin Russwin PED4800 Series User manual

Assa Abloy Corbin Russwin PED5000 DB Series User manual

Assa Abloy

Assa Abloy Corbin Russwin PED5000 DB Series User manual

Assa Abloy Sargent 1331 User manual

Assa Abloy

Assa Abloy Sargent 1331 User manual

Assa Abloy Sargent Electroguard-59 80 Series Assembly instructions

Assa Abloy

Assa Abloy Sargent Electroguard-59 80 Series Assembly instructions

Assa Abloy 5800 ADAEZ PRO User manual

Assa Abloy

Assa Abloy 5800 ADAEZ PRO User manual

Assa Abloy SARGENT 278 Series User manual

Assa Abloy

Assa Abloy SARGENT 278 Series User manual

Assa Abloy Besam SW300 User manual

Assa Abloy

Assa Abloy Besam SW300 User manual

Assa Abloy Besam SL500 User manual

Assa Abloy

Assa Abloy Besam SL500 User manual

Assa Abloy RIXSON SMOK-CHEK V 0101 User manual

Assa Abloy

Assa Abloy RIXSON SMOK-CHEK V 0101 User manual

Assa Abloy RIXSON W91DCP User manual

Assa Abloy

Assa Abloy RIXSON W91DCP User manual

Assa Abloy RIXSON W50 User manual

Assa Abloy

Assa Abloy RIXSON W50 User manual

Assa Abloy SW100 User manual

Assa Abloy

Assa Abloy SW100 User manual

Assa Abloy SARGENT 351 User manual

Assa Abloy

Assa Abloy SARGENT 351 User manual

Assa Abloy Corbin Russwin PED5600 Series User manual

Assa Abloy

Assa Abloy Corbin Russwin PED5600 Series User manual

Assa Abloy effeff ePED 1386Z1LB7 04S0 Series Reference guide

Assa Abloy

Assa Abloy effeff ePED 1386Z1LB7 04S0 Series Reference guide

Popular Door Opening System manuals by other brands

Dorma ITS 96 Fixing instructions

Dorma

Dorma ITS 96 Fixing instructions

Von Duprin XP98 installation instructions

Von Duprin

Von Duprin XP98 installation instructions

WRIGHT WC13 installation instructions

WRIGHT

WRIGHT WC13 installation instructions

GEZE TS 5000 Recommended Settings

GEZE

GEZE TS 5000 Recommended Settings

Stanley M-Force Operation and maintenance manual

Stanley

Stanley M-Force Operation and maintenance manual

Bohle MasterTrack FT instruction manual

Bohle

Bohle MasterTrack FT instruction manual

Yale Tri-Pack 51 installation instructions

Yale

Yale Tri-Pack 51 installation instructions

tau T-SIDETD installation guide

tau

tau T-SIDETD installation guide

MOX C40 Series INSTRUCTIONS AND RECOMMENDATIONS FOR THE INSTALLER

MOX

MOX C40 Series INSTRUCTIONS AND RECOMMENDATIONS FOR THE INSTALLER

Dorma COMFORTDRIVE Moveo Original Operating Instruction Manual

Dorma

Dorma COMFORTDRIVE Moveo Original Operating Instruction Manual

Dormakaba ED50 owner's manual

Dormakaba

Dormakaba ED50 owner's manual

Olide SD3108 product manual

Olide

Olide SD3108 product manual

Dorma 7400 DS manual

Dorma

Dorma 7400 DS manual

Cookson FDO AC owner's manual

Cookson

Cookson FDO AC owner's manual

SUGATSUNE LAMP FD35EV installation manual

SUGATSUNE

SUGATSUNE LAMP FD35EV installation manual

Portalp SW10 installation guide

Portalp

Portalp SW10 installation guide

Dorma MUTO PREMIUM XL 80/150 SYNCHRO Mounting instructions

Dorma

Dorma MUTO PREMIUM XL 80/150 SYNCHRO Mounting instructions

cinetto PS10 Assembly instructions

cinetto

cinetto PS10 Assembly instructions

manuals.online logo
manuals.online logoBrands
  • About & Mission
  • Contact us
  • Privacy Policy
  • Terms and Conditions

Copyright 2025 Manuals.Online. All Rights Reserved.