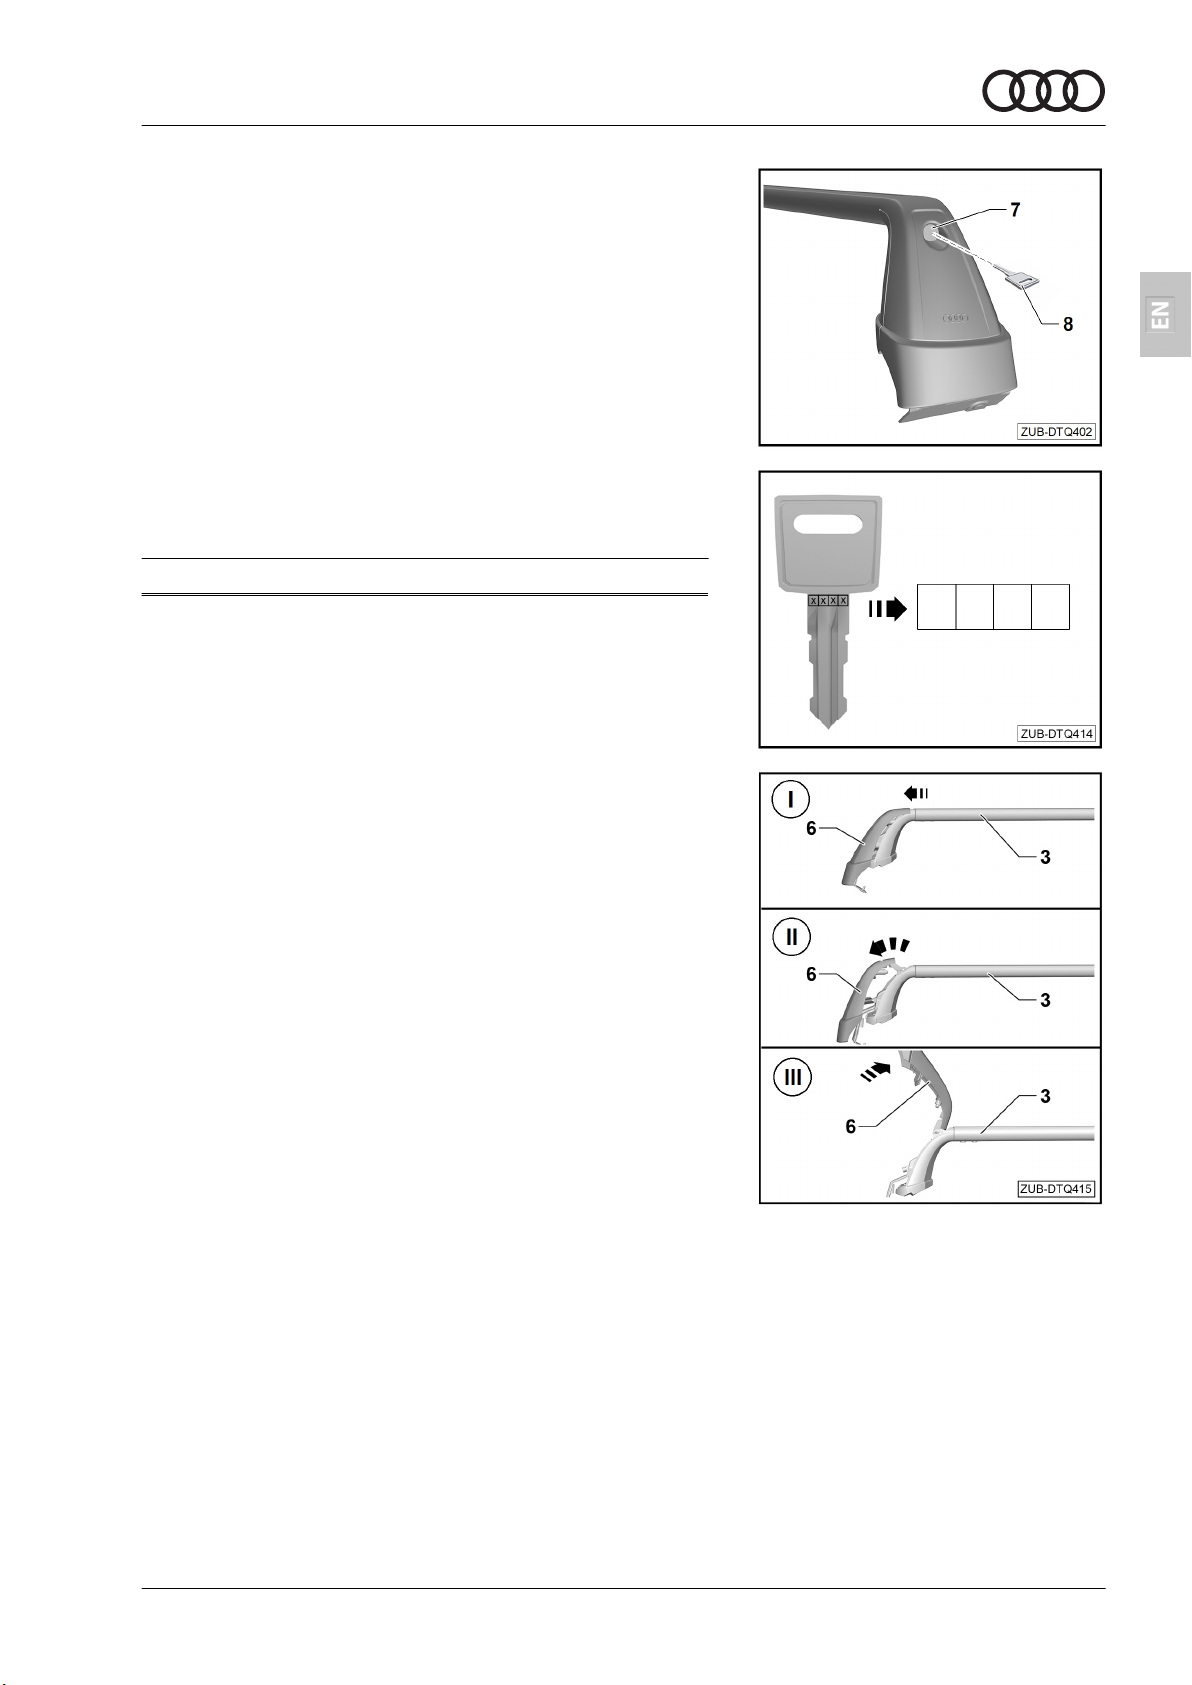
– Gently tighten the tensioning bolts -5- alternately using the
torque wrench -4-.
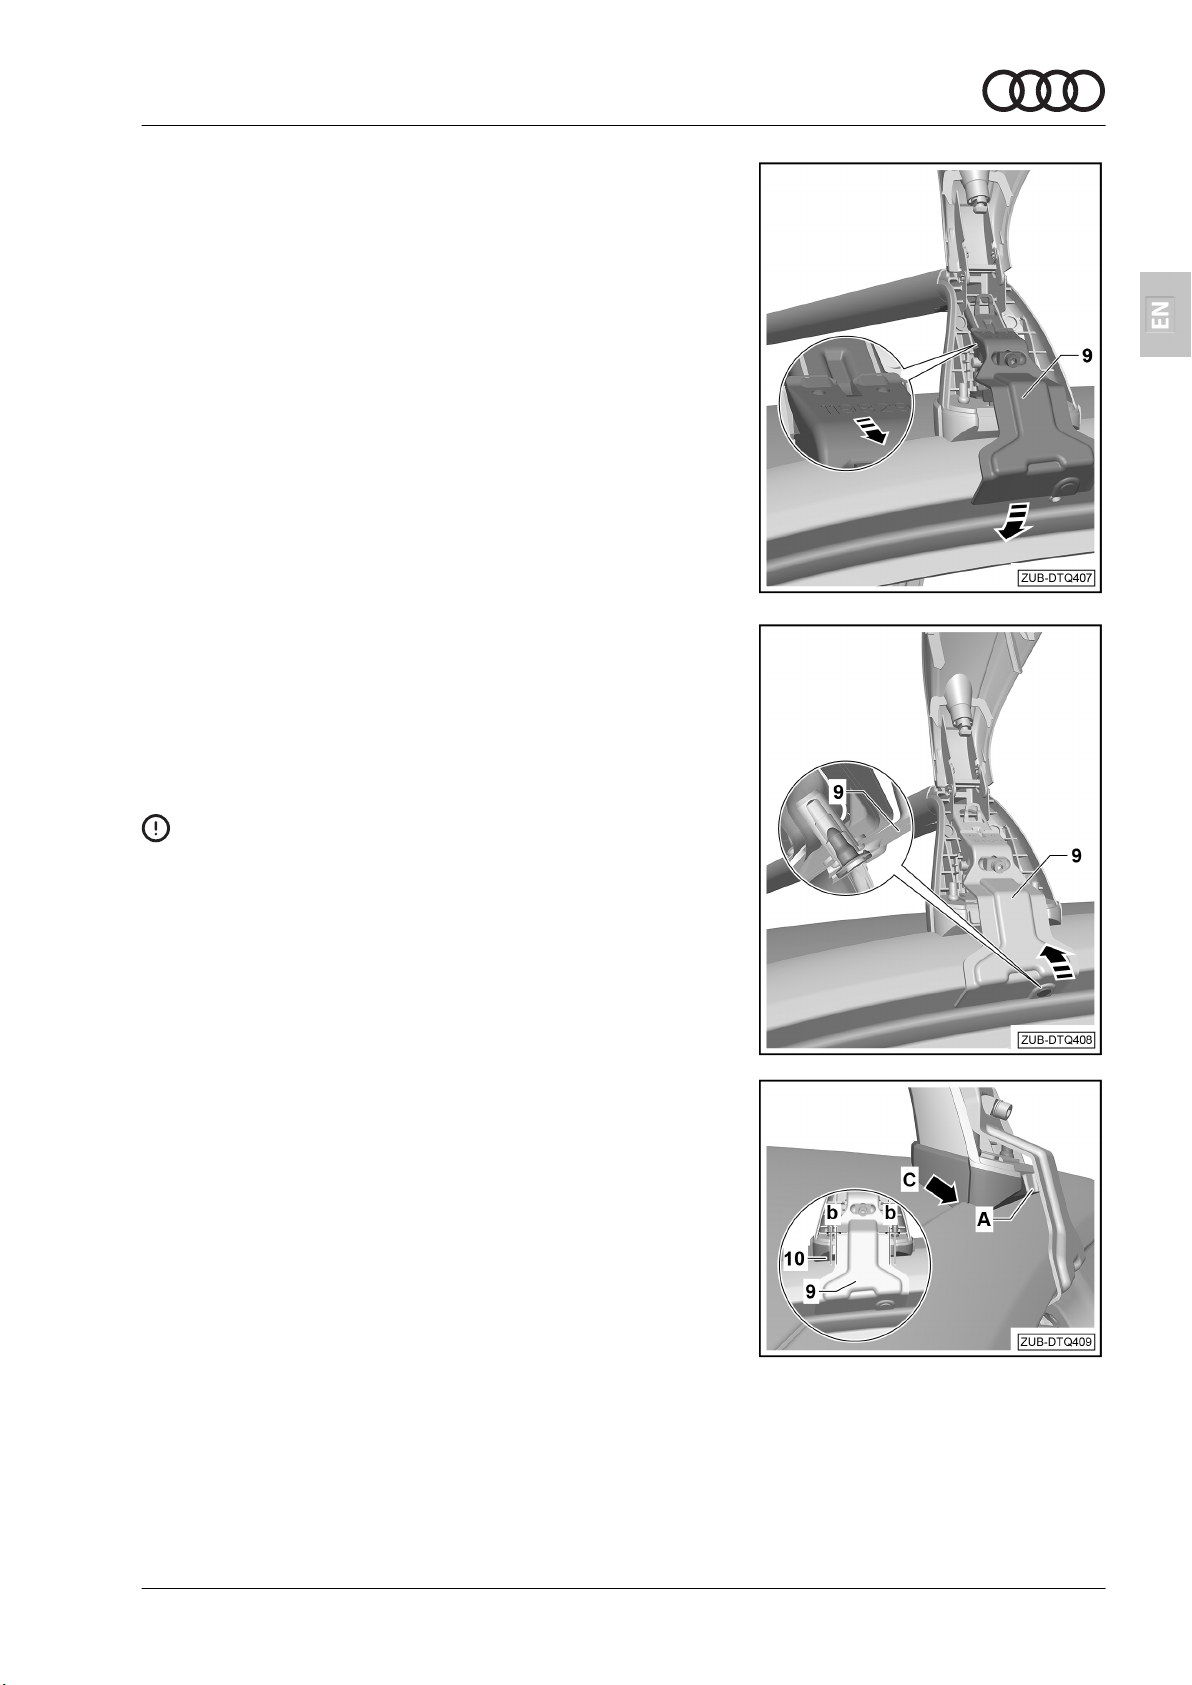
– Check the position of the roof support -10- and claw fastener
-9- and correct if necessary.
The spacer -A- of the claw fastener -9- must be at the same lev-
el as the rubber bearing.
– Tighten one tensioning bolt -5- after another using the torque
wrench -4- until the torque wrench makes an audible clicking
sound. This indicates that the correct tightening torque has
been applied.
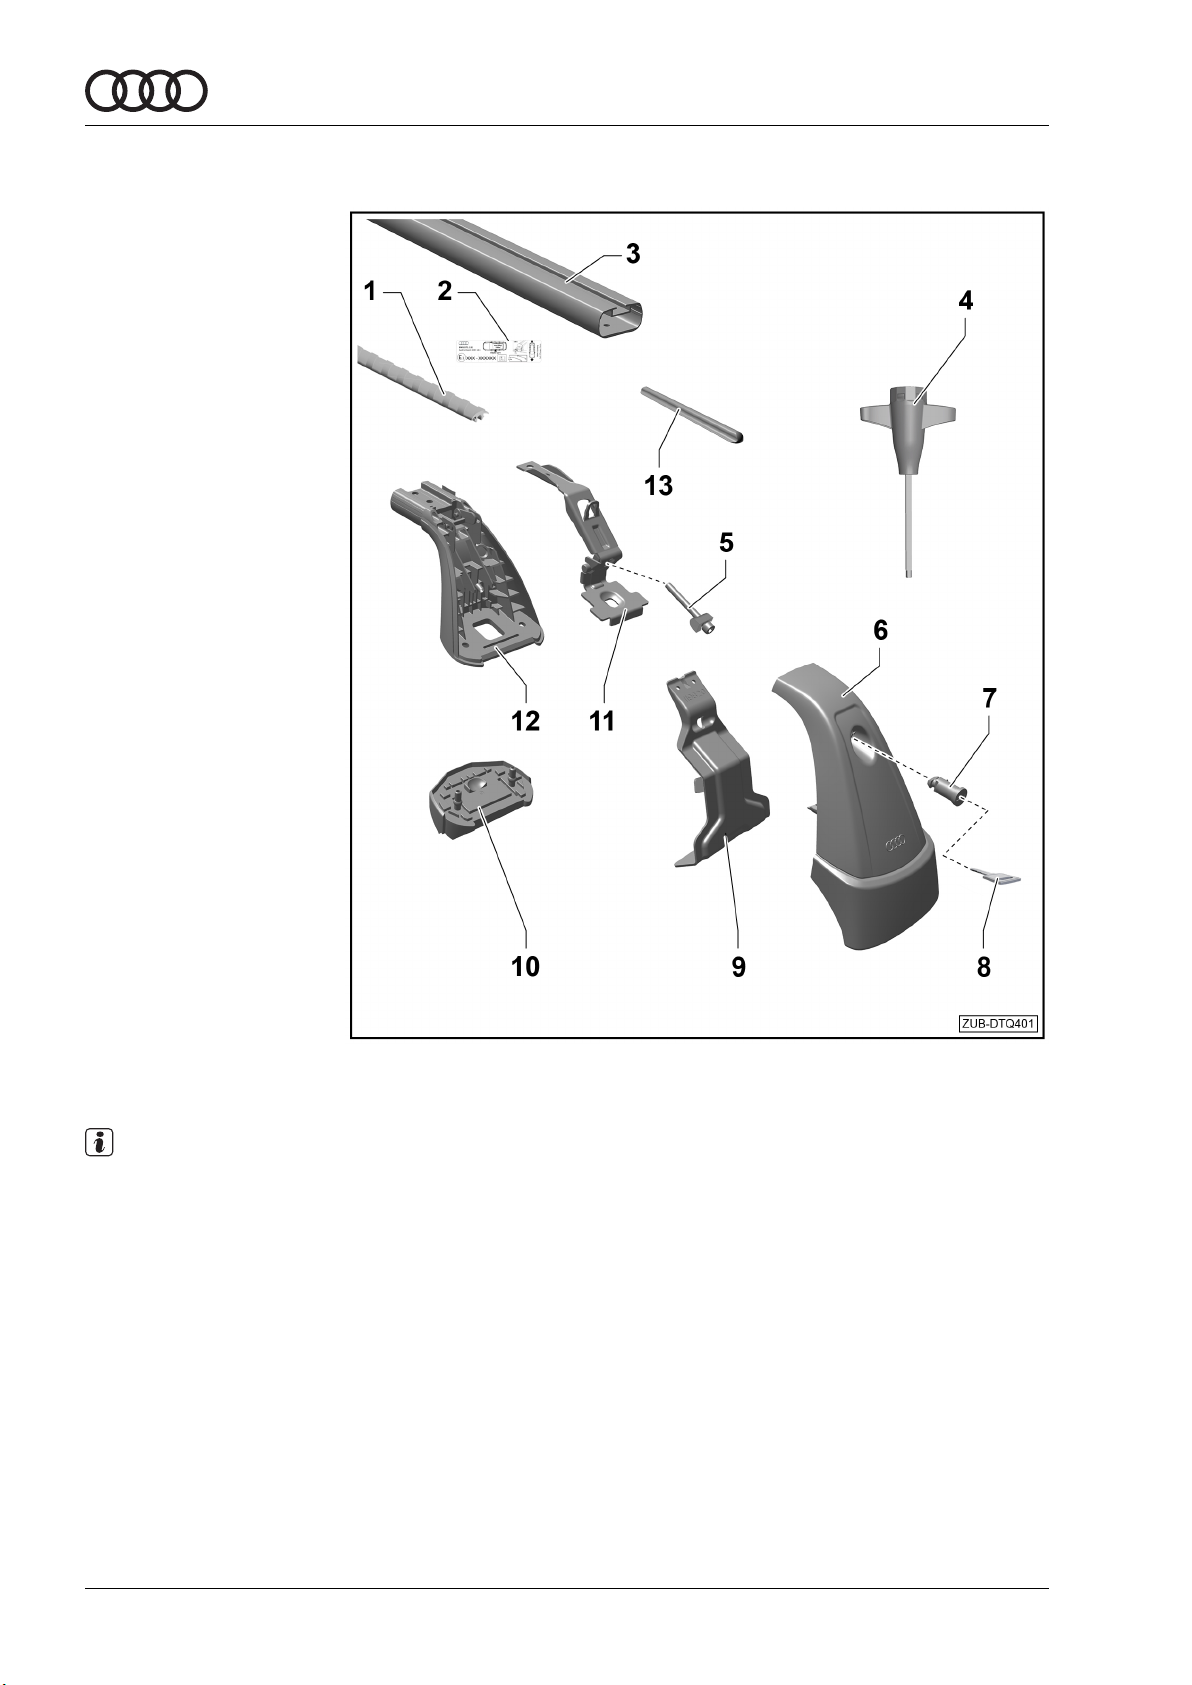
– Close the cover flap -6- and lock the lock -7- with the key -8-.
– Remove the key -8-.
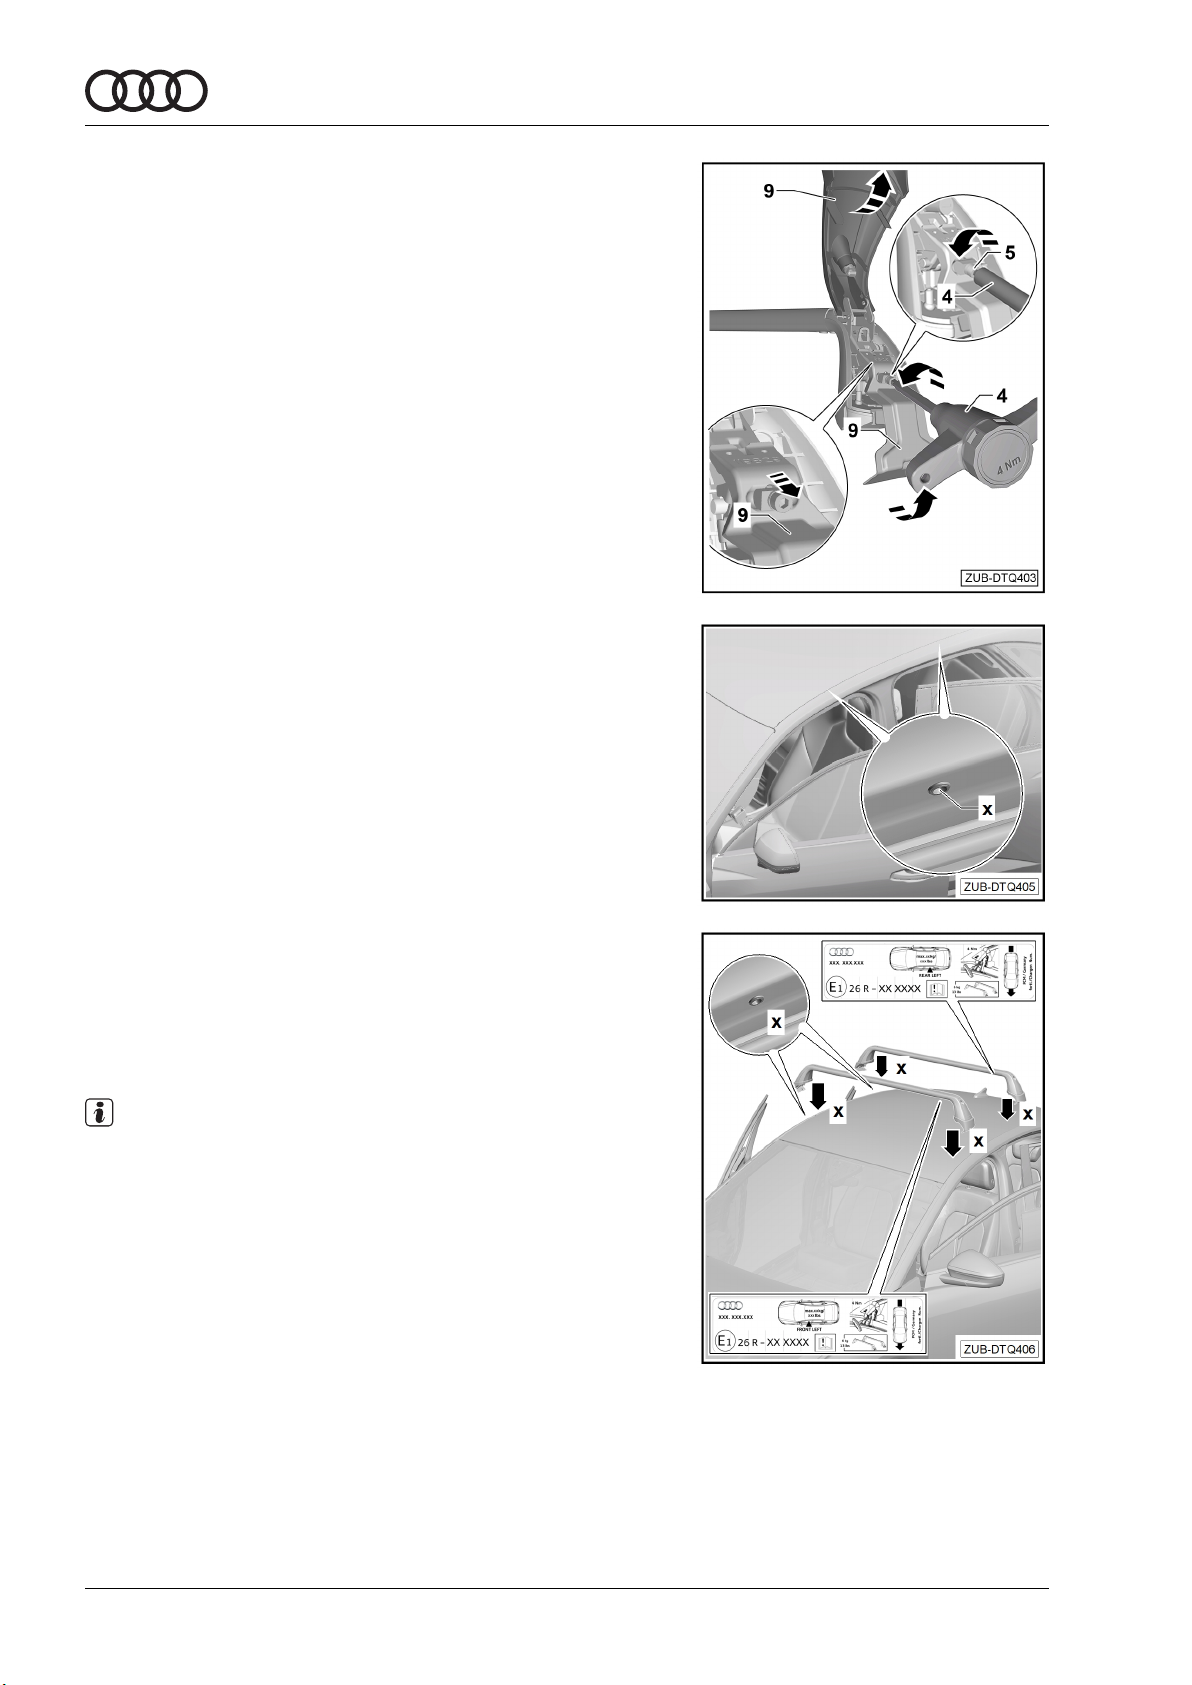
The second carrier unit is installed in the same way.
WARNING
Check that the carrier units and the load to be transported are securely attached:
◆Before the start of every journey,
◆After approx. 10 km of the journey,
◆Approx. every 300 km on good roads,
◆Frequently on poor roads (due to vibration),
Regularly to ensure that there has been no movement/displacement.
WARNING
If the carrier units are not checked to make sure that they are secure and to check whether any
fasteners need tightening, they could work loose and parts may therefore be lost, despite instal-
lation being carried out properly – risk of accident!
In the event of a change in position, drive at a reduced speed until the next opportunity to stop
safely and then re-tighten the bolted connections and fixtures on the carrier units.
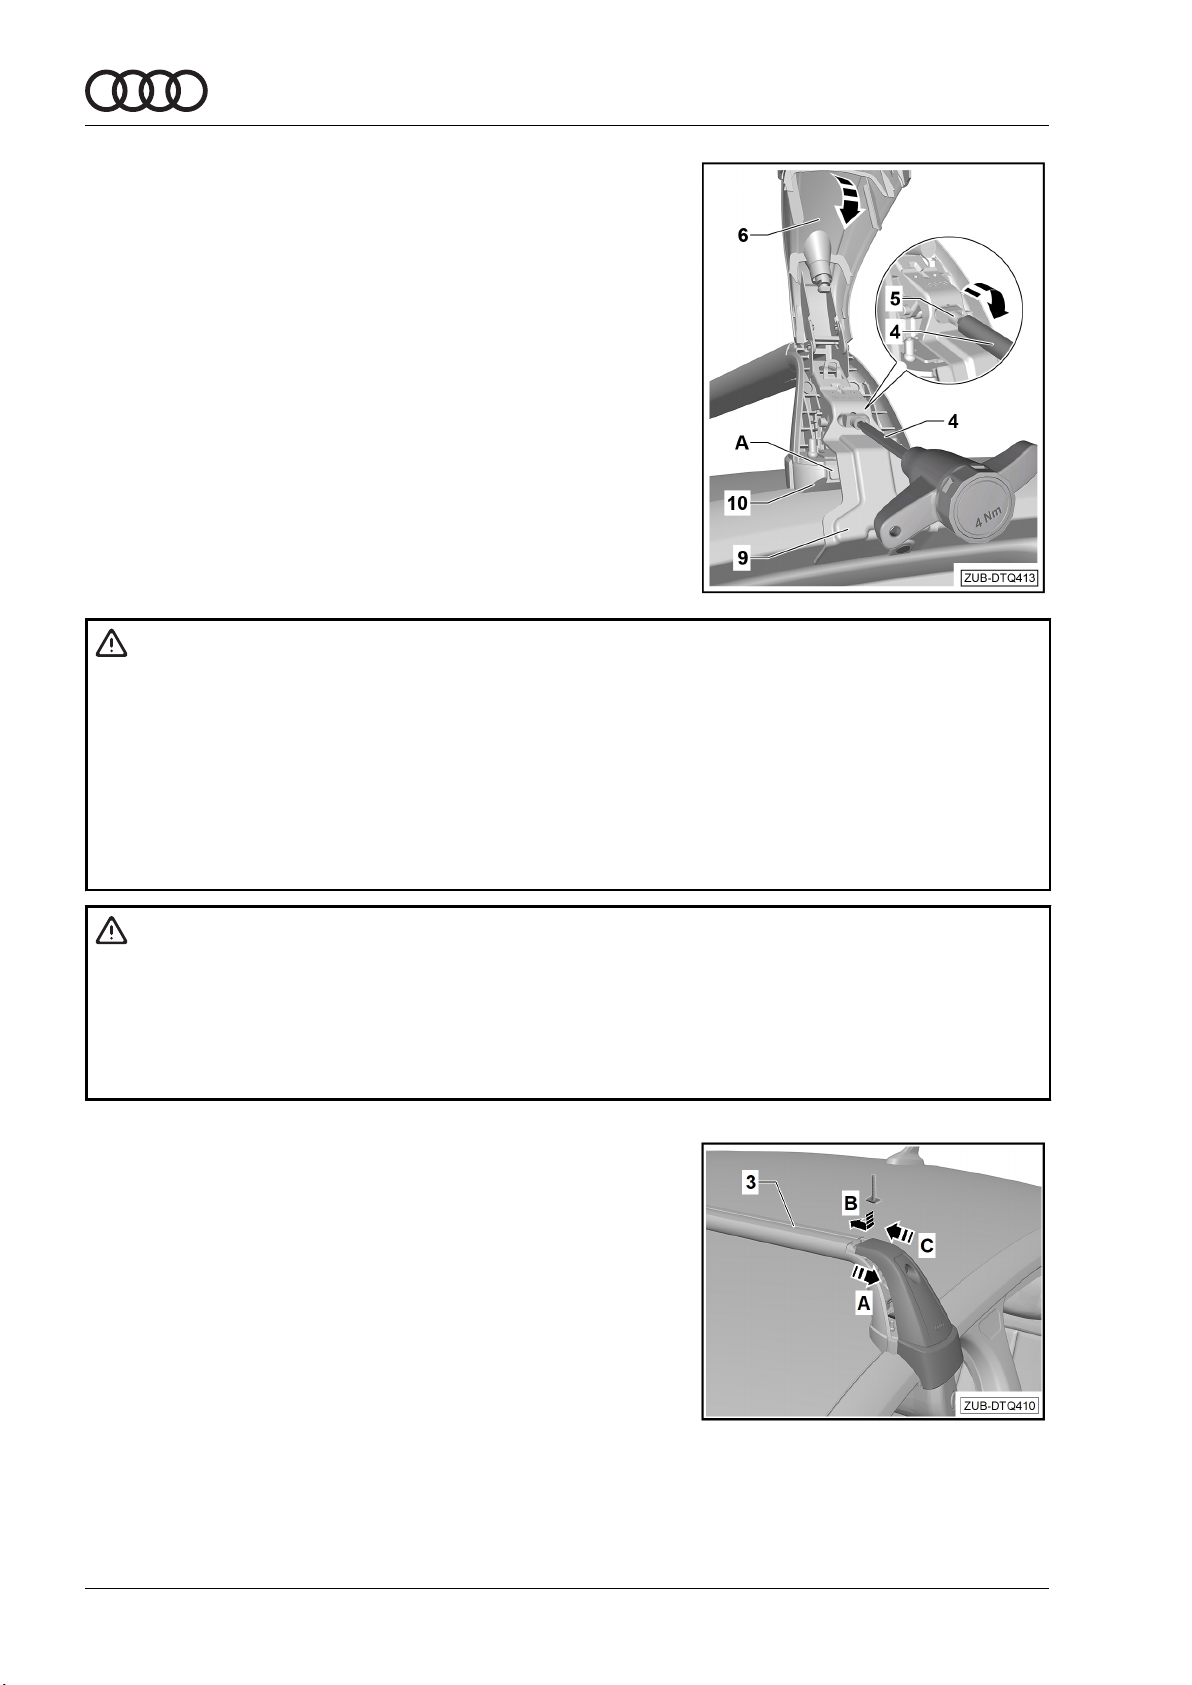
1.7 Installing roof rack modules using T-
slot nuts
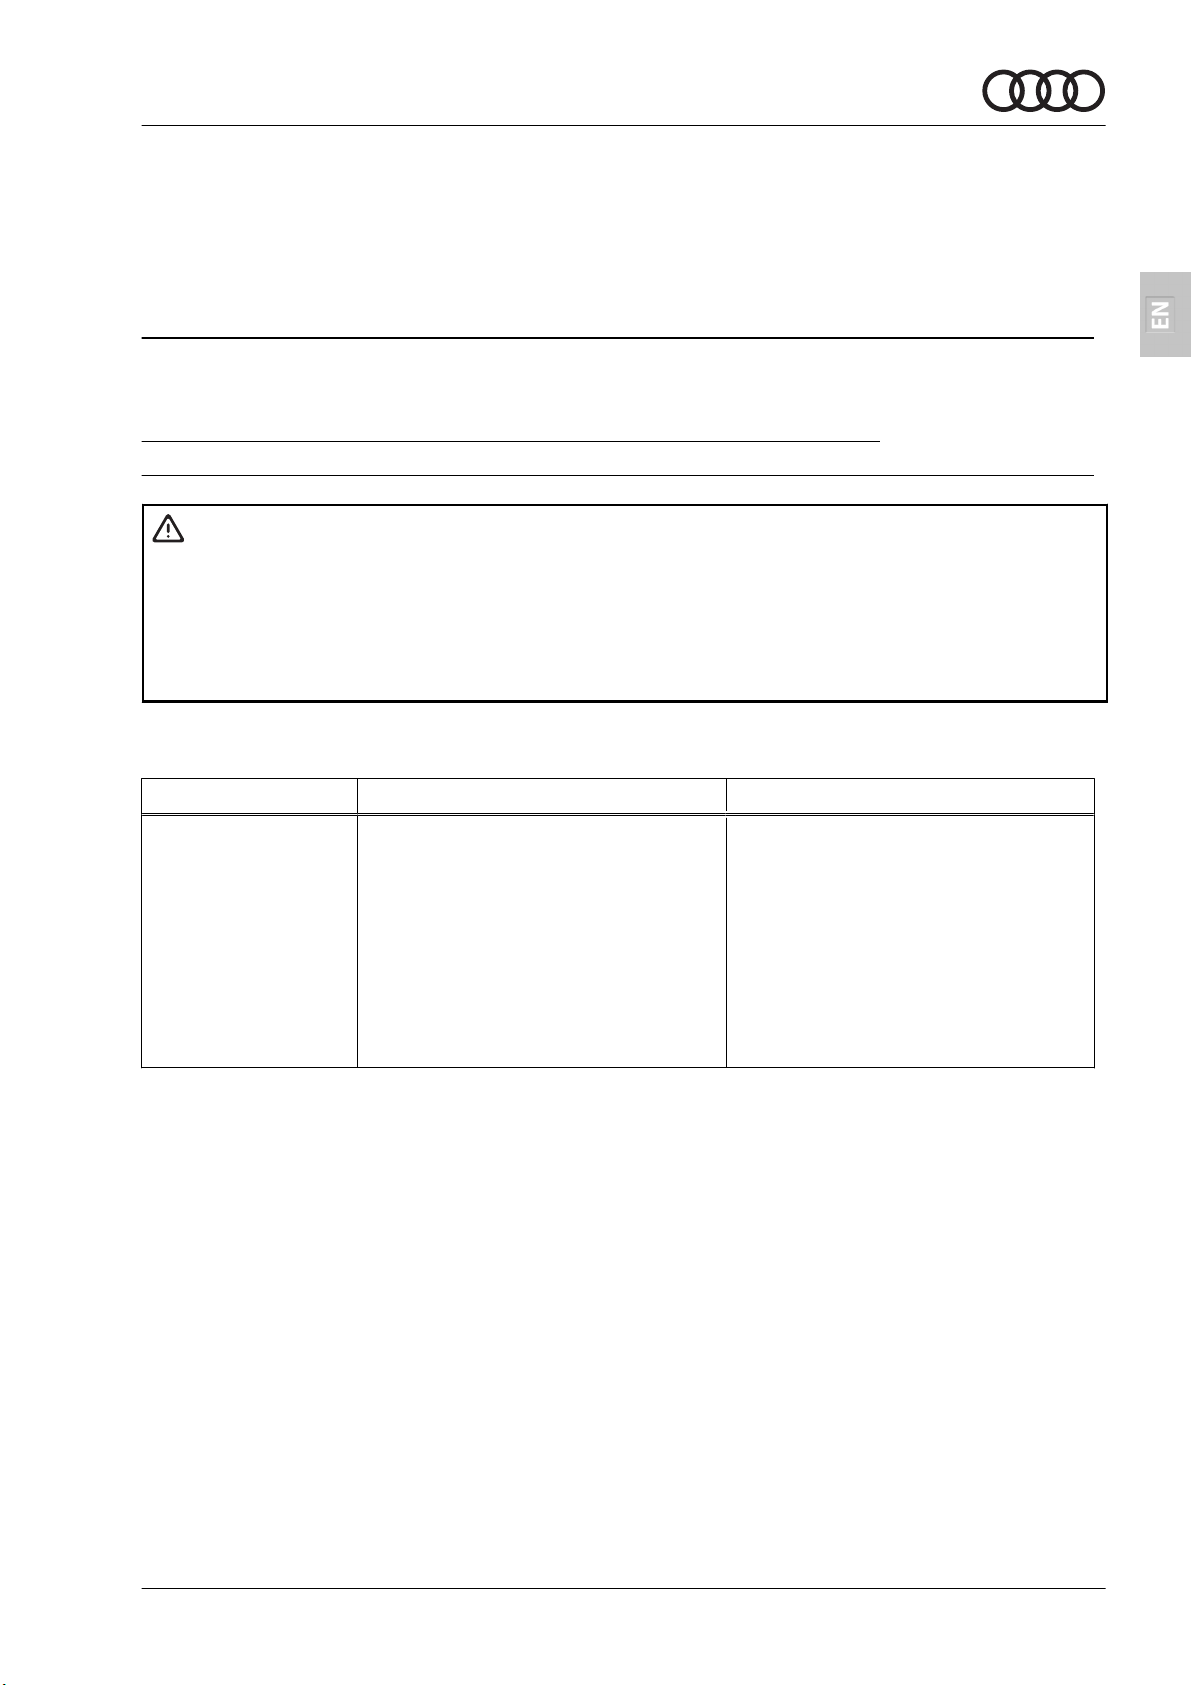
– To install the T-slot nuts, remove the profile cap -6- from the
profile tube -3- -arrow A-.
– Insert the T-slot nut in the T groove provided -arrow B-.
– Slide the profile cap -6- back on and close it -arrow C-.
– Secure the roof rack modules to the T-slot nuts in accord-
ance with the respective installation instructions.
Installation instructions - Audi Q4 Sportback e-tron 2022 ►
Edition 01
81 Notes


 2020 User manual")