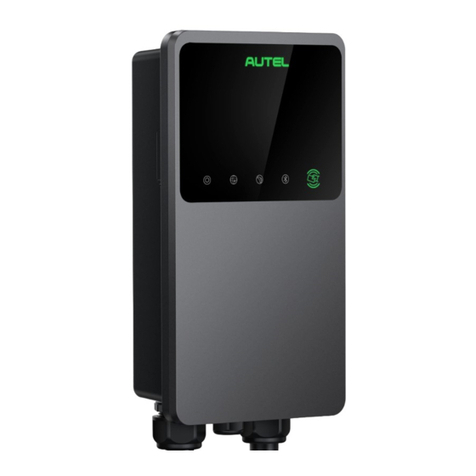
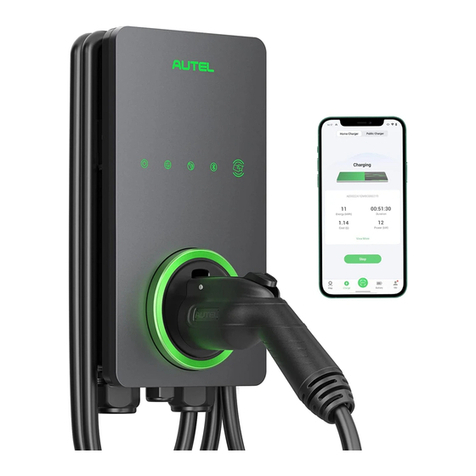
Autel MaxiCharger AC Wallbox Home User manual

MaxiCharger AC Wallbox Home
Installation and Operation Manual

i
Trademarks
Autel®, MaxiCharger®, MaxiSys®, MaxiDAS®, MaxiScan®, MaxiCheck®, and MaxiRecorder®
are trademarks of Autel Intelligent Technology Corp , Ltd , registered in China, the United
States and other countries All other marks are trademarks or registered trademarks of their
respective holders
Copyright Information
No part of this manual may be reproduced, stored in a retrieval system or transmitted, in any
form or by any means, electronic, mechanical, photocopying, recording, or otherwise without
the prior written permission of Autel
Disclaimer of Warranties and Limitation of Liabilities
All information, specifications and illustrations in this manual are based on the latest
information available at the time of printing
Autel reserves the right to make changes at any time without notice While information of this
manual has been carefully checked for accuracy, no guarantee is given for the completeness
and correctness of the contents, including but not limited to the product specifications,
functions, and illustrations
Autel will not be liable for any direct, special, incidental, indirect damages or any economic
consequential damages (including the loss of profits)
IMPORTA T
Before operating or maintaining this unit, please read this manual carefully, paying extra
attention to the safety warnings and precautions
For Services and Support (24/7):
Web: www autelenergy com
Tel: (844) 765-0150
Email: Autelenergy@autel com
For technical assistance in all other markets, please contact your local selling agent
ii
Safety Information
For your own safety and the safety of others, and to prevent damage to the device and
vehicles upon which it is used, it is important that the safety instructions presented throughout
this manual be read and understood by all persons operating or coming into contact with the
device
Safety Messages
Safety messages are provided to help prevent personal injury and equipment damage All
safety messages are introduced by a single word indicating the hazard level
DA GER
Indicates an imminently hazardous situation which, if not avoided, will result in death or
serious injury to the operator or to bystanders
WAR I G
Indicates a potentially hazardous situation which, if not avoided, could result in death or
serious injury to the operator or to bystanders
Safety Instructions
The safety messages herein cover situations Autel is aware of Autel cannot know, evaluate
or advise you as to all of the possible hazards You must be certain that any condition or
service procedure encountered does not jeopardize your personal safety
SAFETY WAR I GS
Read and follow all warnings and instructions before installing and operating the charger
This equipment should only be installed by a licensed electrician in accordance with all
local codes and ordinances
This equipment must be grounded through a permanent wiring system or an equipment-
grounding conductor
Do not install or use this equipment near flammable, explosive, harsh, or combustible
materials, chemicals or vapors
Children should be supervised when around this equipment
Do not insert fingers or foreign objects into the electric vehicle connector
Do not use the equipment if the flexible power cord or EV cable is frayed, broken or
otherwise damaged, or fails to operate
Do not use the equipment if the enclosure or the EV connector is frayed, broken or
otherwise damaged, or fails to operate

iii
Use 90 °C wire copper conductors only
Do not operate the equipment outside its operating temperature range of -40 to 131 °F
(-40 to 55 °C)
Incorrect installation and testing of the equipment could potentially damage the vehicle's
battery, components, and/or the equipment itself
Handle the equipment with care during transportation Do not subject it to strong force
or impact or pull, twist, tangle, drag or step on the equipment, to prevent damage to it or
any components
For NEMA plug-in version, use only the NEMA outlet (6-50 or 14-50) For your own safety,
do not unplug the charger during charging

iv
CO TE TS
SAFETY I FORMATIO II
SAFETY MESSAGES II
SAFETY I STRUCTIO S II
1 USI G THIS MA UAL 1
CONVENTIONS 1
2 GE ERAL I TRODUCTIO 3
2 1 PRODUCT OVERVIEW 4
2 2 MODELS 7
2 3 SPECIFICATIONS 8
3 I STALLATIO
10
3 1 UNPACKING 10
3 2 PREPARING FOR INSTALLATION 12
3 3 NEMA PLUG-IN OUTLET 14
3 4 INSTALLING THE CHARGER 15
4 OPERATIO 30
4 1 POWERING ON 30
4 2 ADDING YOUR CHARGER 30
4 3 START CHARGING 31
4 4 STOP CHARGING 31
5 TROUBLESHOOTI G A D SERVICE 32
5 1 TROUBLESHOOTING TABLE 32
5 2 SERVICE 34
6 COMPLIA CE 35

1
1 Using This Manual
This manual describes the installation and use of the MaxiCharger AC Wallbox Home Prior
to installation, read through this manual to be familiarized with the instructions of this
MaxiCharger to ensure a successful installation and smooth operations
Conventions
The following conventions are used
Bold Text
Bold text is used to highlight selectable items such as buttons and menu options
Example:
Tap OK
otes and Important Messages
otes
A OTE provides helpful information such as additional explanations, tips, and comments
Example:
OTE
The images and illustrations depicted in this manual may differ slightly from the actual ones

2
Important
IMPORTA T indicates a situation which, if not avoided, may result in damage to the test
equipment or vehicle
Example:
IMPORTA T
In Canada, a NEMA plug-in installation is only allowed with a 50 amp circuit
Hyperlink
Hyperlinks or links that take you to other related articles, procedures, and illustrations are
available in electronic documents
Illustrations
Illustrations used in this manual are only examples; the actual product(s) or screens may vary

3
2 General Introduction
The MaxiCharger AC Wallbox Home is designed to charge a plug-in hybrid electric vehicle or
an electric vehicle (hereinafter called EV) at your home or condo Our chargers provide you
with safe, reliable, fast, and smart charging solutions
The difference between the MaxiCharger AC Wallbox Home (Separate Holster) and
MaxiCharger AC Wallbox Home is that the former requires the additional holster installation,
while the latter already has a built-in holster The installation procedures for the two models
are same This manual uses the MaxiCharger AC Wallbox Home (Separate Holster) as an
example when describing the installation steps
This manual will instruct you how to install and use this charger
Intended Use
The MaxiCharger AC Wallbox Home is intended for the AC charging of EVs It is intended for
both indoor and outdoor use
DA GER
1 If you use the equipment in any way other than described in this manual or other related
documents, possible death, injury and damage to property can occur
2 Use the equipment only as intended
OTE
The images and illustrations depicted in this manual may differ slightly from the actual ones

4
2.1 Product Overview
Autel MaxiCharger AC Wallbox Home
1 LED Indicators (from left to right):
Power LED
Internet Connection LED
Charging LED
Bluetooth Connection LED
2 RFID LED
3 EV Charging Cable
4 Bottom AC Inlet Hole
5 Bottom Ethernet Cable Port

5
6 Mounting Screws
7 Rear AC Inlet Hole
8 Rear Ethernet Cable Port
9 Product Label
10 RJ45 Port
11 RS485 Port — connects the
RS485 cables
12 Current Selector — adjusts the
current for the charger

6
LED Description
LED Description
Power LED
Solid Green: The charger is on
ot Illuminated: The charger is off
Flashing Yellow: Data is being transmitted and/or firmware is
upgrading
Solid Yellow: Firmware upgrade has failed
Solid Blue: Data transmission has failed; will illuminate green in
five seconds
Internet
Connection
LED
Solid Green: The charger is connected to the Internet
ot Illuminated: The charger is not connected to the Internet
Charging LED
Solid Blue: An EV is connected
Flashing Blue: A schedule is active
Flashing Green: An EV is charging
Solid Green: A charge session has ended
ot Illuminated: The charger is not connected
Solid Orange: A recoverable error has occurred
Solid Red: An irrecoverable error has occurred (Please contact
support )
Bluetooth
Connection
LED
Flashing Green: The charger is connected to a mobile device
via Bluetooth
Flashing Blue: The charger is connected to the accessory VCI
(Vehicle Communication Interface) via Bluetooth (VCI sold
separately )
Flashing Cyan: The charger is connected to a mobile device and
a VCI device simultaneously via Bluetooth (VCI sold separately )
ot Illuminated: The charger is not connected via Bluetooth
RFID LED
Illuminated: The RFID function is enabled You can use the
RFID card to start and stop charging
ot Illuminated: The RFID function is disabled

7
2.2 Models
MaxiCharger AC Wallbox Home (Separate Holster)
NEMA Plug-in Version Hardwire Version
MaxiCharger AC wallbox Home
A Holster
B Connector

8
2.3 Specifications
Item Description
AC Power Output Rating
Maximum 7 6 kW (240 VAC @ 32 A model)
Maximum 9 6 kW (240 VAC @ 40 A model)
Maximum 12 kW (240 VAC @ 50 A model)
AC Power Input Rating 208/240 V AC, 60 Hz, single phase @ 16 A,
24 A, 32 A, 40 A, 48 A, 50 A
Circuit Breaker Options (A) 20 A, 30 A, 40 A, 50 A, 60 A, 70 A
Input Wiring Scheme Three wires: L1, L2, and Earth (no neutral)
Input Cord
NEMA 6-50
NEMA 14-50
Hardwired
Connector Type SAE J1772
Charging Cable Length 24 6 ft (7 5 m)
Display 5 LEDs
Metering Meter IC, ± 1 %
Ground Fault Detection 20 mA CCID with auto retry
Protection Overcurrent, overvoltage, undervoltage, integrated
surge protection
Connectivity
Bluetooth
Wi-Fi
Ethernet
RS485
Card Reader ISO 15693, ISO 14443, NFC

9
Item Description
Sub-G (Auto Open the Tesla
Charging Port) Optional, only available on chargers with built-in holster
Communication Protocols
OCPP 1 6J
OCPP 2 0 (Optional, will be available soon)
Mounting Wall-mounted or floor using a pedestal
Enclosure Ratings NEMA 4, indoor or outdoor installation
Operating Temperature -40 to 131 °F (-40 to 55 °C)
Storage Temperature -40 to 158 °F (-40 to 70 °C)
Dimension (H x W x D) 13” x 7” x 3” (335 x 187 x 85 mm)
Weight 14 8 lbs (6 7 kg)
Safety and Compliance
NEC Article 625 and UL 916, UL 2594,
UL2231-1, UL2231-2, UL 1998,
CSA C22 2 No 280
Codes and Standards FCC Part 15 Class B, Energy Star, OpenADR2 0 B
Warranty 3 years
Model
Maxi US AC W12-H
Maxi US AC W10-N14-H
Maxi US AC W10-N6-H
Maxi US AC W12
Maxi US AC W10-N14
Maxi US AC W10-N6

10
3 Installation
3.1 Unpacking
Make sure that all parts are delivered according to the order Check the packaging for the
following parts
Charging Station
Wall Dock
Screw (M6 x 50)
2 PCS
Screw (M5 x 12)
Wall Anchor
(5/16”)
2 PCS
Bottom Entry
Power Conduit
Plug (M32)
Installation Guide
Packing List
Amperage Labels

11
Tool Kit
Screwdriver (Type
T10)
Screwdriver (Type
T25)
Holster & Mounting
Holster
Wall Dock
Screw (M6 x 50)
3 PCS
Screw (M5 x 12)
Wall Anchor
(5/16”)
2 PCS
OTE
1 The Holster & Mounting accessories are only applicable for the MaxiCharger AC
Wallbox Home (Separate Holster) model
2 The list above does not necessarily include all the tools required for installation We
recommend you read through the installation procedure and gather all the tools
needed prior to installation

12
3.2 Preparing for Installation
3.2.1 Location
Install your charger on a flat and vertical surface capable of supporting its weight (e g ,
a finished wall or pedestal) The maximum weight of a MaxiCharger AC Wallbox Home
is approximately 14 8 lbs (6 7 kg)
Install the charger in a location that allows the charging cable to remain within its bending
tolerance
Position the charger in a location where it is not vulnerable to being damaged.
3.2.2 Positioning
1 Determine the desired charging amperage and whether the desired circuit rating requires
a hardwired circuit Choose based on the electrical capacity in the panel, the desired
speed of charging, and whether the user prefers a NEMA plug-in or hardwired installation
Circuit Rating
Max Load
Estimated Range
per Hour EMA Plug-in
Hardwire
50 A 40 A Up to 38 miles/61 km
Yes Yes
40 A 32 A Up to 30 miles/48 km
Yes Yes
IMPORTA T
In Canada, a NEMA plug-in installation is only allowed with a 50 amp circuit
The MaxiCharger AC Wallbox Home can also be wired for higher amperages Consult
all applicable codes for breaker and wire sizing requirements The field-wiring terminal
is rated to 105 °C and accepts a maximum of 6 AWG (16 mm²) wire
Circuit Rating
Max Load
Estimated Range
per Hour EMA Plug-in
Hardwire
70 A 50 A Up to 45 miles/72 km
No Yes
2 For NEMA plug-in installation, determine the purchased plug type, either a NEMA 6-50
or 14-50 plug
3 Ensure the electrical panel supports a 240 V dedicated circuit with a new, dedicated, and
non-GFCI two-pole circuit breaker, in accordance with local codes and ordinances

13
4 The recommended installation height is between 51 and 67 inches (1300 and 1700 mm)
For NEMA plug-in installation, the NEMA outlet should be located at least 18 inches (460
mm) from the ground adjacent to the position where the charger will be mounted

14
3.3 EMA Plug-in Outlet
This section introduces how to install a NEMA outlet if you do not have one already
WAR I G
Switch off the circuit breaker of the electrical outlet before installing your charger
If you already have a NEMA outlet, ensure that it complies with local electrical codes and has
a designated circuit breaker and electrical wiring that are dimensioned appropriately
IMPORTA T
When installing a NEMA 14-50 outlet, ensure that the ground pin is facing up as shown per
the diagram
EMA 14-50P EMA 6-50P
Ensure you have the correct permits for this electrical installation
The NEMA outlet must be placed on the left side of the charger
The power supply cable length is limited to 11 8” (300 mm)
CAUTIO
To reduce the risk of fire, connect only to a circuit with a branch circuit over-current protection
of 50 A in accordance with ANSI/NFPA 70 (US) C22 2 NO 280-13 (Canada)

15
3.4 Installing the Charger
3.4.1 EMA Plug-in Installation
1 To find the ideal mounting height of the charger:
DA GER
Risk of shock Turn off the power to the outlet at the circuit breaker until the installation
is completed
1) Find the wall stud nearest to the NEMA outlet using a wall stud finder Draw a
vertical line of approximately 20" (50 cm) in line with the wall stud
2) Plug the NEMA cable into the outlet, and position the charger centered on the
vertical line Ensure that the NEMA cable has a slight curve and is not stretched
3) Mark a horizontal line at the bottom of the charger
4) Unplug the charger
Other manuals for MaxiCharger AC Wallbox Home
1
Table of contents
Other Autel Batteries Charger manuals

Autel
Autel MaxiCharger User manual

Autel
Autel MaxiCharger Maxi US AC LW12 User manual

Autel
Autel MaxiCharger User manual

Autel
Autel EVO II Series Instruction Manual

Autel
Autel EVO Nano Series Instruction Manual

Autel
Autel MaxiCharger AC Compact User manual

Autel
Autel MaxiCharger User manual

Autel
Autel DRAGON FISH User manual

Autel
Autel MaxiCharger User manual