manuals.online logo
Brands
  1. Home
  2. •
  3. Brands
  4. •
  5. Avaya
  6. •
  7. IP Phone
  8. •
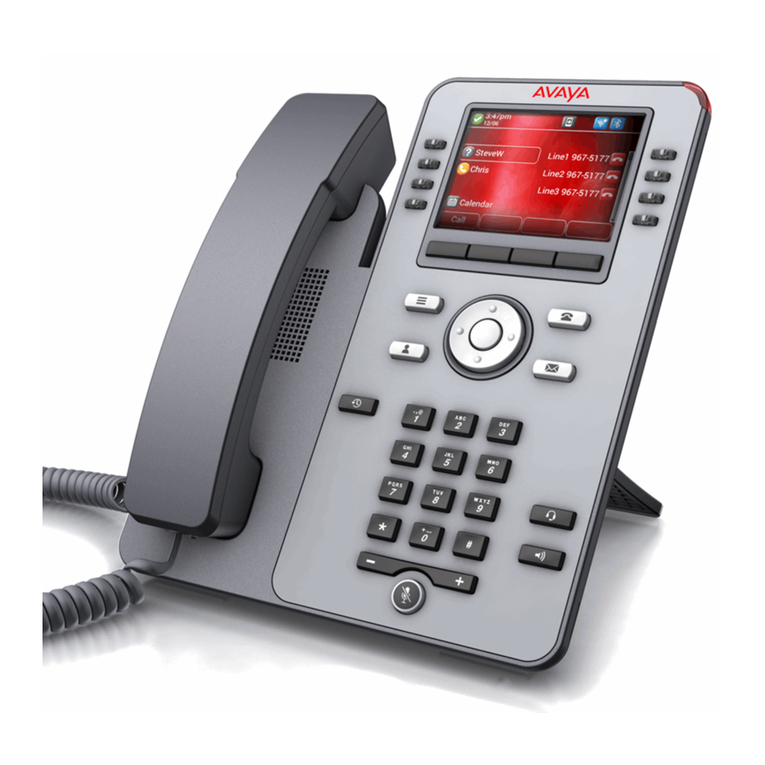
  9. Avaya J129 User manual

Avaya J129 User manual

Avaya IP Office VM Pro Voicemail
on a J129 Phone
User Manual
SYRACUSE
1 Dupli Park Drive, 5th Floor
Syracuse NY 13204
Tel: 315-671-6200
Fax: 315-671-0080
HOLLAND PATENT
9560 Main Street
Holland Patent NY 13354
Tel: 315-624-2000
Fax: 315-624-0288
1
LOG IN TO YOUR MAILBOX
NOTE: See page 3 for first time mailbox setup instructions.
When you have new messages, the light on your phone lights
and/or you will receive an email notification when configured in
your system settings by a System Administration.
FROM AN INTERNAL EXTENSION:
Press MAIN MENU Key
Scroll to Voicemail
Press SELECT Softkey
Or Dial *17
Enter Your Extension (Mailbox) Number and Press #
Enter your password and Press #
NOTE: At your own desk you do not have to enter your mailbox
number. When prompted for the mailbox number, press #.
FROM AN EXTERNAL NUMBER:
Dial: Your Backdoor Number
When the system answers:
Enter Your Extension (Mailbox) Number and Press #
Enter your password and Press #
OR
Dial: Your Direct Dial (DID) Number
Press *7
Enter Your Extension (Mailbox) Number and Press #
Enter your password and Press #
NOTE: If you are using the Twinning feature, you cannot dial
your own direct dial number to check for messages.
Once you log in:
+IP Office plays a summary of new messages in your mailbox.
+You do not have to listen to voice prompts. You can enter
commands immediately.
+To begin playing messages immediately after logging in Press 2.
MESSAGE KEY: The J129 Phone does not have a message
key. Dial *17or access voicemail through the menu key.
MAILBOX NUMBER: Your Extension Number or an
Assigned Number.
PASSWORD: You do not have a password initially. You
will be forced to create one the first time you log in. Your
new Password must be between 6 and 15 numbers and it
must be secure (you cannot use your extension number, any
series of numbers ie: 123456, or a repeat of numbers ie:
111111). It is recommended that passwords be complex and
that you change them often.
RECORDED NAME: Your name is played as a confirma-
tion when you log in to your mailbox. It is also used for
other system announcements including the company
directory search feature, and when you leave a message
for another internal user.
NOTE: You will be FORCED to create your Password and
record your name the first time you log in to your mailbox.
GREETINGS: By default callers who reach your mailbox
hear the system greeting. “Your call has been answered by
Avaya IP Office (Name) is not available. To leave a mes-
sage, wait for the tone”.
You can replace this greeting with one that you record. You
can record a library of up to 9 personal greetings and as-
sign them for specific call situations. Please see page 3 for
the description of calls types.
COMMANDS: Commands are activated by pressing
Numbers and Signs on the dial pad.
PROMPTS: A Synthesized Voice summarizes your Mail-
box, gives available Commands and options.
NOTE: You do not need to listen to prompts or greetings.
Enter desired command or press 1 to bypass a personal
greeting.
LOG IN: You must log in using the password you created
to Retrieve and Send Messages, Change Password, Record
Name and Greetings.
HELP: To Receive help at any time press *H (4)
**MAILBOX INFORMATION** **ACCESS YOUR MAILBOX (LOG IN)**
To:
Skip Header
Forward
Restart
Replay without header
Skip to Previous
Pause/Resume
Replay Header
Back 5 Seconds
Restart
Advance
Save and Skip Category
Save and Play Next
Play Next
Delete and Play Next
Restore deleted message
Print Fax (if applicable)
Press:
0
1
2
0
*2
3
23
5
*5
6
*#
#
**4
*3
**8
*1
NOTE:
If you do not delete or save a
message, it becomes an OLD
message and is automatically
deleted in 30 days.
2
LEAVE MESSAGE: Leave a message without ringing the phone:
Internal: Press # and enter the mailbox number
At tone: Leave your message and hang up.
CALL TRANSFER TO A MAILBOX: Transfer a caller to a mailbox.
With Caller on line
Press TRANSFER Key
Press # and Enter mailbox number
Press TRANSFER Key or COMPLETE Softkey Immediately
FORWARD MESSAGES TO ONE OR MORE MAILBOXES
While listening to a message
Press 1 To begin forward process
Press 2 To forward with comment
Record at the tone
Press # To end your recording
Enter a list of extensions separated by # sign
Press # at the end of list to indicate you have finished
Press # to deliver the forwarded message
MAILBOX OPTIONS When in a mailbox on the system
Press *7 to log in to your mailbox
Press *8 to be transferred to another extension
Press # to return to previous menu
CHANGE VOICEMAIL TO EMAIL OPTIONS
Voicemail to email options on the J129 phone must be done by a
System Administrator.
Options are:
RECORD OR CHANGE GREETINGS (Log in to your mailbox)
NOTE: See page 3 for first time mailbox setup instructions
Press 3 to access greeting menu
Press 1 to create, change, delete a greeting
Enter Greeting number (1-9)
Voice prompt indicates if greeting is recorded
When Greeting is already recorded, you hear a prompt to Press
1 again to rerecord.
Begin speaking after the tone
Press 1 to end recording
Press 23 to listen
Press *3 to delete and rerecord
Press # to APPROVE stay on line to activate
IMPORTANT: A greeting must be activated. Stay on the line and
follow voice prompts to activate the greeting.
Voice prompt will give you call type options (see page 3)
When activating as temporary, you will be prompted to enter the
number of days you wish greeting to remain active. (Between 0 –
30). If 0 is chosen, greeting remains active until you deactivate it.
CHANGE PASSWORD (Log in to your mailbox)
Press 5 For Personal Options
Press 4 To Change Password
Enter your new password and # key
Enter your new password again and # key
CHANGE RECORDED NAME (Log in to your mailbox)
Press 5 For Personal Options
Press 5 To Record Name
Speak your name after the tone
Press 1 To End Recording
Press # To Accept Recording
ACTIVATE A GREETING (Log in to your mailbox)
Press 3 to access greeting menu
Press 3 To activate greeting
Enter Greeting Number (1-9)
If you have not already recorded the greeting:
Record at the tone
Press 1 to end recording
Press # to Approve
If you have already recorded the greeting:
Press 0 to listen to it
Follow voice prompts to select required call type
Press # exits you to the greeting menu
DEACTIVATE A GREETING (Log in to your mailbox)
Press 3 to access greeting menu
Press 0 To listen
Enter Greeting Number (1-9) then Press *8
** CHANGE MAILBOX INFORMATION** **OTHER VOICEMAIL FEATURES**
OFF
COPY
FORWARD
ALERT
Messages will be received on your desk phone.
Messages are received in both your email and on
your desk phone, you must manage them in both.
Messages are sent to your voicemail as a wave file
attachment and are not left on your desk phone.
Messages are received on your desk phone and the
system will send you an email to alert you of a new
voicemail.
3
The first time you use your mailbox, you must create a password and record your name.
IMPORTANT: There is no initial password. You will create one in the first step below.
CREATE PASSWORD: REQUIRED
Dial *17
Enter mailbox number (your ext) and Press #
When prompted for password Press # there is no initial password, so just press # when prompted
Enter your new password and Press # must be 6—15 digits and must be secure (can’t use 123456, etc)
Re-enter your new password again and Press #
Stay on the line
RECORD NAME: REQUIRED
If you hung up, Log in to your mailbox (See page 1)
Press 1 and at the tone record your name (and/or Title, Dept. and/or Ext Number)
Press 1 to end Recording System will replay your Name
Press # to Approve OR
Press 1 to Rerecord
NOTES: Pressing 1 always starts and ends the record process.
When recording the name for a general or group mailbox, use the Group name ie: Operator or Receptionist
RECORD and ACTIVATE GREETINGS: OPTIONAL BUT RECOMMENDED
If you hung up, log in to your mailbox (See page 1)
Press 3 to access greeting menu
Press 1 To create change delete a greeting
Enter Greeting number (1-9) It is easiest to match your greeting number to the call type you will use as listed below.
Begin speaking after the tone
Press 1 to end recording
Press 23 to listen
If you don’t like the greeting: Press *3 to delete what you already recorded then Press 1 to rerecord
Press # to APPROVE your greeting
STAY ON THE LINE TO ACTIVATE GREETING
IMPORTANT: A greeting must be activated in order for it to play to callers. Stay on the line to activate your greeting by following
voice prompts.
Voice prompt will tell you “to use this greeting for”:
ALL CALL Press 1 Plays to ALL callers and overrides all other greetings except Temporary
INTERNAL Press 2 plays to callers inside your organization Use in conjunction with EXTERNAL
EXTERNAL Press 3 plays to callers from outside your organization
BUSY Press 4 Plays when ALL extensions are busy use in conjunction with NO REPLY
NO REPLY Press 5 Plays when you do not answer your phone
Default Press 8 System greeting in synthesized voice (your recorded name is inserted into this greeting)
TEMPORARY Press 9 Takes over for ALL active greetings and can be deactivated by system (see page 2)
NOTE: It is recommended you record an ALL CALL or Internal and External Greetings, it is not necessary to record all of the greetings.
**FIRST TIME MAILBOX SETUP**
SAMPLE GREETING
You have reached the voicemail of [NAME] . I am not available to take your call right now please leave me a brief
message and I will return your phone call as soon as possible. Thank you. (Optional) If you need immediate assistance
press 0 now.
NOTE: It is also optional to have a press 2 and press 3 to go to other departments or people. These choices must be
configured by a System Admininstrator.

Other manuals for J129

14

Other Avaya IP Phone manuals

Avaya J100 Series Instruction Manual

Avaya

Avaya J100 Series Instruction Manual

Avaya IP 9608 User manual

Avaya

Avaya IP 9608 User manual

Avaya IP Office Basic Edition 9500 Series User manual

Avaya

Avaya IP Office Basic Edition 9500 Series User manual

Avaya 3641 User manual

Avaya

Avaya 3641 User manual

Avaya 1408 User manual

Avaya

Avaya 1408 User manual

Avaya 46xx User manual

Avaya

Avaya 46xx User manual

Avaya 1140E User manual

Avaya

Avaya 1140E User manual

Avaya one-X 9640 User manual

Avaya

Avaya one-X 9640 User manual

Avaya Definity 8410D User manual

Avaya

Avaya Definity 8410D User manual

Avaya IP OFFICE 2420 User manual

Avaya

Avaya IP OFFICE 2420 User manual

Avaya 1220 User manual

Avaya

Avaya 1220 User manual

Avaya 40DHB0002UKCL User manual

Avaya

Avaya 40DHB0002UKCL User manual

Avaya 4400 Series User manual

Avaya

Avaya 4400 Series User manual

Avaya 1220 User manual

Avaya

Avaya 1220 User manual

Avaya 3901 User manual

Avaya

Avaya 3901 User manual

Avaya ETR 6D User manual

Avaya

Avaya ETR 6D User manual

Avaya IP Office 1400 Series User manual

Avaya

Avaya IP Office 1400 Series User manual

Avaya IP OFFICE 3.2 2420 User manual

Avaya

Avaya IP OFFICE 3.2 2420 User manual

Avaya 4600 Series User manual

Avaya

Avaya 4600 Series User manual

Avaya IP Office 5621 User manual

Avaya

Avaya IP Office 5621 User manual

Avaya 9504 User manual

Avaya

Avaya 9504 User manual

Avaya 9601 User manual

Avaya

Avaya 9601 User manual

Avaya IP Office Phone Manager User manual

Avaya

Avaya IP Office Phone Manager User manual

Avaya 9630 Deskphone Edition User manual

Avaya

Avaya 9630 Deskphone Edition User manual

Popular IP Phone manuals by other brands

Cisco 7940G user guide

Cisco

Cisco 7940G user guide

iPECS LIP-8004D user guide

iPECS

iPECS LIP-8004D user guide

Grandstream Networks GRP2615 Quick installation guide

Grandstream Networks

Grandstream Networks GRP2615 Quick installation guide

Htek UC924 quick reference

Htek

Htek UC924 quick reference

Yealink SIP-T23G Quick reference user guide

Yealink

Yealink SIP-T23G Quick reference user guide

Mitel MiVoice 5312 user guide

Mitel

Mitel MiVoice 5312 user guide

Burnside P355 user guide

Burnside

Burnside P355 user guide

Cisco 7940G datasheet

Cisco

Cisco 7940G datasheet

Bittel HA988868TSD-IP manual

Bittel

Bittel HA988868TSD-IP manual

Polycom SoundPoint IP 650 user guide

Polycom

Polycom SoundPoint IP 650 user guide

Yealink One Talk CP960 Quick reference guide

Yealink

Yealink One Talk CP960 Quick reference guide

Yealink T58W Pro Quick reference guide

Yealink

Yealink T58W Pro Quick reference guide

Samsung OfficeServ ITP-5012L Quick reference guide

Samsung

Samsung OfficeServ ITP-5012L Quick reference guide

Polycom IP 500/501 SIP 2.0 user guide

Polycom

Polycom IP 500/501 SIP 2.0 user guide

Panasonic KX-HDV100 operating instructions

Panasonic

Panasonic KX-HDV100 operating instructions

Yealink T41 quick start guide

Yealink

Yealink T41 quick start guide

Guardian Telecom DTR-VoIP Series Installation and operation

Guardian Telecom

Guardian Telecom DTR-VoIP Series Installation and operation

comfortel 1400 IP Advanced information

comfortel

comfortel 1400 IP Advanced information

manuals.online logo
manuals.online logoBrands
  • About & Mission
  • Contact us
  • Privacy Policy
  • Terms and Conditions

Copyright 2025 Manuals.Online. All Rights Reserved.