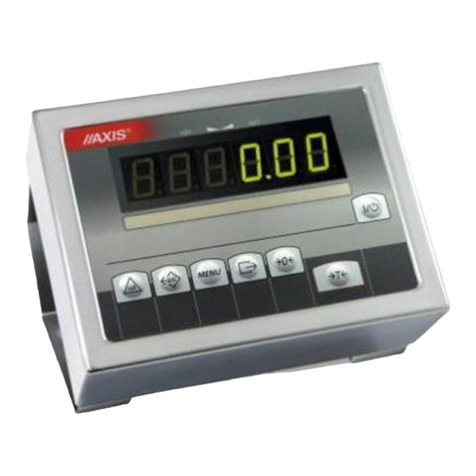
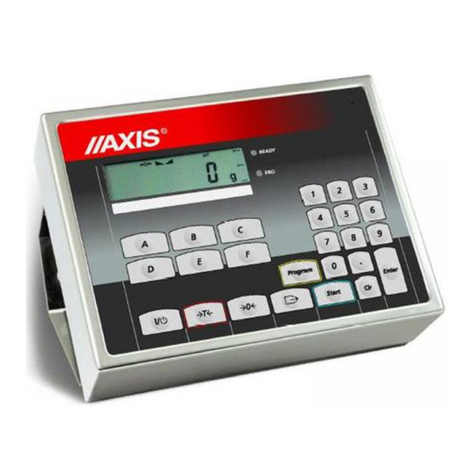
Axis SE-03/N/LCD Operator's manual

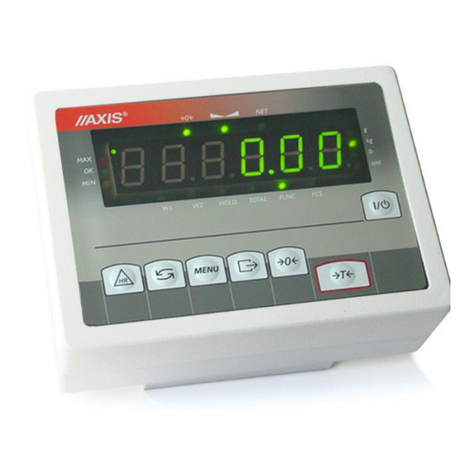
SE-03/N/LCD meter
File 2016-04-08 DTR-SE03 nE0053 GB

SE-03 TECHNICAL AND USAGE DOCUMENTATION
__________________________________________________________________________________________
2
TABLE OF CONTENTS
1. Introduction ...................................................................................................................................3
2. Certificates....................................................................................................................................4
3. Completation .................................................................................................................................5
4. Balance keys and indicators...........................................................................................................6
5. Technical data...............................................................................................................................8
6. Balance preparation to work...........................................................................................................9
7. General operation principles ........................................................................................................12
7.1 Label name entering..............................................................................................................13
7.2 Cumulative labels printing .....................................................................................................13
7.3 Entering number of printed labels ..........................................................................................14
7.4 LIST function.........................................................................................................................14
7.4.1 User functions set (Fun-U) .................................................................................................15
7.4.1.1 Pieces counting (LIC).....................................................................................................15
7.4.2 Option of selecting data transfer mode to the printer (Pola)..................................................16
7.4.3 Function of entering constant bar code (bar-S) ...................................................................16
7.4.4 Function of entering variable bar code (bar-Z).....................................................................16
7.4.5 Function of entering access code (Cod-d)...........................................................................16
7.4.6 Function of comparing with threshold values (thr) - option...................................................16
7.5 Setting of RS232 port operation mode...................................................................................17
7.6. Constant tare deleting...........................................................................................................18
7.7. Entering digits of variable bar code.......................................................................................18
7.8 Entering digits of constant bar code.....................................................................................19
7.9 Entering current date and time ............................................................................................19
7.10 Entering current date offset (expiration days)......................................................................19
7.11 Label print..........................................................................................................................20
7.12 Constant tare entering........................................................................................................21
7.13 CLEAR function .................................................................................................................21
8. Maintenance and small repairs.....................................................................................................21
9. Additional information .................................................................................................................22
10. Printer communication protocol in AUTO mode ..........................................................................22
11. Labels designing with ZEBRA DESIGNER software ..........................................................................................................23
11.1 Printer selection................................................................................................................ 23
11.2 Data entering.................................................................................................................... 24
11.3 Saving label design in balance memory............................................................................. 26
11.4 Label printing with printer connected to balance................................................................. 26
Declaration of Conformity....................................................................................................................................................27
SE-03 TECHNICAL AND USAGE DOCUMENTATION
__________________________________________________________________________________________
3
1. Introduction
SE-03 meter replaces standard meters produced by AXIS Sp. z o.o. in order to
enhance their functionality with label printers produced by ZEBRA company, that use EPL-2
protocol.
The meter has hermetic housing from stainless and acid-resistant steel sheet, LCD display
with 14 mm digits. SE-03 meter may be the element of platform balances BA series or
industrial balances 4BA series.
The meter’s keyboard allows for setting the operation mode and entering data,
required for label printing. The label printer should have in its memory previously loaded
label graphical layout, where data from the balance will be entered. Labels are designed with
use of professional computer software Zebra Designer, supplied by Zebra. During label
designing printer should be disconnected from balance and connected to computer (using
USB port).
List of data, used in the labels:
Field
Indication
Chars.
no.
Description
1. net weight
<m_netto>
10
value displayed during label printing
2. gross weight
<m_brutto>
10
net + tare value
3. tare
<tara>
10
package weight, entered with T key, from
keyboard or by weighing
4. price *
<price>
8
price for kg or g, depending on scale type
5. value
<wartosc>
net weight x price (for negative readings –zero)
6. production
date
<data_p>
10
scale system date
7. expiration
date*
<data_s>
10
production date + offset days
8. bar code*
<kod>
12
constant EAN13 (prefix 590) or with weight
(prefix from 21 to 29)
9. net weights
sum
<s_netto>
12
content of net weights summing register
zeroing: during cumulative label printing or scale
turn off
10. gross weights
sum
<s_brutto>
12
content of gross weights summing register
zeroing: during cumulative label printing or scale
turn off
11. packages no.
<l_opk>
4
number of printed labels (from balance turning on
or printing cumulative label)
12. time
<godzina>
10
current time, hh.mm.ss
13. code 2
<code2>
6
additional code, e.g. for employee, batch, etc.
14. code 3
<code3
6
as above
15. code 4
<code3>
6
as above
16. code 5
<code4>
6
as above
17. pieces no.
<l_szt>
14
currently displayed no. of pieces
18. sum of pieces
<s_szt>
14
total no. of pieces
19. unit weight*
<m_jed>
14
single piece weight
* date stored in memory after balance turning off for labels with numbers 0-150.
Label design (layout) is created on PC computer, then it is uploaded to the printer
memory, where it remains (also after disconnecting it from the computer). Each layout, stored
in the printer memory has its name (identification number).

SE-03 TECHNICAL AND USAGE DOCUMENTATION
__________________________________________________________________________________________
4
Cooperation between balance and printer is based on recalling proper label layout (stored
previously in the printer’s memory) and sending data, entered in appropriate label fields.
During the label printing balance sends the layout name, then successive data entered in the
label fields.
The meter allows to choose one of two data sending modes:
-AUTO –meter sends successive data, indicated by the printer (recommended mode but not
available in all printer types),
-MANUAL –balance sends data set, previously activated with the meter keyboard (this
mode requires strict matching of data format and order during the label designing).
In further part of the manual, SE-03 meter operation is described as the part of complete scale.
2. Certificates
Test certificate Quality management system ISO
No. PL CB 1 DIN EN ISO 9001:2009
Upon the basis of above certificates, scales produced by AXIS with the use of SE-03
meter may obtain EC verification.
Verified balances have the following verification features:
- protective seals, located on the balance meter and in points preventing access to the balance
interior.
- Office of Measures marks and green metrological mark, located on the rating plate.
New verification is required after seals breaching or after 3 years from the 1st of January of
year following the year of the first verification. In order to perform new verification, contact
AXIS authorised service point.
Moreover, the module has IP65 protection grade, confirmed by test performed in Research
Laboratory of Electrotechnical Institute, accredited by PCBC.
Balances classification (PKWiU code) 29.24.23.

SE-03 TECHNICAL AND USAGE DOCUMENTATION
__________________________________________________________________________________________
5
3. Set
The basic set includes:
1. Scale with SE-03 module (or separate module)
2. External PSU ZN12V/500mA (only in version with the external PSU)
3. Documentation
4. Warranty card
On demand:
1. EPL label printer + label designing software Zebra Designer
2. Individual label design according to customer’s requirements
3. Extensometer sensors set

SE-03 TECHNICAL AND USAGE DOCUMENTATION
__________________________________________________________________________________________
6
4. Balance keyboard
Keys with single function
I/
- balance ON/OFF
Enter
- operation confirmation or object selection
Clr
- exit (clear)
T
- tare (subtracts package weight placed on balance)
0
- balance zeroing (only when it is empty)
F
- function key –activates enhanced functions of other keys
Keys with direct and auxiliary function (activated with F key):
- label printing
/(F) PA
/ setting manual or automatic printing mode
TCK
- entering constant tare with numeric keys
/(F) TCP
/ entering constant tare by package weighing
Numeric keys with variable direct function and auxiliary function (activated
with F key):

SE-03 TECHNICAL AND USAGE DOCUMENTATION
__________________________________________________________________________________________
7
SUM or 1
- cumulative label printing or digit 1 (during number entering)
/(F) N
/ entering quantity of labels to printout with numeric keys
CODE 2 or 2
- entering code 2 or digit 2 (number entering)
/(F) TC
/ “constant” tare deleting
CODE 3 or 3
- entering code 3 or digit 3 (number entering)
/(F) LIST
/ selection of sending mode (AUTO or MANUAL), setting functions and setting
access code
CODE 4 or 4
- entering code 4 or digit 4 (number entering)
/(F) RS
/ setting serial port transmission parameters
CODE 5 or 5
- entering code 5 or digit 5 (number entering)
/(F) BAR V
/ setting variable bar code
PCS/mass or 6
- pieces no./weight switching or digit 6 (number entering)
/(F) BAR C
/ setting constant bar code
PCS-sample or 7
- entering sample amount (PCS function) or digit 7 (number entering)
/(F) DATE
/ entering current date
or 8
- entering unit weight (PCS function) or digit 8 (number entering)
/(F) DATE E
/ entering expiration date
PCS/RS or 9
- entering unit weight from auxiliary balance though RS232C port (PCS
function) or digit 9 (number entering)
No. LABEL or 0
- entering label number or digit 0 (number entering)
/(F) PRICE
/ entering price
.
- decimal point (number entering)
Notes:
1. Access to all functions, recalled with F key may be code protected. To obtain access to
those functions, enter the access code after displaying Cod-d message and press ENTER.
2. Navigation keys, character keys and shift key are disabled and text entering is not possible.

SE-03 TECHNICAL AND USAGE DOCUMENTATION
__________________________________________________________________________________________
8
5. Technical data
Parameter
Protection grade
IP65
Max. number of legalization graduations
3000e
Precision class
III
Sensors supply
5V AC 25Hz
Reading graduation (d)
1, 2, 5, 10, 20 (g, kg)
Verification graduation (e)
any
Operational temperature
-10÷40oC
Tare set range
full
Max. number of connected sensors
6
Input voltage ranges
10mV (2mV/V)
20mV (4mV/V)
40mV (8mV/V)
80mV (16mV/V)
Load capacity of transoptor outputs (option)
100mA, 24V
Power supply
230V, 50Hz, 6VA
Ready for operation
after 5 minutes from turning on
Housing material
stainless, acid resistant steel sheet
Dimensions:
238x182x77mm
Installation system
Fixing
2 otwory Ф5, rozstaw 203mm
Weight
5.07lb
The metrological parameters of the balance are indicated on the rating plate.

SE-03 TECHNICAL AND USAGE DOCUMENTATION
__________________________________________________________________________________________
9
6. Scale preparation to work
1. Assembling scale based on SE-03 meter should be ordered to authorized producer service,
or performed according to meter assembly manual, supplied with the meter.
Fulfilling of requirements connected with CE sign, requires application of filter cores during
wires connecting, which are supplied with the module. Core 20mm for sensor (sensors)
wires and cores 16mm for protective wires –see below. Distance of core from connection
point must not exceed 30 mm.
2. All devices connected with scale should be supplied from the same line (phase) 230V.
Connecting tensomteric sensors to meter during scale work can damage the
meter!
For the scale supply use the socket with protective contact.
przewód ochronny
czujnika - 2 zwoje
przewód ochronny
ekran
przewody sygnałowe - 4 zwoje
sieciowy - 2 zwoje
screen
Protective wire –2 reels
Protective wire
–2 reels
Signal wires–4 reels

SE-03 TECHNICAL AND USAGE DOCUMENTATION
__________________________________________________________________________________________
10
3. In SE-03 meters connections are ended by joints or they should be connected to feeder
board by using Z16A joint (TO –sending, RI –receiving)
Main board
Feeder
GND
Z4
Z19
Z16A
TO
RI
Attention:
Z4 and Z19 connection is crucial for the Z16A joint to be active.
To connect scale’s RS232C to computer use WK-1 cable or special converter. If Your PC
doesn’t have RS232C interface then You have to additionaly use RS232C-USB active
converter (available in shops with computer equipment).

SE-03 TECHNICAL AND USAGE DOCUMENTATION
__________________________________________________________________________________________
11
RS232C serial interface:
1. The basic connection for communication with external devices is RS1(RS232C-I) port, the
second port RS2(RS232C-II) requires special version of balance software.
2. Meter in standard execution is equipped with conductors ended with male joint. Following
signals layout is used:
RS232C (to label printer)
RxD (receive)
TxD (send)
gnd 5
4
3
2
1
8
7
6
9
THRESHOLDS output Relay connections method
for THRESHOLDS output
DE-9
THRESHOLDS output is the transoptor output of open collector type, signal –short
impulse 0.5 s, load capacity 25mA / 24V.
+24V
0V
8
1
Waga Przekaźnik
Scale
Relay
Thr 1
Thr 2
Zero
gnd
shield

SE-03 TECHNICAL AND USAGE DOCUMENTATION
__________________________________________________________________________________________
12
7. General operation principles
1. Each scale turning on causes autotests performing and balance zero entering, so the scale
should be unloaded (it does not apply to the tank balances).
2. Full precision is obtained after 5 minutes from turning on. Until that moment weighing is
possible, but the measurement error may be higher than allowed.
3. The module has automatic tare setting system, that causes automatic balance zeroing
before each measurement, which is indicated by the zero indicator "". If the zero
indication is not shown, or "----" is displayed, press the "" key with unloaded pan..
4. The module enables tare setting in the whole measuring range. It is performed when pan is
loaded by pressing "T" key.
5. The weighing result should be read during the " " indicator lighting, which indicates the
result stabilization.
6. Weighed mass should be placed in the platform centre.
7. Do not drop weighed objects on the platform.
8. Do not overload the balance over 20% of maximum load.
9. Protect the balance from dust, aggressive dusts and liquids. For cleaning purposes use
water and dry it.
To print the label the following conditions must be fulfilled:
1. The printer must have entered layout (label design, made on the computer and loaded to
the printer memory).
2. The balance must have AUTO or MANUAL data exchange mode set.
3. The parameters and transmission protocol must be suitable for the printer type.
The label layout is designed with the ZEBRA DESIGNER software (see the labels designing
description).
In the MANUAL mode the balance sends control instructions and data amount to the printer
according to number of variables fields in the label design (see section 7.4.2). Before the first
print carefully set all parameters with the scale keys:
1. label name (F/No LABEL),
2. parametres RS (F/RS, PROT, OUT),
3. enter the bar code (if it is in the label design):
bar code constant part with variable part (F/BAR, 6 or 7 digits)
or two parts of constant code (F/BAR C, 6 digits + 6 digits)
4. (if it is in the label design) date (F/DATE),
5. (if it is in the label design) expiration date offset (F/DATE E),
6. number of printed labels (F/N),
7. enter price (if it is in the label design) (F/PRICE),
8. select label printing method: with key (F/ ,PA-0) or automatically after result
stabilization (F/ , PA-1),
9. zero tare (F/TC),
Caution:
Setting error causes no printer reaction or incorrect printing.
If the data are not entered, and are present in the list of fields sent to the printer, the random
characters may be sent instead, causing the printer lock. Then it is required to turn the printer
off, wait 30 seconds, turn it back on and repeat settings.

SE-03 TECHNICAL AND USAGE DOCUMENTATION
__________________________________________________________________________________________
13
During normal balance operation it is not required to change its settings each time (even after
turning off).
Recalling label number from range 0-150 automatically recalls balance settings.
Together with label name (0-150) balance memory stores data belonging to the label:
- price,
- bar code
- expiration date
- print control parameters (PA, LIST and RS)
- list of sent fields.
For labels from range 150 –9999 the settings of previously recalled label are used. They may
be corrected, but will not be saved after the balance turning off.
Names from range 1000 –1999 are reserved for cumulative labels. Their parameters are
copies of their according labels with names below 1000.
7.1 Label name entering
Label name (number) is from range 0 to 9999, being the name of label previously loaded to
the printer memory. The balance by sending label number to the printer, recalls appropriate
label for formatting and printing.
Name (number) entering:
press 0/No. LABEL key (the display shows message NO_Ety)
using the numeric keyboard, enter the number –maximum 4 digits (do not enter leading
zeros)
press ENTER key to store entered number in the balance.
Label name is kept in the memory as long as new number is entered.
That name is not deleted by turning the balance off.
7.2 Cumulative labels printing
First level cumulative label is a special label type, which is placed on cumulative package,
containing any number of unitary packages of the same product.
The balance may also print second level cumulative labels for transport packages, containing
any number of cumulative packages of given product.
Cumulative labels must be previously designed and entered to the printer memory and must
have their names:
-level I –1000 higher than the basic label,
-level II –2000 higher than the basic label.
Cumulative labels printing is protected by code.
Cumulative label printing is performed by recalling label with name of 1000 or 2000 higher
than the current basic label name, and cumulative labels designs of I and II level use the same
fields of summation and labels counter, which automatically switch to I or II level.
Printing of cumulative label of I level:
press key F and 1/SUM
display shows “Cod-d”, enter the access code and press ENTER
PRINT message will be displayed and the cumulative label of I level will be printed.
Printing of cumulative label of II level:
press key F and ENTER
display shows “Cod-d”, enter the access code and press ENTER
PRINT message will be displayed and the cumulative label of II level will be printed.

SE-03 TECHNICAL AND USAGE DOCUMENTATION
__________________________________________________________________________________________
14
Caution:
Printing of cumulative label of I level causes zeroing of summation registers of the current
label:
- number of weighed products with current name counter
- sum of net weights for current label
- sum of gross weights for current label
Printing of cumulative label of II level causes zeroing of registries:
- number of printed labels of I level counter
- sum of net weights for printed labels of I level counter (all products)
- sum of gross weights for printed labels of I level counter (all products)
- moreover, to avoid operator error: summation registries of current label.
7.3 Entering number of printed labels
During weighing it is sometimes required to print more than one label for the same
measurement.
Entering number of printed labels:
press F key (the display shows message “o” )
press 2/N key (the display shows message NO_Ety)
using the numeric keyboard, enter the number –maximum 4 digits (do not enter leading
zeros)
press ENTER key to store entered number in the balance.
7.4 LIST function
This function reveals balance special options list.
Special options selection:
press F key (the display shows message “o” )
press 4/LIST key, the display will scroll the following messages:
Fun-u - user functions set (option)
FIELd - selection of sending mode for data record fields to the printer:
- AUTO –automatically after recalling by the printer
- MANUAL –balance sends data set, selected by user
Cod-d - entering code protecting printing of cumulative label
select the appropriate option with ENTER key.
Sign “o”, displayed on the right, means that given option is currently selected (active).

SE-03 TECHNICAL AND USAGE DOCUMENTATION
__________________________________________________________________________________________
15
7.4.1 User functions set (Fun-U)
Each balance contains set of functions, which may be available for the user or not –according
to the order. If no user functions are available, after recalling Fun-U the message “NO-F” will
be displayed.
7.4.1.1 Pieces counting (PCS)
That function allows for counting the identical details, e.g. nuts or nails, contained in the
weighed batch.
The measurement takes place in two phases:
- first phase –calculation of single detail weight upon the basis of sample of specified number
of pieces
- second phase –counting the details in the weighed batch.
It is recommended, that the single detail weight is higher than the balance reading
graduation, and the weight of sample, used in the first phase is higher than 100 of
reading graduations.
Number of pieces may be entered in the variable bar code.
This function allows for weighing on one balance or two connected balances: main balance
with higher measurement range for batch weighing, and more precise balance for sample
weighing.
Quick access to function is available with keys 6, 7, 8, 9. Access is also available with key
LIST, option Fun-U and PCS, however it is less convenient (PCS-0/1 corresponds to key 6, 7
–PCS-2, 8 –PCS-3, 9 –PCS-4).
Pieces counting with use of the same main balance (key 7)
Put sample of known pieces number (quantity) on the main balance.
Press key 7/PCS-sample, the message will be displayed: „PCS_S”.
Set pieces quantity in sample and press ENTER.
It displays number of details, placed on the main balance (pcs).
Exit and re-enter by pressing key 6.
Counting pieces with known unitary weight (key 8) –option on demand
Put sample of knows pieces number on the auxiliary balance.
Press key 8, the message will be displayed: „LOAD_J”.
Enter unitary mass value and press ENTER.
It displays number of details, placed on the main balance (pcs).
Exit and re-enter by pressing key 6.
Balance with weighing module SE-03 cooperates with standard weight (auxiliary balance)
and allows for automatic counting of high numbers of pieces with identical weight. Auxiliary
balance is used for measuring weight of few pieces sample, e.g. 5. Upon the basis of that
measurement and entered sample pieces number the unitary weight is calculated. As a result,
it is possible to put more pieces on the main balance and direct reading of number of pieces,
placed on the balance.

SE-03 TECHNICAL AND USAGE DOCUMENTATION
__________________________________________________________________________________________
16
Counting pieces with auxiliary balance (key 9) –option on demand
Put sample of knows pieces number on the auxiliary balance.
Press key 9/PCS/RS, the message will be displayed: „ PCS_S”.
Enter pieces number in sample and press ENTER.
Exit and re-enter by pressing key 6.
It displays number of details, placed on the main balance (pcs).
7.4.2 Option of selecting data transfer mode to the printer (Field)
In order to activate AUTO transfer mode (sending data recalled by printer):
press key F and then LIST.
during displaying FIELD press ENTER key.
during displaying AUTO press ENTER key.
To correct list of data record fields select POLA option:
during displaying MANUAL press ENTER key.
during displaying ALL press ENTER key (if all fields will be included) or 0 to open the
fields list.
during displaying of successive fields press ENTER, if that field will be sent, or 0, if not.
7.4.3 Function of entering constant bar code (bar-S)
Do not use (see section 7.8).
7.4.4 Function of entering variable bar code (bar-Z)
Do not use (see section 7.7).
7.4.5 Function of entering access code (Cod-d)
This function is used for entering access code (maximum 6 digits), preventing access to labels
parameters and cumulative label printing (registries deleting!).
Operations sequence:
press F and then LIST key.
during displaying "Cod-d"press ENTER key.
after displaying Set-c1 enter current access code or service functions access code and
confirm with ENTER key
after displaying Set-c2 –enter new access code.
7.4.6 Function of comparing with threshold values (thr) - option
Function can be used for dosing and selection.
This function allows to compare the weighing result with two, previously programmed
values: upper and lower threshold. The comparison result is signaled on the display and by
acoustic signal, as well as with use of control outputs.
If the weighing result is:
- lower than the lower threshold –balance signals MIN (zero value activates zero steering
output threshold for about 0,5s),
- between thresholds –the balance signals OK and activates output threshold I ,
- higher than the upper threshold –the balance signals MAX and activates output threshold II
for about 0,5s.

SE-03 TECHNICAL AND USAGE DOCUMENTATION
__________________________________________________________________________________________
17
Operations sequence during function activation by the operator:
1. Press Fkey and the LIST key.
2. During displaying “tHr”press ENTER.
3. The display shows in sequence:
F..-0 –function deactivation,
F..-1 –function activation,
F..-P –checking of previously entered thresholds values.
4. After displaying F..-1 press ENTER.
5. The following options are displayed:
SEt-0 –weighing with signaling of thresholds exceeding,
SEt-1 - entering of lower threshold value,
SEt-2 - entering of higher threshold value (as above).
6. Using ENTER key select option SEt-1 and write lower threshold value.
7. Using ENTER key select option SEt-2 and enter the upper threshold value (as above).
8. Using ENTER key select option SEt-0. It activates balance operation with simultaneous
signalling of thresholds exceeding.
9. To finish the function operation choose SEt-0.
Checking of entered threshold values:
1. Press key MENU.
2. After displaying F..-tHr press ENTER.
The display shows in sequence: F..-0, F..-1 and F..-2.
3. After displaying F..-2 press ENTER. The display shows value of the lower threshold, and
after pressing key –upper threshold. If the printer is connected, threshold values are
printed.
4. Press key to switch to weighing.
Caution:
After the balance turning on both thresholds are set to maximum values. During upper
threshold setting pay attention, so its value is not lower than the lower threshold.
After the balance turning off and on this function remains unchanged
7.5 Setting of RS232 port operation mode
This function is used for setting parameters of serial port. Baud rate 9600B, no parity control,
8 bits options are used as a standard.
Setting of serial port parameters:
press F key (the display shows message “o” )
press 5/RS key, the display will show successive positions of basic menu (confirming
option with ENTER key causes selection or switching to menu of selected option):
- out - setting mode exit
- SEt-nr - scale network number (needed when connecting few scales
to one computer, 0 if scale doesn’t work in network)
- Prot - selection of transmission parameters with the following
settings:
- baud rate 9600B
- length 8 bits
- no parity control
- 1 stop bit
- baud - baud rate selection (from 1200 to 9600 B)
- bit - bits number selection (7 or 8)

SE-03 TECHNICAL AND USAGE DOCUMENTATION
__________________________________________________________________________________________
18
- ParIty - parity control allowance
- 0 - not allowed
- 1 - allowed
- Odd - parity type selection (odd or even)
- 0 - Even
- 1 - Odd
select option “Prot” (factory settings of RS232 port are restored).
option exit with Out.
Other options allow for port parameters change in case of balance cooperation with devices
with different settings.
7.6. Constant tare deleting
This function is used for deleting of constant tare registry, entered with keyboard or by
package weighing.
Constant tare setting:
press F key (the display shows message “o” )
press 3/TC key (the display shows message “--“ and tare registry will be zeroed).
7.7. Entering digits of variable bar code
This function is used for entering constant digits of variable bar code (EAN13). The variable
digits are added automatically during label printing.
Available code formats:
bAr-1: CCCCCC VXXXXX (V)
bAr-2: CCCCCC CVXXXX (V)
bAr-3: CCCCCC CXXXXX (V)
bAr-4: CCCCCC SXXXXX (V)
where:
C –digit of bar code constant part
X –digit of bar code variable part (depending on balance indications)
V –this sign is replaced by control digit, calculated by the printer upon the previous
digits
(V) –control digit, added by the printer, calculated from the previous digits
S –control sum calculated by the printer from the digits XXXXX
X digits may be:
charge
amount
net weight.
Entering digits of variable bar code:
press F key (the display shows message “o” )
press 6/BAR V (the display shows message bAr-Z)
using the numeric keyboard, enter constant digits of variable bar code (6 or 7)
press ENTER key to store entered number in the balance.
available code formats will be displayed in sequence: bAr-1, bAr-2, bar-3 and bAr-4,
select the appropriate format with ENTER key
after that options for variable digits will be displayed in sequence: charge, amount and net
weight, select with ENTER key.

SE-03 TECHNICAL AND USAGE DOCUMENTATION
__________________________________________________________________________________________
19
Constant digits of bar code are stored in the balance memory and remain unchanged until re-
entering new number. Turning the balance off does not change the entered number as well.
During the number storing the variable bar code is selected as active.
Bar code type may be changed with LIST function.
7.8 Entering digits of constant bar code
This function is used for entering significant digits of constant bar code EAN13.
12 significant digits are entered. As the display contains only 6 digits, entering is divided into
two steps. In the first step 6 initial digits are entered, beginning from 590 (example: for
Poland), in the second one –6 other digits.
Entering digits of constant bar code:
press F key (the display shows message “o” )
press 7/BAR C (the display shows message bAr-S)
using the numeric keyboard, enter number –6 digits of bar code
press ENTER key to store entered number in the balance (the display will show “neXt”
message)
using the numeric keyboard, enter other 6 digits of bar code
press ENTER key to store entered number in the balance.
Digits of bar code are stored in the balance memory and remain unchanged until re-entering
new number. Turning the balance off does not change the entered number as well.
During the number storing the bar code type is automatically selected: constant bar code.
Bar code type may be changed with LIST function.
7.9 Entering current date and time
This function is used for changing date and time of balance system clock. Date is entered into
the label as production date.
Entering date and time:
press F key (the display shows message “o” )
press 8/DATE key (the display will show currently set day and month, e.g. “d 09.09”)
using the numeric keyboard enter new date (4 digits –day and month accordingly) and
press ENTER key (the display will show currently set year, e.g. “r 2000”)
using the numeric keyboard enter 4 digits of year and press ENTER key (the display will
show currently set time, e.g. “h 08.15”)
using the numeric keyboard enter new time –4 digits –hour and minutes accordingly, and
finally press ENTER key.
Date and time are stored in the balance system clock. Turning the balance off does not
deactivate clock.
7.10 Entering current date offset (expiration days)
This function is used for changing offset days of current date. This date is entered into the
expiration date.
Maximum 4 digits are entered, meaning number of days, which are added to the current date
and create expiration date. This date is calculated by the balance. Calculation procedure does
not take leap years into account. In the leap year, when expiration date includes February, it is
required to add 1 more day.

SE-03 TECHNICAL AND USAGE DOCUMENTATION
__________________________________________________________________________________________
20
Entering days of date offset:
press F key (the display shows message “o” )
press 9/DATE E (the display shows message “dAYS”)
using the numeric keyboard, enter number –max. 4 digits –offset days
press ENTER key to store entered number in the balance.
Offset number is stored in the balance memory. Turning the balance off does not deactivate
offset.
7.11 Label print
Printing may be performed in manual or automatic mode.
In the manual mode pressing key causes label printing (after the balance indications
stabilization).
In the automatic mode each putting of load on the pan and indications stabilization causes
label printing. Printing will not be performed, if the indication is zero or negative.
Printing takes place according to selected settings (printer type, transmission speed, bar code
type and label name).
With each printing:
- weighed products counter is increased
- net weight summation
- gross weight summation
If the automatic mode is selected, pressing key does not cause printing (display shows “---
-“).
Table of contents
Other Axis Measuring Instrument manuals

Axis
Axis 01618-001 User manual

Axis
Axis SE-01 Operator's manual

Axis
Axis S3008 Mk II User manual

Axis
Axis ME-01 Installation instructions manual

Axis
Axis DV426 User manual

Axis
Axis S10 Series User manual

Axis
Axis ADF Web HD67316-U-D1 User manual

Axis
Axis S3016 User manual

Axis
Axis Companion Recorder 8CH 2TB User manual

Axis
Axis Companion Recorder User manual
Popular Measuring Instrument manuals by other brands

Elditest
Elditest GE2500 Series manual

Watts
Watts HF scientific CLX-Ex2 Series Operation and maintenance manual

Tektronix
Tektronix RSA5100B series Help guide

CESVA
CESVA CB011 quick guide

YOKOGAWA
YOKOGAWA Power Series Plus instruction manual

PCB Piezotronics
PCB Piezotronics IMI SENSORS EX608A11 Installation and operating manual