manuals.online logo
Brands
  1. Home
  2. •
  3. Brands
  4. •
  5. B.E.G.
  6. •
  7. Security Sensor
  8. •
  9. B.E.G. LUXOMAT Indoor 180-R User manual

B.E.G. LUXOMAT Indoor 180-R User manual

1. Product information
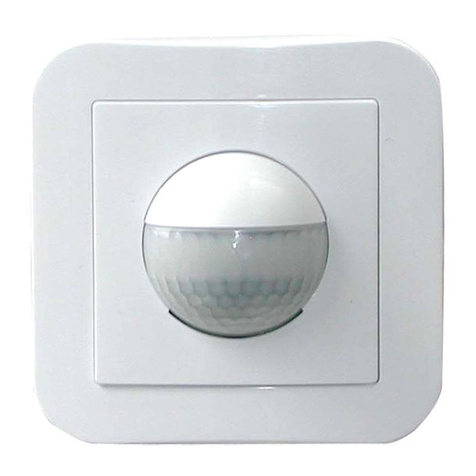
• Wall motion detector with acoustic sensor
• Indoor 180-R: Relay version in 3-conductor engineering for
inductive, capacitive and ohmic loads
• Indoor 180-T: Triac version with 2-wire technology, no neutral
• Indoor 180-T: Only for resistive loads. Not suitable for LED
loads
• Individually adjustable acoustic sensor
• Automatic restart of follow-up time on movement and sound
• Available with surround (interior cover dimensions 60 x
60mm) or without surround for use with faceplate (interior
cover dimensions 50 x 50mm) in 5 different colours
• Centre plates are available for installation in different
manufacturers’ switch systems: see accessories
• Push button manual switching available
2. Operation
The motion detector switches the light automatically, depending
on people being present (movement) and on ambient light.
The motion detector switches the light on if the ambient light level
is below a brightness threshold (which can be set on the device)
and movement is detected.
The motion detector switches off again once no more movement
is detected within a follow-up time, i.e. it remains switched on as
long as it detects movements (independent of the light level).
As well as a PIR sensor for motion detection, the device also
has an additional acoustic sensor. Motion detection is always
required first for switching on the lighting. When it is switched
on, a follow-up time starts, which restarts when either sound or
motion is detected. After the follow-up time has expired and
therefore the lighting has switched off, there is an additional
duration of 9
sec. in which the lighting may be switched on
again by sound.
3. Safety information
!
Work on the 110 - 240V mains supply may only be
carried out by qualified professionals or by instructed
persons under the direction and supervision of
qualified skilled electrical personnel in accordance
with electrotechnical regulations.
!
Disconnect supply before installing!
!
This device is not suitable for disconnection.
4.
Mounting
(A) Sensor insert
(B) Mounting screws
(C) Blinds for the exclusion of interference sources
(Animals, small children ...)
(D) Frame
(E) Cover
(F) Cover-cap
(G) Vandal-proong of potentiometer cover against unwanted
removal
!
The connected load must not exceed the following values:
180-T (Triac version):
Incandescant / halogen lamps min. 40 - max. 300
W
180-R (Relay version):
2300
W, cos ϕ = 1
1150
VA, cos ϕ = 0,5
Install the unit in a protected position,
for wall mounting at a height of 1.10
to 2.20 m.
1m Minimum distance to lighting being
controlled, to the front or to the side of
the unit: 1 m
X
X
X
X
Inappropriate installation or use will
interfere with trouble-free operation or
lead to damage to the unit.
X
Suitable for installation in a 60mm
flush-mount box. The cable inlet should
be vertical.
5. Hardware configuration
Position LEDs and Potentiometer
(A)
(B)
(C)
I
II
Potentiometer (A): Potentiometer for Brightness setting
Potentiometer (B): Potentiometer for Acoustic sensor
Potentiometer (C): Potentiometer for Follow-up time
LED I: red
LED II: red (Acoustic sensor)
6. Self test cycle/Startup behavior
The product enters an initial 60-second self-test cycle, when the
supply is first connected (LEDs flash).
7. Putting into operation/Settings
120 6050
40
30
15
10
A
16 10 5
2
1
30
15
TEST
2000
1200
600
200
40
5
Brightness threshold (Potentiometer A)
The brightness set value can be defined between
40 and 2000Lux. Using the rotary control, the
luminance set points can be set as desired.
Symbol : Night-time operation (10Lux)
Symbol : Day-time operation
(light evaluation inactive)
120 6050
40
30
15
10
A
16 10 5
2
1
30
15
TEST
2000
1200
600
200
40
5
Follow-up time for light control (Potentiometer B)
The time can be set infinitely variably between
15 sec. and 16 min.
Symbol TEST: test mode, only motion-dependent.
Every movement switches the light on for 1sec.,
then off again for 2sec.
Symbol : approx. 1sec. on, 9 sec. off
Acoustic sensor
The sensitivity of the acoustic sensor is infinitely
adjustable with the rotary control (Left position =
max. sensitivity, Right position = acoustic sensor
off).
8. Wiring diagrams
Standard mode with 1-channel motion detectors Indoor 180-R
and optional arc extinction kit
RC
L
N
LLN
C1
E1
S1
R
T1
Optional
S1 = switch for permanent light
T1 = NO button, manual switching additionally possible
RC = RC-suppression kit if required
Standard mode with 2-wire technology, triac




L
N
L΄
΄΄΄L
C1
E1
S1
Optional
S1 = switch for permanent light
Operating and mounting instruction B.E.G. motion detector Indoor 180-R and Indoor 180-T
LUXOMAT®Indoor 180-R/-T
EN
9. Range
12 m
3 m
10 m
180°
1,10 -2,20 m
Walking across
Walking towards
1
2
1
2
10. Exclude sources of interference
To hide the detection area below the detector ( f.e.animals/small
children), the enclosed Blind can be mounted or attached on it.
11. Technical data
11a. Technical data Indoor 180-R
Power supply: 110 – 240VAC, 50/60 Hz
Power consumption: approx. 0.5W
Area of coverage: semicircular 180°
Range of coverage Ø H 1.10 m / T = 18°C:
tangential 10m / radial 3m
Max. mounting height: 2.2 m
Degree of protection/class: IP20, with accessory IP54 / II
Ambient temperature: -25°C – +50°C
Housing: UV- and shock resistant
polycarbonate
Dimensions: H 87 x W 87 mm (with cover frame)
• Channel 1 for light control
Switching power / 2300 W, cos φ= 1
contact 1150 VA, cos φ= 0,5
NOC/with pretravel tungsten
contact
Follow-up time: 15 sec. to 16 min. or pulse
Brightness threshold: 10 - 2000Lux
11b. Technical data Indoor 180-T
Power supply: 110 – 240VAC, 50/60 Hz
Power consumption: approx. 1.3 W
Area of coverage: semicircular 180°
Range of coverage Ø H 1.10 m / T = 18°C:
tangential 10m / radial 3m
Max. mounting height: 2.2 m
Degree of protection/ class: IP20, with accessory IP54 / II
Ambient temperature: -25°C – +50°C
Housing: UV- and shock resistant
polycarbonate
Dimensions: H 87 x W 87 mm (with cover frame)
• Channel 1 for light control
Switching power / only incandescant / halogen lamps
contact min. 40 - max. 300 W, cos φ= 1
not suitable for LED loads!
Follow-up time: 15 sec. to 16 min. or pulse
Brightness threshold: 10 - 2000Lux
Declaration of Conformity:
This product respects the directives concerning
1. electromagnetic compatibility (2014/30/EU)
2. low voltage (2014/35/EU)
3. restriction of the use of certain hazardous substances in
electrical and electronic equipment (2011/65/EU)
12. Article / Part-No. / Accessory
Type Part-No.
Indoor 180-R, covering included 92623
Indoor 180-T, covering included 92622
Indoor 180-R, covering not included 92665
Indoor 180-T, covering not included 92664
Accessory:
Covering IP20 pure white, mat 92630
RAL9010
Covering IP20 traffic white, mat 92631
RAL9016
Covering IP20 oyster white, mat 92632
RAL1013
Covering IP20 silver, mat 92633
RAL9006
Covering IP20 anthracite, mat 92634
RAL7021
Covering IP54 pure white, mat 92139
RAL9010
SM-Socket for Indoor pure white, brilliant 92141
RAL9010
Central plate pure white, brilliant 39222
55x55mm RAL9010
Central plate traffic white, brilliant 39223
55x55mm RAL9016
Central plate pure white, brilliant 35126
56x56mm (angular) RAL9010
Central plate pure white, brilliant 35127
56x56mm (rounded) RAL9010
Central plate traffic white, mat 38947
45x45mm RAL9016
Central plate cream white, mat 39076
45x45mm RAL9001
Blinds vertical/ transparent 92294
horizontal detection
13. LED-functional indicators
LED function indicators during operation
Process LED function indicators
Mains power restored Self-test: LED I flashes red
regularly for approx. 60 seconds
Motion detection LED I flashes red on every
movement detected
Sound detection LED II flashes red on every sound
detected
MAN 5613 – 160620-7

This manual suits for next models

5

Other B.E.G. Security Sensor manuals

B.E.G. Luxomat PD2-S User manual

B.E.G.

B.E.G. Luxomat PD2-S User manual

B.E.G. LUXOMAT LC-Mini 120 Owner's manual

B.E.G.

B.E.G. LUXOMAT LC-Mini 120 Owner's manual

B.E.G. LUXOMAT PD4-M-DALI/DSI-1C/PD4-S User guide

B.E.G.

B.E.G. LUXOMAT PD4-M-DALI/DSI-1C/PD4-S User guide

B.E.G. LUXOMAT PD1-M-DIM User guide

B.E.G.

B.E.G. LUXOMAT PD1-M-DIM User guide

B.E.G. LUXOMAT RC-plus next Series User guide

B.E.G.

B.E.G. LUXOMAT RC-plus next Series User guide

B.E.G. LUXOMAT PD4-S-DAA4G User guide

B.E.G.

B.E.G. LUXOMAT PD4-S-DAA4G User guide

B.E.G. LUXOMAT PD4-S-DAA4G User guide

B.E.G.

B.E.G. LUXOMAT PD4-S-DAA4G User guide

B.E.G. Luxomat PD2N-M-1C-LED User manual

B.E.G.

B.E.G. Luxomat PD2N-M-1C-LED User manual

B.E.G. LUXOMAT PD2-M-DALI/DSI User guide

B.E.G.

B.E.G. LUXOMAT PD2-M-DALI/DSI User guide

B.E.G. LUXOMAT PD2-M-DALI/DSI-1C/PD2-S User guide

B.E.G.

B.E.G. LUXOMAT PD2-M-DALI/DSI-1C/PD2-S User guide

B.E.G. LUXOMAT PD2-M-1C User guide

B.E.G.

B.E.G. LUXOMAT PD2-M-1C User guide

B.E.G. LUXOMAT PD4-S-GH User guide

B.E.G.

B.E.G. LUXOMAT PD4-S-GH User guide

B.E.G. Luxomat PD2-S User manual

B.E.G.

B.E.G. Luxomat PD2-S User manual

B.E.G. LUXOMAT PD2N-KNX-ST-UP User manual

B.E.G.

B.E.G. LUXOMAT PD2N-KNX-ST-UP User manual

B.E.G. LUXOMAT net PD2N-KNX-DX User manual

B.E.G.

B.E.G. LUXOMAT net PD2N-KNX-DX User manual

B.E.G. LUXOMAT PD2-M-2C User manual

B.E.G.

B.E.G. LUXOMAT PD2-M-2C User manual

B.E.G. LUXOMAT net PD4N-LTMS-RR User guide

B.E.G.

B.E.G. LUXOMAT net PD4N-LTMS-RR User guide

B.E.G. 93385 User manual

B.E.G.

B.E.G. 93385 User manual

B.E.G. LUXOMAT PD4-M-DIM-Corridor User guide

B.E.G.

B.E.G. LUXOMAT PD4-M-DIM-Corridor User guide

B.E.G. LUXOMAT PD5-M-1C-Clip User guide

B.E.G.

B.E.G. LUXOMAT PD5-M-1C-Clip User guide

B.E.G. LUXOMAT PD4-M-1C-C-SM User guide

B.E.G.

B.E.G. LUXOMAT PD4-M-1C-C-SM User guide

B.E.G. LUXOMAT PD2-M-2C-24V User guide

B.E.G.

B.E.G. LUXOMAT PD2-M-2C-24V User guide

B.E.G. LUXOMAT PD4-M-TRIO-2DALI DSI-1C Wiring diagram

B.E.G.

B.E.G. LUXOMAT PD4-M-TRIO-2DALI DSI-1C Wiring diagram

B.E.G. LUXOMAT PD4-BMS User manual

B.E.G.

B.E.G. LUXOMAT PD4-BMS User manual

Popular Security Sensor manuals by other brands

Ecolink WST-302 manual

Ecolink

Ecolink WST-302 manual

iRay Technology Luna1012X user manual

iRay Technology

iRay Technology Luna1012X user manual

Carrier Graviner Mk7 INSPECTION & CLEANING INSTRUCTIONS

Carrier

Carrier Graviner Mk7 INSPECTION & CLEANING INSTRUCTIONS

DMP Electronics 1161 installation guide

DMP Electronics

DMP Electronics 1161 installation guide

sewerin Stethophon 04 operating instructions

sewerin

sewerin Stethophon 04 operating instructions

LEGRAND 0 942 80 manual

LEGRAND

LEGRAND 0 942 80 manual

ring Motion Detector 2nd Generation Z-Wave Technical manual

ring

ring Motion Detector 2nd Generation Z-Wave Technical manual

olympia electronics BS-470 quick start guide

olympia electronics

olympia electronics BS-470 quick start guide

Ravaglioli S374 A1 manual

Ravaglioli

Ravaglioli S374 A1 manual

Pyronix KX15DT manual

Pyronix

Pyronix KX15DT manual

Inovonics EN1262HT Installation and operation manual

Inovonics

Inovonics EN1262HT Installation and operation manual

Tyco SD-304C PG2 installation instructions

Tyco

Tyco SD-304C PG2 installation instructions

Greenlee GT-11 instruction manual

Greenlee

Greenlee GT-11 instruction manual

Bosch D603 installation instructions

Bosch

Bosch D603 installation instructions

Altrex RS TOWER 34 Assembly and use manual

Altrex

Altrex RS TOWER 34 Assembly and use manual

Resolution Products RE353 instructions

Resolution Products

Resolution Products RE353 instructions

PNI SafeHome PT330 user manual

PNI

PNI SafeHome PT330 user manual

Visonic DUET-AM C/O Installer's guide

Visonic

Visonic DUET-AM C/O Installer's guide

manuals.online logo
manuals.online logoBrands
  • About & Mission
  • Contact us
  • Privacy Policy
  • Terms and Conditions

Copyright 2025 Manuals.Online. All Rights Reserved.