manuals.online logo
Brands
  1. Home
  2. •
  3. Brands
  4. •
  5. Balanced Body
  6. •
  7. Fitness Equipment
  8. •
  9. Balanced Body F.I.T. Quick start guide

Balanced Body F.I.T. Quick start guide

Installation and use of the Balanced Body®F.I.T. Kit
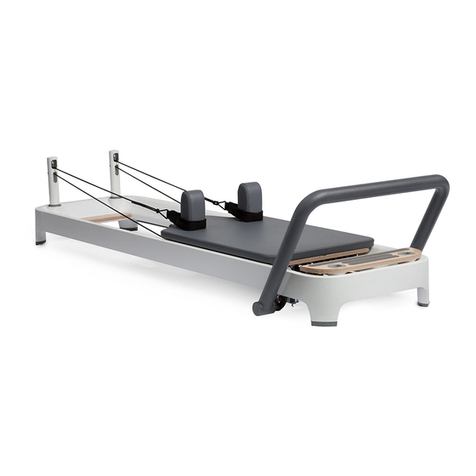
NOTE: The images will show an Allegro Refromer but the same
install applies to studio Reformers with towers.
Parts List
Part Number Qty Description
707-214 2Black ropes
220 - 011 2 Fit Kit Pulley
607-276 2 Extension straps
1. Remove the existing ropes from the Reformer
2. For an Allegro Reformer installation, move your pulleys to
their lowest position.
For a Studio Reformer installation, lower your metal risers to
their lowest position. Make sure the detent pin is retaining the
riser in position.
3. Install one F.I.T. Kit pulley.
Locate the pulley assembly
over the desired eyebolt. Push
the pulley assembly in and
hook it onto the eyebolt.
Then release and verify that
the hook is fully engaged
onto the eyebolt. The F.I.T.
Kit pulley can attach to any
eyebolt (other than the top
center one) to create different
angles of pull for different
exercises, and can be moved with the ropes in place.
4. Feed the new longer rope through the F.I.T. Kit pulley, Tower
pulley and finally into the carriage cleats as shown in Figure B
and C.
5. Repeat on other
side and make
sure ropes are even.
Proper installation
should look like
Figure D.
Fig. A: Pulley clip must engage
eyebolt.
Fig. C: Proper orientation of rope
going through cleat.
Fig. B
Fig. D
Contact Us
1-800-PILATES | +1-916-388-2838
pilates.com | info@pilates.com
400-174 | 06.29.18
2
Using the F.I.T. Kit
Once the F.I.T. Kit is installed, you can attach the F.I.T. Kit pulleys to any of the eyebolts on the tower by pressing the spring over the
eyebolt and securing the hook on the eyebolt.
ORGANIZING THE LONGER ROPES
To accommodate all positions of the F.I.T. Kit pulleys, the ropes
for the F.I.T. Kit are longer than standard ropes. Manage the
longer ropes by placing them around the shoulder rests so that
they rest on either side of the headrest. The ends should rest on
the floor inside the well of the Reformer.
When using the higher pulley positions, you will need to
adjust your rope length. Here are a few general guidelines
for appropriate rope length. The exercise section includes
suggestions for pulley height and rope length for specific
exercises;
»Supine, hands in loops: In this position, hold loops with both
hands and adjust ropes so there is a slight amount of tension
on the ropes when the elbows are straight and the arms are at
90 degrees of glenohumeral flexion.
»Supine, feet in loops: With loops around the arches of the
feet, adjust ropes so there is a slight amount of tension on the
ropes when the legs are straight and the hips are flexed to 90
degrees.
»Sitting or kneeling on the carriage, facing the tower: Hold
hands in the loops with the shoulders in flexion and adjust the
rope length so there is a small amount of tension on the ropes
to begin the exercise.
»Sitting or kneeling on the carriage, facing the footbar: Hold
hands in the loops with the arms at your sides and adjust the
rope length so there is a small amount of tension on the ropes
to begin the exercise.
»Standing on the floor facing the tower: Stand approximately
4 to 5 feet from the tower with loops in your hands and
shoulders in 45 degrees of flexion. Adjust the ropes so there is
a small amount of tension to start the exercise.
»Standing on the floor facing away from the tower: Stand
approximately 3 feet from the tower with loops in your hands
and hands at your sides. Adjust the ropes so there is a small
amount of tension to start the exercise.
USING THE EXTENSION STRAPS
The included circular extension straps are used to secure the
loops to the shoulder rests or silver peg when the tower pulleys
are in a high position as shown in Figure A.
To attach extension strap simply take the strap and put it
through the end of your loop as shown in Figure B. Take one
rounded end of the strap and put it over the other. Then pull the
other strap to tighten around loop as shown in Figure C. When
in use you can take the strap and put it around the foot with
the primary loop as shown in Figure D. Do not use the extension
strap by itself as a hand or foot support. Or you can move it out
of the way by sliding it up the D-ring.
Fig. B
Fig. A
Fig. C Fig. D: Loop and extension strap
around foot.
DO NOT USE EXTENSION STRAP
BY ITSELF AS A HAND OR FOOT
SUPPORT.
3
Supine Arm Work
Springs: R to RB
Headrest: as needed
Straps: Adjust the ropes so the loops are under a slight amount
of tension with the arms flexed to 90 degrees.
Pulleys: High position to increase challenge on posterior shoulder.
Middle or low position to target scapular depression.
STARTING POSITION
Lie supine on the Reformer with the head on the head rest and
the knees at 90 degrees. Hold the straps in the hands with the
elbows bent and the palms facing toward the legs.
MOVEMENT SEQUENCE
Exhale – Engage the abdominals as the arms move down
towards the hips.
Inhale – Return the arms to the starting position.
ARM POSITIONS
Triceps Pull: With the elbows bent at 90 degrees and the upper
arm resting on or just off the carriage, pull the straps down
toward the carriage and return.
Posterior Shoulder Pull (Supine Chest Expansion): With the
elbows straight and the arms reaching toward the ceiling directly
in line with the shoulders, pull the straps down toward the
carriage and return.
Latissimus Dorsi Pull: With the elbows straight and the arms
abducted to slightly less than 90 degrees, pull the straps down
towards the hips and return.
Arm Circles: With the elbows straight and the arms reaching
toward the feet at a 45 degree angle, circle the arms several
times in each direction. Keep the hands below shoulder height.
CUEING AND IMAGERY
»Engage the abdominals
before the arms move.
»Keep the low back neutral
throughout the exercise.
»Keep the wrists neutral.
»Keep the chest open.
»Keep the shoulders away
from the shoulder rests.
PURPOSE
»Strengthen the arms including triceps, latissimus dorsi, lower
trapezius, deltoid, pectoralis major.
»Strengthen the abdominals.
»Maintain neutral spine.
»Learn to use arms and abdominals together.
PRECAUTIONS
For low back, hip and sacroiliac joint problems – Keep the knees
into the chest and the low back on the carriage or in a supported
neutral position. Rest between exercises.
For wrist and elbow injuries – Keep the wrists straight, be careful
with triceps pulls.
For neck and shoulder injuries – Keep the arms below the
shoulders, decrease the range of motion.
2. Straighten the elbows and pull the ropes down
toward the carriage focusing on the back of the arms.
1. Triceps Pull - Starting position.
2. Pull the ropes down toward the carriage with the
elbows straight.
1. Latissimus Dorsi Pull - Starting position.
2. Pull the ropes down toward the hips with the elbows
straight.
1. Posterior Shoulder Press - Starting position.
3. Circle the arms out to the sides to return to the
starting position.
2. Pull the ropes down to the carriage with the elbows
straight.
1. Arm Circles - Starting position.
Feet in Straps
Springs: RB to 2R
Footbar: Low or High (to get into the straps)
Straps: Adjust the ropes so the loops are under a slight amount
of tension with the legs straight and the hips flexed to 90
degrees.
Pulleys: High position to increase challenge on posterior hip.
Middle or low position to target pelvic stability.
STARTING POSITION
Lie supine on the carriage with the head on the headrest and the
straps on the arches of the feet. To place the straps on the feet,
hold the straps in the hands, place one foot on the footbar and
place the other foot in one footstrap. Press into the footstrap and
hold the rope to stabilize the leg as you place the other foot in
the second footstrap. Flex the hips and raise the legs as close to
90 degrees as possible while keeping the pelvis neutral.
MOVEMENT SEQUENCE
Exhale – Engage the abdominals to stabilize the back and
start the exercise. Maintain the position of the back and pelvis
throughout the movement.
Inhale – Return the legs to the starting position.
POSITIONS
Leg lowers: With the pelvis stable and the inner thighs together,
lower and raise the legs.
Scissors: With the pelvis stable and the inner thighs together,
open the legs out to the sides and return.
Variations – Keep the legs at 90 degrees and don’t move the
carriage or move the legs from the split position towards the
footbar allowing the carriage to move.
Circles: With the pelvis stable and the inner thighs together,
move the legs down, open the legs out to the sides and circle
them around to the starting position. Do 6 to 10 in each
direction.
Knee circles - Place the straps around the knees to warm up the
hips and decrease the challenge.
CUEING AND IMAGERY
»Engage abdominals before the legs lower and keep them
engaged.
»Lower legs only as far as back can stay stable throughout
exercise.
»Move the legs symmetrically.
»Don’t hyperextend the knees.
PURPOSE
»Strengthen abdominals.
»Strengthen the hamstrings, adductors, deep hip external
rotators, gluteus maximus, hip abductors.
»Increase flexibility of the hamstrings, adductors and hip
flexors.
»Increase pelvic stability.
»Develop balance in the hip musculature.
PRECAUTIONS
For low back and sacroiliac joint problems – Make sure the low
back is not changing position as the legs move. Support the low
back in a neutral position with a towel. Limit the range of motion
as the legs lower. Avoid if symptoms increase.
For hip flexor injuries and hip arthritis – Work only in a range of
motion that does not increase symptoms. Work with the knees
rather than the feet in the straps to decrease the load on the hips
or avoid if symptoms increase.
For limited hamstring flexibility – In order to avoid stress on the
low back, hamstring flexibility needs to be great enough to allow
the back to stay stable as the legs move to approximately 65
degrees of hip flexion. If the student doesn’t have this
range it is preferable to do these exercises on the Cadillac or
Trapeze Table
6
1. Feet in the Straps - Starting position.
2. Leg Lowers - Pull the ropes down
toward the carriage.
2. Scissors - Open the legs out to the side keeping
the carriage still.
3. Circle the legs down toward the footbar.
2. Leg Circles - Open the legs out to the side.
4. Draw the legs together to return to the starting
position.
5. Return to the starting position.
Coordination
Springs: R to RB
Head Rest: As needed
Straps: Adjust the straps so there is a slight amount of tension
on them when the arms are flexed at 90 degrees to the torso
with the elbows straight.
Pulleys: Place the pulleys in the high position to target the back
of the arm.
STARTING POSITION
Lie supine on the carriage with the head between the shoulder
rests. Place the knees at 90 degrees and the hands in the straps
with the upper arms parallel to the carriage and the elbows bent.
The low back should stay stable throughout the exercise.
MOVEMENT SEQUENCE
Exhale – Engage the abdominals, lift the head and lower the
arms until they are just slightly above the carriage and parallel to
the torso as in the Hundred. Choose your leg position based on
your ability to maintain the stability of the back. For beginners,
straighten the legs toward the ceiling, as you get stronger, lower
the legs toward the carriage.
Inhale – Open and close the legs no wider than the hips while
keeping the torso lifted and the head up.
Exhale – Bend the knees in to the chest.
Inhale – Lower the head and return the arms to the
starting position.
CUEING AND IMAGERY
»Engage the abdominals before beginning the exercise.
»Breathe into the sides and back of the ribs while maintaining a
scooped abdomen.
»Lower the legs only as far as the back can stay stable.
»Keep the chest open and the shoulders away from the ears.
PURPOSE
»Strengthen the abdominals, hip flexors, latissimus dorsi and
adductors.
»Increase thoracic flexibility.
»Teach pelvic stability.
»Increase coordination.
»Learn to connect the arms to the core.
PRECAUTIONS
»For low back, hip and sacroiliac joint problems - Keep the
knees bent at 90 degrees.
»For neck and shoulder injuries – Support the upper body.
»Avoid with osteoporosis, active lumbar disc injuries and
sciatica.
8
1. Coordination - Starting position. 4. Bring the legs back together.
2. Press the straps out, lift the head and upper back
off the carriage and straighten the legs out. 5. Draw the knees back into the chair position.
3. Open the legs out as wide as the carriage. 6. Lower the head and upper body to return to the
starting position.
Spine Massage Variation - Magician
Springs: BR to 2R Head Rest: Down
Straps: Adjust the length of the straps so there is a small amount
of tension on the ropes when they are on the arches of the feet
and the hips are flexed to 90 degrees with the knees straight.
Pulleys: Place the pulleys in the high position to increase the
support for the torso as it rolls off the carriage into the shoulder
stand position.
STARTING POSITION
Lie supine on the carriage with the head between the shoulder
rests and the straps on the arches of the feet. Lower the legs to
approximately 45 degrees of hip flexion. Turn the legs out and
bend the knees in to the chest without letting the hips come off
the carriage to begin.
MOVEMENT SEQUENCE
Exhale – Press the legs out away from the body to about 45
degrees of hip flexion.
Inhale – Flex the hips as far as the hamstring flexibility will allow
without lifting the sacrum off the carriage.
Exhale - Press the upper arms into the carriage, engage the
abdominals and roll the spine off the mat going no higher than
the top of the scapulae. The body will be in one line from the
shoulders to the feet.
Inhale – Round the spine and roll the torso down one vertebra at
a time until the pelvis is back on the mat and the hips are flexed
to 90 degrees.
Exhale – Press the legs back out to approximately 45 degrees of
hip flexion.
Inhale – Bend the knees to return to the starting position.
CUEING AND IMAGERY
»Do not roll up past the top of the scapulae.
»Press the upper arms into the carriage to stabilize the torso.
»As you roll down, don’t press the legs out until the back is
anchored on the carriage.
»Roll symmetrically down the back.
PURPOSE
»Strengthen abdominals.
»Strengthen the hamstrings and gluteus maximus.
»Increase flexibility of the spine and hamstrings.
»Improve spinal alignment.
»Develop balance in the spinal musculature.
PRECAUTIONS
»Avoid with osteoporosis, low back injuries, neck injuries, high
blood pressure, eye problems and overweight clients.
To modify, do the exercise without the roll up.
1. Magician - Starting position.
2. Straighten the legs out to about 45 degrees.
10
4. Press the hips up toward the ceiling. Don’t roll
higher than the shoulder blades.
3. Flex the hips until they are at about 90 degrees.
8. Bend the knees to return to the starting position.
6. Until the hips are back on the mat.
7. Lower the legs to 45 degrees.
5. Flex the spine and roll down one vertebra at a time.
11
Long Box Breast Stroke
Springs: R to 2R Box: Long box
Straps: Adjust the length of the straps so they are level with the
front of the shoulder rests when the carriage is at rest.
Pulleys: Place the pulleys on the #4 eyebolt in order to increase
the support for the back as it goes into extension.
STARTING POSITION
To get into the position, hold one strap in each hand, place the
closest hand and leg on the box, lower the torso and lift the other
leg onto the box. Lie prone on the box with the chest over the
front edge and the knees off the back end. Bend the knees and
bend the elbows to bring the back of the hands to the forehead.
MOVEMENT SEQUENCE
Exhale – Press the straps out away from the forehead as the legs
straighten.
Inhale – Circle the arms forward and up while lifting the torso off
the box into back extension.
Exhale – Continue to circle the straps around until they are back
in front of the head as the torso lowers onto the box.
Inhale – Bend the elbows and the knees to return to the starting
position.
CUEING AND IMAGERY
»Engage the abdominals to begin.
»Slide the shoulder blades down to extend the back.
»Keep the shoulder blades down as the arms reach overhead.
»Engage the gluteals and hamstrings to decompress the lower
back.
»Keep the legs together.
PURPOSE
»Strengthen spinal extension.
»Strengthen gluteus maximus and hamstrings.
»Strengthen deltoid, rotator cuff and shoulder girdle.
»Increase back extension flexibility.
»Increase shoulder flexibility.
PRECAUTIONS
For clients with limited range of motion in back extension –
Instructor holds clients feet as client lifts up.
For men – If this is uncomfortable, try a pad under the pelvis or
under each of the hip bones.
Avoid with active shoulder injuries and back problems that do
not tolerate flexion.
1. Breast Stroke - Starting position.
2. Press the straps out as you straighten the legs.
12
5. Continue to circle the arms as you lower the torso
back onto the box.
4. Continue to circle the arms up and around to the
back keeping the chest as high as possible.
7. Return to the starting position.
6. Reach the arms forward.
3. Extend the spine as you circle the arms up toward
the ceiling.
13
Kneeling Side Arms
Springs: Y to RB
Straps: Adjust the straps so there is a slight amount of tension
with the arm in the starting position. The longer the strap, the
lighter the exercise will feel.
Pulleys: Place the pulleys in the #2 eyebolt to direct the line of
pull into the shoulder.
PULL ACROSS
STARTING POSITION
Kneel on the Reformer facing sideways with the knees slightly
away from the shoulder rests. Hold the front strap with the arm
closest to it.
For an easier version, place the knee against the shoulder rest
with the legs hip width apart. For more challenge, bring the knees
away from the shoulder rest with the legs together.
MOVEMENT SEQUENCE
Exhale – Pull the strap across the body keeping the arm rounded
and the hand level with the bottom of the sternum.
Inhale – Return the arm to the starting position. Do not rotate
the torso or twist the shoulders.
CHALLENGE
Rotations: Rotate the torso from the waist or from the knees as
you pull the strap across.
DRAW A SWORD
STARTING POSITION
Take hold of the strap with the hand that is farthest from it.
Begin the exercise with the hand holding the strap in front of
the opposite hip bone. Place the other hand on the hip with the
elbow out to the side.
MOVEMENT SEQUENCE
Inhale – Pull the strap across the body and extend the arm out to
the side. Imagine you are drawing a sword out of a scabbard.
Exhale – Return to the starting position by bending the
elbow and reaching the hand holding the strap back to
the opposite hip.
CUEING AND IMAGERY
»Stabilize the position of the torso before moving the arms.
»Keep the chest open, the shoulders away from the ears and
the eyes looking straight ahead.
»Keep the wrists straight.
PURPOSE
»Strengthen the arm and shoulder muscles including the
brachialis, biceps, triceps, pectoralis major, latissimus dorsi,
rotator cuff and deltoid.
»Strengthen the scapular stabilizers including the serratus
anterior, trapezius and rhomboids.
»Increase torso stabilization.
»Improve standing posture.
PRECAUTIONS
For shoulder, arm and wrist injuries – Keep the weight light, keep
the wrists straight and avoid if symptoms increase.
For knee injuries – Pad the knees, sit on the carriage or avoid.
14
1. Pull Across - Starting position.
2. Pull the strap across the midline keeping the elbow
slightly bent.
1. Pull Across with Rotation - Starting position.
1. Draw a Sword - Starting position.
2. Rotate the torso as you pull the arm across the
body.
2. Pull the strap across the body leading with the
elbow.
3. Straighten the elbow.
15
Rowing Front
Springs: B to RB
Straps: Adjust the straps so there is a slight amount of tension
with the arm in the starting position.
Pulleys: Place the pulleys in the #2 or 3 eyebolt to direct the line
of pull into the shoulder.
STARTING POSITION
Sit on the carriage facing the footbar with the back of the hips
against the shoulder rests and the legs extended. Sit up on
the sit bones without rounding the back. Bend the elbows and
abduct the arm so it is slightly lower than the shoulder.
MOVEMENT SEQUENCE
Inhale – Engage the abdominals, reach the arms forward along
the carriage and curve over the legs as if leaning over a ball.
Exhale – Scoop the abdominals in and stack one vertebra on
top of the next to return to sitting tall with the arms reaching
forward.
Inhale – Circle the arms around and out to the sides as the torso
returns to the upright position.
Exhale – Bend the elbows to return to the starting position.
MODIFICATION
Tight Hamstrings: Sit cross legged on the carriage or sit on
a pad or towel.
CUEING AND IMAGERY
»Engage the abdominals before moving the arms.
»Stay upright on your sit bones.
»Keep the abdominals in as you bend forward as if leaning over
a ball.
»Keep the chest open, the shoulders away from the ears and
the eyes looking straight ahead.
»Keep the ribs in place as the arms circle.
»Keep the wrists straight.
PURPOSE
»Strengthen the shoulder muscles including the pectoralis
major, latissimus dorsi, rotator cuff and deltoid.
»Strengthen the scapular stabilizers including the serratus
anterior, trapezius and rhomboids.
»Strengthen abdominals and hip flexors.
»Stretch hamstrings, back and latissimus dorsi.
»Increase torso stabilization.
»Improve coordination.
PRECAUTIONS
For shoulder, arm and wrist injuries – Keep the weight light. Keep
the arms below shoulder height. Avoid if symptoms increase.
For low back injuries – Be cautious with the lumbar flexion and
adjust the sitting position to minimize pull on the lumbar spine.
For tight hamstrings – Sit on a pad, bend the knees or sit cross
legged to keep the pelvis over the ischial tuberosities rather than
behind them.
16
1. Rowing Front - Starting position.
2. Roll the torso forward over the legs and reach the
hands to the carriage.
3. Press the arms forward as you continue to flex the
spine.
6. Return to the starting position.
5. Circle the arms out to the sides.
4. Reach the arms forward and straighten the torso
into one long line from hips to hands.
17
Rowing Back
Springs: B to RB
Straps: Adjust the straps so there is a slight amount of tension
with the arm in the starting position.
Pulleys: Place the pulleys in the #6 eyebolt to direct the line of
pull into the torso.
STARTING POSITION
Sit on the carriage facing the straps with the hips at least one
hand width from the front edge of the carriage and the legs
extended through the shoulder rests. Sit up on the sit bones
without rounding the back. Hold the straps in the hands.
MOVEMENT SEQUENCE
Inhale – Pull the straps in toward the sternum with the elbows
wide.
Exhale – Engage the abdominals, round the back and roll down
keeping the hands about 6 inches from the sternum.
Inhale – Open the arms out to the side with the palms facing
back and press the arms back.
Exhale – Round the torso forward as the arms continue to press
back until the hands are behind the body and the torso is over
the legs.
Inhale – Keeping the torso forward, circle the arms up and
around to the front.
Exhale – Pull the abdominals in and roll up until the torso is
straight over the hips in the starting position with the elbows
bent and the hands level with the chest.
MODIFICATIONS
Tight Hamstrings: Bend the legs slightly to stay up on the sit
bones.
CUEING AND IMAGERY
»Engage the abdominals and tuck the tailbone under to roll
down.
»Maintain an open curve in the spine throughout the exercise.
»Move smoothly through the entire exercise.
»You control the straps, they don’t control you!
PURPOSE
»Strengthen the shoulder muscles including the pectoralis
major, latissimus dorsi, rotator cuff and posterior deltoid.
»Strengthen the scapular stabilizers including the serratus
anterior, trapezius and rhomboids.
»Strengthen abdominals and hip flexors.
»Stretch hamstrings and back.
»Increase dynamic torso stabilization.
»Improve coordination.
PRECAUTIONS
For shoulder, arm and wrist injuries – Keep the weight light.
Don’t press the arms back.
For tight hamstrings and Low back injuries – Bend the knees
slightly if that makes it possible to sit up on the sit bones.
Because of the roll back it doesn’t work well to pad the hips
or sit cross legged.
Avoid with osteoporosis.
18
1. Rowing Back - Starting position.
2. Pull the straps into the chest with the elbows wide
and the knuckles together.
5. Press the straps back as you round the torso
forward over the legs.
4. Turn to palms back as you open the arms out to
the side.
3. Round the back and roll back keeping the arms in
the same position. as you roll.
8. Return to the starting position.
7. Bring the arms all the way in front of the body.
6. Circle the arms up and around to the front as if
doing the butterfly stroke in swimming.
19
Kneeling Arm Work Facing Straps
Springs: B to 2R
Straps: Adjust the ropes so the loops are under a slight amount
of tension with the arms in the starting position.
Pulleys: High position to increase challenge on posterior hip.
Middle or low position to target pelvic stability.
STARTING POSITION
Kneel facing the straps with the torso lined up over the sit bones
and the straps or handles in the hands. Adjust the straps so there
is a small amount of tension on the ropes to begin the exercise.
MOVEMENT SEQUENCE
Exhale – Engage the abdominals and pull the straps back.
Inhale – Return the arms to the starting position with control.
ARM WORK VARIATIONS
Biceps: Bend the elbows and bring the palms toward the
shoulders. For beginners, keep the elbows at the waist as the
elbows bend. For more advanced students, begin with the arms
in front of the body at 45 to 90 degrees of shoulder flexion.
Triceps/Posterior Deltoid: Begin with the arms straight, just in
front of the hips with the palms facing backwards. Pull the straps
back as far as possible without rolling the shoulders forward.
Rows: Hold both straps with the straps crossed and the elbows
bent. Pull the straps back keeping the elbows bent.
Alternating Double Arm Twist: Hold one strap in each hand.
Rotate the torso to the right as you pull the right strap back,
keeping the elbow into the body. Reach the left arm forward as
the torso twists back to increase the rotation. Repeat to the other
side.
CUEING AND IMAGERY
»Engage the abdominals before moving the arms.
»Sit up on top of the sit bones throughout the exercise.
»Keep the chest open, the shoulders away from the ears and
the eyes looking straight ahead.
»Keep the wrists straight.
PURPOSE
»Strengthen arm and shoulder muscles including rotator cuff,
brachialis, biceps, triceps, pectoralis major, latissimus dorsi
and deltoid.
»Strengthen scapular stabilizers including serratus anterior,
trapezius and rhomboids.
»Increase torso stabilization.
»Improve sitting posture.
PRECAUTIONS
For shoulder, arm and wrist injuries – Check to see whether
handles or straps are more comfortable to hold. Keep wrists
straight. Keep arms below 90 degrees of flexion or abduction.
For low back injuries – Choose the most comfortable sitting
position for the back.
1. Biceps - Starting position.
2. Pull the handles toward the shoulders keeping the
elbows parallel to the floor.
20

Other Balanced Body Fitness Equipment manuals

Balanced Body Precision Rotator Discs User manual

Balanced Body

Balanced Body Precision Rotator Discs User manual

Balanced Body Reformer with Tower Instruction sheet

Balanced Body

Balanced Body Reformer with Tower Instruction sheet

Balanced Body CenterLine Reformer User manual

Balanced Body

Balanced Body CenterLine Reformer User manual

Balanced Body Trapeze Table (Cadillac) Administrator Guide

Balanced Body

Balanced Body Trapeze Table (Cadillac) Administrator Guide

Balanced Body Allegro Reformer Administrator Guide

Balanced Body

Balanced Body Allegro Reformer Administrator Guide

Balanced Body MOTR Installation instructions

Balanced Body

Balanced Body MOTR Installation instructions

Balanced Body Allegro Instruction sheet

Balanced Body

Balanced Body Allegro Instruction sheet

Balanced Body CoreAlign Quick setup guide

Balanced Body

Balanced Body CoreAlign Quick setup guide

Balanced Body Cadillac User manual

Balanced Body

Balanced Body Cadillac User manual

Balanced Body Contrology Cadillac User manual

Balanced Body

Balanced Body Contrology Cadillac User manual

Balanced Body Allegro 2 Reformer User manual

Balanced Body

Balanced Body Allegro 2 Reformer User manual

Balanced Body Duet User manual

Balanced Body

Balanced Body Duet User manual

Balanced Body Rialto with Riser Konnector Instruction Manual

Balanced Body

Balanced Body Rialto with Riser Konnector Instruction Manual

Balanced Body Studio Reformer User manual

Balanced Body

Balanced Body Studio Reformer User manual

Balanced Body Studio Reformer User manual

Balanced Body

Balanced Body Studio Reformer User manual

Balanced Body Tower on the Allegro 2 Instruction Manual

Balanced Body

Balanced Body Tower on the Allegro 2 Instruction Manual

Balanced Body Tower Bracket Retrofit Kit User manual

Balanced Body

Balanced Body Tower Bracket Retrofit Kit User manual

Balanced Body Allegro Reformer User manual

Balanced Body

Balanced Body Allegro Reformer User manual

Balanced Body Pilates Arc User manual

Balanced Body

Balanced Body Pilates Arc User manual

Balanced Body CoreAlign User manual

Balanced Body

Balanced Body CoreAlign User manual

Balanced Body Avalon Chair User manual

Balanced Body

Balanced Body Avalon Chair User manual

Balanced Body Reformer with Tower Instruction sheet

Balanced Body

Balanced Body Reformer with Tower Instruction sheet

Balanced Body Metro IQ User manual

Balanced Body

Balanced Body Metro IQ User manual

Balanced Body IQ REFORMER User manual

Balanced Body

Balanced Body IQ REFORMER User manual

Popular Fitness Equipment manuals by other brands

Kettler Giro R manual

Kettler

Kettler Giro R manual

Crivit 355239 2004 Instructions for use

Crivit

Crivit 355239 2004 Instructions for use

MARBO-SPORT MS-D203 Assembly instruction

MARBO-SPORT

MARBO-SPORT MS-D203 Assembly instruction

Weider WEBE1996.0 user manual

Weider

Weider WEBE1996.0 user manual

Confidence Fitness NHCFV-2300 quick start guide

Confidence Fitness

Confidence Fitness NHCFV-2300 quick start guide

BRONZE GYM A Series user manual

BRONZE GYM

BRONZE GYM A Series user manual

PROZIS Pulse hex user manual

PROZIS

PROZIS Pulse hex user manual

Matrix Elliptical Total Body owner's manual

Matrix

Matrix Elliptical Total Body owner's manual

Finnlo Bio Force 3842 user manual

Finnlo

Finnlo Bio Force 3842 user manual

HEPRO 35148 manual

HEPRO

HEPRO 35148 manual

ESCALADE GOALRILLA STRIKER TRAINER TR5000 Assembly manual

ESCALADE

ESCALADE GOALRILLA STRIKER TRAINER TR5000 Assembly manual

Nautilus NP-L1110 Owner's manual and installation instructions

Nautilus

Nautilus NP-L1110 Owner's manual and installation instructions

Bowflex Dumbbell owner's manual

Bowflex

Bowflex Dumbbell owner's manual

Cortex Omega CUKR-10 owner's manual

Cortex

Cortex Omega CUKR-10 owner's manual

BLK BOX 21-0112-0J Owner's manual & quick start guide

BLK BOX

BLK BOX 21-0112-0J Owner's manual & quick start guide

Vibratrim VT500 Assembly and instruction manual

Vibratrim

Vibratrim VT500 Assembly and instruction manual

Hudora Back Trainer 65218 INSTRUCTIONS ON ASSEMBLY AND USE

Hudora

Hudora Back Trainer 65218 INSTRUCTIONS ON ASSEMBLY AND USE

Insportline PW200 user manual

Insportline

Insportline PW200 user manual

manuals.online logo
manuals.online logoBrands
  • About & Mission
  • Contact us
  • Privacy Policy
  • Terms and Conditions

Copyright 2025 Manuals.Online. All Rights Reserved.