manuals.online logo
Brands
  1. Home
  2. •
  3. Brands
  4. •
  5. Balanced Body
  6. •
  7. Fitness Equipment
  8. •
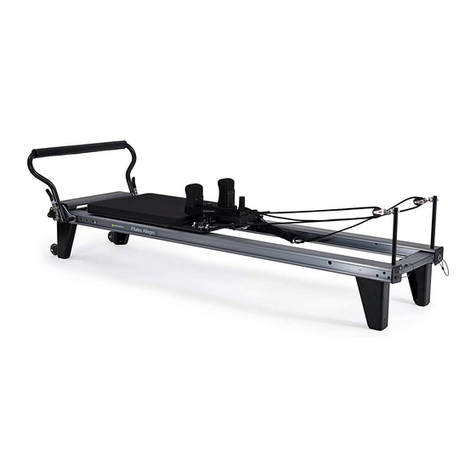
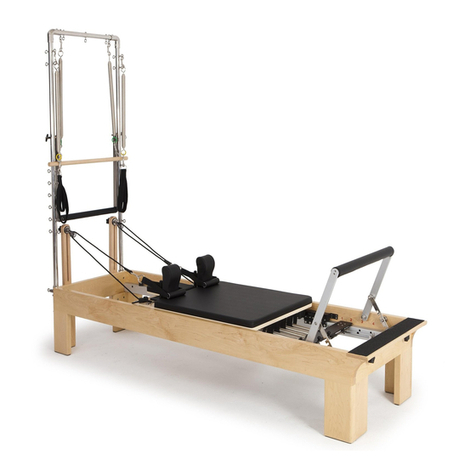
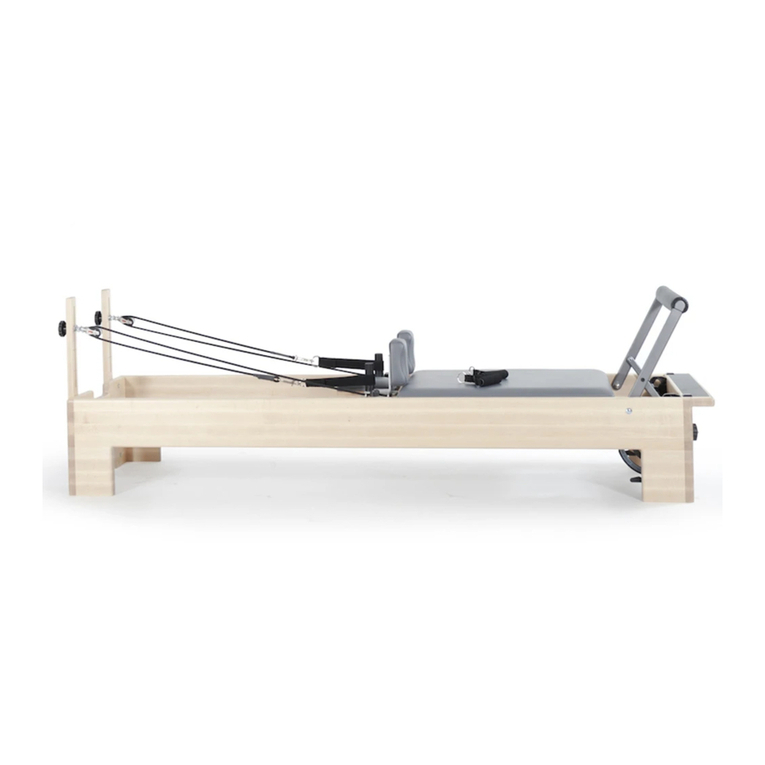
  9. Balanced Body Studio Reformer User manual

Balanced Body Studio Reformer User manual

How to assemble your Studio Reformer®
800-PILATES (745-2837) 916-388-2838FAX 916-379-9277
8220 Ferguson Avenue Sacramento, CA 95828
www.pilates.com [email protected]om 06/06
Carriage
Risers
Footbar
Pulleys
IMPORTANT! INSPECT FOR FREIGHT DAMAGE
If you see any obvious crate damage, bring it to the attention of the freight company driver immediately so that you can open it in his presence to verify any
possible damage to the contents. This would include holes in the crate, damaged corners or any evidence that the crate has been mishandled.
IN CASE OF FREIGHT DAMAGE
If there is freight damage, make certain you keep all packaging material. Please call Balanced Body as soon as possible.
INSTALL STANDARD FOOTBAR
SAFETY BUMPERS
In order to protect the vinyl on the
carriage from accidental footbar
damage, two safety bumpers are
included in your hardware package.
These consist of two black screws with
white plastic sleeves.
These should be installed on the inside
of the frame just in front of the main
pivot bolt of the footbar. You will see
an insert on each side into which these
bumpers should be threaded. A hex key
is provided.
NOTE: If you use a mat conversion,
these bumpers must be removed.
INSTALL THE CARRIAGE
Turn the carriage over and clean all the
wheels of shipping dust, etc. Clean the
full length of the rail surfaces inside
the frame. Carefully place the carriage
into the frame with the headrest facing
away from the footbar.
ATTACH THE SPRINGS TO THE
UNDERSIDE OF THE CARRIAGE
Locate the bracket with five eye-bolts
attached beneath the carriage.
Hook the springs down into the tops
of the eyes. The open end of the hook
should be facing down.
The bodies of the springs should rest
on the flat, padded brace between the
two wheels.
INSTALL THE SPRINGBAR
STANDARD & INFINITY
SPRINGBARS ONLY
If you have a Revo® Footbar, your
springbar is pre-installed, so please
proceed to the next step. If your
reformer has a standard footbar, the
springbar will be in the sitting box
along with the rest of the hardware.
Install it into the gears under the
footbar with its hooks facing up.
NOTE: The colored tabs on the
springs should be visible on the ends of
the springs which protrude from under
the carriage.
INSTALL THE RISERS
Unwrap the adjustable riser blocks
from their paper wrapping. You will
have four black screws and a hex key
provided in your hardware package.
Install the riser blocks to the outside
of the frame at the head end. The long
slots in the risers go to the top with
the fully rounded edges facing out.
Start both screws in the riser block
before tightening. This will help ensure
that there is enough wiggle room to
get the second screw aligned so that it
will thread cleanly. When both screws
are engaged, tighten them with the
hex key.
ATTACH THE PULLEYS TO
THE RISERS
The hardware package contains two
pulleys with black knobs. Unscrew the
black knobs and remove. Take off one
of the large washers from the exposed
bolt on a pulley and install the bolt
through the slot on a riser. Place the
washer back onto the bolt on the
backside of the riser and add the black
knob. Do this to both risers, making
sure the pulleys are facing the carriage.
You can raise and lower the pulleys by
loosening the black knob and sliding
the pulley up or down in the slot.
ATTACH THE ROPES
First engage at least one spring
from the carriage to the springbar to
stabilize the carriage.
Remove the ropes from the bag.
Clip the end of the ropes to the
D-rings on the cotton loops. Place
the cotton loops over the shoulder
posts.
Run the free ends of the ropes
down through the pulleys mounted
inside the head end of the frame.
(If adjustable risers have been
ordered, install them first.)
Footbar bumper installation
Footbar bumper hardware
Springs attached to eye-bolts under
carriage with hooks facing down
Springs resting on brace under carriage
Springbar installed
Riser bolted to outside of frame
Pulley installed
Rope clipped to D-ring on loop
Loops over shoulders
Ropes threaded through pulleys
Bring the free ends of the ropes
back toward the carriage and
insert them through the first
chrome eyestrap, into the cam
cleats, and finally out through the
second chrome eyestrap. Pull on
both ropes until equal pressure is
felt against the spring resistance.
Adjust for more length by picking
up the rope out of the cam cleats
and feeding it out towards the
pulleys. To secure, push the rope
back down into the cleats. Give
the rope a firm tug to secure them
in the cleats. Feed the ends of the
ropes through the holes in the
carriage to get them out of the way.
ADJUSTING AND REMOVING
SHOULDER RESTS
Your Studio Reformer comes with
adjustable/removable shoulder
rests. The wider shoulder rest
position is 1” wider than the
narrower position.
If your equipment was ordered
without twin mats, your shoulders
will be locked in place with a
bolt-and-knob system.
To remove the shoulder rests, pull
the pins and slide the shoulder rests
toward the carriage until they come
off. To adjust to a wider shoulder
rest width, switch the shoulder
rests and re-insert the locking pins
WHEN TO USE THE
REMOVABLE LOCKING PIN
OPTION
Use the locking pin option when
you want the ability to remove
the shoulder rests for installation
of the mat conversion, or when
you want the option of adjusting
wider/narrower shoulder rests for
different clients.
To install the locking pins, remove
the bolts, washers and knobs from
Ropes threaded through chrome
eyestraps and cam cleats
the shoulders. First, unscrew the
black knob directly underneath
each shoulder rest. Then, carefully
gather the washer and knob as
they come off the bolt. Pull the
bolt up out of the hole. Set the
parts aside.
Insert the locking pins into the
holes from which you removed
the black bolts. The plastic tethers
provided with each locking pin
can be affixed to any of the screw
heads on top of the carriage that
hold the chromed rope guides.
With a Phillips screwdriver,
unscrew the inside metal rope
guide screw. Thread the eyelet on
the end of the pin tether through
the screw. Replace the screw and
tighten with the screwdriver.
Insert the pin into the bolt hole.
Set the hardware aside, but save
it in case you want to use it in the
future.
.
WHEN TO USE THE
PERMANENT BOLTAND
KNOB OPTION
If you don’t have a mat conversion
and don’t need to adjust your
shoulder rests for wider/narrower
widths, then the permanent bolt-
and-knob option is suggested.
The bolt-and-knob hold the
shoulder rests firmly in place.
If you are using the locking pin
option and feel there is too much
movement in the shoulder rests,
use the bolt-and-knob option
instead.
Note: if you prefer wider shoulder
rests using the bolt-and-knob
option, remove the bolts,
washers, and knobs from the
shoulders, slide the shoulder rests
off, switch the shoulder rests, and
replace the hardware.
Knob under carriage for loosening
shoulder rest
Locking pin installed
Tether attached to rope guide screw
Shoulder rests removed
Locking pins and tethers
INSTALL THE PADDED FOOT PLATE
STANDARD FOOTBAR
To install the footplate (regular
or Jumpus Maximus) on
equipment with a standard
footbar design, first loosen
the two black knobs located
beneath the standing platform
at the foot end of the frame.
Place the springbar into the
second gear (closest to the
carriage). Drop the shorter
of the two footbar supports
into the first gear. The longer
footbar support will rest on top
of the standing platform. Gently
slide the wooden tongue of
the padded foot plate into the
aluminum bracket on the inside
of the frame. Finally, tighten
the two black knobs on the
outside of the frame to lock the
foot plate into position.
Note: the padded portion of the
footbar should be behind the
wooden block on the back of
the foot plate, not pulled up on
top of it.
REVO FOOTBAR®
To Install the padded foot plate
(regular or Jumpus Maximus)
on reformers with the Revo
Footbar®, first loosen the two
black knobs located beneath
the standing platform at the
food end of the frame. Place the
footbar support into its lowest
(bottom) position. Gently lower
the tongue of the footplate
into the aluminum bracket.
The top block of the footbar
should be resting against (not
on) the footbar. The bottom
block should be resting on the
footend of the frame. Gently
tighten the black knobs until
snug.
Springbar in second gear with footbar
support in first gear
Foot plate installed
CLEANING AND MAINTENANCE
CLEANING
You can extend the life of your upholstery by keeping it clean and free
of dirt, oil and perspiration. After each use, wipe down the upholstery
with solution of mild soap and water. Then wipe down with a damp rag
and allow to dry.
Boltaflex® upholstery is coated with PreFixx Protective Finish, which
offers antimicrobial/antibacterial protection. If you want additional
disinfection, use any common, off-the-shelf disinfectant spray or
solution, such as Pine Sol®or Lysol®disinfecting spray. Since these
disinfectants will leave a fragrance residue buildup with repeated use,
we recommend wiping down the disinfected area with clean water on a
sponge or soft rag.
Aluminum wheel tracks and wheels should be wiped down weekly.
If you feel a “bump” in the ride, chances are that debris has become
stuck to the wheels and needs to be removed. If hair becomes wrapped
around the wheel axels, use tweezers to remove it. Regular cleaning
will minimize“bumps” and ensure that your equipment tracks smoothly.
LUBRICATION
In the past, we have included a can of dry silicone spray with each
Studio Reformer. Due to shipping regulations, we can no longer ship
this spray. Most Reformers never need silicone, but occasionally, a
sidewheel may squeak. If this happens, lightly spray dry silicone on
the aluminum tracking rail where the sidewheel makes contact. “Dry”
silicone does not have an oil base. Oil-based (“wet”) silicones and
WD40 attract dirt and should not be used. If silicone is needed, apply it
lightly and wipe off any excess. Never spray silicone inside the wheels
– this can wash the oil out of the bearings and ruin the wheels. You can
purchase dry silicone at most hardware and auto stores.
IF YOU HAVE ANY QUESTIONS, PLEASE CALL BALANCED BODY
AT 8007452837 OR 9163882838.
Revo Footbar® installed

Other manuals for Studio Reformer

3

Other Balanced Body Fitness Equipment manuals

Balanced Body Avalon Chair User manual

Balanced Body

Balanced Body Avalon Chair User manual

Balanced Body Allegro Reformer Administrator Guide

Balanced Body

Balanced Body Allegro Reformer Administrator Guide

Balanced Body Reformer with Tower Instruction sheet

Balanced Body

Balanced Body Reformer with Tower Instruction sheet

Balanced Body CoreAlign Quick setup guide

Balanced Body

Balanced Body CoreAlign Quick setup guide

Balanced Body MOTR Installation instructions

Balanced Body

Balanced Body MOTR Installation instructions

Balanced Body Precision Rotator Discs User manual

Balanced Body

Balanced Body Precision Rotator Discs User manual

Balanced Body Allegro CC User manual

Balanced Body

Balanced Body Allegro CC User manual

Balanced Body Metro IQ User manual

Balanced Body

Balanced Body Metro IQ User manual

Balanced Body Rialto Reformer User manual

Balanced Body

Balanced Body Rialto Reformer User manual

Balanced Body Pilates Arc User manual

Balanced Body

Balanced Body Pilates Arc User manual

Balanced Body Allegro 36395 User manual

Balanced Body

Balanced Body Allegro 36395 User manual

Balanced Body F.I.T. Quick start guide

Balanced Body

Balanced Body F.I.T. Quick start guide

Balanced Body Contrology User manual

Balanced Body

Balanced Body Contrology User manual

Balanced Body Cadillac User manual

Balanced Body

Balanced Body Cadillac User manual

Balanced Body Konnector Instruction Manual

Balanced Body

Balanced Body Konnector Instruction Manual

Balanced Body CenterLine Pole System Programming manual

Balanced Body

Balanced Body CenterLine Pole System Programming manual

Balanced Body Allegro 1B Instruction Manual

Balanced Body

Balanced Body Allegro 1B Instruction Manual

Balanced Body Studio Reformer User manual

Balanced Body

Balanced Body Studio Reformer User manual

Balanced Body Wall Tower Administrator Guide

Balanced Body

Balanced Body Wall Tower Administrator Guide

Balanced Body CenterLine Tower Retrofit Instruction Manual

Balanced Body

Balanced Body CenterLine Tower Retrofit Instruction Manual

Balanced Body Contrology User manual

Balanced Body

Balanced Body Contrology User manual

Balanced Body CoreAlign User manual

Balanced Body

Balanced Body CoreAlign User manual

Balanced Body Studio Reformer User manual

Balanced Body

Balanced Body Studio Reformer User manual

Balanced Body Allegro Administrator Guide

Balanced Body

Balanced Body Allegro Administrator Guide

Popular Fitness Equipment manuals by other brands

Costway GOPLUS SP37722 user manual

Costway

Costway GOPLUS SP37722 user manual

XMark Fitness XM-4410 owner's manual

XMark Fitness

XMark Fitness XM-4410 owner's manual

BH Tecnovita YC202 manual

BH

BH Tecnovita YC202 manual

AAT c-max U2 C1415 user manual

AAT

AAT c-max U2 C1415 user manual

K-SPORT KSH013 Assembly instruction

K-SPORT

K-SPORT KSH013 Assembly instruction

Abilica AirTrack Home 300 user manual

Abilica

Abilica AirTrack Home 300 user manual

Kettler YM 6723 BLE manual

Kettler

Kettler YM 6723 BLE manual

Technogym SKILLROW Technical service guide

Technogym

Technogym SKILLROW Technical service guide

Physionics FNST01 Assembly instructions

Physionics

Physionics FNST01 Assembly instructions

PROSOURCEFIT Multi-Grip Pull-Up Bar Instruction Manual & Exercise Guide

PROSOURCEFIT

PROSOURCEFIT Multi-Grip Pull-Up Bar Instruction Manual & Exercise Guide

Gold's Gym GGSY24618.0 user manual

Gold's Gym

Gold's Gym GGSY24618.0 user manual

Matrix CONNEXUS COMPACT GFTCOR quick start guide

Matrix

Matrix CONNEXUS COMPACT GFTCOR quick start guide

Kettler Astro Assembly instructions

Kettler

Kettler Astro Assembly instructions

Hammer Cardio CE1 manual

Hammer

Hammer Cardio CE1 manual

schwa-medico PhalliMax 2 operating manual

schwa-medico

schwa-medico PhalliMax 2 operating manual

Bowflex MAX Trainer M5u user manual

Bowflex

Bowflex MAX Trainer M5u user manual

Stamina AeroPilates 55-0012A manual

Stamina

Stamina AeroPilates 55-0012A manual

SKLZ SELF-GUIDED FITNESS KIT Getting started

SKLZ

SKLZ SELF-GUIDED FITNESS KIT Getting started

manuals.online logo
manuals.online logoBrands
  • About & Mission
  • Contact us
  • Privacy Policy
  • Terms and Conditions

Copyright 2025 Manuals.Online. All Rights Reserved.