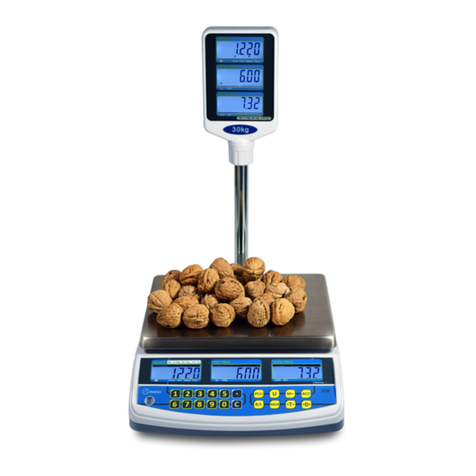
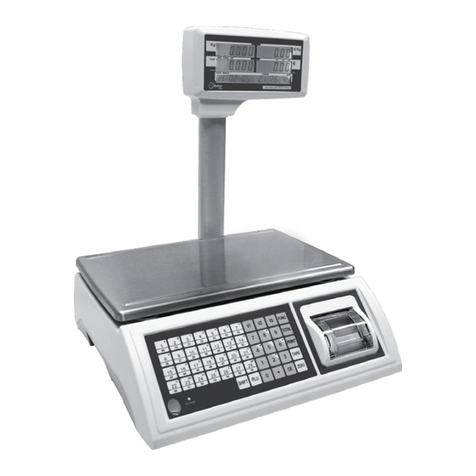
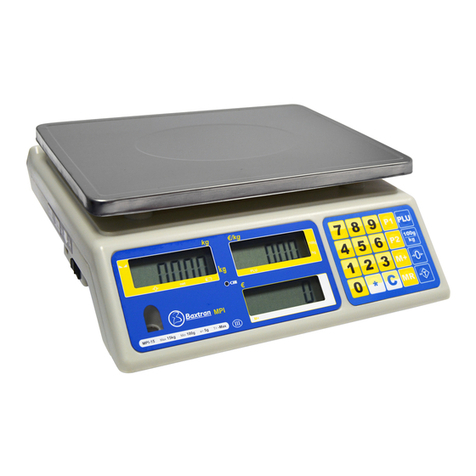
Baxtran XTA User manual

| marca propiedad de | est une marque de | trade mark propiety of | ist als Marke des Markeneigentums zu kennzeichnen
|marchio proprietà di
Pol. Empordà Internacional Calle F. Parcela 15-16
17469 VILAMALLA - (Girona) SPAIN
T. (34) 972 527 212 - F. (34) 972 527 211
El fabricante se reserva el derecho de modificar sin previo aviso las características de sus productos para introducir mejoras técnicas o cumplir con nuevas regulaciones oficiales./Le
constructeur se réserve le droit de modifier les caractéristiques de ses produits en vue d’y apporter des améliorations techniques ou de respecter de nouvelles réglamentations./The
manufacturer reserves the right to modify the specifications of its products in order to make technical improvements or comply with new regulations/ Der Hersteller behält sich das Recht vor,
ohne Vorankündigung die Eigenschaften seiner Produkte zu ändern, um weitere Verbesserungen zu erzielen oder neuen offiziellen Richtlinien nachzukommen/ Il fabbricante si riserva il diritto
di modificare senza alcun preavviso le caratteristiche dei suoi prodotti in vista di apportare migliorie tecniche o di rispettare nuove regolamentazioni.
14/03/2019
EN|FR|ES
USER MANUAL | MANUEL D’UTILISATION | MANUAL DE USUARIO
XTA / XTA-P

XTA
EN
CONTENTS
1. PRECAUTIONS 5
2. INTRODUCTION 6
3. SPECIFICATIONS 6
3.1. GENERAL SPECIFICATIONS 6
4. INSTALLATION 7
5. KEYBOARD & DISPLAY 8
6. OPERATION 9
6.1. POWER ON/OFF 9
6.2. ZERO 9
6.3. TARE 9
6.4 WEIGHING GOODS 10
6.5. UNIT PRICE SETTING 10
6.6. UNIT PRICE MEMORY 10
6.7. BACK LIGHT 11
6.8. AUTOMATIC UNIT PRICE CLEAR 12
6.9. GIVE CHANGE 12
7. PARAMETER 13
7.1. PARAMETER SETTINGS 13
7.2. PARAMETER MENU 14
8. CALIBRATION 15
9. RS 232 OUTPUT 15
10. ERROR CODES 16

FR
SOMMAIRE
XTA
1. PRÉCAUTIONS 17
2. INTRODUCTION 18
3. DISPOSITIONS 18
3.1. DISPOSITIONS GÉNÉRALES 18
4. INSTALLATION 19
5. CLAVIER & ÉCRAN 20
6. FONCTIONNEMENT 21
6.1. POSITION ON/OFF 21
6.2. ZÉRO 21
6.3. TARE 21
6.4 PESAGE DE MARCHANDISES 22
6.5. FIXATION DU PRIX UNITAIRE 22
6.6. MÉMOIRE DU PRIX UNITAIRE 22
6.7. RÉTRO-ÉCLAIRAGE 23
6.8. EFFACEMENT DU PRIX UNITAIRE AUTOMATIQUE 24
6.9. RENDRE LA MONNAIE 24
7. PARAMÈTRE 25
7.1. PARAMÉTRAGES 25
7.2. MENU DES PARAMÈTRES 26
8. ÉTALONNAGE 27
9. RS 232 SORTIE 27
10. CODES D’ERREURS 28

ES
ÍNDICE
XTA
1. PRECAUCIONES 29
2. INTRODUCCIÓN 30
3. ESPECIFICACIONES 30
3.1. ESPECIFICACIONES GENERALES 30
4. INSTALACIÓN 31
5. TECLADO Y PANTALLA 32
6. OPERACIÓN 33
6.1. ENCENDIDO ON/OFF 33
6.2. CERO 33
6.3. TARA 33
6.4 PESAR PRODUCTOS 33
6.5. CONFIGURACIÓN UNIDAD DE PRECIO 34
6.6. MEMORIA UNIDAD DE PRECIO 34
6.7. LUZ TRASERA 35
6.8. BORRADO AUTOM 35
6.9. DAR CAMBIO 35
7. PARÁMETROS 36
7.1. CONFIRGURACIÓN PARÁMETROS 36
7.2. MENÚ PARÁMETROS 37
8. CALIBRACIÓN 38
9. SALIDA RS 232 38
10. CÓDIGOS ERROR 39

5
ENUSER MANUAL XTA
1. PRECAUTIONS
WARNING
DISCONNECT ALL POWER TO THIS UNIT BEFORE
INSTALLING, CLEANING, OR SERVICING. FAILURE TO
DO SO COULD RESULT IN BODILY HARM OR DAMAGE
THE UNIT.
CAUTION
• PERMIT ONLY QUALIFIED PERSONS TO SERVICE THE INSTRUMENT
• BEFORE CONNECTING OR DISCONNECTING ANY COMPONENTS, REMOVE THE POWER.
• FAILURE TO OBSERVE THESE PRECAUTIONS BODILY HARM OR DAMAGE TO OR DESTRUCTION
OF THE EQUIPMENT.
• The price computing scale is a precision electronic instrument, handle it carefully.
• Do not install the scale in direct sunlight.
• Verify the local voltage and receptacle type are correct for the scale.
• Only use original adaptor, other could cause damage to the scale.
• Pluggable equipment must be installed near an easily accessible socket outlet.
• Avoid unstable power sources. Do not use near large users of electricity such as welding equipment or large motors.
• Avoid sudden temperature changes, vibration, wind and water.
• Avoid heavy RF noise.
• Keep the scale clean

ENUSER MANUAL XTA
6
2. INTRODUCTION
XTA & XTA-P scales are very compact, reliable, high accuracy and much stable.
It uses 15mm LCD display with LED backlight, with the different back light operation,
Weighing unit conversion /kg and /100g and change function.
20 membrane keyboard
10 indirect PLU, it can store 10 unit price values
Auto unit price clear operation (SAVE function)
3. SPECIFICATIONS
3.1. GENERAL SPECIFICATIONS
MODEL XTA / XTA-P
Display 15mm LCD Display with white LED back Light
Gross weight 4.1kg (XTA) / 4,5kg (XTA-P)
Capacity 3/6kg 6/15kg 15/30kg
Readability 1/2g 2/5g 5/10g
Max. Divisions 2 x 3000e
Weighing Units kg
Pan size 204 x 263 mm
Housing ABS plastic and stainless steel pan
Operation Temperature -10°C ~ +40°C
Stability Time 1 seconds typical
Power AC switching adaptor 12V/2500mA.
Rechargeable battery 6V/3.2Ah
Keypad 20 keys
Zero range 0mV~5mV
Signal input range 0~15mV
ADC Sigma delta
Internal counts 600,000
ADC update Max. 60 times/second
Load cell drive voltage Max. 5V/150mA

7
ENUSER MANUAL XTA
4. INSTALLATION
UNPACKING
Carefully take the scale out of its package, make it sure its not damaged and all accessories are included.
Accessories:
1. Scale
2. Power Adaptor
3. Stainless steel pan
4. Product manual
Keep the packaging material for your future use.
LEVEL ADJUSTING
Place the scale on a table.
Check the water mark. If bubble is not centered, adjust the leveling feet until reach centre. Check the level when you change the
location.
CONECT ADAPTOR
• To charge the battery insert the adaptor pin to jack. Adaptor simply plug into the mains power.
The scale no needs to be turned on.
• The battery should be charged for 4 hours for full capacity.
• On the right side of the display there is an LED to indicate the status of battery charging. When the scale is plugged into the
mains power he internal battery will be recharged. If the LED is green, the battery has a full charge. If it is red, the battery is nearly
discharged and if yellow, the battery is being charged.
• Do not use any other type of power adaptor than the one supplied with the scale.
• Verify that the AC power socket outlet is properly protected
Note: Please charge the battery before using the scale for the first time.
ADAPTOR JACK POWER KEY

ENUSER MANUAL XTA
8
5. KEYBOARD & DISPLAY
KEYS PRESS THIS KEY TO
to Numeric Keys, enter unit price / PLU: In setting mode, press numeric keys to enter parameters setting.
Clear incorrect entries and error conditions.
Being set unit price in fix mode, press the key to input double zero; being set unit price in float mode, press the key
to input decimal point.
Returns the display to zero if the weight on the pan is inside the metrological limitation. In parameter settings, to
escape from the menu.
Subtracts the tare values, change to gross to net mode and enter parameter settings.
Activate / desactivate the SAVE function.
Used to store or recall unit price. In parameter setting mode, used to scroll down the menu.
Used to give change operation.
Without function.
Used to change unit (kg/100g).
Whitout Function.

9
ENUSER MANUAL XTA
DISPLAY OVERLAY
DISPLAY SYMBOLS
BATT
Battery indicator. When it’s illuminated, battery should be
recharged.
Net Net weight.
Stable Stable indicator. When it’s illuminated, the scale is stable.
Zero Zero indicator. When it’s illuminated, the scale is in zero point.
/Kg or /100g Kilogram or 100g mode.
SAVE Save indicator.
CHARGE Battery charging indicator
CH Check out indicator
6. OPERATION
INITIAL START-UP
Warm-up time of 15 minutes stabilizes the measured values after switching on.
6.1 POWER ON/OFF
Power switch is located below the right side of the scale. Switch on the scale by pressing on/off. The display is switched on and the
self test is started. If you want to switch off press again the key.
6.2 ZERO
Environmental conditions can lead to the balance exactly zero in spite of the pan not taking any strain. However, you can set the display
of your balance to zero any time by pressing key and therefore ensure that the weighing starts at zero if the desviation is
inside metrological margins.
6.3 TARE
The weight of any container can be tared by pressing key, so that with subsequent weighing the net weight of the object being
weighed is always displayed.

ENUSER MANUAL XTA
10
PROCECTURE:
• Load weight on the pan.
• Press key. Zero is displayed, and tare is subtracted.
• Remove weight from the platform. Tared weight is displayed. It can set only one tare value. It can display with a minus value.
• Press key. Zero is displayed, tare weight is cleared.
6.4 WEIGHING GOODS
• Place goods to be weighed on the platform.
• Wait few seconds for stability display.
• Read the result.
• Avoid overloading. When display appears “ol” reduce the load or unload.
6.5 UNIT PRICE SETTING
• Make sure platform is empty and display is zero
Weight 0 000
Unit price 0 000
Total price 0 000
• Place goods to be weighed on the platform.
Weight 0 175
Unit price 0 000
Total price 0 000
• Enter the unit price by pressing numeric keys. Total price will be calculate automatically.
Weight 0 175
Unit price 5 000
Total price 0 88
6.6 UNIT PRICE MEMORY
XTA & XTA-P can store 10 unit price values. It can select from 0 to 9 numeric keys.
SAVE TO MEMORY
• By pressing numeric keys enter the unit price, for example, 10.
Weight 0000
Unit price 10
Total price 0
• Press and hold PLU, display will be shown.

11
ENUSER MANUAL XTA
Weight SAVE
Unit price PoS
Total price PS 0-9
• Press numeric key 0 to 9 to select location. If want to select to numeric key 1, press 1.
Weight PLU
Unit price
Total price SAvED
Unit price 10 saved into numeric key 1.
RE-CAL UNIT PRICE
When you want to weigh using stored unit price weighment.
• Press PLU, display will be shown
Weight LoAd
Unit price PoS
Total price PS 0-9
• Press the numeric key, which you stored in 0 to 9. If want to use stored in 1, press 1.
• Display will show, the unit price stored.
Weight 0000
Unit price 10
Total price 0
• Place the weigh on the platform, total pirce will be calculate automatically.
6.7 BACK LIGHT
XTA & XTA-P have an option to choose the back light operation.
• Being in normal weighing mode, press and hold . Key until to show the display
Weight bL SET
Unit pice nodE
Total price AUto
• Press the key to change the settings back light display mode to Auto / Manual /Off.

ENUSER MANUAL XTA
12
DISPLAY DESCRIPTION
bLSET nodE AUto Backlight will be turned on, when start to use or when weight is not in zero.
SET
Bl MODE
ON
Backlight stays on permanently.
SET
Bl MODE
OFF
Backlight function will be turned off
6.8 AUTOMATIC UNIT PRICE CLEAR (SAVE)
XTA & XTA-P can set automatic unit price clear.
• Press key to turn on or off to save indicator.
• When save indicator on, unit price appear after return to zero.
• When save indicator off, unit price will be clear automatically.
6.9 GIVE CHANGE
After one price eperation is done, you can use change function.
Press CH key: weight display shown price.
Weight 2460
Unit pice 0
Total price -------
By pressing numeric keys enter the amount, wich is given from customer.
Weight 2460
Unit pice 3000
3
Total price 540
If enter 3000, remaining balance will be shown in Total price display.
Press key to return weighing mode.

13
ENUSER MANUAL XTA
7. PARAMETER
7.1 PARAMETER SETTINGS
ENTER INTO THE MENU
• Turn on the scales. Press and hold key during the self test.
Display will show "Pin” briefly PIN is activated. Press the Pin number to get into the parameter menu.
• The default PIN number is “0000”.
• Press numeric key 0 four times, display will be shown Pn - - - -
• Press key to confirm, it will enter into the parameter settings and will to show “FO CAL”
ENTER TO SELECTED MENU
• Press , for to confirm and access to displayed parameter.
SELECT THE MENU
• Press or for to choose menu.
RETURN TO WEIGHING MODE
• Press for to escape from the menu and exit to weighing mode
ACTIVE PARAMETER
!Press CAL switch to enable metrological parameters for to access and change them. CAL switch is locating bottom
of the scale.
You need to break metrological seals for to press cal switch. With this action you will loose scale verification.
CAL SWITCH

ENUSER MANUAL XTA
14
7.2 PARAMETER MENU
MENU SUB MENU DESCRIPTION
F0 CAL Calibration.
F 1 r ES
3000
Set external resolution
6000
dUAL - i
dUAL - r
F 2 CAP
3KG
Set scale capacity
6KG
15KG
30KG
F 3 PDEC,
0
Set Price Decimal Point
0. 0
0. 00
0. 000
0. 0000
F 4 PdESC F E Set unit Price to FIX or FLOATING
FLoAT
F 5 SPEED
SLOW
To select A/D speed
MEDIUM
FAST
F6 Min coin 1 2 5 0 Select minimum coin
F7 SCSIUE
tare
ON Multi - Tare function ON
OFF Multi - Tare function OFF.
F8 ISN This display will show XXXXX for indicating the internal counts.
F9 Gra To set your local gravity value.
F10 Reset Factory default settings
F11 rS232 ModE
The scale RS232 protocol will be determined by the Baud & Pr settings
oFF RS232 function disable
Cont Continues data transmission
StC Stable data transmission (sending continue frame)
toLE do Protocol type 1: Toledo
nC iE Cr Protocol type 2: NCI-ECR
nC iG En Protocol type 3: NCI-General
tEC Protocol type 4: TEC
EASY Protocol type 5: Easy Weigh
POS Protocol type 6: POS
bAUd Set baud rate to (1200/2400/4800/9600/19200/38 400/115200)
Pr Bn 1 8 data bits, no verify, 1 stop bit
Pr 7E1 7 data bits, Even verify, 1 stop bit
Pr 7o1 7 data bits, Odd verify, 1 stop bit

15
ENUSER MANUAL XTA
8. CALIBRATION
Turn on the scale. Keep pressed key during the self test.
Display will show “Pn” briefly PIN is activated. Press the PIN number to get into the parameter menu.
• The default PIN number is “0000”
• Press numeric key 0 four times, display will be shown Pn - - - -
• Press key to confirm, it will enter into the parameter settings and will to show “
F0 CAL
”.
Then press the calibration switch to access to calibration.
• Press key to confirm for calibration, display will be show “
UNLOAD
”
• Remove the goods from the platform and make sure STABLE indication has been enable.
• Press key to confirm.
• Display will be show ,CAP LoAdXX.
• If necessary change the calibration weight value by pressing key and place the callibration weight on the platform.
• Press key to confirm when display gets stable, display will be show PASS.
Finished calibration and display will come to FO CAL.
• Remove calibration weigjt from the platform.
• Press key for to go back to the weighing mode.
9. RS 232 OUTPUT
1. SPECIFICATIONS:
RS-232 output of weighing data
ASCII code
1200~115200 Baud
8 data bits
No Parity
2. RS-232 (9PIN D TYPE CONNECTOR)
Pin 2 RXD Input Receiving data
Pin 3 TXD Output Transmission data
Pin 5 GND - Signal ground

ENUSER MANUAL XTA
16
9PIN D CONNECTER:
Scale Computer
Pin 2 Pin 3
Pin 3 Pin 2
Pin 3 Pin 5
3. CONTINUOUS & STABLE OUTPUT PROTOCOL
“CONT”:
S T , G S : - +/- k gCR LF
-HEADER 1- -HEADER 2- - WEIGHT DATA - -WEIGHT UNIT- -TERMINATOR-
4. COMMUNICATION PROTOCOL
The XTA & XTA-P scale has the following protocols, accessible from the R232 menu:
Toledo
NCI - ECR
NCI - General
TEC
Easy
POS
10. ERROR CODES
Error Message Description Solution
---- Maximum load exceeded Unload or reduce weight
Err 4 Zero setting error Zero setting range exceeded due to switching on. (4%max) Make sure platform
empty(4%max) Make sure platform empty.
Err 5 Key board error Check the keys and connecter
Err 6 A/D value out of range Make sure platform empty and check the pan is installed proper. Check the load cell
connectors.
Err 7 Percentage Error Please check input data, must be > 0.5d
Err 8 Calibration weight error Check the test weights for calibration or linear calibration
Err 9 Unstable Reading Check any air variation, vibration, RF noise and touching some where. Check the
load cell and connecters
Err 15 Gravity error Check the gravity settings. Gravity range must be 0.9xx ~
Err 17 Tare out of range Minus weight or overload. Remove the load and restart
-- ol --- Over range Remove the load. Re calibrate
-- lo --- Underload Minus weight, check the platform and restart or calibrate.
fAil H
fAil l
fAil
Calibration Error Check the test weights & Re calibrate
bA lo
lo bA Battery low Re charge battery, check the voltages.

17
FRMANUEL D’UTILISATION XTA
1. PRÉCAUTIONS
AVERTISSEMENT
DÉCONNECTEZ L'ALIMENTATION ÉLECTRIQUE DE CET
APPAREIL AVANT DE L'INSTALLER, DE LE NETTOYER
OU DE PROCÉDER À UNE OPÉRATION DE MAINTE-
NANCE. LE NON-RESPECT DE CETTE CONSIGNE PEUT
ENTRAÎNER DES BLESSURES CORPORELLES OU
ENDOMMAGER L'APPAREIL.
AVERTISSEMENT
• N'AUTORISEZ QUE DES PERSONNES QUALIFIÉES À EFFECTUER L'ENTRETIEN DE L'APPAREIL
• AVANT DE BRANCHER OU DE DÉBRANCHER DES COMPOSANTS, COUPEZ L'ALIMENTATION
ÉLECTRIQUE.
• LE NON-RESPECT DE CES CONSIGNES DE SÉCURITÉ PEUT PROVOQUER DES DOMMAGES COR-
PORELS, ENDOMMAGER OU DÉTRUIRE L'ÉQUIPEMENT.
• La balance de calcul des prix est un instrument électronique de précision, manipulez-la avec précaution.
• N'installez pas la balance à la lumière directe du soleil.
• Vérifiez que la tension locale et que le type de prise sont adaptés à la balance.
• N'utilisez que l'adaptateur d'origine, sinon vous risqueriez d'endommager la balance.
• L'équipement enfichable doit être installé près d'une prise de courant facilement accessible.
• Évitez les sources d'alimentation instables. Ne l’utilisez pas à proximité de gros consommateurs d'électricité tels que des équipements
de soudage ou de gros moteurs.
• Évitez les changements brusques de température, les vibrations, le vent et l'eau.
• Évitez les bruits RF intenses.
• Mantenez la balance propre

FRMANUEL D’UTILISATION XTA
18
2. INTRODUCTION
Les balances XTA & XTA-P sont très compactes, fiables, de haute précision et très stables.
Elles fonctionnent avec un écran LCD de 15 mm avec rétro-éclariage LED, comportant différentes opérations de
rétro-éclairage
Conversion de l'unité de pesage /kg et /100g et fonction de retour.
Clavier à membrane avec 20 touches
10 PLU indirects, elles peuvent mémoriser 10 valeurs de prix unitaire
Opération d’effacement automatique du prix unitaire (fonction SAVE)
3. DISPOSITIONS
3.1. DISPOSITIONS GÉNÉRALES
MODÈLE XTA / XTA-P
Écran Elles possèdent des écrans LCD de 15 mm avec rétro-
éclairage LED blanc
Poids brut 4,1kg (XTA) / 4,5kg (XTA-P)
Capacité 3/6kg 6/15kg 15/30kg
Lisibilité 1/2g 2/5g 5/10g
Divisions Max. 2 x 3000e
Unités de pesage kg
Taille du plateau 204 x 263 mm
Boîtier Plateau en plastique ABS et acier inoxydable
Température de fonctionnement -10°C ~ +40°C
Temps de stabilité 1 seconde typique
Puissance Adaptateur prise AC 12V/2500mA.
Batterie rechargeable 6V/3.2Ah
Clavier 20 touches
Plage zéro 0mV~5mV
Plage d'entrée du signal 0~15mV
ADC Sigma delta
Décomptes internes 600 000
Mise à jour de l'ADC Max. 60 fois/seconde
Voltage de commande du capteur de pesage Max. 5V/150mA

19
FRMANUEL D’UTILISATION XTA
4. INSTALLATION
DÉBALLAGE
Retirez soigneusement la balance de son emballage, assurez-vous qu'elle n'est pas endommagée et que tous les accessoires
sont inclus.
Accessoires :
1. Balance
2. Adaptateur d'alimentation
3. Plateau en acier inoxydable
4. Manuel du produit
Conservez le matériel d'emballage pour votre utilisation future.
RÉGLAGE DU NIVEAU
Placez la balance sur une table.
Vérifiez la marque du niveau à bulle. Si la bulle n'est pas au centre, ajustez les pieds de réglage jusqu'au centre. Vérifiez le niveau
lorsque vous changez d'emplacement.
CONNECTER L’ADAPTATEUR
• Pour charger la batterie, insérez la broche de l'adaptateur dans la prise. Il suffit de brancher l'adaptateur sur le secteur.
Il n'est pas nécessaire d'allumer la balance.
• La batterie doit être chargée pendant 4 heures pour une pleine capacité.
• Sur le côté droit de l'écran se trouve une LED pour indiquer l'état de charge de la batterie. Lorsque la balance est branchée sur
le secteur, la batterie interne est rechargée. Si la LED est verte, la batterie est complètement chargée. Si elle est rouge, la batterie
est presque déchargée et si elle est jaune, la batterie est en charge.
• N'utilisez pas d'autres types d'adaptateurs de courant que celui fourni avec la balance.
• Vérifiez que la prise de courant CA est correctement protégée
Remarque : Veuillez charger la batterie avant d'utiliser la balance pour la première fois.
TOUCHE MARCHE/ÂRRETPRISE D'ADAPTATEUR

FRMANUEL D’UTILISATION XTA
20
5. CLAVIER & AFFICHAGE
TOUCHES APPUYER SUR CETTE TOUCHE POUR
pour Touches numériques, entrer le prix unitaire/PLU : En mode réglage, appuyez sur les touches numériques pour accéder
au réglage des paramètres.
Effacez les entrées incorrectes et les conditions d'erreur.
Avec le prix unitaire en mode fixe, appuyez sur la touche pour entrer le double zéro; avec le prix unitaire en mode
flottant, appuyez sur la touche pour entrer le point décimal.
Remet l'affichage à zéro si le poids sur le plateaur est dans les limites metrologiques. Dans le paramétrage, pour
sortir du menu.
Soustrait les valeurs de tare, change du en mode brut au mode net et accede aux les réglages des paramètres.
Activer / désactiver la fonction SAVE
Utilisé pour stocker ou rappeler le prix unitaire. En mode paramétrage, permet de faire défiler le menu vers le bas.
Utilisé pour les opérations de retour d’argent.
Sans fonction
Utilisé pour changer l’unité (kg/100g)
Sans fonction
This manual suits for next models
1
Table of contents
Languages:
Other Baxtran Scale manuals
Baxtran
Baxtran Giropes GLASSKS LCD User manual
Baxtran
Baxtran DSC User manual
Baxtran
Baxtran PTI User manual

Baxtran
Baxtran STI User manual
Baxtran
Baxtran KRN User manual
Baxtran
Baxtran MS Series User manual
Baxtran
Baxtran STV Series User manual
Baxtran
Baxtran RTI User manual
Baxtran
Baxtran RGT User manual

Baxtran
Baxtran AND200A User manual
Popular Scale manuals by other brands

Bosch
Bosch PPW3330 operating instructions
ADE
ADE M101000-01 Instructions for use
RSF Elektronik
RSF Elektronik MS 35 MO Mounting instructions
ScienTECH
ScienTECH Zeta ZSM50 Set up and operating instructions
Soehnle
Soehnle CWE 7745 operating instructions
LW MEASUREMENTS
LW MEASUREMENTS TREE LDS Series Operation manual
