manuals.online logo
Brands
  1. Home
  2. •
  3. Brands
  4. •
  5. Bayco
  6. •
  7. Work Light
  8. •
  9. Bayco INS-1005-12 User manual

Bayco INS-1005-12 User manual

INS-1005-12
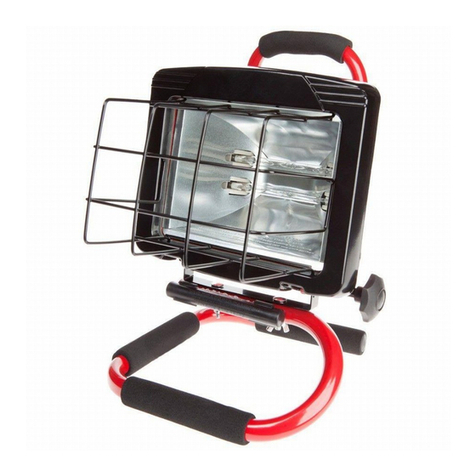
1000 Watt Halogen Work Light
Important safety instructions
WARNING: Read all instructions carefully
SAVE THESE INSTRUCTIONS
CAUTION: RISK OF ELECTRICAL SHOCK
Do not use with extension cord near water or where water may
accumulate.
Keep plugs and receptacles dry.
For use only on GFCI protected circuits.
Risk of burns, do not operate without guard. (See assembly instructions.)
Lighted lamp is hot. Keep away from combustibles. Unplug to change
bulb. Do not touch bulb
WARNING RISK OF FIRE, ELECTRIC SHOCK, EXPOSURE
TO EXCESSIVE UV RADIATION OR INJURY TO PERSONS
Unit operates on 120V AC 60 Hz only
Unplug and allow cooling before replacing bulb.
Bulb gets HOT quickly
Do not touch hot lens guard or enclosure.
Do not remain in light if skin feels warm.
Do not look directly at lighted lamp.
Keep lamp away from materials that may bum.
Use only with a 500 Watt or smaller type T bulb.
Do not touch the bulb at any time; use a soft cloth or gloves. Oil from skin
may damage bulb.
Do not operate the lamp with missing or damaged guard, lamp
containment barrier or UV light filter.
SAVE THESE INSTRUCTIONS
WARNING: When using outdoor use work lights, basic safety precautions
should always be followed to reduce the risk of fire, electrical shock, and
personal injury, including the following:
Use only three-wire outdoor extension cords that have three-prong
grounding plug and receptacles that accept the appliance's plug.
Ground Fault Circuit Interrupter (GFCl) protection should be provided on
the circuit(s) or outlet(s) to be used for the wet location work light.
Receptacles are available having built-in GFCI protection and are able to
be used for this measure of safety.
Use only an extension cord for outdoor use, such as an extension cord of
cord type SW, SW-A, SOW, SOW -A. STW, STW-A, STOW. STOW-A.
SlW, SlW-A. SlOW. SlOW-A. SJTW. SJTW-A. or SJTOW, SJTOW-A.
BULB INSTALLATION AND REPLACEMENT
DO NOT TOUCH BULB WITH BARE HANDS
1. Turn the light off and unplug from the power source.
2. Allow the fixture to fully cool before proceeding.
3. Always wear gloves or use a clean cloth to handle bulb. The natural oil
from skin will leave a residue that will cause the light to burn out
immediately.
4. To remove the lens cover, remove the retaining screw on the front of the
lens cover. The lens cover will then swing open exposing the bulb.
5. To remove the bulb, grip one end of the bulb and gently push towards the
other end and pull outward to release the bulb.
6. Using a clean cloth or wearing gloves to hold the bulb, gently insert one
end of the bulb into the receptacle and press firmly into place. Place the
other end of the bulb into the opposite receptacle and gently press into
place. Make sure bulb is seated properly.
7. Close the lens cover and replace the retaining screw.
8. Do not test light without lens cover properly attached.
WARNING: Read all instructions carefully
SAVE THESE INSTRUCTIONS
CAUTION: RISK OF ELECTRICAL SHOCK
WARRANTY
PRODUCTS COVERED UNDER THIS LIMITED WARRANTY:
This product is warranted to the original purchaser for 1 year and only covers
failures due to defects in materials or workmanship. If this product is used for
rental purposes, the warranty term is reduced to 90 days from the date of
purchase.
NOT COVERED
The warranty does not cover normal wear and tear or cosmetic damage. The
Limited Warranty also does not cover damages which occurred in shipment or
failures which are caused by accidents, misuse, abuse, faulty installation and
lightning damage. Consequential damages, incidental damages or incidental
expenses, including damage to property. Some states do not allow the
exclusion or limitation of incidental or consequential damages, so the above
limitation or exclusion may not apply to you. This warranty gives you specific
legal rights, which may vary from state to state. This warranty does not apply to
certain Bayco professional products that carry a specific warranty unique to
those products.
WARRANTY CLAIMS - USA
Contact Bayco for USA warranty claims. Call and Bayco Customer Service will
provide a Return Goods Authorization (RGA) to facilitate rapid warranty action.
After receiving the RGA, send the product (shipping prepaid) to BAYCO.
Include a dated proof of purchase and a brief description of the defect with your
name, address and phone number. Your product will either be repaired or
replaced at the option of Bayco and returned as soon as practical, but no later
than 45 days after being received by Bayco.
WARRANTY CLAIMS - CANADA
Return the product to the place where purchased with a dated proof of
purchase and a brief description of the defect with your name, address and
phone number. Your product will either be replaced or purchase price
refunded.
REQUEST FOR WARRANTY ACTION
If you have any questions about this warranty or any other Bayco product
inquiries contact BAYCO.
Model 1005 Assembly Instructionsfor
Double 500 Watt Halogen Tripod Light
1. Attach light handle (B) to 500 watt halogen light assembly using light
handle thumb screw (C)
2. Attach 500 watt halogen light assemblies (A) to light bar (E) using light
bar knob/bolt (F) light bar washer (G) and light bar bolt (H)
3. Fasten connection box (M) to light bar (E) using connection box screw (N)
4. Slide support pole (I) into the base of tripod stand (K) and tighten tri-pod
stand knob / bolts (L).
5. Position light bar (E) on top of support pole (I) and attach with support
pole knob / bolt (J)
6. Snap grill guard (D) over the lens on the 500 watt halogen light assembly
(A)
To convert the tripod into a portable light:
Remove support pole knob / bolt (J)
Lift assembly at light fixture handle (B) to separate the unit from support
pole (I)
A 1000 watt halogen light assembly
2
B Light handle 2
C Light handle thumb screw 2
D Grill guard 2
E Light bar 1
F Light bar knob/bolt 2
G Light bar washer 1
H Light bar bolt 2
I Support pole 1
J Support pole knob/bolt 1
K Tripod stand 1
L Tripod stand knob/bolt 1
M Connection box 1
N Connection box screw 1
CAUTION-RISK OF BURNS DO NOT OPERATE WITHOUT GRILL GUARD
INSTALLATION INSTRUCTION OF GRILL GUARD
Step 1:
Unscrew the lens cover in order to have enough space to insert the grill guard
into the four corners around lens cover.
Step 2:
The grill guard must be inserted between the lens cover and glass lens
Step 3:
Screw the lens cover back on to light housing and tighten it gently
The light is ready for use.
1
2
3
When it comes to quality work lights, Bayco is the brand you can depend on.

This manual suits for next models

1

Other Bayco Work Light manuals

Bayco SL-1504 User manual

Bayco

Bayco SL-1504 User manual

Bayco 651 User manual

Bayco

Bayco 651 User manual

Bayco 450 Series User manual

Bayco

Bayco 450 Series User manual

Bayco Innovation Made Better SL-2135 User manual

Bayco

Bayco Innovation Made Better SL-2135 User manual

Bayco HIPower SLR-2134 User manual

Bayco

Bayco HIPower SLR-2134 User manual

Bayco 2116 User manual

Bayco

Bayco 2116 User manual

Bayco SL-864 User manual

Bayco

Bayco SL-864 User manual

Bayco SL-1514 User manual

Bayco

Bayco SL-1514 User manual

Bayco BAR-2134 User manual

Bayco

Bayco BAR-2134 User manual

Bayco SL-866 User manual

Bayco

Bayco SL-866 User manual

Bayco SL-1022 User manual

Bayco

Bayco SL-1022 User manual

Bayco Nightstick NSR 2166 Series User manual

Bayco

Bayco Nightstick NSR 2166 Series User manual

Bayco 506-507-520-550 User manual

Bayco

Bayco 506-507-520-550 User manual

Bayco 675 User manual

Bayco

Bayco 675 User manual

Bayco 675 User manual

Bayco

Bayco 675 User manual

Bayco BAR-2392 User manual

Bayco

Bayco BAR-2392 User manual

Bayco 821 User manual

Bayco

Bayco 821 User manual

Bayco NightStick XPR-5580G User manual

Bayco

Bayco NightStick XPR-5580G User manual

Bayco NIGHTSTICK Dual-Light Xtreme Lumens... User manual

Bayco

Bayco NIGHTSTICK Dual-Light Xtreme Lumens... User manual

Bayco SL-1514 User manual

Bayco

Bayco SL-1514 User manual

Bayco Nightstick 2166 User manual

Bayco

Bayco Nightstick 2166 User manual

Bayco SL-866 User manual

Bayco

Bayco SL-866 User manual

Bayco 825 User manual

Bayco

Bayco 825 User manual

Bayco SL-868 User manual

Bayco

Bayco SL-868 User manual

Popular Work Light manuals by other brands

Omega 94125 operating instructions

Omega

Omega 94125 operating instructions

AMiO 02823 user manual

AMiO

AMiO 02823 user manual

Festool SYSLITE UNI Original operating manual

Festool

Festool SYSLITE UNI Original operating manual

Saunia 46313 Installation and operation guide

Saunia

Saunia 46313 Installation and operation guide

LED Linear VarioContour 1907-R installation instructions

LED Linear

LED Linear VarioContour 1907-R installation instructions

NightSearcher Kanga Star 2.2K instruction manual

NightSearcher

NightSearcher Kanga Star 2.2K instruction manual

Stanley SXLS34624E instruction manual

Stanley

Stanley SXLS34624E instruction manual

Makita DML810 instruction manual

Makita

Makita DML810 instruction manual

Saber Compact ATD-80395A owner's manual

Saber Compact

Saber Compact ATD-80395A owner's manual

NOMA 052-4058-6 instruction manual

NOMA

NOMA 052-4058-6 instruction manual

Canyon WF MO 961114B & S instructions

Canyon

Canyon WF MO 961114B & S instructions

Saber Compact ATD-80350A owner's manual

Saber Compact

Saber Compact ATD-80350A owner's manual

ALS RFL251R user manual

ALS

ALS RFL251R user manual

REV Ritter AKKU FLOOD 5W Assembly and operating instructions

REV Ritter

REV Ritter AKKU FLOOD 5W Assembly and operating instructions

TOBIAS GRAU XT-S FLOOR TWO manual

TOBIAS GRAU

TOBIAS GRAU XT-S FLOOR TWO manual

Craftsman CMXELAYMPL1033 instruction manual

Craftsman

Craftsman CMXELAYMPL1033 instruction manual

Trae KIYO user guide

Trae

Trae KIYO user guide

Hella 1GA 995 506 Series Installation instruction

Hella

Hella 1GA 995 506 Series Installation instruction

manuals.online logo
manuals.online logoBrands
  • About & Mission
  • Contact us
  • Privacy Policy
  • Terms and Conditions

Copyright 2025 Manuals.Online. All Rights Reserved.