manuals.online logo
Brands
  1. Home
  2. •
  3. Brands
  4. •
  5. BDI
  6. •
  7. Indoor Furnishing
  8. •
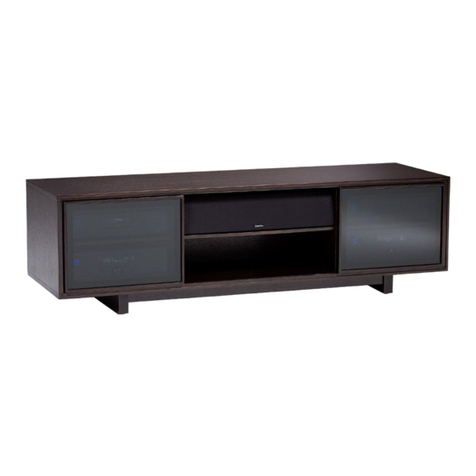
  9. BDI CIRRUS 8158 User manual

BDI CIRRUS 8158 User manual

B - 4mm Hex Driver
A - Phillips Screwdriver
E - Cam Fastener
x 4
F- Leg Assembly
x 2
I - Assembled Cabinet
x 1
N - Center Wheel Block
x 1
J - Washer x 8
Q - Adjustable
Center Shelf x 1
K - 1/4-20 x 55mm
Machine Screw x 8
M - 1/4-20 x 38mm
Machine Screw x 4
P - Back Panel
x 2
R - Adjustable Shelf
x 4
G - Rear Rail x 1
H - Front Rail x 1
C - Dowel Pin x 8
D - Cam Bolt x 4
O - Sliding Door x 2
L - 1/4-20 x 90mm
Machine Screw x 2
CIRRUS
Designed by Matthew Weatherly
These distinctive product configurations are protected by US and international
patents, trade dress, and/or copyright laws.
BDI are trademarks of Becker Designed, Inc.
All Rights reserved. © 2010 BDI
Made in China. 8158 Revision: 031610
Component List
8158
ASSEMBLY INSTRUCTIONS
1
BDIUSA.COM CUSTOMERSERVICE@BDIUSA.COM
Cirrus is engineered for easy assembly. Carefully follow this procedure to
prevent any damage.
Placement and Maintenance
Cirrus is designed for indoor use on level floors. Clean glass with glass
cleaner, and steel parts and wood veneer with a moist cloth.
Step 1
Unpack and Identify
Unpack and identify the components at left. Note that some components
are shipped inside the cabinet. The assembly workspace should be a
nonmarring surface such as carpet. For missing hardware pieces, please
contact BDI Customer Service at customerservi[email protected]om. For all
other concerns, please contact your BDI Retailer.
Step 2
Build Base Assembly
Install Cam Bolts (D) near front and rear edge of each Leg Assembly (F)
using provided Phillips Screwdriver (A). Next, insert Dowel Pins (C) into
holes at ends of Front Rail (H) and Rear Rail (G). Then join both Rails
and Leg Assemblies together, aligning holes for all Cam Bolts and Dowel
Pins.
Once all Cam Bolts and Dowel Pins are fully inserted to the respective
holes, fasten together by inserting Cam Fastener (E) and turning about
one-half turn clockwise using Phillips Screwdriver (A).
E
C
G
F
C
F
D
F
F
G
H
H
CIRRUS
8158 ASSEMBLY INSTRUCTIONS
2 BDIUSA.COM CUSTOMERSERVIC[email protected]
Step 3
Attach Base Assembly
Attach Base Assembly to Assembled
Cabinet (I) with Front Rail (H) oriented
towards cabinet front (see drawing).
Fasten into place using Washers (J) and
Screws (K) at Front Rail (H) and Rear
Rail (G) and tighten with Hex Driver (B).
Step 5
Attach Center Wheel Block
Attach Center Wheel Block (N) to cabinet’s
bottom panel using Screws (L) and tighten
with Hex Driver (B).
Rear Rail (G)
is painted Black
Cabinet upside down
on carpeted floor to
protect finish.
NOTE:
Levelers are present at
the front and rear
underside of each Leg
Assembly. Each Leveler is
manually adjustable by
hand-turning to extend or
retract to the desired position.
Such adjustment will help
offset uneven flooring
and/or will prevent the
cabinet from rolling.
Front Rail (H)
is wood veneered
Assembled Cabinet (I)
Front
K
J
M
M
Step 4
Install Screws into Leg Assembly
Install Screws (M) into Leg Assembly (F)
and tighten with Hex Driver (B).
Center Wheel Block (N)
Leveler towards front
Screws (L)
Cabinet upside down
on carpeted floor to
protect finish.
Leg Assembly (F)
Leg Assembly
(F)
Assembled Cabinet (I)
Front
CIRRUS
8158 ASSEMBLY INSTRUCTIONS
3 BDIUSA.COM CUSTOMERSERVIC[email protected]
Optional Step
Adjust Height of Doors
In case door is not aligned properly, fixed wheel rollers on the bottom
of each door are height-adjustable. Loosen two (2) inner screws using
Phillips Screwdriver (A), raise or lower wheel cartridge slightly,
then re-tighten screws.
Step 6
Install Sliding Doors
Install Sliding Doors (O) by carefully inserting wheels at door edge
with brass plate into track as shown. Make sure each door rolls
smoothly side to side, then push downward with gentle, firm motion
and tip wheels at opposite door edge carefully into opposite track.
NOTE: Match Labels on Door with Labels on Cabinet.
Door Track
Cabinet upside down
on carpeted floor to
protect finish.
Door Track
Brass Plate
on Door
Door Track
Top Edge
with Brass Plate
and Spring-Loaded
Wheels
A
Brass Plate
Sliding Door (O)
Top Edge
Bottom Edge
Sliding Door (O)
Back View
Brass Plate towards
sides of cabinet
Round Ball Catch
Round Ball Catch
VIEW 42
CIRRUS
8158 ASSEMBLY INSTRUCTIONS
4 BDIUSA.COM CUSTOMERSERVIC[email protected]
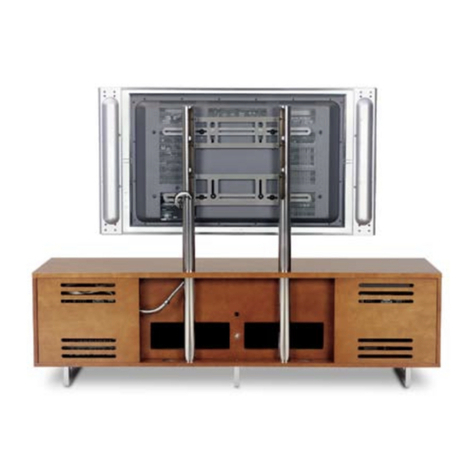
Optional Flat Panel TV Mount
This BDI cabinet is compatible with
BDI’s Flat Panel TV Mount Arena 9972
(sold separately), with the following features:
accommodates most TVs up to 60"
swivel allows for rotating for optimal viewing
allows adjustable TV mounting height
accepts and route cables to and from the TV
For more information, visit www.bdiusa.com
Step 7
Turn Cabinet Over and Install Back Panels
With the help of another person, position the
cabinet right side up.
CAUTION: Do Not Turn Cabinet Over on the
Doors.
Install Back Panels (P) to the back side of the
cabinet by inserting top edge in upper channel,
then tipping bottom edge forward and into lower
channel. NOTE: Velcro straps are included as
wire management for your convenience.
Back Panel (P)
Step 8
Install Adjustable Shelves
Adjustable shelf pins may be repositioned
depending on the height of your component,
allowing you to raise or lower the Adjustable
Shelves (Q) and (R) to the desired level.
Adjustable Center Shelf (Q)
Adjustable Shelf (R)
behind doors
Recommended
2-person Step

Other BDI Indoor Furnishing manuals

BDI Corridor 8172 User manual

BDI

BDI Corridor 8172 User manual

BDI Avion 8521 Corner User manual

BDI

BDI Avion 8521 Corner User manual

BDI Sequel User manual

BDI

BDI Sequel User manual

BDI SECTOR 7527 Series User manual

BDI

BDI SECTOR 7527 Series User manual

BDI SEQUEL 20 6107 User manual

BDI

BDI SEQUEL 20 6107 User manual

BDI REVEAL 1196 User manual

BDI

BDI REVEAL 1196 User manual

BDI SEQUEL 20 6116 User manual

BDI

BDI SEQUEL 20 6116 User manual

BDI Vertica 8556 User manual

BDI

BDI Vertica 8556 User manual

BDI Sequel User manual

BDI

BDI Sequel User manual

BDI CODE 7376 User manual

BDI

BDI CODE 7376 User manual

BDI sequel 6001 Desk User manual

BDI

BDI sequel 6001 Desk User manual

BDI EILEEN 5156 User manual

BDI

BDI EILEEN 5156 User manual

BDI 8354 User manual

BDI

BDI 8354 User manual

BDI DUO 6241 User manual

BDI

BDI DUO 6241 User manual

BDI LINQ 9185 User manual

BDI

BDI LINQ 9185 User manual

BDI STANCE MODESTY PANEL 6657 User manual

BDI

BDI STANCE MODESTY PANEL 6657 User manual

BDI CONTINUUM 3472 User manual

BDI

BDI CONTINUUM 3472 User manual

BDI CIRRUS 8157 User manual

BDI

BDI CIRRUS 8157 User manual

BDI CORRIDOR 8179-WL User manual

BDI

BDI CORRIDOR 8179-WL User manual

BDI CORRIDOR BAR 5620 User manual

BDI

BDI CORRIDOR BAR 5620 User manual

BDI LINQ 9181 User manual

BDI

BDI LINQ 9181 User manual

BDI TERRACE 1150 User manual

BDI

BDI TERRACE 1150 User manual

BDI Format 6307 User manual

BDI

BDI Format 6307 User manual

BDI STANCE 6650 User manual

BDI

BDI STANCE 6650 User manual

Popular Indoor Furnishing manuals by other brands

Regency LWMS3015 Assembly instructions

Regency

Regency LWMS3015 Assembly instructions

Furniture of America CM7751C Assembly instructions

Furniture of America

Furniture of America CM7751C Assembly instructions

Safavieh Furniture Estella CNS5731 manual

Safavieh Furniture

Safavieh Furniture Estella CNS5731 manual

PLACES OF STYLE Ovalfuss Assembly instruction

PLACES OF STYLE

PLACES OF STYLE Ovalfuss Assembly instruction

Trasman 1138 Bo1 Assembly manual

Trasman

Trasman 1138 Bo1 Assembly manual

Costway JV10856 manual

Costway

Costway JV10856 manual

moss DESIGN Caisson Credenza Assembly instructions

moss DESIGN

moss DESIGN Caisson Credenza Assembly instructions

Aquaglide FULL DECK 15.0 owner's manual

Aquaglide

Aquaglide FULL DECK 15.0 owner's manual

AREBOS AR-HE-SW30 user manual

AREBOS

AREBOS AR-HE-SW30 user manual

Till-Hilft Fulda 87005.330 Assembly instructions

Till-Hilft

Till-Hilft Fulda 87005.330 Assembly instructions

Twoey Outside 2010 quick start guide

Twoey Outside

Twoey Outside 2010 quick start guide

Hettich Easys 200 operating instructions

Hettich

Hettich Easys 200 operating instructions

The bedboss RELAX 404 Series owner's manual

The bedboss

The bedboss RELAX 404 Series owner's manual

Oeseder Möbelindustrie Bern 991 720 Assembly instructions

Oeseder Möbelindustrie

Oeseder Möbelindustrie Bern 991 720 Assembly instructions

Costway HW68469 user manual

Costway

Costway HW68469 user manual

Next ALIX A27743 Assembly instructions

Next

Next ALIX A27743 Assembly instructions

BROSA Hans Assembly guide

BROSA

BROSA Hans Assembly guide

Prodigg MINIKA PBA015T-FUR installation manual

Prodigg

Prodigg MINIKA PBA015T-FUR installation manual

manuals.online logo
manuals.online logoBrands
  • About & Mission
  • Contact us
  • Privacy Policy
  • Terms and Conditions

Copyright 2025 Manuals.Online. All Rights Reserved.