manuals.online logo
Brands
  1. Home
  2. •
  3. Brands
  4. •
  5. BDI
  6. •
  7. Indoor Furnishing
  8. •
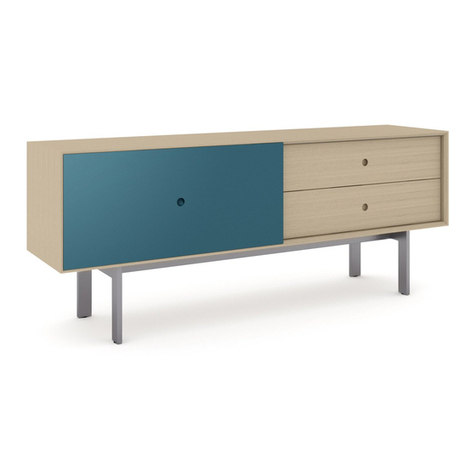
  9. BDI MARGO 5211 User manual

BDI MARGO 5211 User manual

1
A1 Left frame x 1
A2 Right frame x 1
C1 Shelf x 1
C2 Cabinet x 1
C3 Door Facia x 1
Product Registration
Registering your new BDI product allows us to send you important
product updates, service information and helpful hints related to your BDI
products. Register today, and you will be entered to win free a BINK table
from BDI: www.bdiusa.com/register
Placement and Maintenance
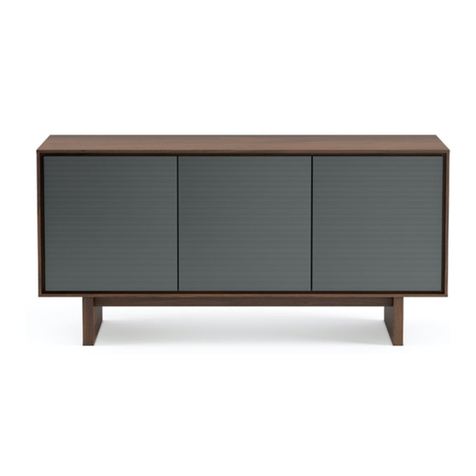
Your Margo Console is designed for indoor use on level floors.
Clean wood veneer and steel parts with a moist cloth.
Margo is engineered for easy assembly. Carefully follow this procedure to
prevent any damage. Do not use power tools for assembly of this product.
Step 1
This unit ships in 3 cartons (metal frames, cabinet & shelf, and sliding door
front) Unpack all cartons and associated hardware bags. Identify the parts
listed below. The assembly workspace should be a non-marring surface
such as carpet. For missing hardware pieces, contact BDI Customer
Service at: [email protected]. For all other concerns, please
contact your BDI retailer.
bdiusa.com
customerservic[email protected]om
Designed by Jeff Bare.
These distinctive product configurations are protected by US and international patents, trade dress, and/or
copyright laws. Margo & BDI are trademarks of Becker Designed, Inc. All rights reserved. ©2019, BDI
Made in China. 06.12.2019 V3
MARGO™ 5211
Console
H1 M6 x 38 mm
Pan Head Screw x 10
T1 Hex Driver x 1
H3 Thumb Screw x 2
T2 Leveler wrench x 1
bdiusa.com
customerservic[email protected]om
MARGO 5211
Console
2
Step 2 - Making sure the levelers are facing down, place the left and right frames at least 2' off the wall and
30.5" (78cm) apart in the orientation shown below. Use the provided template to accurately space the frames.
Step 3 - Carefully place shelf C1 on top of the frames. Attach shelf C1 to each frame with pan-head screws
H1 and partially tighten with hex driver T1. DO NOT tighten the screws completely until the cabinet is
also positioned and installed.
H1 x 4 T1 Hex Driver
30.5" (78cm)
at least 2 feet
bdiusa.com
customerservic[email protected]om
MARGO 5211
Console
3
Step 5 -Secure the back of the cabinet to the 2 frames using pan-head screws H1 and hex driver T1.
Tighten ALL SCREWS for the shelf and cabinet at this time.
Step 4 - Make sure the cabinet is oriented right side up with door track on top. With help from another person,
carefully slide the cabinet into the opening in the frame and center it so that the 2 holes on top of the cabinet
are directly under the frame. Slide the cabinet all the way back and attach to the frame as shown using pan-
head screws H1 and partially tighten with hex driver T1. DO NOT tighten screws completely yet.
H1 x 4
T1 Hex
Driver
Door track
on top
Holes on left
2 Person Ta sk
H1 x 2 T1 Hex driver
bdiusa.com
customerservic[email protected]om
MARGO 5211
Console
4
Step 6 - Slide the door frame towards the middle. Orient the door facia C3 as shown with the threaded
holes behind the left side. Position the door facia C3 into the door frame and shift it to the right while hold-
ing the left edge of the door frame to prevent it from sliding. Secure the left side of the door fascia to the door
frame with 2 thumb screws H3 going into the holes on the back of the door frame and into the threaded
holes on the back of the door facia C3.
Check to make sure the door facia is level with the cabinet and the gaps along the top and bottom edges of
the door are even with no rubbing between the door and cabinet. If not, proceed to step 8.
Door frame
C3 Door facia
H3
H3
slide to the right
to lock
bdiusa.com
customerservic[email protected]om
MARGO 5211
Console
5
Levelers
Step 7 - Level the console
Levelers are integrated into each leg assembly and are accessed at the bottom of each leg. If your floor is
uneven, you may extend one or more levelers to attain a level, stable position.
Step 8 - Adjust sliding door if needed
If your sliding door is not hanging evenly, or rubs at the top or bottom, it can be adjusted up or down by turn-
ing one (or both) adjustment wheels inside the cup (located behind each upper corner of the door). To move
the door frame up turn the wheel towards the left. To move the door frame down, turn the wheel towards the
right. Lifting the door frame up with your other hand allows the adjustment wheel to turn more freely.
lift here while
adjusting the
door
T2
Leveler
wrench
wheel
direction
door direction
adjustment
wheel

Other BDI Indoor Furnishing manuals

BDI SEQUEL 20 6117 User manual

BDI

BDI SEQUEL 20 6117 User manual

BDI CENTRO 6407 SW User manual

BDI

BDI CENTRO 6407 SW User manual

BDI 6401 User manual

BDI

BDI 6401 User manual

BDI Novia 8421 User manual

BDI

BDI Novia 8421 User manual

BDI DUO 6241 User manual

BDI

BDI DUO 6241 User manual

BDI CORRIDOR 8179-WL User manual

BDI

BDI CORRIDOR 8179-WL User manual

BDI 8239 User manual

BDI

BDI 8239 User manual

BDI CENTRO User manual

BDI

BDI CENTRO User manual

BDI LINEA 5801A User manual

BDI

BDI LINEA 5801A User manual

BDI LINQ 9185 User manual

BDI

BDI LINQ 9185 User manual

BDI ELEMENTS User manual

BDI

BDI ELEMENTS User manual

BDI CENTRO 6451 User manual

BDI

BDI CENTRO 6451 User manual

BDI sequel 6001 Desk User manual

BDI

BDI sequel 6001 Desk User manual

BDI MILO 1055 User manual

BDI

BDI MILO 1055 User manual

BDI CORA 1173 User manual

BDI

BDI CORA 1173 User manual

BDI Mirage 8222 User manual

BDI

BDI Mirage 8222 User manual

BDI TERRACE 1150 User manual

BDI

BDI TERRACE 1150 User manual

BDI MATTHEW WEATHERLY CORRIDOR 8173 User manual

BDI

BDI MATTHEW WEATHERLY CORRIDOR 8173 User manual

BDI BOLO 3531 User manual

BDI

BDI BOLO 3531 User manual

BDI Avion User manual

BDI

BDI Avion User manual

BDI Icon 9422 User manual

BDI

BDI Icon 9422 User manual

BDI STILETTO 5701A User manual

BDI

BDI STILETTO 5701A User manual

BDI Novia 8429-2 User manual

BDI

BDI Novia 8429-2 User manual

BDI LINEA 6220 User manual

BDI

BDI LINEA 6220 User manual

Popular Indoor Furnishing manuals by other brands

Teknion COMPLEMENTS NAVIGATE TABLE - ELECTRIC Installation guides

Teknion

Teknion COMPLEMENTS NAVIGATE TABLE - ELECTRIC Installation guides

Heritage Bathrooms ASOC26 Installation instructions and user guide

Heritage Bathrooms

Heritage Bathrooms ASOC26 Installation instructions and user guide

WATSON C9 Height Adjustable Desk Assembly

WATSON

WATSON C9 Height Adjustable Desk Assembly

Mocka Sadie Assembly instructions

Mocka

Mocka Sadie Assembly instructions

Gami G50-ELISA 150 Assembly instructions

Gami

Gami G50-ELISA 150 Assembly instructions

fantastic furniture Havana Robe 2 Door 1 Drawer manual

fantastic furniture

fantastic furniture Havana Robe 2 Door 1 Drawer manual

hygena 459/1553 Assembly instructions

hygena

hygena 459/1553 Assembly instructions

Schrank technik IWA SZ 2D Assembly instruction

Schrank technik

Schrank technik IWA SZ 2D Assembly instruction

Costway HW67587 user manual

Costway

Costway HW67587 user manual

Epoch Design DAKOTA 5375 Assembly instructions

Epoch Design

Epoch Design DAKOTA 5375 Assembly instructions

Fackelmann 87205 Instructions for mounting and use

Fackelmann

Fackelmann 87205 Instructions for mounting and use

OVE NEVADA 60 installation manual

OVE

OVE NEVADA 60 installation manual

Bestar 26163-1117 Assembly instructions

Bestar

Bestar 26163-1117 Assembly instructions

SIGE PRO Series quick start guide

SIGE

SIGE PRO Series quick start guide

KIDSMILL VINCE 11704256 user manual

KIDSMILL

KIDSMILL VINCE 11704256 user manual

Bloomingville Korfu 82051110 Assembly instruction

Bloomingville

Bloomingville Korfu 82051110 Assembly instruction

Argos Jonas 889 / 4184 Assembly instructions

Argos

Argos Jonas 889 / 4184 Assembly instructions

Pitarch 1076 Assembly instructions

Pitarch

Pitarch 1076 Assembly instructions

manuals.online logo
manuals.online logoBrands
  • About & Mission
  • Contact us
  • Privacy Policy
  • Terms and Conditions

Copyright 2025 Manuals.Online. All Rights Reserved.