manuals.online logo
Brands
  1. Home
  2. •
  3. Brands
  4. •
  5. BDI
  6. •
  7. Indoor Furnishing
  8. •
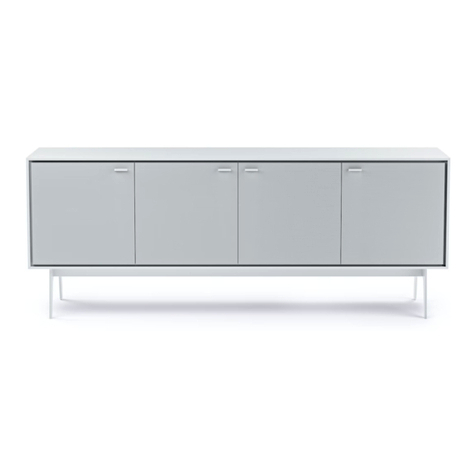
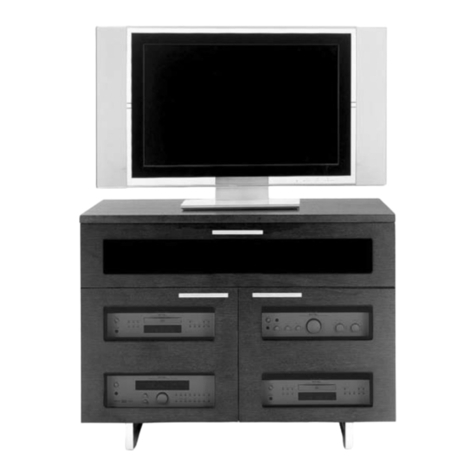
  9. BDI Avion Noir 8937 User manual

BDI Avion Noir 8937 User manual

1
Your Avion® Noir Home Theater Furniture is engineered for easy
assembly. Carefully follow this procedure to prevent any damage.
Placement and Maintenance
Avion® Noir Home Theater Furniture is designed for indoor use on level
floors. Clean glass with glass cleaner, and steel parts and wood veneer
with a moist cloth.
Step 1
Unpack and Identify
Unpack and identify the components at left. Note that some components
are shipped inside the cabinet. The assembly workspace should be a non-
marring surface such as carpet. For missing hardware pieces, please
contact BDI Customer Service at [email protected]. For all
other concerns, please contact your BDI Retailer.
Step 2
Install Handles
Install Handles (K) on the doors and drawers using the M4 x 25mm
Screws (J) and the Phillips Screwdriver (A) supplied.
Component List
Designed by BDI Design Studio.
These distinctive product configurations are protected by US and international
patents, trade dress, and/or copyright laws.
“Avion” and BDI are trademarks of Becker Designed, Inc.
All Rights reserved. ©2009, BDI
Made in China. 8937REV102909v2
Av i o n ® no i r
8937
a s s e m b l y instructions
b d i u s a .c o m customerservice@b d i u s a .c o m
K
J
C - Hollow Bolt Wrench
x 1
F - Assembled Cabinet
x 1
E - 1/4”-20 x 2”
Machine Screws
x 10
D - Hollow Bolts x 4
Pre-installed on
Metal Legs (H)
G-Metal Rail x 2
J -M4 x 25mm Screws
x 8
B - 4mm Hex Drivers
x 2
A - Phillips Screwdriver
x 1
I - Wood Leg x 1
K - Handles x 4
L - Adjustable Shelf
x 2
I - Speaker Drawer
Panel
x 1
M - Back Panel x 2
H - Metal Leg x 2
2
assembly instructions
b d i u s a .c o m c u s t o m e r s e r v i c e @b d i u s a .c o m 3
G
Completed
base
assembly
Step 4
Fasten Base Frame to Assembled Cabinet
Carefully lay Assembled Cabinet (F) back-side down. Using one of 4mm
Hex Drivers (B), attach the completed base assembly to the bottom
of the Assembled Cabinet (F) with 1/4”-20 x 2” Machine Screws (E).
*Note: Each of the metal legs has levelers that can be adjusted from
inside the cabinet using one of the 4mm Hex Drivers (B).
E x 8
Step 3
Build Base Assembly
Using the Hollow Bolt Wrench (C), remove the four (4) pre-installed
Hollow Bolts (D) from Metal Leg (H). screw the Metal Rail (G) to the
top of Metal Leg (H) with Hollow Bolts (D).
H
H
D
G
G
Detail view of Hollow Bolts (D)
connecting the Metal Rail (G) to
the top of Metal Leg (H).
D
G
H
H
Completed base assembly
NOTE: Make sure
that the larger bolt
opening on Metal Rail
(G) faces toward the
floor.
3
assembly instructions
b d i u s a .c o m c u s t o m e r s e r v i c e @b d i u s a .c o m
Completed
base
assembly
Step 5
Install Wood Leg
Install Wood Leg (I) at rear-center edge of cabinet bottom using two
(2) 1/4”-20 x 2” Machine Screws (E) and one of 4mm Hex Drivers
(B). Wood Leg (I) must straddle the rearmost Metal Rail (G), as
indicated in drawing.
E
E
Step 6
Install Back Panel
Install both Back Panels (M) to the backside of the cabinet.
*Note: Velcro straps are included as wire management for your
convenience.
I
G
NOTE: To install first Machine Screw (E), open cabinet’s bottom-center
door to gain access to interior compartment. Once first Machine Screw
(E) is threaded into the Wood Leg (I), upright the cabinet and install
second Machine Screw (E) from cabinet exterior, near back edge of
cabinet.
Optional Flat Panel TV Mount
This BDI cabinet is compatible with BDI’s Flat-
Panel TV Mount #9970 (sold separately), with
the following features:
attaches easily to the back of the cabinet•
accommodates most TVs up to 60”•
swivel allows for rotating for optimal viewing•
allows adjustable TV mounting height•
accepts and route cables to and from the TV•
For more information, visit www.bdiusa.com
4
assembly instructions
b d i u s a .c o m c u s t o m e r s e r v i c e @b d i u s a .c o m 5
Step 7
Center channel speaker option A.
If you decide to use your top/center drawer area for a center channel
speaker, the drawer may be easily removed. In order to do this, follow
the steps below.
Step 9
Option: Removing Center Drawer Divider
Remove Center Drawer Divider by loosening & removing Philips head
screw fasteners, installed on outer-side walls of Drawer Assembly,
using provided Phillips Screwdriver (A). Divider can be re-installed within
the Drawer by positioning at one of the pre-determined locations and
threading Philips screws through corresponding holes in outer-side
walls and into Divider with Phillips Screwdriver (A).
Fully extend drawer and locate plastic lever
on drawer slide.
Simultaneously on the LEFT side of drawer, lift UP on plastic lever AND on the RIGHT side
of drawer, push DOWN on plastic lever and pull STRAIGHT OUT the entire drawer assem-
bly. Remove drawer slides from interior side panels using a Phillips screwdriver.
Step 8
Center channel speaker option B
If you decide to use your top/center drawer
area for a center channel speaker, the glass
drawer face may be replaced with Speaker
Drawer Face (I). In order to do this, follow the
steps below.
1. Pull out drawer and locate all exposed Cam
inserts. Cam inserts are located inside drawer
and bottom side of drawer shelf.
2. Remove glass drawer face from drawer
assembly by turning all Cam inserts (counter
clock-wise) using a Phillips screwdriver.
3. Switch all previously removed hardware
over to back side of speaker panel.
4. Install speaker panel to drawer assembly
and tighten Cam inserts.
Small
Wood Dowel
Large
Cam
Screw
Small
Cam
Screw
Large
Wood
Dowel
x 4
x 2
x 2
x 2
5
assembly instructions
b d i u s a .c o m c u s t o m e r s e r v i c e @b d i u s a .c o m
Small
Wood Dowel
STEP 2 - Adjust Door Hinges (if needed)
The doors on your cabinet should be evenly spaced and the doors should open and close freely without rubbing against the
door frame.
If the cabinet’s doors appear out of alignment, this condition can be
corrected with minor adjustment to the European hinges on each
door.
Because these hinges are infinitely adjustable, adjusting one
hinge element can sometimes cause the need for adjustments
to other elements. But with a few adjustments, you can modify
the orientation of the cabinet doors to make sure that they hang
perfectly within your cabinet.
Use a Phillips screwdriver to adjust the door hinges:
By adjusting
• Screw 1, the door will move LEFT or RIGHT
within the frame. Make minor adjustments at both top and
bottom hinges for best results.
By adjusting• Screw(s) 2, the door will move UP or DOWN
within the frame (the top and bottom hinges must be adjusted the
same amount).
By adjusting• Screw 3 the entire door will move IN or OUT,
opening or closing the gap between the door frame and cabinet
(this screw rarely needs adjustment).

1.
2.
3.
3.
1.
2.
*
2.
*
Thank you for choosing BDI.
Your BDI home theater cabinet is engineered to include a range of adjustments. Please read and retain this guide so that
you can fully enjoy the look and use of your cabinet for years to come.
Unless manual leveling is required or you wish to prevent the cabinet from rolling, you may prefer to keep the cabinet’s
levelers up and off the floor. This allows easier cabinet movement for greater access to rear panels and wire-
management, and permits easier cleaning/vacuuming underneath the cabinet.
By following the steps in this guide, you can be sure that your BDI cabinet is in optimum tune and adjustment. If you need
additional assistance, contact BDI at [email protected].
Fine tuning your BDI Avion Home Theater Furniture
After unpacking and assembling your cabinet, inspect it to be sure that it is sitting level on the floor, that all doors appear
level, and that they open and close freely without rubbing or binding.
Due to uneven floors or perhaps gentle jostling during shipment, your BDI cabinet may not appear to be in perfect
alignment when first assembled or when loaded with heavier electronic equipment. Such alignment issues are usually
minimized or eliminated with only a few minor adjustments.
STEP 1 - Level the cabinet (if needed)
Levelers are integrated into each leg assembly and are accessed from inside
the cabinet. If your floor is uneven, you may extend one or more levelers (with the
provided 4mm Hex Drivers (B)) to attain a level, stable cabinet placement. Turning
the leveler clockwise will extend the leveler; turning it counter-clockwise will retract it.
INCORRECT! Door is
out of alignment with
the rest of the unit.
CORRECT! Door is sit-
ting squarely and evenly
spaced on tops and
sides.

Other BDI Indoor Furnishing manuals

BDI Revo 9981 User manual

BDI

BDI Revo 9981 User manual

BDI Sequel User manual

BDI

BDI Sequel User manual

BDI Format 6307 User manual

BDI

BDI Format 6307 User manual

BDI LINEA 6224 User manual

BDI

BDI LINEA 6224 User manual

BDI CLOUD 9 1183 User manual

BDI

BDI CLOUD 9 1183 User manual

BDI COSMO 5729 User manual

BDI

BDI COSMO 5729 User manual

BDI Icon 9422 User manual

BDI

BDI Icon 9422 User manual

BDI OLA 8137 User manual

BDI

BDI OLA 8137 User manual

BDI LINEA 5801A User manual

BDI

BDI LINEA 5801A User manual

BDI CORA 1176 User manual

BDI

BDI CORA 1176 User manual

BDI CODE 7376 User manual

BDI

BDI CODE 7376 User manual

BDI Hokkaido Table User manual

BDI

BDI Hokkaido Table User manual

BDI 8177 User manual

BDI

BDI 8177 User manual

BDI ALIGN 7473 User manual

BDI

BDI ALIGN 7473 User manual

BDI Novia 8421 User manual

BDI

BDI Novia 8421 User manual

BDI Novia 8424 User manual

BDI

BDI Novia 8424 User manual

BDI Icon 9424 User manual

BDI

BDI Icon 9424 User manual

BDI SEQUEL 6003 User manual

BDI

BDI SEQUEL 6003 User manual

BDI REVEAL 1192 User manual

BDI

BDI REVEAL 1192 User manual

BDI BOLO 3531 User manual

BDI

BDI BOLO 3531 User manual

BDI Corridor 8172 User manual

BDI

BDI Corridor 8172 User manual

BDI Icon 9422 User manual

BDI

BDI Icon 9422 User manual

BDI Sequel User manual

BDI

BDI Sequel User manual

BDI CORRIDOR BAR 5620 User manual

BDI

BDI CORRIDOR BAR 5620 User manual

Popular Indoor Furnishing manuals by other brands

HUGO&BORG W1830 installation guide

HUGO&BORG

HUGO&BORG W1830 installation guide

Home Decorators Collection CREEDMOOR CDNV3621R Use and care guide

Home Decorators Collection

Home Decorators Collection CREEDMOOR CDNV3621R Use and care guide

ROOMS TO GO SPRINGTOWN 34170213 manual

ROOMS TO GO

ROOMS TO GO SPRINGTOWN 34170213 manual

Amart Furniture DALVIN 74029 Assembly instruction

Amart Furniture

Amart Furniture DALVIN 74029 Assembly instruction

Rauch Orange M2584 Assembly instructions

Rauch

Rauch Orange M2584 Assembly instructions

OYOY Lune Marble Assembly instructions

OYOY

OYOY Lune Marble Assembly instructions

The Container Store 12-Pair Shoe Organizer Assembly instructions

The Container Store

The Container Store 12-Pair Shoe Organizer Assembly instructions

pakoworld 182-000030 Assembly manual

pakoworld

pakoworld 182-000030 Assembly manual

Next MALVERN 190699 Assembly instructions

Next

Next MALVERN 190699 Assembly instructions

CANOPY NAH0506c Guide

CANOPY

CANOPY NAH0506c Guide

Steelcase 9000 E.I.P. Corner Work Surface Series Assembly instructions

Steelcase

Steelcase 9000 E.I.P. Corner Work Surface Series Assembly instructions

Hillsdale Furniture 1450-500 manual

Hillsdale Furniture

Hillsdale Furniture 1450-500 manual

Koala Kirribilli Coffee Table manual

Koala

Koala Kirribilli Coffee Table manual

Wilson & Fisher CHESAPEAKE BL15029 quick guide

Wilson & Fisher

Wilson & Fisher CHESAPEAKE BL15029 quick guide

Dauphin Syncro-Free-Balance SH 35195 owner's manual

Dauphin

Dauphin Syncro-Free-Balance SH 35195 owner's manual

BENE LEVEL LIFT PURE HOME Assembly and operating instructions

BENE

BENE LEVEL LIFT PURE HOME Assembly and operating instructions

Kvik MO802-050 Assembly manual

Kvik

Kvik MO802-050 Assembly manual

Naterial PARIS 2024R09P01-0338 instruction manual

Naterial

Naterial PARIS 2024R09P01-0338 instruction manual

manuals.online logo
manuals.online logoBrands
  • About & Mission
  • Contact us
  • Privacy Policy
  • Terms and Conditions

Copyright 2025 Manuals.Online. All Rights Reserved.