BEKA BA544D User manual

Issue: 3
7th April 2009
BA544D
Battery powered
pulse input
field mounting
rate totaliser
Issue 3

2
1. Description
2. Operation
2.1 Controls
2.2 Displays
3. System Design
3.1 Flow transmitter loops
3.2 Pulse input
3.3 Remote reset
4. Installation
4.1 Location
4.2 Installation procedure
4.3 EMC
4.4 Installing a replacement battery
4.5 Disposal of used batteries
5. Programming and Calibration
5.1 Calibration structure
5.2 Accessing programme functions
5.3 Summary of programmable
functions.
5.4 Display update interval
5.5 Type of input
5.6 Position of the decimal points
5.7 Lower display
5.8 Rate scale factor
5.9 Timebase
5.10 Rate filter
5.11 Total scale factor
5.12 Clip-off
5.13 Local reset
5.14 Resetting grand total
5.15 Security code
6. Calibration Example
6.1 Calibration procedure
7. Maintenance
7.1 Fault finding during commissioning
7.2 Fault finding after commissioning
7.3 Servicing
7.4 Routine maintenance
7.5 Guarantee
8. Accessories
8.1 Units of measurement and
instrument identification.
8.2 Alarms
8.2.1 Solid state output
8.2.2 Programming and
adjustment
8.2.3 Alarm enable
8.2.4 Type of alarm
8.2.5 Setpoint adjustment
8.2.6 Alarm function
8.2.7 Alarm output status
8.2.8 Hysteresis
8.2.9 Alarm delay
8.2.10 Alarm silence time
8.2.11 Access setpoint
8.2.12 Adjusting alarm setpoints
from display mode.
8.3 External push-buttons
8.4 Pipe mounting kits
8.4 Stem mounting kit
9. Index
Appendix 1
BA491 replacement battery
CONTENTS
The BA544D is CE marked to show compliance with the
the European EMC Directive 2004/1-8/EC

3
1. DESCRIPTION
The BA544D is a battery powered pulse input
rate totaliser primarily intended for use with
flowmeters. The instrument simultaneously
displays the rate of flow and the total flow in
engineering units on two separate displays.
Housed in a robust IP66 glass reinforced
polyester (GRP) enclosure with an armoured
glass window, the BA544D is surface
mounting, or may be pipe mounted using one
of the accessory kits. A stem mounting kit is
also available allowing direct mounting onto a
flowmeter conduit entry.
2. OPERATION
Fig 1 shows a simplified block diagram of a
BA544D. The instrument accepts a pulse input
which, after scaling is displayed as the total
number of pulses received and their rate on
two separate displays. When connected to a
pulse output flowmeter the BA544D will provide
an accurate display of total flow and the rate of
flow. The BA544D has two sets of input
terminals allowing connection to high or low
level voltage pulses, switch contacts or to an
open collector output, it may therefore be used
with most flowmeters. The total display may
be reset to zero by a remote switch contact,
the internal switches or via the optional
external keypad.
Optional alarms, which may be programmed to
function on the rate or total displays, further
extend the applications of this instrument.
The BA544D contains an internal replaceable
battery that will power the instrument for up to
five years. Battery life depends upon how the
BA544D is programmed and the pulse input
frequency. Replacement BA491 batteries may
be installed with the BA544D in situ.
Fig 1 Simplified block diagram of BA544D
2.1 Controls
The BA544D is controlled and calibrated via
four push-button switches which are located
behind the instrument control cover, or as an
option on the outside of the control cover. In
the operating mode, i.e. when the instrument is
displaying rate and total flow, the switch
functions are:
Description of Switch Functions
E+ Down While these buttons are pushed the
total display will show the least
significant eight digits of the grand
total, and the grand total
annunciator will be activated.
E+Up While these two buttons are pushed
the total display will show the most
significant eight digits of the grand
total and the grand total annunciator
will be activated.
Down The total display is reset to zero
+Up when these two push-buttons are
operated simultaneously for two
seconds.
This function may be turned on or
off from within the programme
menu.
See section 5.13
PWhile these buttons are pushed the
+Down instrument will display the firmware
part number and version number.
Note: When optional alarms are fitted the
push-buttons may be programmed to have
alternative functions – see section 8.2

4
2.2 Displays
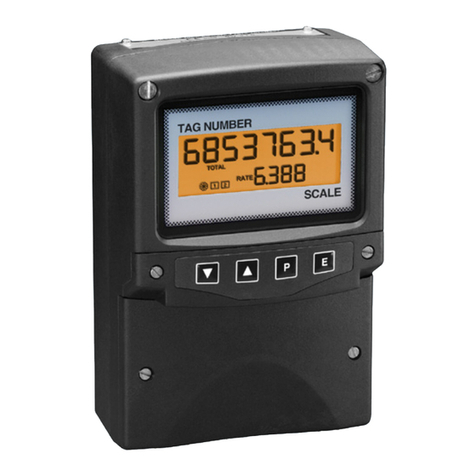
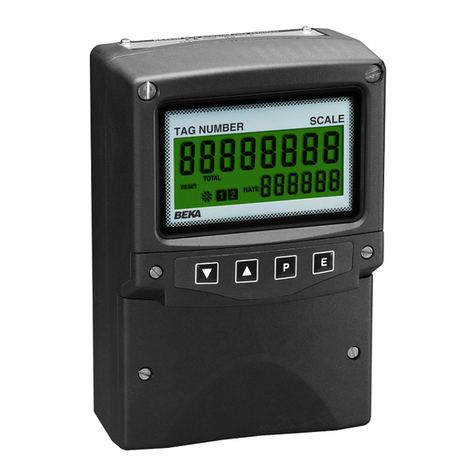
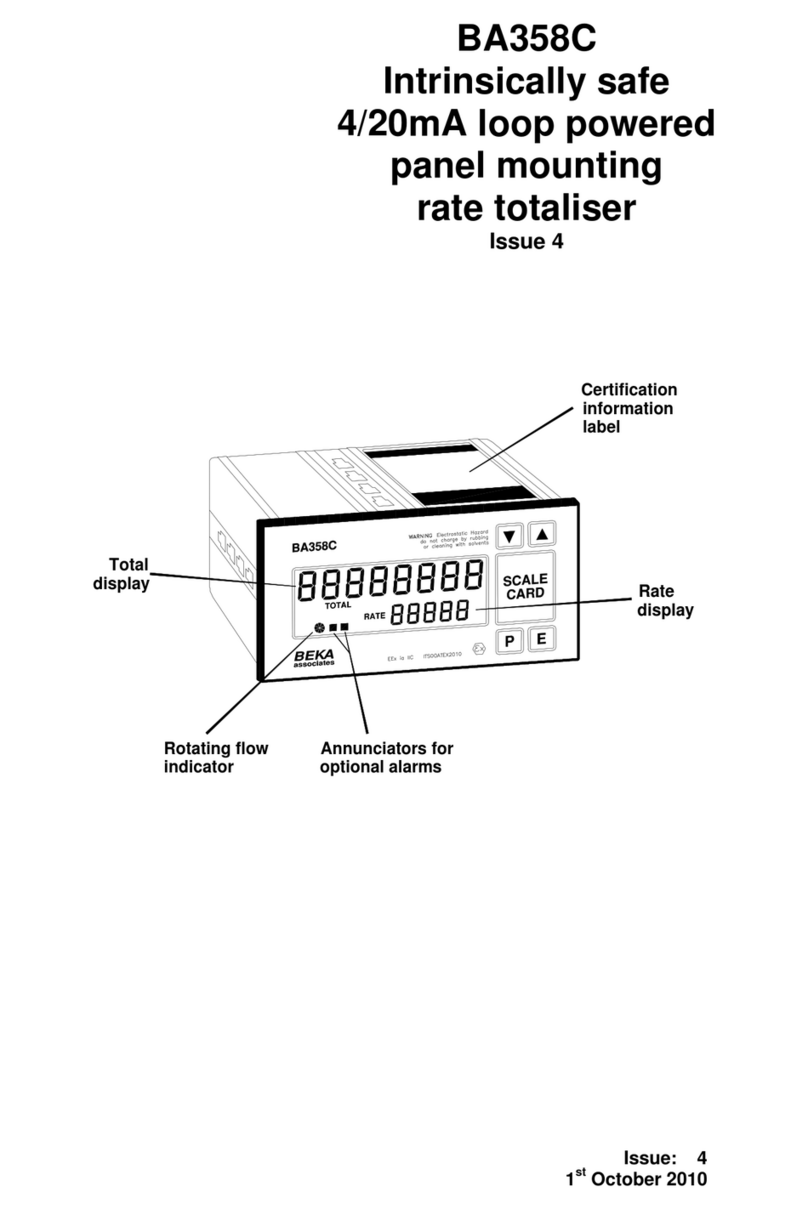
The BA544D has two digital displays and
associated annunciators, plus a flow indicator
as shown on page 1.
Rate Shows the flow rate on the
Display smaller six digit display.
Total Shows the total flow on the
display larger eight digit display. Set
to zero when local or remote
reset switch is operated.
Flow This disc in the lower left
indicator hand corner of the display
'rotates' while input pulses are
being received. It will stop
rotating within two seconds of
the end of a display update
period in which no pulses were
received.
Hold Activated when input
annunciator frequency is below the clip-off
threshold.
Low battery Battery symbol containing
Annunciator word ‘LO’ is activated when
internal battery requires
replacement.
2.3 Internal battery
The BA544D rate totaliser is powered by a
BA491 replaceable lithium battery that is
mounted within the instrument. This will
operate the BA544D for about five years, the
exact time depends upon how the instrument is
programmed and used, whether alarms are
fitted and the input pulse frequency. A low
battery alarm annuciator on the instrument
display will be activated when the battery
requires replacing. Normally the rate totaliser
will continue to operate for about five hundred
hours after the annunciator is activated, but the
exact time will depend upon how the
instrument is programmed, whether alarms are
fitted and the input frequency. During this
period the total and grand total will continue to
be transferred to permanent memory once per
hour. When the battery is exhausted the total
and grand total will be stored in permanent
memory, totalisation will stop and the
instrument will display ‘bAtt’.
3. SYSTEM DESIGN
3.1 Flow transmitter loops
The BA544D may be connected to almost any
pulse output flowmeter and calibrated to
display rate and total flow in the same or
different engineering units.
Fig 2 illustrates the basic circuit that is used for
all BA544D installations.
Fig 2 BA544D flow application
3.2 Pulse input
As shown in Fig 2, the BA544D will count
pulses from a wide variety of transducers
enabling it to display the output from almost
any flowmeter.
The instrument has one pulse input, but two
sets of input terminals enabling it to
accommodate different types of transducers.
Terminals 3 and 4 are for voltage pulse inputs
and terminals 5 and 6 are for contact and open
collectors inputs.
Note: Only one pair of input terminals may be
used at a time. i.e pulses can not be counted
from terminals 3 & 4 and from terminals 5 & 6
at the same time.
The following table shows the switching
thresholds for the various transducers, plus the

5
maximum operating frequency and the input
terminal numbers. For reliable counting the
input signal must fall below the lower threshold
and rise above the upper threshold.
Switching
thresholds Freq
max Input
terminals
Switch 100Ω1000Ω100Hz 5 & 6
Open
collector 2kΩ10kΩ10kHz 5 & 6
Magnetic
pick-off 0mV 40mV 10kHz 3 & 4
Voltage
pulse 1.0V 3.0V 10kHz 3 & 4
3.3 Remote reset
The BA544D total display is reset to zero when
terminals 7 & 8 are connected together for
more than one second. Permanent
interconnection of these terminals will stop
totalisation and may be used as an inhibit
function. There is no practical limit on the
distance that the reset switch may be from the
totaliser.
Alternatively, the BA544D may be programmed
so that the total display is reset to zero when
the Up and Down push-buttons are operated
simultaneously for more than two seconds. –
see 5.13
Note: Each time the total display is reset to
zero, the grand total is stored in permanent
memory.
4. INSTALLATION
4.1 Location
The BA544D rate totaliser is housed in a
robust IP66 glass reinforced polyester (GRP)
enclosure incorporating an armoured glass
window and stainless steel fittings. It is
suitable for exterior mounting in most industrial
environments, including off-shore and waste
water treatment installations. Please consult
BEKA associates if high vibration is
anticipated.
The BA544D enclosure is surface mounting.
Accessory kits described in sections 8.4 & 8.5
of this manual enable the instrument to be
mounted onto a vertical or horizontal pipe, or
directly onto a flowmeter conduit entry.
The field terminals and the two mounting holes
are located in a separate compartment with a
sealed cover allowing the instrument to be
installed without exposing the display
assembly.
The BA544D earth terminal is connected to the
internal EMC filters. For maximum radio
frequency interference rejection this terminal
should be connected to a local earth, or to an
earthed cable screen.
The BA544D enclosure is supplied with a
bonding plate to ensure electrical continuity
between the three conduit / cable entries.
4.2 Installation Procedure
Fig 3 illustrates the instrument installation
procedure.
a. Remove the instrument terminal cover by
unscrewing the two captive 'A' screws.
b. Mount the instrument on a flat surface
and secure with two M6 screws through
the 'B' holes. Alternatively use one of the
mounting kits described in section 8.4 &
8.5
c. Remove the temporary dust seals from
the three cable entries and install the
required glands, conduit fittings or
blanking plugs.
Note: The temporary dust seals fitted for
transit do not maintain the IP66
protection of the BA544D enclosure.
d. Connect the field wiring to the terminals
as shown in Fig 4.

6
e. If the instrument is about to be
commissioned, turn the BA544D ON by
moving the slide switch located above
terminals 3 and 4 to the right. See Figs 3
& 4.
Note: If the instrument has not been
switched on recently it may take a few
minutes to start functioning. If the
instrument does not start, please refer to
the battery configuration instructions in
Appendix 2.
f. Replace the instrument terminal cover
and evenly tighten the two 'A' screws.
Fig 3 BA544D installation procedure
4.3 EMC
The BA544D complies with the requirements of
the European EMC Directive 2004/108/EC.
For specified immunity all wiring should be in
screened twisted pairs. The BA544D earth
terminal should be locally earthed or connected
to an earthed cable screen.
To prevent circulating currents, cable screens
should only be earthed at one point.
Fig 4 Dimensions and terminal connections
4.4 Installing a replacement battery
The internal battery will power the BA544D rate
totaliser for about five years; the exact time
depends upon how the instrument is
programmed and the input pulse frequency.
When the battery requires replacing the low
battery alarm annunciator on the instrument
display will be activated indicating that the rate
totaliser will continue to operate for about
another five hundred hours. When the battery
is exhausted the total and grand total will be
stored in permanent memory, totalisation will
stop and the instrument will display ‘bAtt’.
Replacement batteries are available from
BEKA associates and our agents. When not
installed in an instrument, at 20oC the battery
only loses about one percent of its charge each
year, so it is practical to hold spares on-site.
This long shelf life results from an oxide layer
which forms on the battery internal electrodes
and may need clearing before use – see 4.3e
and Appendix 1.

7
WARNING
Only BA491 batteries should be fitted.
No attempt should be made to
recharge or to open the battery
assembly.
The discharged battery may be removed and
the replacement fitted while the BA544D rate
totalisers is in situ. Fig 5 together with the
following notes illustrate the replacement
sequence:
a. If the instrument has an external
keypad, remove the switch cover by
unscrewing the two ‘C’ screws and
unplug the ribbon cable from the outer
row of pins.
b. CAUTION
The total and grand total are
automatically stored in
permanent memory once
every hour. If the instrument
is still operational i.e. has a
display other than ‘bAtt’,
turning the instrument off
may result in up to 59 minutes
of flow being lost from these
displays.
Entering and leaving the
programme menu by pressing
Pand Efollowed by E, will
force the BA544D to
immediately store the totals in
permanent memory thus
preventing data loss.
Remove the terminal cover by
unscrewing the two ‘A’ screws and turn
the instrument OFF by moving the
slide switch to the left – see Figs 3 & 4.
c. Remove the four ‘D’ screws and lift-off
the front of the enclosure.
d. Remove the two ‘E’ screws securing
the BA491 battery and gently pull the
battery away from the instrument
printed circuit board – see Fig 5.
e. Before installing a replacement BA491
battery it should be conditioned to
remove the oxide layer that forms on
the internal electrodes, please see
instruction sheet supplied with each
replacement BA491. Battery
conditioning is also described in
Appendix 1.
f. Plug the replacement BEKA BA491
battery into the instrument. Ensure
that the two pins on the instrument
printed circuit board are correctly
aligned with the socket on the battery
and then replace the two ‘E’ screws.
g. Reassemble the instrument enclosure.
Before replacing the terminal cover
turn the instrument ON by moving the
slide switch to the right.
Fig 5 Replacement of internal battery
4.5 Disposal of used batteries
The BEKA BA491 battery contains Lithium
Thionyl Chloride cells that should not be
included with standard industrial waste. Do not
incinerate.
More information about disposal is available
from The British Battery Manufacturers
Association www.rebat.com

8
5. PROGRAMMING & CALIBRATION
The BA544D is programmed and calibrated via
four push-buttons which are located behind the
instrument control cover, see Fig 8. If frequent
access to the push-buttons is required, the rate
totaliser can be supplied with duplicate
membrane push-buttons mounted on the
outside of the control cover.
All the programming functions are contained in
an easy to use menu that is shown
diagramatically in Fig 7. Each function is
summarised in section 5.3 and includes
references to more detailed information.
Although this simple menu driven system
enables most adjustments to be made without
repeated reference to this manual, it is
recommended that at least the summary of the
programmable functions in section 5.3 is read
before attempting programming or
recalibration.
When the BA544D is fitted with optional alarms
the basic menu is expanded to include the
option. Section 8.2 of this manual explains
how to programme these additional functions.
Note: While the instrument is being
programmed or calibrated, totalisation
continues so that any flow occurring during this
time is recorded.
5.1 Calibration structure
Fig 6 shows the BA544D calibration structure.
The rate and total display calibration functions
are totally independent allowing the displays to
have different units of measurement.
For the rate display the pulse input is scaled by
SCALE-r to show the required units of
measurement and multiplied by the timebase
t-bASE to calculate and display the rate of flow
per second, minute or hour.
Similarly, to calculate the total flow in the
required units of measurement, the number of
input pulses is divided by the total scale factor
SCALE-t. Total flow is continuously added to
the grand total.
The BA544D uses floating point arithmetic and
‘real’ decimal points. Moving the position of a
decimal point will therefore affect the
instrument calibration and display.
Fig 6 Calibration structure
5.2 Accessing programming functions
Throughout this manual push-buttons are
shown in italics e.g. P or Up push-button, and
legends displayed by the instrument are shown
within inverted commas e.g. 'CAL' and ' ALr2'.
Access to the programme menu is obtained by
operating the Pand Epush-buttons
simultaneously. If the instrument is not
protected by a security code the first parameter
'UPdAtE' will be displayed. If a security code
other than the default code 0000 has already
been entered, the instrument will display
'COdE'. Press Pto clear this prompt and enter
the security code for the instrument using the
Up or Down push-buttons to adjust each digit,
and the P push-button to move control to the
next digit. If the correct code has been
entered pressing Ewill cause the first
parameter 'UPdAtE' to be displayed. If an
incorrect code is entered, or a push-button is
not operated within ten seconds, the
instrument will automatically return to the
display mode.
Apart from defining the position of the decimal
point in the rate display all programme
functions and prompts are shown on the large
eight digit display.
Once within the main programme menu the
required parameter can be reached by scrolling
through the menu using the Up and Down
push-buttons as shown by the programme
structure in Fig 7.
9

10
All new BA544D rate totalisers are supplied
calibrated as requested at the time of ordering.
If calibration information is not supplied, the
instrument will be conditioned for an open
collector input, with SCALE-r and SCALE-t set
to 1 and a timebase of seconds.
5.3 Summary of programmable functions
This section summarises all the programmable
functions. When read in conjunction with Fig 7
it provides a quick aid for programming the
instrument. If more detail is required, each
section contains a reference to a full
description of the function.
SUMMARY
Display Description of function
‘UpdAtE’ Display update time
Allows the interval between
display updates to be selected.
Updating the display less
frequently lengthens battery
life.
See section 5.4
'InPut' Type of input
Enables one of four types of
input to be selected:
‘UOLtS’ Voltage pulse
‘COIL’ Magnetic pick-off
‘ContACt’ Switch contact
‘OP.COL’ Open collector
See section 5.5
'd.P.' Decimal points
Defines the position of the
decimal point in both the rate
and total displays and enables
the rate and total displays to
be interchanged.
See section 5.6
‘dISPLAY.2’ Lower display
Turns the lower display, which
normally shows rate, on or off.
See section 5.7
Display Description of function
'SCALE-r' Rate Scale Factor
Defines the arithmetic relationship
between the pulse input frequency
and the rate display. May be
adjusted between 0.001 and
99999999.
When used with a flowmeter,
SCALE-r should be set to the
flowmeter K factor (pulses per unit
of measurement) if the display is
required in the same units as the
K factor.
See section 5.8
't-bASE' Timebase
Selectable multiplier to display
flow rate in units per second, per
minute or per hour..
Select: tb-1 for flow / second
tb-60 for flow / minute
tb-3600 for flow / hour
See section 5.9
'FILtEr' Rate filter
Adjustable digital filter to reduce
noise on the rate display. Two
parameters each adjustable
between 0 and 9.
See section 5.10
'SCALE-t' Total Scale Factor
Defines the arithmetic relationship
between the number of input
pulses and the total display.
May be adjusted between 0.001
and 99999999.
When used with a flowmeter
SCALE-t should be set to the
flowmeter K factor (pulses per unit
of measurement).
See section 5.11
'CLIP-OFF' Clip off
To prevent the totalisation of very
low flow rates, clip-off enables the
user to select a flow rate below
which totalisation is inhibited.
See section 5.12

11
Display Description of function
'LOC.rSEt'Local reset of total display
When turned 'On' the total display
may be reset to zero from the
display mode by simultaneously
operating the Up and Down push-
buttons for two seconds.
See section 5.13
'CLr. Gtot'Clear grand total
This function resets the grand
total to zero when 'CLr YES' is
selected. 'SurE' must be entered
to confirm the instruction.
Note: Once cleared, a grand total
can not be recovered.
See section 5.14
'COdE' Security code
Defines a four digit numeric code
which must be entered to gain
access to the programmable
functions. Default code 0000
disables the security function and
allows unrestricted access to all
programmable functions.
See section 5.15
5.4 Display update interval: ‘UpdAtE’
Six different intervals between display updates
varying between 0.5 and 20 seconds may be
selected. Increasing the interval between
display updates will significantly lengthen
battery life and make it easier to read a rapidly
changing rate or total display. The selected
update interval does not affect the accuracy of
the display, but it will affect the response time
of the optional alarms.
When any of the push-buttons are operated,
the update time automatically changes to 0.5
seconds for 30 seconds to provide the fastest
response while adjustments are being made.
To define the update interval select ‘UpdAtE’
from the main menu and press Pto reveal the
current time. Pressing the Up or Down button
will scroll through the six times. When the
required interval has been selected press Eto
return to the main menu.
5.5 Type of input: ‘InPut’
The BA544D may be programmed to accept
pulse inputs from a wide variety of sensors.
To define an input type select ‘InPut’ from the
menu and press Pwhich will reveal the current
input type. Pressing Up or Down will scroll
through the four options:
‘UOLts’ Voltage pulse input
Threshold 1V and 3V
10kHz max.
Input terminals 3 and 4
‘COIL’ Low voltage pulse
Threshold typically 40mV
peak to peak ac.10kHz max.
Input terminals 3 and 4
‘COntACt’ Switch contact
Threshold 100 and 1000Ω
100Hz max.
Input terminals 5 and 6
‘OP.COL’ Open collector
Threshold 2 and 10kΩ
10kHz max.
Input terminals 5 and 6
When the required type of input has been
selected press Eto return to the main menu.
Note: To count reliably, the input signal must
fall below the lower switching threshold and
rise above the higher switching threshold.
5.6 Position of the decimal points: ‘d.P.’
The rate display can have up to six digits and
the decimal point may be positioned between
any of them, or omitted. Similarly, the total
display has eight digits and the decimal point
may be positioned between any of them, or
may be omitted.
To adjust the position of either decimal point
select 'd.P.' from the main menu and press P.
This will activate both displays with one digit
plus the following decimal point of the total
display flashing. If only the least significant
digit is flashing, this indicates that the decimal
point is omitted.
The position of the decimal point can be moved
by pressing the Up or Down push-button.
Operating the P push-button will toggle control
between the two displays. When both decimal
points have been correctly positioned press E
to return to the main menu.
If the application requires flow rate to be the
primary display i.e. shown on the large display,
the d.P. function enables the rate and total
displays to be interchanged. The rate display
will continue to have six digits but the total
display will be reduced from eight to six digits.
The rate and total annunciators will also be
exchanged. Pressing the Up and Down

12
buttons simultaneously will exchange the
displays.
Note: Both decimal points must be
repositioned after the displays have been
exchanged.
5.7 Lower display: ‘dISPLAY.2’
This function turns the lower display on or off.
When turned off, the BA544D will only have
one eight digit display which may be
programmed to show total flow or rate of flow.
To check the status of the lower display select
‘dISPLAY.2’ from the menu and press Pwhich
will reveal if the function is ‘On’ or ‘OFF’. The
settings may be changed by pressing the Up or
Down button followed by the Ebutton to return
to the menu.
5.8 Rate scale factor: ‘SCALE-r’
Together with the instrument timebase, this
function defines the arithmetic relationship
between the pulse input frequency and the rate
display. When used with a flowmeter SCALE-r
should be set to the K-factor of the flowmeter
i.e. the number of pulses the flowmeter
produces for a unit of flow. e.g. 45.6 pulses
per litre. See section 6 for a worked example.
SCALE-r is a dividing factor that may be
adjusted between 0.001 and 99999999.
To check or change the total scale factor select
'SCALE-r' from the main menu and press Pto
reveal the existing setting, one digit will be
flashing. The value of the flashing digit can be
changed by pressing the Up or Down buttons.
When this digit is correct pressing Pwill
transfer control to the next digit.
To position the decimal point in the rate scale
factor, move the flashing digit to the left hand
side of the required decimal point position and
simultaneously press the Up and Down
buttons.
When the required rate scale factor has been
entered, press E to store the number and
return to the main menu.
5.9 Timebase: ‘t-bASE’
The timebase multiplies the rate display by 1,
60 or 3,600 depending upon whether the
BA544D is required to display rate per second,
per minute or per hour. See Fig 6.
To check or change the timebase, select
't-bASE' from the main menu and press P
which will reveal the current setting. Pressing
the Up or Down button will index through the
three options: tb-1 for flow / second
tb-60 for flow / minute
tb-3600 for flow / hour
Select the required multiplier and press Eto
return to the main menu.
5.10 Rate filter: ‘FILtEr’
This digital filter has two independent
adjustable parameters enabling the rate
display frequency response to be tailored for
optimum performance.
The filter parameters are controlled by a two
digit number. The first digit defines the amount
of filtering applied to the display as shown
below.
First digit Filter time constant
seconds
0X 0
1X 1.3
2X 4.3
3X 6.5
4X 8.7
5X 11.3
6X 15.7
7X 20.9
8X 25.2
9X 31.5
The second digit defines the deviation from the
displayed rate at which the filter will be
overridden and the rate display will move
rapidly to the new value.
Second
digit Magnitude of step
change which will
produce a rapid
response
X0 Off
X1 1%
X2 2%
X3 4%
X4 8%
X5 12%
X6 16%
X7 24%
X8 32%
X9 64%
By careful adjustment of the two parameters a
stable display with an acceptable step input
response can be obtained for most
applications.
During commissioning it is recommend that
initially the second digit is set to 0 (off) and the
first digit is adjusted to provide acceptable rate

13
display stability. The second digit should then
be increased until the selected step size is
greater than the noise on the display signal, at
which setting the rate display will again
become stable. These will be the optimum
filter parameters for acceptable rate display
stability and a fast response to a large rate
signal change.
To check or change the filter select 'FILtEr'
from the main menu and press Pto reveal the
current settings. Pressing the Up or Down
button will change the flashing digit and Pwill
transfer control to the second digit. While
making adjustments the filtered rate display is
shown on the lower display so that stability can
be assessed. When set as required, press the
Ebutton to enter the revised parameters and
return to the main menu.
5.11 Total scale factor: ‘SCALE-t’
This factor defines the arithmetic relationship
between the number of input pulses and the
total display. SCALE-t is a dividing factor that
may be adjusted between 0.001 and
99999999. See Fig 6.
When used with a flowmeter SCALE-t should
be set to the K-factor of the flowmeter i.e. the
number of pulses the flowmeter produces for a
unit of flow. If the BA544D total display is
required in units different from those in which
the flowmeter K factor is specified, a
conversion factor will be required.
e.g. If the flowmeter has a K factor of 45.6
pulses per litre and the BA544D total display is
required in units of 1,000 gallons, then
SCALE-t should be set to number of pulses
produced by the flowmeter per 1,000 gallons:
45.6 x 4.54609 x 1000
207,301.7 pulses per 1000 gallons
.
(there are 4.54609 litres in a UK gallon)
To check or change the total scale factor select
'SCALE-t' from the main menu and press Pto
reveal the existing setting, one digit will be
flashing. The value of the flashing digit can be
changed by pressing the Up or Down buttons.
When this digit is correct pressing Pwill
transfer control to the next digit.
Note: After changing the total scale factor, the
total and grand total displays will be reset to
zero.
To position the decimal point in the scale
factor, move the flashing digit to the left hand
side of the required decimal point position and
simultaneously press the Up and Down
buttons.
When the required total scale factor has been
entered, press E to store the number and
return to the main menu.
5.12 Clip-off: ‘CLIP-OFF’
To prevent totalisation of very low flow rates
which over long periods may result in
significant totalisation errors, the BA544D may
be programmed to stop totalising when the flow
rate falls below an adjustable threshold.
To check or change the clip-off threshold select
'CLIP-OFF' from the main menu and press P
which will reveal the current setting. The
threshold is shown in units of flow rate with one
digit flashing. The value of the flashing digit
may be changed by pressing the Up or Down
buttons. When this digit is correct pressing P
will transfer control to the next digit. When set
as required, press the E button to enter the
revised figure and return to the main
programme menu.
If the flow rate falls below the entered
threshold, the rate display will show zero flow,
totalisation will stop and the HOLD annunciator
will be activated. The flow indicator will
continue to rotate as defined in section 2.2
Note: When the rate scale factor SCALE-r, the
timebase t-bASE, or the position of the rate
display decimal point are changed, clip-off will
automatically be reset to zero. If required, a
new clip-off threshold may then be entered.
5.13 Local reset of total display:
‘LOC. rSEt’
When activated this function enables the
operator to reset the BA544D total display to
zero in the display mode by operating the Up
and Down push-buttons simultaneously for two
seconds. To check the status of the local
reset function select 'LOC.rSEt' from the menu
and press P which will reveal if the function is
'On' or 'OFF'. If necessary press the Up or
Down button to change the setting, followed by
the E button to return to the main menu.
The total display may also be reset to zero
remotely by connecting terminals 7 and 8
together. See section 3.4 of this manual.

14
5.14 Resetting grand total: ‘CLr. Gtot’
The grand total is a separate sixteen digit
counter which duplicates the total display but is
not zeroed when the total display is reset to
zero. The grand total may be viewed in the
display mode in two eight digit sections as
described in section 2.1 of this manual.
The grand total counter can only be reset to
zero from the 'CLr.Gtot' function in the main
programme menu. To zero the grand total
counter select 'CLr.Gtot' and press P which will
cause the instrument to display 'Clr. no' with
'no' flashing. Continuously press the Up or
Down push-buttons until 'CLr. YES' is
displayed and then press Pwhich will result in
a '0000' prompt. Using the Up, and Down
buttons and the P button to move to the next
digit, confirm the request by entering the
password 'SurE'. Note 'S' is entered as '5'.
Pressing E will then reset the grand total
counter to zero and return the instrument to the
'CLr.Gtot' prompt in the main menu.
CAUTION
After resetting the grand total
to zero the old grand total can
not be recovered.
5.15 Security code: ‘CodE’
The calibration and conditioning of the
instrument may be protected by a four digit
security code which must be entered before
access to the programme menu is granted.
New instruments are programmed with the
default security code 0000 which allows
unrestricted access to all programming
functions without entering a security code.
To enter a new security code select 'COdE'
from the menu and press P which will cause
the instrument to display the current security
code. Each digit of the code can be changed
using the Up and Down push-buttons, and the
Pbutton to move to the next digit. When the
required code has been entered press E to
return to the main menu. The revised security
code will be activated when the indicator is
returned to the operating mode.
If the security code is lost, access to the
programmable functions can be obtained by
moving the internal security link to the override
position. The original security code can then
be viewed by selecting 'CodE' from the main
menu and pressing P.
To gain access to the security code link,
remove the instrument control cover by
undoing the two ‘C’ screws – see Fig 5. If the
instrument is fitted with external push-buttons
the connecting ribbon cable should be
unplugged from the outer row of the five pin
connector. The security code override link is
located on the inner row of the five pin
connector as shown in Fig 8.
Security code
operational Security code
override
PE
Fig 8 Location of security override link &
function of push-buttons

15
6. CALIBRATION EXAMPLE
In this example a BA544D rate totaliser is
connected to a turbine flowmeter having a K-
factor of 105.0 pulses per litre. The flowmeter
has a magnetic pick-off with a peak to peak
output greater than 40mV at 1 litre per minute
and a usable range of 1 to 40 litres per minute.
The BA544D is required to display rate of flow
in litres per hour with a resolution of one litre
and total flow in cubic metres with a resolution
of 0.01 cubic metres. Totalisation is to stop
when the flow rate falls below 1 litre per
minute. To maximise battery life, the display is
to be updated once every twenty seconds.
Rate display filtering is required. In this
application the operator needs to reset the total
display to zero by simultaneously pushing the
Up and Down push-buttons. To prevent
tampering the instrument programme menu is
to be protected by security code 1209
6.1 Calibration procedure
The BA544D rate totaliser may be calibrated
on-site without disconnection from the power
supply or from the flowmeter.
Step 1 Enter the programming mode
Put the BA544D in the
programming mode by
simultaneously pressing P and E.
Assuming a security code has not
already been entered the
instrument will respond by
displaying 'UPdAtE' which is the
first function in the main menu.
See Fig 7.
Step 2 Select the interval between
display updates
With 'UPdAtE' displayed, press P
to reveal the existing interval
between display updates. If this is
not as required, press the Up or
Down button until ‘20’ is displayed.
(i.e. the display is updated once
every twenty seconds). Enter the
revised time and return to the
'UPdAtE' prompt in the main menu
by pressing E.
Step 3 Select the type of input
Using the Up or Down button scroll
through the main menu until ‘InPut’
is displayed, then press Pto reveal
the existing setting. Select ‘COIL’,
the input for a magnetic pick-off,
using the Up or Down button and
return to the 'InPut' prompt in the
main menu by pressing E.
Note: The BA544D has two pairs of
input terminals. 3 & 4 for voltage
inputs and 5 & 6 for switch contact
and open collector inputs. Ensure
that the magnetic pick-off, which
has a voltage output, is connected
to terminals 3 & 4.
Step 4 Position rate & total decimal
points
Select ‘d.P.’ from the main menu
and press P. The rate and total
displays will be activated with one
digit of the total display flashing.
Press the Up or Down push-button
until the third least significant digit
of the total display and following
decimal point are flashing. This
gives the required total display
resolution of 0.01
Press Pto move control to the rate
display. Using the Up or Down
push-button move the flashing digit
to the least significant position (right
hand side) which will result in no
decimal point being displayed.
Finally press Eto return to the 'd.P’.
prompt in the main menu.
Step 5 Enter the rate scaling factor
Select ‘SCALE-r’ from the main
menu and press Pto show the
current figure. The K factor of the
flowmeter in this example is 105.0*
pulses per litre which should be
entered as the rate scaling factor.
Firstly to position the decimal point,
operate the Ppush-button to move
the flashing digit to the second least
significant position. Pressing the
Up and Down buttons
simultaneously will then position the
decimal point in front of the least
significant digit.
Using the Up and Down buttons to
adjust each digit in turn and the P
button to transfer control between
digits, enter 105.0 Finally return
to the 'SCALE-r' prompt in the main
menu by pressing E.
* Could also be entered as 105

16
Step 6 Enter the rate timebase
Select ‘t-bASE’ from the main menu
and press Pto show the current
setting. In this example the rate
display is required in litres per hour.
Using the Up or Down button scroll
through the three options and
select ‘tb-3600’ which will multiply
the rate display by 3600. Return to
the ‘t-bASE’ prompt in the main
menu by pressing E.
Step 7 Adjust the rate filter
The rate display filter parameters
should be adjusted experimentally
after installation to provide a stable
rate display with an acceptable step
response.
During commissioning it is
recommend that initially the second
digit of the rate parameters is set to
0 (step response off) while the first
digit (amount of filtering) is adjusted
to provide acceptable rate display
stability. The second digit should
them be increased until acceptable
rate display stability is once again
achieved.
To adjust the filter parameters
select ‘FILtEr’ from the main menu
and press Pto reveal the current
setting. The first digit will be
flashing and may be adjusted using
the Up or Down button. The P
button will transfer control to the
second digit. When both are set as
required, return to the ‘FILtEr’
prompt in the main menu by
pressing E.
Note: While adjusting the filter, the rate is
shown on the lower display so that
stability can be assessed.
Step 8 Enter the total scaling factor
The K factor of the flowmeter in this
example is 105.0 pulses per litre
and the total display is required in
cubic metres.
There are 1000 litres in a cubic
metre so the BA544D is required to
display 1 cubic metre for every 105
x 1,000 pulses received. ‘SCALE-t’
should therefore be set to 105,000
Select ‘SCALE-t’ from the main
menu and press Pwhich will reveal
the current setting with one digit
flashing. To position the decimal
point, operate the Ppush-button to
move the flashing digit to the least
significant position. Pressing the
Up and Down buttons
simultaneously will then remove the
decimal point.
Using the Up and Down buttons to
adjust each digit in turn and the P
button to transfer control between
digits, enter 105000 - Finally
return to the 'SCALE-t' prompt in
the main menu by pressing E.
Step 9 Define clip-off
In this example totalisation is to be
inhibited at flow rates below 1 litre
per minute.
Select ‘CLIP-OFF’ from the main
menu and press Pwhich will reveal
the clip-off threshold in litres per
hour i.e. the same units already
selected for the rate display. The
most significant digit of the display
will be flashing indicating that this
digit may be adjusted. Pressing P
five times will move the flashing
digit to the third least significant
position.
Using the Up and Down buttons set
the second least significant digit to
6 i.e. a clip-off threshold of 60 litres
per hour (1 litre per minute).
Finally return to the 'CLIP-OFF'
prompt in the main menu by
pressing E.
.
Step 10 Turn local reset on
In this example the operator needs
to reset the total display to zero by
pressing the Up and Down buttons
simultaneously. To activate the
local reset function select
‘LOC.rSEt’ from the main menu and
press Pto display the current
setting. Pressing the Up or Down
button will toggle the display
between ‘On’ and ‘OFF’. Select
‘On’ and press Eto return to the
‘LOCrSEt’ prompt in the main
menu.

17
Step 11 Reset the grand total to zero
Before completing commissioning
the grand total counter should be
reset to zero. Select 'CLr. Gtot'
from the main menu and press P
which will cause the instrument to
display 'Clr. no'. Toggle this to
'CLr. YES' using the Up or Down
push-buttons and press Pwhich will
result in a '0000' prompt. Using the
Up, and Down buttons and the P
button to move to the next digit,
confirm the request by entering the
password 'SurE'. Note: S is entered
as 5. Pressing E will then reset
the grand total counter to zero and
return the instrument to the 'CLr.
Gtot' prompt in the main menu.
Step 12 Define the security code
Defining a security code prevents
unauthorised access to the
programme functions. Select
'COdE' from the main menu and
press Pwhich will reveal the
existing security code. Using the
Up and Down buttons enter the
new code 1209 digit by digit. The P
button will transfer control between
digits. When the new code has
been entered, press Eto return to
the main programme menu.
Step 13 Return to the operating mode
Following completion of
programming and calibration, return
the BA544D to the operating mode
by pressing E. All the
programming functions will now be
stored in permanent memory and
will be protected by the security
code from accidental or
unauthorised adjustment.

18
7. MAINTENANCE
7.1 Fault finding during commissioning
If a BA544D fails to function during
commissioning the following procedure should
be followed:
Symptom Cause Check:
No display Instrument has
not been
switched ON.
Battery is not
conditioned,
Position of slide
switch above
terminals 3 & 4.
See Figs. 3 & 4.
See Appendix 1
Flow indicator
not rotating No input
pulses,
incorrect input
terminals
used, or
incorrect type
of input
selected
That BA544D has
been calibrated for
the correct input.
That input signal is
connected to
correct input
terminals and
correctly polarised.
Flow indicator
rotating but
incorrect rate
display
Incorrect
calibration
Input below
clip-off
threshold
That rate scale
factor and
timebase are
correctly
programmed.
That clip-off
threshold is set
correctly.
Unstable rate
display Noisy pulse
input signal Source of noise
and try to
eliminate, or
increase rate filter.
Correct rate
display but
incorrect total
display
Incorrect
calibration
Remote reset
switch
contacts
closed
That total scale
factor is correctly
programmed.
That ‘RESET’
annunciator is not
activated. If it is,
check reset wiring
and switch.
Unable to
enter
programme
mode
Incorrect
security code That the correct
security code is
being used, or fit
security link in
override position.
See Fig 8.
7.2 Fault finding after commissioning
ENSURE PLANT SAFETY BEFORE
STARTING MAINTENANCE
If a BA544D fails after it has been functioning
correctly, the following table may help.
Symptom Cause Check:
No display Instrument has
been switched
OFF
If BA544D has
been switched
OFF for
extended
period battery
may need
conditioning.
Discharged
battery
Position of slide
switch above
terminals 3 & 4.
See Figs. 3 & 4.
See Appendix 1
f replacement
battery restores
operation
Low battery
annunciator
activated
Battery almost
exhausted.
Install
replacement
battery as
soon as
possible.
Instrument
displaying
‘bAtt’
Battery
exhausted.
Install
replacement.
Flow indicator
not rotating No input
pulses Output from
flowmeter and
wiring between
flowmeter and
BA544D.
Flow indicator
rotating,
‘HOLD’
annunciator
activated
Input below
clip-off
threshold
Clip-off threshold
and if necessary
adjust.
Unstable rate
display Noisy pulse
input signal Source of noise
and try to
eliminate, or
increase rate filter.
If this procedure does not reveal the cause of
the fault, it is recommended that the instrument
is replaced.
7.3 Servicing
We recommend that faulty BA544D rate
totalisers are returned to BEKA associates or
to our local agent in your area for repair.
7.4 Routine maintenance
The mechanical condition of the instrument
and electrical calibration should be regularly
checked. The interval between inspections
depends upon environmental conditions. We
recommend that initially instrument calibration
should be checked annually.
7.5 Guarantee
Instruments which fail within the guarantee
period should be returned to BEKA associates
or our local agent. It is helpful if a brief
description of the fault symptoms is provided.

19
8. ACCESSORIES
8.1 Units of measurement and instrument
identification
All BA544D rate totalisers are fitted with a
display label behind the armoured glass
window. This label can be supplied printed
with any units of measurement and tag
information specified when the instrument is
ordered. Alternatively the information may be
added on-site via an embossed strip, dry
transfer or a permanent marker.
To gain access to the display label remove the
terminal cover by unscrewing the two 'A'
screws which will reveal two concealed 'D'
screws. – see Fig 5. Remove all four 'D'
screws and carefully lift off the front of the
instrument. Add the required legend to the
display label, or replace with a new pre-printed
label which is available from BEKA associates.
The BA544D can also be supplied with a blank
or custom engraved stainless steel plate
secured by two screws to the side of the
instrument enclosure. This plate can
accommodate:
1 row of 9 alphanumeric characters 10mm high
or 1 row of 11 alphanumeric characters 7mm high
or 2 rows of 18 alphanumeric characters 5mm
high
8.2 Alarms
The BA544D can be supplied with two solid
state single pole outputs that may be
independently programmed as high or low, rate
or total alarms with normally open or normally
closed outputs.
WARNING
These alarm outputs should not be
used for critical safety applications
such as a shut down system.
When the battery is exhausted both BA544D
alarm outputs will open irrespective of whether
normally open or normally closed outputs have
been selected. When designing a system an
open output should therefore be the alarm
condition.
Alarm annunciators on the instrument display
indicate the status of both alarms. If an alarm
delay or silence time has been selected the
annunciator will flash during the delay or
silence period.
Programmable functions for each alarm include
adjustable setpoint, alarm delay time and alarm
accept time. Hysteresis may be applied to
rate alarms.
The ‘UpdAtE’ function in the main menu
defines how frequently the total display is
updated, this also defines the interval between
alarm status updates. Six times varying
between 0.5 to 20 seconds may be selected –
see section 5.4. Increasing the interval
between display updates will significantly
increase battery life.
Note: Use of the alarm outputs may reduce
battery life by about 5%
8.2.1 Solid state output
Each alarm has a galvanically isolated single
pole solid state switch output as shown in
Fig 9. The outputs are polarised and current
will only flow in one direction. Terminals A1
and A3 should be connected to the positive
side of the supply.
Vmax = 30V dc
Imax = 250mA dc
Ron = 5Ω+ 0.6V
Roff = greater than 180k
Note: Because of the series protection diode
some test meters may not detect a
closed alarm output
Fig 9 Equivalent circuit of each alarm output

20
Fig 10 Typical alarm application
8.2.2 Programming and adjustment
When a BA544D is supplied with alarms the
main programme menu is extended as shown
in Fig 11. The two alarm functions appear
between the 'LOC-rSEt' and the 'CLr.Gtot'
functions, and each alarm may be programmed
as a rate or a total alarm.
For simplicity Fig 11 only shows the
programmable functions on the rate option of
alarm AL1. Alarm 2 and the total options are
identical except that the total alarms do not
have hysteresis.
The following table summarises each of the
alarm programme functions and includes a
cross reference to more detailed information.
Again only the functions on alarm AL1 are
listed.
Summary of programmable alarm functions
Display Description of function
'EnbL' Alarm enable
Enables or disables the alarm
function without changing the alarm
parameters.
See section 8.2.3
Display Description of function
'tYPE' Type of alarm
Defines whether the alarm operates
on the rate or total display.
See section 8.2.4
'SPr1' Alarm setpoint 1
or Adjusts the alarm setpoint. The
‘SPt1’ alarm is activated when the rate or
total display equals the setpoint.
Note: ‘SPr1’ is displayed for a rate
alarm and ‘SPt1’ for a total alarm.
See section 8.2.5
'HI.LO' Alarm function
Defines whether the alarm has a
high or low function
See section 8.2.6
'no.nc' Normally open or normally
closed output
Determines whether the single pole
alarm output is open or closed in
the non-alarm condition.
See section 8.2.7
'HStr' Hysteresis
Adjusts the alarm hysteresis. Only
available on rate alarms.
See section 8.2.8
'dELA' Alarm delay time
Adjusts the delay between the
display equalling the setpoint and
the alarm output being activated.
See section 8.2.9
'SIL' Alarm silence time
Defines the time that the alarm
output remains in the non-alarm
condition following acceptance of
an alarm.
See section 8.2.10
'AcSP' Access setpoint
Sub-menu that enables direct
access to the alarm setpoints from
the display mode and defines a
separate security code.
See section 8.2.11
Table of contents
Other BEKA Measuring Instrument manuals

BEKA
BEKA BA558C User manual

BEKA
BEKA BA358C User manual

BEKA
BEKA BA304NE User manual

BEKA
BEKA Advisor A75 User manual

BEKA
BEKA BA304E User manual

BEKA
BEKA BA337E-SS User manual

BEKA
BEKA BA314E User manual

BEKA
BEKA BA307E User manual

BEKA
BEKA BA507E Installation and operating instructions

BEKA
BEKA BA307C User manual