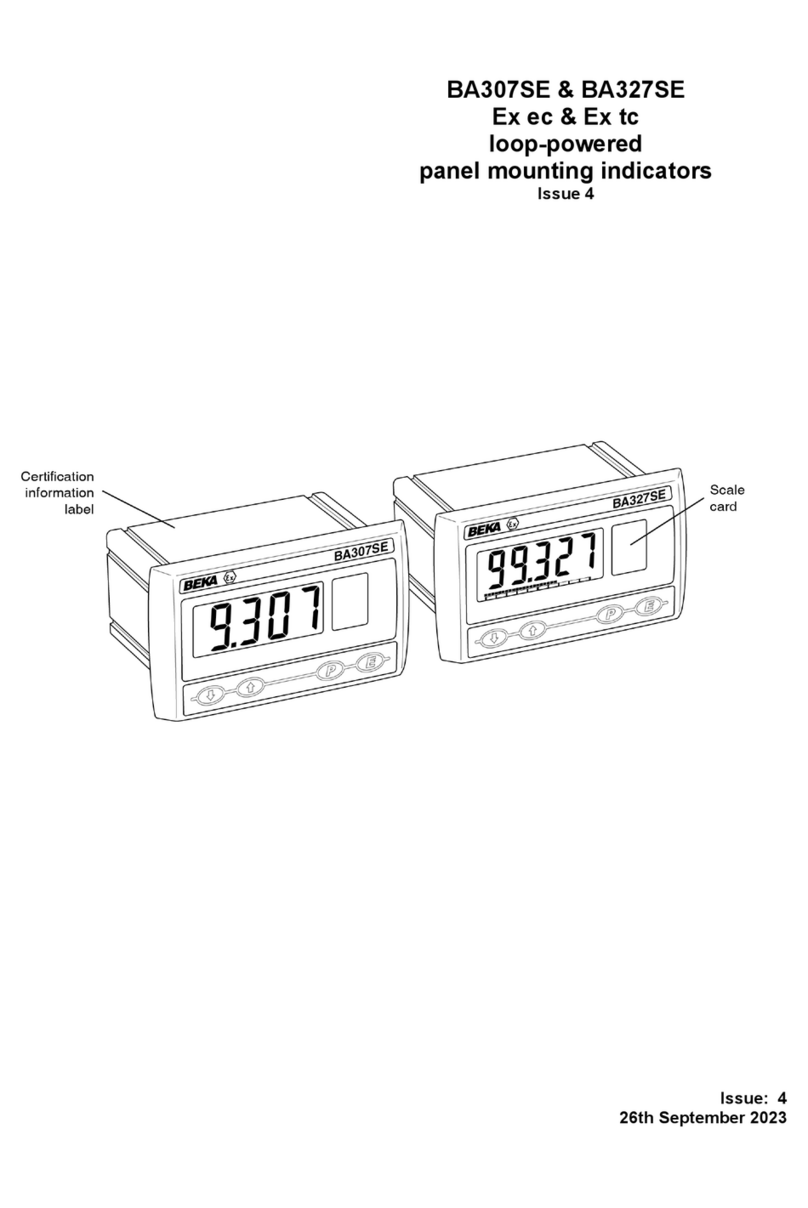
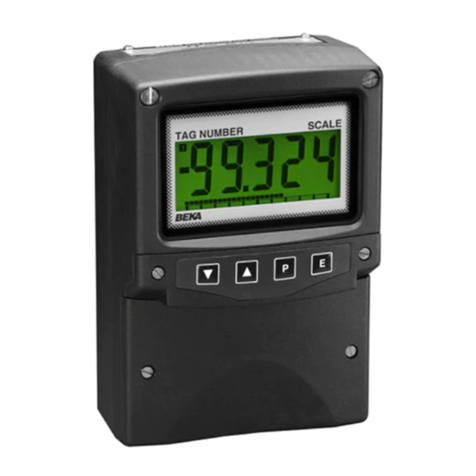
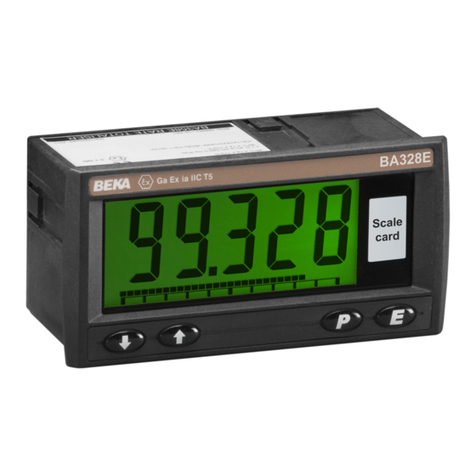
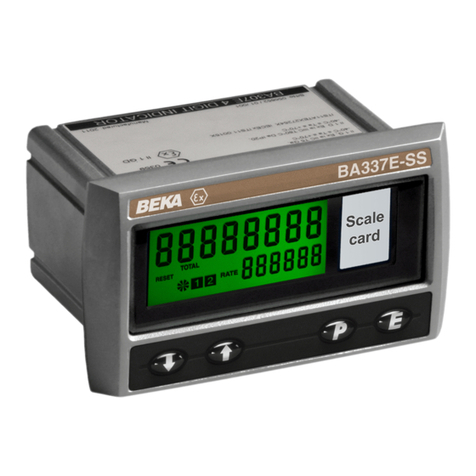
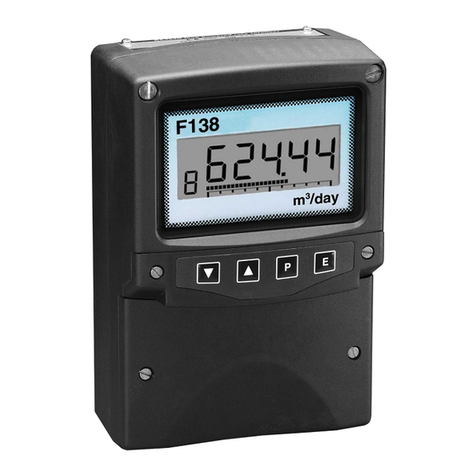
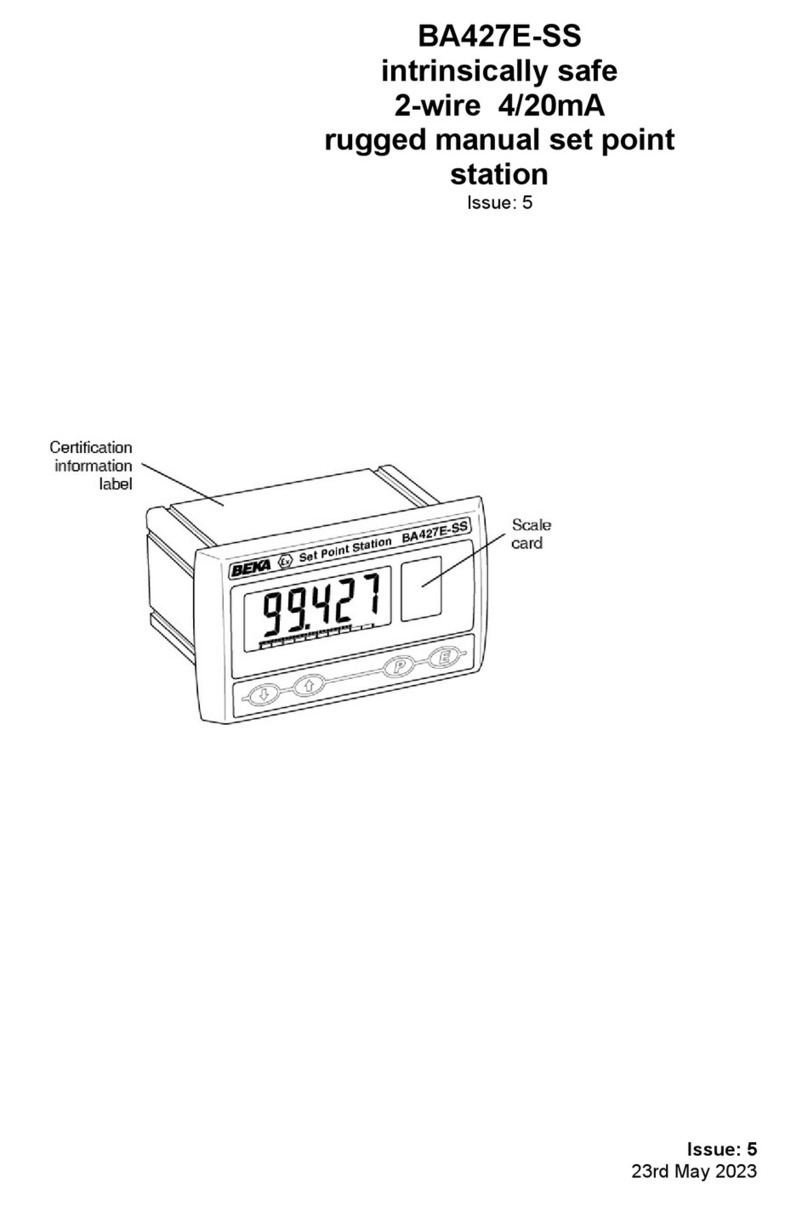
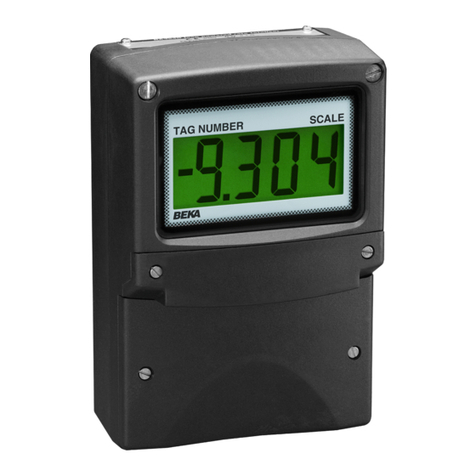
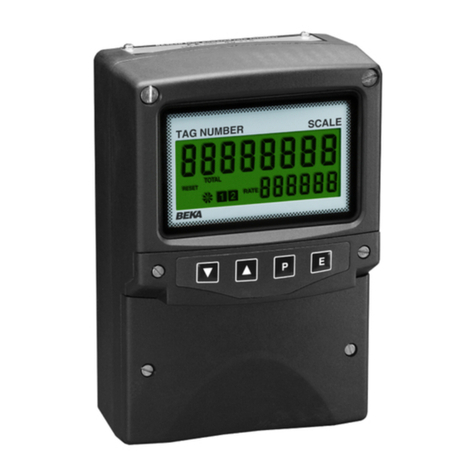
BEKA BA304D User manual

BA304D
Intrinsically safe
loop-powered
3½ digit field
mounting indicator
issue 12
Issue: 12
25th September 2008

2
1. Description
2. Operation
3. Intrinsic Safety Certification
3.1 ATEX certificate
3.2 4/20mA input
3.3 Zones, gas groups & T rating
3.4 Certification label information
4. System Design for Hazardous Areas
4.1 Transmitter loops
4.2 Remote indication
5. Installation
5.1 Location
5.2 Installation procedure
5.3 EMC
6. Calibration
6.1 Zero adjustment
6.2 Span adjustment
6.3 Decimal point
6.4 Reverse action
6.5 Calibration example
6.6 Over and under-range
7. Maintenance
7.1 Fault finding during commissioning
7.2 Fault finding after commissioning
7.3 Servicing
7.4 Routine maintenance
7.5 Guarantee
7.6 Customer comments
8. Accessories
8.1 Units of measurement & instrument
identification.
8.2 Internal calibrator
8.3 Root extractor
8.3.1 Calibration example with root
extractor.
8.4 Display backlight
8.4.1 Separately powered backlight
8.4.2 Loop powered backlight
8.5 Pipe mounting kits
Appendix 1
FM approval for use in USA and cFM
approval for use in Canada
Appendix 2
ATEX dust certification
Appendix 3
IECEx certification
The BA304D is CE marked to show compliance with the European Explosive Atmospheres
Directive 94/9/EC and the European EMC Directive 2004/108/EC
CONTENTS

3
1. DESCRIPTION
The BA304D is an intrinsically safe loop powered
digital indicator which displays the current flowing
in a 4/20mA loop in engineering units. The
indicator introduces less than a 1.1V drop which
allows it to be installed into almost any 4/20mA
current loop. No additional power supply or battery
are required.
The BA304D is a third generation instrument
incorporating a separate terminal enclosure.
Complying with the European Explosive
Atmospheres Directive ATEX, the instrument has
been certified intrinsically safe for use in explosive
gas and combustible dust atmospheres. ATEX
dust certification is an option - See Appendix 2.
For installations in the USA and Canada, FM and
cFM intrinsic safety and nonincendive certification
are also available. See Appendix 1.
All versions have IECEx certification.
The main application of the BA304D is to display a
measured variable or control signal in a hazardous
process area. The zero and span of the display
are independently adjustable so that the indicator
may be calibrated to display any variable
represented by the 4/20mA current, e.g.
temperature, flow, pressure or level.
The BA304D has been certified intrinsically safe by
ITS Testing and Certification Ltd to the European
ATEX Directive 94/9/EC. The EC-Type
Examination Certificate specifies that under fault
conditions the voltage, current and power at the
input terminals 1 and 3 will not exceed those
specified for simple apparatus in Clause 5.4 of
EN50020:1994.
The indicator is housed in a robust IP66 glass
reinforced polyester (GRP) enclosure with an
armoured glass window.
2. OPERATION
Fig 1 shows a simplified block diagram of a
BA304D. The 4/20mA input current flows through
resistor R1 and forward biased diode D1. The
voltage developed across D1, which is relatively
constant, is multiplied by a switch mode power
supply and used to power the analogue to digital
converter and liquid crystal display. The voltage
developed across R1, which is proportional to the
4/20mA input current, provides the input signal for
the analogue to digital converter.
Fig 1 Simplified block diagram of BA304D
3. INTRINSIC SAFETY CERTIFICATION
3.1 ATEX certificate
The BA304D has been issued with an EC-Type
Examination Certificate number ITS99ATEX2001
by ITS Testing and Certification Ltd (formerly ERA
Technology Ltd) showing compliance with the
European ATEX Directive 94/9/EC for Group II,
Category 1, gas and dust atmospheres, EEx ia IIC.
The instrument bears the Community Mark and,
subject to local codes of practice, may be installed
in any of the European Economic Area (EEA)
member countries. ATEX certificates are also
acceptable for installations in Switzerland.
This manual describes installations in gas
atmospheres which conform with BS
EN60079:Part 14:2003 Electrical Installation in
Hazardous Areas. When designing systems for
installation outside the UK, the local Code of
Practice should be consulted.
For use in the presence of combustible dust,
please refer to Appendix 2 which describes
installations complying with EN 61242 -14. Dust
certification is an option, which must be specified
when the instrument is ordered.
3.2 4/20mA input
In Europe, sources of energy which do not
generate more than 1.5V; 100mA, and 25mW are,
for intrinsic safety purposes, considered to be
simple apparatus (Clause 5.4 of EN50 020:1994).

4
Although the BA304D indicator does not itself
comply with the requirements for simple apparatus,
the EC-Type Examination Certificate specifies that
under fault conditions the voltage, current and
power at the 4/20mA input terminals 1 and 3 will
not exceed those specified for simple apparatus in
Clause 5.4 of EN50020:1994. This allows the
BA304D to be connected into any intrinsically safe
circuit protected by a Zener barrier or galvanic
isolator providing the output parameters of the
circuit do not exceed:
Uo = 30V dc
Io = 200mA
Po = 0.85W
For this reason the BA304D indicator has only an
apparatus certificate. No system certificate has
been issued, or is required, because the system
certificate of the loop into which the indicator is
connected remains valid. Note: The optional
display backlight does have a system certificate.
The BA304D EC-Type Examination Certificate
specifies the maximum equivalent capacitance and
inductance between the two 4/20mA input
terminals is:
Ci = 20nF
Li = 10µH
To determine the maximum permissible cable
parameters these figures must be subtracted from
the maximum cable capacitance and inductance
permitted by the system certificate of the loop into
which the BA304D is installed.
3.3 Zones, gas groups and T rating
The BA304D has been certified for Group II,
Category 1, G, EEx ia IIC T5 Tamb -40 to 60oC.
When connected to a suitable system the indicator
may be installed in:
Zone 0 explosive gas air mixture
continuously present.
Zone 1 explosive gas air mixture likely
to occur in normal operation.
Zone 2 explosive gas air mixture not
likely to occur, and if it does will
only exist for a short time.
Be used with gases in groups:
Group A propane
Group B ethylene
Group C hydrogen
Having a temperature classification of:
T1 450°C
T2 300°C
T3 200°C
T4 135°C
T5 100°C
This allows the BA304D indicators to be installed
in all Zones and to be used with most common
industrial gases.
3.4 Certification Label Information
The certification label is fitted in a recess on the
top outer surface of the enclosure. It shows the
ATEX certification information plus BEKA
associates name and location. Non European
certification information may also be included. The
instrument serial number and date of manufacture
are shown on a separate label inside the terminal
compartment.
4. SYSTEM DESIGN FOR HAZARDOUS
AREAS
4.1 Transmitter loops
A BA304D indicator may be connected in series
with almost any intrinsically safe 4/20mA current
loop and calibrated to display the measured
variable or control signal in engineering units.
There are two basic design requirements:
1. The intrinsic safety output parameters of the
4/20mA loop, which are defined by the Zener
barrier or galvanic isolator, must be less
than: Uo = 30V dc
Io = 200mA
Po = 0.85W
2. The loop must be able to tolerate the
additional 1.1V required to operate the
indicator.
Fig 2 illustrates a typical application in which a
BA304D indicator is connected in series with a 2-
wire transmitter protected by a Zener barrier.

5
Fig 2 BA304D in a transmitter loop
4.2 Remote indication
A BA304D indicator may be driven from a 4/20mA
safe area signal via an intrinsically safe interface to
provide a remote indication within a hazardous
area. The type of interface is not critical, either a
Zener barrier or a galvanic isolator may be used,
providing the output parameters of the interface
are: Uo less than 30Vdc
Io less than 200mA
Po less than 0.85W
Note: when the hazard is a IIC gas, and two single
channel Zener barriers or a two channel Zener
barrier are used, only one barrier or channel may
be a 28V 300ohm device.
Again it is necessary to ensure that the voltage
capability of the 4/20mA signal is sufficient to drive
the indicator plus the voltage drop introduced by
the intrinsically safe interface. Figs 3A, 3B and 3C
show the alternative circuits which may be used.
If one side of the 4/20mA current loop may be
earthed, a single channel Zener barrier provides
the lowest cost protection. If the 4/20mA signal is
not isolated, then two Zener barriers, a two
channel Zener barrier or a galvanic isolator should
be used.
Fig 3A Simplest circuit with one side of 4/20mA
current loop connected to earth
Fig 3B Two Zener barrier channels are required if
the 4/20mA current loop can not be
earthed at the barrier busbar.
Fig 3C Galvanic isolator can be used with any
4/20mA current loop.

6
5. INSTALLATION
5.1 Location
The BA304D indicator is housed in a robust IP66
glass reinforced polyester (GRP) enclosure
incorporating an armoured glass window and
stainless steel fittings making it suitable for exterior
mounting in most industrial applications, including
offshore and waste water treatment. Please
consult BEKA associates if high vibration is
anticipated.
The BA304D is surface mounting, but may be pipe
or stem mounted using the accessory kits
described in section 8 of this manual.
The field terminals and the two mounting holes are
located in a separate compartment with a sealed
cover allowing the instrument to be installed
without exposing the display assembly or controls.
Terminals 2 and 4 are internally joined and may be
used for linking the return 4/20mA wire - see Fig 2.
Similarly, terminals 5 and 6 are internally joined
and may be used for linking the cable screens.
The BA304D earth terminal is connected to the
internal EMC filters. For maximum radio frequency
interference rejection this terminal should be
connected to a local earth, or to a cable screen
which is earthed in the safe area. To prevent
circulating currents, cable screens should only be
earthed in the safe area.
The BA304D enclosure is fitted with a bonding
plate to ensure electrical continuity between the
three conduit / cable entries.
5.2 Installation Procedure
Fig 4 illustrates the instrument installation
procedure.
a. Remove the instrument terminal cover by
unscrewing the two captive 'A' screws.
b. Mount the instrument on a flat surface and
secure with screws or bolts through the two
'B' holes. Alternatively use one of the pipe or
stem mounting kits described in sections 8.5
and 8.6
c. Remove the temporary dust seals from the
three cable entries and install the required
glands, conduit fittings or blanking plugs.
Note: the temporary dust seals supplied with
the instrument do not provide IP66 protection
d. Connect the field wiring to the terminals as
shown in Fig 5.
e. Replace the instrument terminal cover and
tighten the two 'A' screws.
Fig 4 BA304D installation procedure
Fig 5 Dimensions and terminal connections
5.3 EMC
The BA304D complies with the requirements of the
European EMC Directive 89/336/EEC. For
specified immunity all 4/20mA wiring should be in
screened twisted pairs, with the screen earthed
within the safe area.

7
6. CALIBRATION
The BA304D will be supplied calibrated as
requested at time of ordering. If calibration is not
requested, the indicator will be set to display 00.0
with 4.000mA input, and 100.0 with 20.000mA
input.
The BA304D is conditioned and calibrated by plug-
in links and two multi-turn potentiometers located
behind the instrument control cover which is
secured by two 'C' screws - see Fig 4. Removal of
this cover does not expose the field terminals or
the display assembly. For maximum accuracy,
the instrument should be calibrated using an
external traceable current source with a resolution
of at least 4µA. However, when verification is not
required, the instrument may be fitted with an
optional internal calibrator which allows rapid
calibration without the need for external
instruments or disconnection from the 4/20mA
input current. See section 8.2 for details.
6.1 Zero adjustment
Zero is defined as the number displayed by the
indicator with a 4.000mA input current, and may be
adjusted between -1000 and 1000. The zero
potentiometer has two ranges, 0 to 500 and 500 to
1000. Zero polarity is defined by the position of
the suppression / elevation links which are shown
in Fig 6.
Suppression / elevation links
Position Display with 4mA input
adjustable between
Elevation 0 and 1000
Suppression 0 and -1000
Zero link
Position Display with 4mA input
adjustable between
0 to 500 0 and 500
500 to 1000 500 to 1000
6.2 Span adjustment
Span is defined as the difference between the
number displayed with 4.000mA input, and the
number displayed with 20.000mA input. It is
adjustable between 0 and 1999 in four ranges. Fig
6 shows the position of the span links and the span
potentiometer.
Position Instrument span
of span links adjustable between
000 to 500 000 and 500
or 500 to 1000 500 and 1000
or 1000 to 1500 1000 and 1500
or 1500 to 1999 1500 and 1999
6.3 Decimal point
A decimal point may be displayed between any of
the four digits. The position or absence of this
dummy decimal point is determined by the
position of the decimal point link shown in Fig 6.
When calculating the required span and zero
settings the decimal point should be ignored.
6.4 Reverse action
Normally the BA304D display increases as the
input current increases, but this can be reversed.
Please contact BEKA associates for details.
6.5 Calibration example
The BA304D is required to display:
25.0 with 4.000mA input
115.0 with 20.000mA input
i.e. A zero of positive 250 (Ignoring decimal point)
A span of 900 (Ignoring decimal point)
A decimal point in position 00.0
The following adjustments are required:
Step 1 The BA304D is required to display a
positive zero therefore the suppression
/ elevation links should be put in the
elevation position.
Step 2 The required zero is 250, therefore the
zero link should be put in the 0 to 500
position.
Step 3 The required span is 900, therefore the
span links should be placed in the 500
to 1000 position.
Step 4 The decimal point is required between
the two least significant digits, therefore
the decimal point link should be placed
in the 00.0 position.
Step 5 With 4.000mA input adjust the zero
potentiometer until the indicator
displays 25.0
Step 6 With 20.000mA input adjust the span
potentiometer until the indicator
displays 115.0
Step 7 Repeat steps 5 and 6 until both
calibration points are correct. The span
and zero controls are almost
independent so it should only be
necessary to repeat each adjustment
twice.

8
6.6 Over and under-range
If the indicator display range is exceeded, the three
least significant digits will be blanked. Under-
range is indicated by -1 and over-range by 1. If
the display range is not exceeded, the BA304D will
produce accurate readings outside the 4/20mA
current range. Although not guaranteed, most
BA304D indicators will operate between 3 and
25mA.
Fig 6 Position of plug-in links and potentiometers shown with the control cover removed

9
7. MAINTENANCE
7.1 Fault finding during commissioning
If the BA304D fails to function during
commissioning the following procedure should be
followed:
Symptom Cause Solution
No display Incorrect There should be 1V
wiring between terminals 1 &
3 with terminal 1
positive.
No display Incorrect Check that a current
and no volts wiring or is flowing in the loop.
between no power
terminals 1 supply.
and 3.
Insufficient Check supply voltage
loop voltage and voltage drops
to operate caused by all
BA304D. components in the
loop.
BA304D Positive The BA304D has been
displays 1 over-range incorrectly calibrated &
is trying to display a
number greater than
1999.
BA304D Negative The BA304D has been
displays -1 over-range incorrectly calibrated &
is trying to display a
number less than
-1999.
Unstable 4/20mA input Check loop supply
display has a large voltage.
ripple.
7.2 Fault finding after commissioning
ENSURE PLANT SAFETY BEFORE
STARTING MAINTENANCE
Live maintenance is permitted on
intrinsically safe equipment installed in a
hazardous area, but only certified test
equipment should be used unless a gas
clearance certificate is available.
If a BA304D fails after it has been functioning
correctly, the following table may help to identify
the cause of the failure.
Symptom Cause Solution
No display No power Check that a current
and no volts supply is flowing in the loop.
between
terminals 1
and 3
Unstable 4/20mA Check loop supply
display input has a voltage.
large ripple
If this procedure does not reveal the cause of the
fault, it is recommended that the instrument is
replaced. Alternatively the electronic display
assembly may be exchanged as described in
section 7.3
7.3 Servicing
We recommend that faulty instruments
and instrument assemblies are returned
to BEKA associates or to your local
agent for repair.
Electronic components must not be
replaced or repaired on site.
To simplify servicing all BA304D indicators use a
common display assembly. Depending upon the
accessories fitted, one spare display assembly
may be used to replace any BA304D which fails.
The exchange may be made without disconnecting
the 4/20mA loop which will continue to function,
but the indicator voltage drop will increase from 1V
to 4V without the display assembly.
To exchange the indicator assembly remove the
terminal cover by unscrewing the two 'A' screws
which will reveal two concealed 'D' screws - see
Fig 4. Unscrew all four 'D' screws and carefully lift
off the instrument front. The instrument assembly
is secured by three Pozi headed screws which
should be removed. If the instrument is fitted with
a backlight the fly-lead connecting it to the
terminals must be unplugged. The replacement
display assembly may then be installed and the
enclosure reassembled.
If after replacement of the display assembly the
instrument still does not function, it is likely that the
fault is within the protection components on the
terminal assembly. Terminal assemblies may be
replaced on site providing instruments with a
backlight are fitted with a replacement board
including terminals 12 and 13.

10
7.4 Routine maintenance
The mechanical condition of the instrument and
electrical calibration should be regularly checked.
The interval between inspections depends upon
environmental conditions. We recommend that
initially instrument calibration should be checked
annually.
7.5 Guarantee
Indicators which fail within the guarantee period
should be returned to BEKA associates or our local
agent. It is helpful if a brief description of the fault
symptoms is provided.
7.6 Customer comments
BEKA associates is always pleased to receive
comments from customers about our products and
services. All communications are acknowledged
and whenever possible, suggestions are
implemented.

11
8. ACCESSORIES
8.1 Units of measurement and instrument
identification
All BA304D indicators are fitted with a blank label
around the liquid crystal display. This label can be
supplied printed with any units of measurement
and tag information specified at the time of
ordering. Alternatively the information may be
added on-site via an embossed strip, dry transfer
or even a permanent marker.
To gain access to the display label remove the
terminal cover by unscrewing the two 'A' screws
which will reveal two concealed 'D' screws.
Unscrew the four 'D' screws and carefully lift off the
front of the instrument enclosure - see Fig 4. Add
the required legend to the display label, or replace
with a new pre-printed label which is available from
BEKA associates.
The BA304D can also be supplied with a blank or
custom engraved stainless steel plate secured by
two screws to the side of the instrument enclosure.
This plate can accommodate:
1 row of 9 alphanumeric characters 10mm high
or 1 row of 11 alphanumeric characters 7mm high
or 2 rows of 18 alphanumeric characters 5mm high.
8.2 Internal Calibrator
The BA304D can be supplied with an optional
internal calibrator which simulates 4 and 20mA
input currents. This allows rapid calibration without
the need for external instruments or disconnection
from the 4/20mA input current, but it is not a
substitute for calibration with a traceable external
current source. Fig 6 shows the position of the
calibrator link which is located behind the
instrument control cover.
The plug-in root / linear link shown in Fig 6 must
always be in the root position when an internal
calibrator is fitted. An internal calibrator can not
be fitted to an instrument with a root extractor.
When using an internal calibrator, the following
procedure should be followed at any input current
between 4 and 20mA.
Step 1 Put the suppression / elevation, zero,
span and decimal point links in the
required position. Ensure that the root
/ linear link is in the root position.
Step 2 Put the calibrator link in the 4mA
position and adjust the indicator zero
potentiometer to give the required
display at 4mA.
Step 3 Put the calibrator link in the 20mA
position and adjust the indicator span
potentiometer to give the required
display at 20mA.
Step 4 Repeat steps 2 and 3 until both
calibration points are correct. The span
and zero controls are almost
independent so it should only be
necessary to repeat each adjustment
twice.
Step 5 Return the calibrator link to the
'indicate' position. The indicator will
now respond to the 4/20mA input
current with the revised calibration.
8.3 Root extractor
The BA304D can be supplied with a square root
extractor which enables the indicator to accurately
display the output from a differential flow meter in
linear engineering units between 10 and 100% of
full flow (4.16 to 20mA). The lineariser continues
to operate with reduced accuracy down to 2.5% of
maximum flow, alternatively clip-off can be
selected which will force the display to zero at
flows below 5% (4.04mA). The location of the clip-
off link is shown in Fig 7.
Fig 7 Location of root extractor clip-off link

12
When calibrating a BA304D fitted with a root
extractor the indicator zero potentiometer should
be adjusted to give the required display at 10% of
flow (4.16mA). The indicator zero potentiometer
should not be used to set the display to zero with a
4mA input. Zero suppression or elevation may not
be used, i.e. 4mA must correspond to zero flow.
For reference, the following table shows the output
current from a non-linearised differential flowmeter.
% of full flow Current output mA
2.5 4.01
10.0 4.16
25.0 5.00
50.0 8.00
75.0 13.00
100.0 20.00
A root extractor can not be fitted to an instrument
with an internal calibrator.
8.3.1 Calibration example with root extractor
The BA304D is required to display rate of flow in
gallons per minute, with a resolution of 0.1 gallons.
The differential flowmeter has an output of 20mA
at a flow rate of 140.0 gallons per minute.
i.e. A span of 1400 ignoring the decimal point
A decimal point in position 00.0
The following adjustments are required:
Step 1 Put the suppression / elevation links in
the elevation position.
Step 2 Put the zero link in the 0 to 500
position.
Step 3 The required span is 1400, therefore
the span links should be placed in the
1000 to 1500 position.
Step 4 The decimal point is required between
the two least significant digits, therefore
the decimal point link should be placed
in the 00.0 position.
Step 5 With 4.160mA input current adjust the
zero potentiometer until the indicator
displays 14.0 (10% of flow). If there
is insufficient adjustment to achieve
this, put the elevation/suppression links
in the suppression position and repeat
step 5.
Step 6 With 20.000mA input current adjust the
span potentiometer until the indicator
displays 140.0
Step 7 Repeat steps 5 and 6 until both
calibration points are correct.
8.4 Display backlight
The BA304D may be supplied with two different
backlights. The loop powered backlight produces
green background illumination enabling the display
to be read at night and in poor lighting conditions.
No additional power supply, IS interface or field
wiring are required, but the indicator voltage drop
is increased. Alternatively, the separately powered
backlight has a bright orange output which
enhances daylight viewing, but an additional IS
interface and field wiring are required.
8.4.1 Separately powered backlight
The separately powered backlight is segregated
from the measuring circuit and has been certified
as a separate intrinsically safe circuit, but it does
not comply with the requirements for simple
apparatus.
This backlight must be powered from the safe area
via a Zener barrier or a galvanic isolator as shown
in Fig 8. Any certified device may be used,
providing the output parameters do not exceed:
Uo = 28V dc
Io = 159mA
Po = 0.8W
The EC-Type Examination Certificate specifies that
the maximum equivalent capacitance and
inductance between terminals 12 and 13:
Ci = 40nF
Li = 20µH
To determine the maximum permitted cable
parameters, these figures should be subtracted
from the maximum permitted cable capacitance
and inductance specified by the certificate for the
Zener barrier or galvanic isolator powering the
backlight.
For guidance, System Certificates ITS No
Ex99E2006 and 2007 have been issued which list
some of the devices that may be used.

13
Fig 8 Separately powered backlight
The display brilliance depends upon the current
flowing through the backlight which is determined
by the supply voltage and the end-to-end
resistance of the Zener barrier or output resistance
of the galvanic isolator. Brilliance will not be
significantly reduced until the current falls below
20mA.
Backlight current = Vsupply –18 _
End-to-end resistance of barrier#
# or output resistance of galvanic isolator
8.4.2 Loop powered backlight
This backlight may be connected in series with the
4/20mA measuring circuit so that like the BA304D
indicator it is loop powered. This eliminates the
need for a separate Zener barrier or galvanic
isolator and associated wiring for the backlight,
thus significantly reducing the installation costs.
As shown in Fig 9 the loop powered backlight may
be connected in series with the BA304D indicator.
Any Zener barrier or galvanic isolator certified EEx
ia IIC by an EEC approved certification body may
be used, providing the output parameters do not
exceed: Uo = 30V dc
Io = 200mA
Po = 0.85W
For guidance, ITS System Certificates Ex02E2031
and 2032 have been issued which list some of the
devices that may be used and define cable
parameters.
Fig 9 Loop-powered backlight
Connecting the backlight in series with the
indicator increases the total voltage drop in the
4/20mA loop from 1.1V to 5.0V
8.5 Pipe mounting kits
Two pipe mounting kits are available for securing
the BA304D to a horizontal or vertical pipe.
Detailed assembly instructions are supplied with
each kit.
BA392D Stainless steel bracket secured by two
worm drive hose clips. Will clamp to
any pipe with outside diameter between
60 and 80mm.
BA393 Heavy duty stainless steel bracket
secured by a single 'V' bolt. Will clamp
to any pipe with an outside diameter
between 40 and 80mm.

14
Appendix 1
FM approval for use in USA and cFM
Approval for use in Canada
A1.0 Factory Mutual Approval
For installations in the USA and Canada, the
BA304D and all accessories have FM and cFM
intrinsic safety, Class I, II and III, Divisions 1 and 2;
Class I, Zone 0 approval. They also have FM and
cFM nonincendive approval for Class I, II and III,
Division 2 and Class I, Zone 2 installations.
US installations must comply with the BEKA
associates Control Drawing CI300-27, ANSI/ISA
RP12.6 and the National Electrical Code
ANSI/NFPA70.
Canadian installations must comply with the BEKA
associates Control Drawing CI300-27 and the
Canadian Electrical Code C22.2
All the intrinsically safe circuits shown in this
instruction manual may be used for installations in
the USA and Canada, providing the Zener barriers
and galvanic isolators have the appropriate
approval and specified entity parameters.
A1.1 4/20mA input in intrinsically safe circuit
The BA304D has been evaluated under the entity
concept, and may be connected in series with any
intrinsically safe circuit having output parameters
equal to or less than:
Voc, Vt = 32V
Isc, It = 200mA
Po = 1.2W
The 4/20mA input terminals have a maximum
equivalent capacitance and inductance of:
Ci = 0.02µF
Li = 0.01mH
These figures must be subtracted from the
maximum permissible cable capacitance and
inductance allowed for the Zener barrier or
galvanic isolator powering the loop into which the
indicator is installed.
See Figs 2 and 3.
A1.2 4/20mA input in nonincendive circuit
The BA304D is Factory Mutual approved as
nonincendive for Class I, II and III Division 2
locations, which allows both indicators to be
installed in Division 2 without the need for Zener
barriers or galvanic isolators. The maximum
supply voltage must be less than 32V and the
wiring must be nonincendive or 'Division 2
suitable'.
A1.3 Classes, Divisions, Gas Groups and
Temperature rating
The BA304D has a T4 temperature rating at a
maximum ambient temperature of 60oC. It has
been approved by FM for installation in the
following Divisions and Gas Groups.
Intrinsic Safety Nonincendive
Division 1 or 2 Division 2
Class I Group A & B
Group C
Group D
Class II Group E, F & G
Class III
Zone 0, 1 or 2
Class 1 Group IIC
Group IIB
Group IIA
Class I Group A & B
Group C
Group D
Class II Groups F & G
Class III
Zone 2
Class I Group IIC
Group IIB
Group IIA
A1.4 Nonincendive applications
For nonincendive applications a Zener barrier or
galvanic isolator is not required. The wiring must
be nonincendive or 'Division 2 suitable'.
A2.0 Display backlights
The FM approval allows the BA304D to be
supplied with two different backlights. The loop
powered backlight produces green background
illumination enabling the display to be read at night
and in poor lighting conditions. No additional
power supply, IS interface or field wiring are
required, but the indicator voltage drop is
increased from 1 to 5V. Alternatively, the
separately powered backlight has a bright orange
output which enhances daylight viewing, but an
additional IS interface and field wiring are required.

15
A2.1 Seperately powered backlight
The separately powered backlight is segregated
from the measuring circuit and has been approved
as a separate intrinsically safe circuit under the
entity concept. The backlight may be powered
from any FM certified associated apparatus such
as a Zener barrier or galvanic isolator having
output parameters equal to or less than:
Voc, Vt = 32V
Isc, It = 159mA
Po = 1.2W
The backlight terminals have a maximum
equivalent capacitance and inductance of:
Ci = 0.03µF
Li = 0.01mH
These figures must be subtracted from the
maximum permissible cable capacitance and
inductance allowed for the Zener barrier or
galvanic isolator powering the backlight.
Segregation between the backlight and the
measuring circuits should be maintained by
following the wiring methods recommended in
ANSI/NFPA70 article 504.
See Fig 8.
A2.2 Nonincendive applications
For nonincendive applications a Zener barrier or
galvanic isolator is not required. The backlight
may be powered directly from a dc supply
providing the voltage does not exceed 32V. The
wiring must be nonincendive or 'Division 2
suitable'.
A2.3 Loop powered backlight
This backlight is connected in series with the
4/20mA measuring circuit so that like the BA324D
indicator it is powered by the 4/20mA signal. This
eliminates the need for a separate Zener barrier or
galvanic isolator and associated wiring for the
backlight, thus significantly reducing the installation
costs, but it increases the total voltage drop in the
4/20mA loop from 1.1V to 5.0V
See Fig 9.
Any FM certified Zener barrier or galvanic isolator
may be used, providing the output parameters do
not exceed:
Voc, Vt = 32V dc
Isc, It = 200mA
Po = 1.2W
The indicator and backlight terminals have a
combined maximum equivalent capacitance and
inductance of:
Ci = 0.05µF
Li = 0.02mH
These figures must be subtracted from the
maximum permissible cable capacitance and
inductance allowed for the Zener barrier or
galvanic isolator powering the indicator and
Backlight.
A3.4 Nonincendive applications
For nonincendive installations no barrier or isolator
is required, but the maximum supply voltage to the
combined indicator and backlight must be less
than 32V. Wiring must be nonincendive or
'Division 2 suitable'.

16
Appendix 2
ATEX dust certification
A2.0 ATEX dust certification
In addition to ATEX certification permitting
installation in explosive gas atmospheres which is
described in the main section of this instruction
manual, the BA304D is available ATEX certified for
use in the presence of combustible dusts. If
ATEX dust certification is required it must be
specified when the BA304D indicator is purchased.
WARNING
Before installing a BA304D indicator in
the presence of a combustible dust,
ensure that the certification information
label which is located on the top of the
instrument specifies dust certification -
see section A2.2
A2.1 Zones and Maximum Surface
Temperature
The BA304D has been ATEX certified as Group II,
Category 1 GD apparatus Tamb = -20 to 60°C,
with a Maximum Surface Temperature of 80°C.
When installed as specified by EN 61241-14
‘Selection, installation and maintenance of
electrical apparatus protected by enclosures’, the
indicator may be installed in:
Zone 20 explosive atmosphere in the form of
a cloud of combustible dust in air is
continuously present, or for long
periods or frequently.
Zone 21 explosive atmosphere in the form of
a cloud of combustible dust in air is
likely to occur occasionally in normal
operation.
Zone 22 explosive atmosphere in the form of
a cloud of combustible dust in air is
not likely to occur in normal
operation, but if it does occur, will
only persist for a short period.
Be used with dusts having a Minimum Ignition
Temperature of:
Dust cloud 120°C
Dust layer on BA304D 155°C
up to 5mm thick
Dust layer on BA304D Refer to
over 5mm thick. EN 61241-14
At an ambient temperature between -20 and
+60°C
A2.2 Certification Label Information
The certification label is fitted in a recess on the
top outer surface of the enclosure. It shows the
ATEX dust certification information including the
maximum surface temperature and ingress
protection, plus the ATEX gas certification
information. Non European information may also
be shown.
The instrument serial number and date of
manufacture are recorded on a separate label
inside the terminal compartment.
A2.3 Calibration & maintenance
The ATEX dust certification relies on the indicator
enclosure being dust-tight. Therefore the control
and terminal covers should only be removed when
dust can not enter the instrument enclosure.
Before replacing the control and terminal covers
ensure that the sealing gaskets are undamaged
and are free from foreign bodies.

17
Appendix 3
IECEx Certification
A3.0 The IECEx Certification Scheme
IECEx is a global certification scheme for
explosion protected products which aims to
harmonise international certification standards.
For additional information about the IECEx
certification scheme and to view the BEKA
associate certificates, please visit www.iecex.com
A3.1 IECEx Certificate of Conformity
The BA304D loop powered indicator has been
issued with an IECEx Certificate of Conformity
number IECEx ITS 05.0004 which specifies the
following certification codes and marking:
For gas Ex ia IIC T5
Ta = -40°C to 60°C
For gas & dust Ex ia IIC T5
DIP A21 TA 80°C IP66
Ta = -20°C to 60°C
The specified intrinsic safety parameters are
identical to the ATEX parameters.
The IECEx certificate may be downloaded from
www.beka.co.uk, www.iecex.com or requested
from the BEKA sales office.
A3.2 Versions of the BA304D
All versions of the BA304D Fieldbus Display have
IECEx certification. This includes:
ATEX version for use in gas atmospheres.
IECEx code Ex ia IIC T5
Ta = -40°C to 60°C
ATEX version for use in gas and dust
atmospheres.
IECEx code Ex ia IIC T5
DIP A21 TA 80°C IP66
Ta = -20°C to 60°C
Factory Mutual Approved version
IECEx code Ex ia IIC T5
Ta = -40°C to 60°C
A3.3 Installation
As the IECEx and ATEX certifications specify
identical safety parameters and installation
requirements for both are defined by IEC 60079-
14, the ATEX installation requirements specified in
this manual may also be used for IECEx
installations in gas atmospheres. The local code
of practice should also be consulted.
Table of contents
Other BEKA Measuring Instrument manuals

BEKA
BEKA BA304NE User manual

BEKA
BEKA BA384G User manual

BEKA
BEKA BA327C User manual

BEKA
BEKA BA507E User manual

BEKA
BEKA Advisor A70 User manual

BEKA
BEKA FOUNDATION BA444DF-F User manual

BEKA
BEKA BA537E User manual

BEKA
BEKA BA524D User manual

BEKA
BEKA BA418CF-F Installation and operating instructions

BEKA
BEKA BA307C User manual
Popular Measuring Instrument manuals by other brands

Pulsar
Pulsar IMP Lite Series instruction manual

IDEAL INDUSTRIES
IDEAL INDUSTRIES 61-773 Technical manual

Dwyer Instruments
Dwyer Instruments HFPC Series Specifications-installation and operating instructions

Polytec
Polytec PSV 300 Hardware manual

Endress+Hauser
Endress+Hauser Proline Promag 50D technical information

Horus
Horus Mini user manual