4
REMOVALAND INSTALLATION
REMOVAL
Blockandholdvehiclebymeansotherthanair brakes.Drain
service and emergency or parking reservoirs. Disconnect
airlinesfromvalve.Removethemountingbolts,removevalve.
INSTALLATION
Remountvalvesecurelyusingholesprovidedinbody.Check
and clean air lines and reconnect.
DISASSEMBLY
NOTE: Care should be taken if body is clamped in vise.
Excessivetightening can cause distortion of valve
body.
TR-2™INVERSIONVALVE
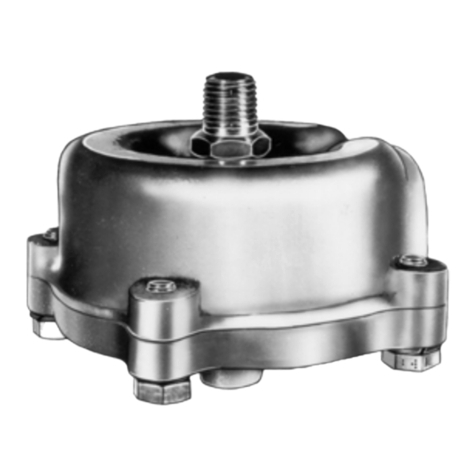
1. Removethecapnutwithsealingring,removesealingring
fromcap nut.
2. Removethe inlet/exhaustvalve springand inlet/exhaust
valve.
3. Turnthe valve overand remove theexhaust diaphragm
cap screw with lockwasher, then the diaphragm washer
anddiaphragm.
4. With a pair of #1 Truarc pliers, remove the retainer ring.
Removethe coverplate and two(2) pistonsprings.
5. Removethe pistonwith grommets.
6. Removethe pistongrommets.
TR-3™INVERSIONVALVE
1. Removethe exhaust portcap nutand o-ring.
2. Removethe diaphragmretainerand pistonspring.
3. Removethe shimwasher orwashers (ifpresent).
4. Removethepiston fromthe valvebody.
5. Removethe pistono-ring and exhauststem o-ring.
6. Removethe supplycap nut ando-ring.
7. Removethevalve stopandspring.
8. Removetheinlet andexhaust valve.
TR-4™INVERSIONVALVE
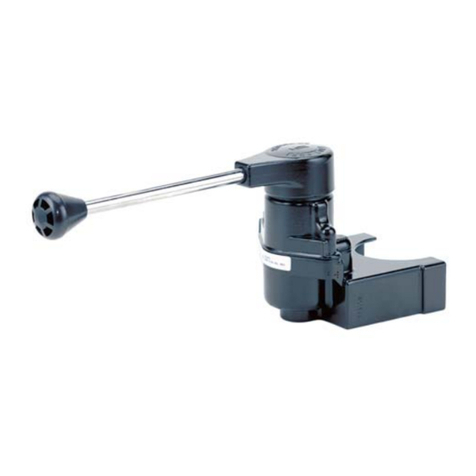
1. Presslever pinout ofthelever andremove lever.
2. Removetheplungerandplungerreturnspringfromcover.
3. Removethe covernut lock nut.
4. Removethe covernutand o-ring.
5. Removethe coverand shimwasher orwashers.
6. Removethe pistonspring and pistonfrom body.
7. Remove the pistonand exhaust stemo-rings.
8. Remove the supplyport capnut and o-ring.
9. Removethe valve stopandvalvereturn spring.
10. Removethe inletand exhaustvalve.
CLEANING AND INSPECTION
Wash all metal parts in a good cleaning solvent. Rubber
partsshould be wipedclean.
Inspect all parts for signs of wear or deterioration. Check
the springs for cracks, corrosion, or distortion. Inspect the
piston and its exhaust seat, body bores, and inlet valve for
nicks, scratches, or burrs.
Replace all parts not considered serviceable during
inspection.
BW1581 © 2004 Bendix Commercial Vehicle Systems LLC. All rights reserved. 4/2004 Printed in U.S.A.
ASSEMBLY
Beforeassemblingthevalve,lubricatethepistono-rings and
bodybores withBendix siliconelubricant suchasBW650M
Bendix Pc. No. 291126.
TR-2™INVERSIONVALVE
1. Install the piston grommets on piston.
2. Install thepiston with grommetsin valve body.
3. Positionthe piston springs,cover plateand retainer ring
in the piston in that order. Press the cover and retainer
down and with a pair of Truarc #1 pliers, snap the ring
intothe bodygroove.
4. Installthediaphragm anddiaphragm washerandsecure
with cap screw.
5. Turn the inversion valve over and position the inlet and
exhaustvalve inits bore.
6. Placethe springoverinlet valve.
7. Installthe sealingring oncap nut.Install thecap nut with
sealing ring and tighten securely. Torque to approx. 125
in. lbs.
8. Usingthe mountingnut andlockwasher,install thevalve
onvehicle.
TR-3™INVERSIONVALVE
1. Install the inlet and exhaust valve in the body (supply
port).
2. Installtheinletvalve springandvalvestop(centerstop on
spring).
3. Install the o-ring on the supply cap nut and install and
tighten the cap nut. Torque to approx. 100 in. lbs.
4. Installthepistonandexhauststem o-ringon piston.Install
the piston in body.
5. Installtheshim washerorwashers (ifpresent). Install the
pistonspring.
6. Installthe diaphragmretainer andexhaust diaphragm.
7. Installtheo-ringonexhaustcapnutand installand tighten
the cap nut. Torque to approx. 275 in. lbs.
TR-4™INVERSIONVALVE
1. Replacethe inletand exhaustvalve.
2. Installthe valvereturnspring andvalve stop.
3. Installtheo-ringonsupplycap nutandinstall andtighten
the cap nut. Torque to approx. 100 in. lbs.
4. Installthe pistonandexhaust stemo-ring onthe piston.
Install the piston in the body.
5. Install the piston spring.
6. Installthe coverand washer orwashers.
7. Replacethe covernuto-ringon thecovernut andinstall
andtighten thecover nut.Torqueto approx.275 in.lbs.
8. Installthe plungerreturn springand plunger.
9. Install the cover nut lock nut. Torque to approx. 100 in.
lbs.
10. Installlever and pressthe lever pinin to secure.
TESTINGREBUILT VALVES
Performoperatingandleakagetestsasoutlinedin“Operating
and Leakage Tests” section.
