manuals.online logo
Brands
  1. Home
  2. •
  3. Brands
  4. •
  5. BENDIX
  6. •
  7. Control Unit
  8. •
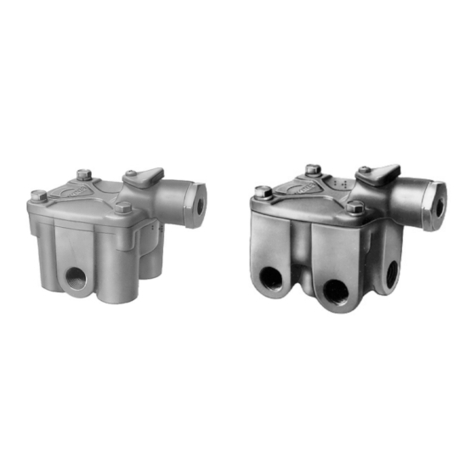
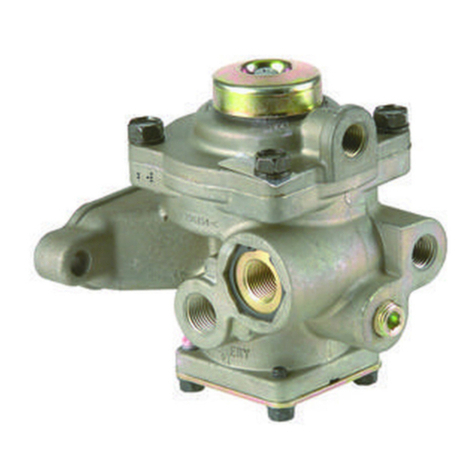
  9. BENDIX R-8R ELAY VALVE User manual

BENDIX R-8R ELAY VALVE User manual

1
Figure 1 – Bendix®R-8™Relay Valve Maintenance Kit Contents
BENDIX®R-8™RELAY VALVE MAINTENANCE KIT
1
2
3
4
5
6
7
Valve
Cover
Valve Body
Piston Return
Spring
Piston
Cap Nut
10-24
Screw Exhaust
Cover
Exhaust Cover
Assembly
Screw Washer
Kit Contents
Item No. Description Qty.
1 O-Ring (.987" I.D.) 1
2 O-Ring (3.725" I.D.) 1
3 O-Ring (1.424" I.D.) 1
4Inlet-Exhaust Valve Assy. 1
5 Sealing Ring (4.125" I.D.) 1
6 Exhaust Diaphragm 1
7 Diaphragm 1
8 Tube of Lubricant 1
Bendix®R-8™Relay Valve
2
GENERAL SAFETY GUIDELINES
WARNING! PLEASE READ AND FOLLOW THESE INSTRUCTIONS
TO AVOID PERSONAL INJURY OR DEATH:
When working on or around a vehicle, the following guidelines should be observed AT ALL TIMES:
▲Park the vehicle on a level surface, apply the
parking brakes and always block the wheels.
Always wear personal protection equipment.
▲Stop the engine and remove the ignition key
when working under or around the vehicle.
When working in the engine compartment,
the engine should be shut off and the ignition
key should be removed. Where circumstances
require that the engine be in operation, EXTREME
CAUTION should be used to prevent personal
injury resulting from contact with moving,
rotating, leaking, heated or electrically-charged
components.
▲Do not attempt to install, remove, disassemble
or assemble a component until you have read,
and thoroughly understand, the recommended
procedures. Use only the proper tools and
observe all precautions pertaining to use of those
tools.
▲If the work is being performed on the vehicle’s
air brake system, or any auxiliary pressurized air
systems, make certain to drain the air pressure
from all reservoirs before beginning ANY work
on the vehicle. If the vehicle is equipped with a
Bendix®AD-IS®air dryer system, a Bendix®DRM™
dryer reservoir module, or a Bendix® AD-9si®air
dryer, be sure to drain the purge reservoir.
▲Following the vehicle manufacturer’s
recommended procedures, deactivate the
electrical system in a manner that safely removes
all electrical power from the vehicle.
▲Never exceed manufacturer’s recommended
pressures.
▲Never connect or disconnect a hose or line
containing pressure; it may whip and/or cause
hazardous airborne dust and dirt particles. Wear
eye protection. Slowly open connections with
care, and verify that no pressure is present. Never
remove a component or plug unless you are
certain all system pressure has been depleted.
▲Use only genuine Bendix®brand replacement
parts, components and kits. Replacement
hardware, tubing, hose, fi ttings, wiring, etc. must
be of equivalent size, type and strength as original
equipment and be designed specifi cally for such
applications and systems.
▲Components with stripped threads or damaged
parts should be replaced rather than repaired.
Do not attempt repairs requiring machining or
welding unless specifi cally stated and approved
by the vehicle and component manufacturer.
▲Prior to returning the vehicle to service, make
certain all components and systems are restored
to their proper operating condition.
▲For vehicles with Automatic Traction Control
(ATC), the ATC function must be disabled (ATC
indicator lamp should be ON) prior to performing
any vehicle maintenance where one or more
wheels on a drive axle are lifted off the ground
and moving.
▲The power MUST be temporarily disconnected
from the radar sensor whenever any tests USING
A DYNAMOMETER are conducted on a vehicle
equipped with a Bendix® Wingman®system.
▲You should consult the vehicle manufacturer's operating and service manuals, and any related literature,
in conjunction with the Guidelines above.
3
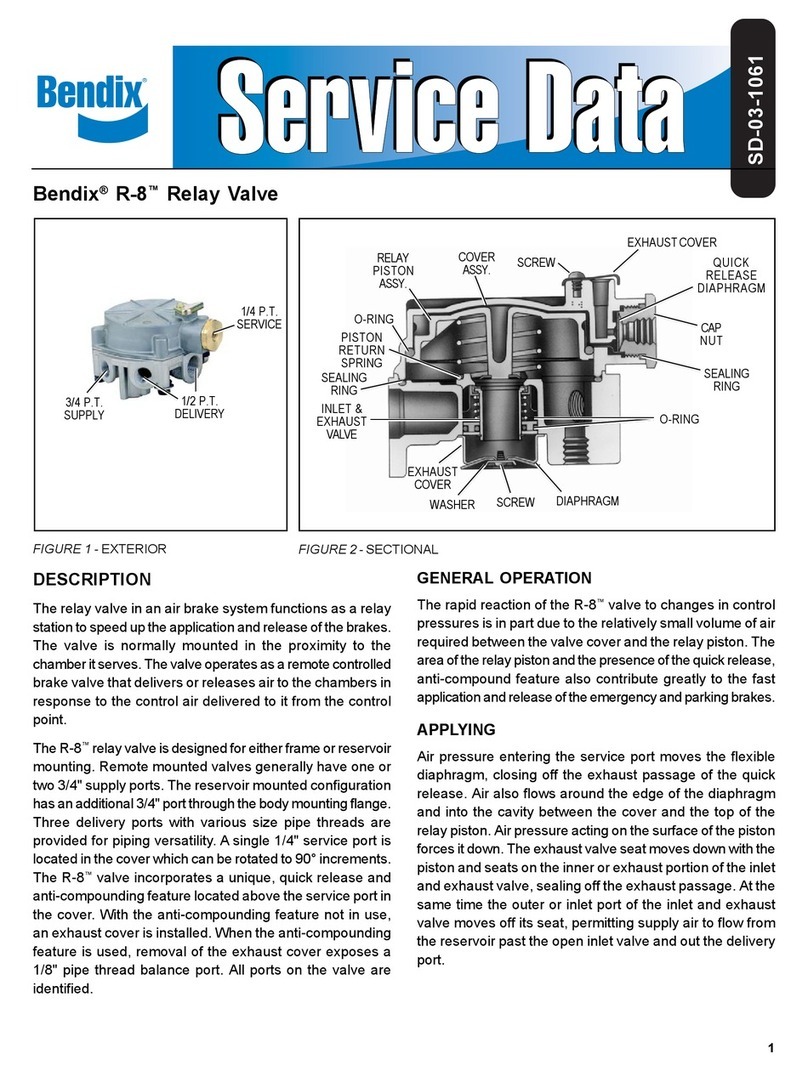
REMOVAL
1. Block or hold the vehicle by means other than the air
brakes.
2. Drain all air brake system reservoirs.
3. Identify, mark, and disconnect all air lines from the R-8™
relay valve.
4. Remove the R-8 valve from its mount on the vehicle.
DISASSEMBLY OF VALVE
1. Note and mark position of the valve cover to the body.
2. Remove the four 5/16" - 18 hex screws and separate
the cover from the body. Some valves have a piston
return spring; if so, remove.
3. Remove the sealing ring (5) from the body.
4. Remove the piston, cap nut, and diaphragm (7) from
the cover.
5. Remove the o-ring (1) from the cap nut and the o-ring (2)
from the piston.
6. Remove the four 10-24 screws which secure the
exhaust cover to the body.
7. Remove the screw, washer, and diaphragm (6) from
the exhaust cover.
8. Remove the complete inlet and exhaust valve assembly (4)
from the valve body.
ASSEMBLY
Prior to assembly of new parts in the valve, clean all parts
in a cleaning solvent equivalent to mineral spirits making
sure all surfaces, bores, and passages are clean and dry.
Grease all o-rings, bores, pistons and internal parts with
the lubricant (8) supplied in the kit.
1. Install the o-ring (3) on the inlet and exhaust valve
assembly (4).
2. Install the diaphragm (6) and diaphragm washer and
secure with a screw. Torque screw to 15-25 in-lbs.
3. Install the inlet and exhaust valve assembly (4) in the
valve body. Position exhaust cover assembly so that
all holes are properly aligned and secure with four
10-24 screws. Torque screws to 20-30 in-lbs.
4. Install the sealing ring (5) in the valve body.
5. Install the piston return spring if the valve requires a
spring. (See "Disassembly", Step 2.)
6. Install the o-ring (2) on the piston and then install the
piston and o-ring in the cover.
7. Install the o-ring (1) on the cap nut.
8. Install the diaphragm (7) in the cover and install the
cap nut. Make certain the diaphragm is free to move
and is not pinched by the cap nut. Torque cap nut to
180-400 in-lbs.
9. If valve is so equipped, install the exhaust cover and
secure it with a 10-24 screw. Torque screw to 15-24
in-lbs.
10. Install the cover assembly on the valve body as marked
and secure with four 5/16" hex head screws. Torque
to 120-150 in-lbs.
INSTALLATION
1. Mount the Bendix®R-8™valve on the vehicle.
2. Connect the air lines to the R-8 valve using the
identification made during Step 3 of "Removal"
instructions.
3. Perform "Operating and Leakage Checks" before
placing the vehicle in service.
OPERATING AND LEAKAGE TEST
1. Block the wheels and fully charge the air system. Adjust
the brakes.
2. Apply and release the parking brakes several times
and check for prompt response of the brakes at all
appropriate wheels.
3. With the park control valve in the "brakes applied"
position, coat the exhaust port with a soap solution to
check for inlet valve and o-ring leakage; a 1" bubble in
5 seconds is permissible.
4. Place the park control valve in the "brakes released"
position and again check at the exhaust port for
leakage of the exhaust valve; a 1" bubble in 3 seconds
is permissible. Apply a soap solution around the valve
where the cover joins the body to check for seal ring
leakage; no leakage permitted.
5. With the park control still in the "brakes released"
position, apply a soap solution to the quick release
exhaust port to check the diaphragm exhaust seat; a
1" bubble in 3 seconds is permitted.
Note: If the anti-compound feature is in use, the line
attached to the R-8 quick release valve exhaust must
be disconnected to perform this test.
4
S-0515 Rev. 002 © 2019 Bendix Commercial Vehicle Systems LLC, a member of the Knorr-Bremse Group • 12/19 • All Rights Reserved
Log-on and Learn from the Best
On-line training that's available when you are 24/7/365.
Visit brake-school.com.

Other BENDIX Control Unit manuals

BENDIX TC-2 TRAILER CONTROL BRAKE VALVE User manual

BENDIX

BENDIX TC-2 TRAILER CONTROL BRAKE VALVE User manual

BENDIX TABS-6 TRAILER ABS MODULE User manual

BENDIX

BENDIX TABS-6 TRAILER ABS MODULE User manual

BENDIX PR-3 User manual

BENDIX

BENDIX PR-3 User manual

BENDIX TR-2 Mounting instructions

BENDIX

BENDIX TR-2 Mounting instructions

BENDIX BP-1 BRAKE PROPORTIONING VALVES User manual

BENDIX

BENDIX BP-1 BRAKE PROPORTIONING VALVES User manual

BENDIX R7 VALVE 3-04 SPANISH Instruction Manual

BENDIX

BENDIX R7 VALVE 3-04 SPANISH Instruction Manual

BENDIX LQ-3 LQ-4 FRONT AXLE RATIO VALVE User manual

BENDIX

BENDIX LQ-3 LQ-4 FRONT AXLE RATIO VALVE User manual

BENDIX PRESSURE PROTECTION VALVES User manual

BENDIX

BENDIX PRESSURE PROTECTION VALVES User manual

BENDIX R-6 RELAY VALVE User manual

BENDIX

BENDIX R-6 RELAY VALVE User manual

BENDIX ATR-1 ANTILOCK TRACTION RELAY User manual

BENDIX

BENDIX ATR-1 ANTILOCK TRACTION RELAY User manual

BENDIX ATR-1 ANTILOCK TRACTION RELAY Service manual

BENDIX

BENDIX ATR-1 ANTILOCK TRACTION RELAY Service manual

BENDIX AR-2 ANTILOCK RELAY VALVE User manual

BENDIX

BENDIX AR-2 ANTILOCK RELAY VALVE User manual

BENDIX INLET REG VALVE COMP User manual

BENDIX

BENDIX INLET REG VALVE COMP User manual

BENDIX E-10P DUAL BRAKE VALVES User manual

BENDIX

BENDIX E-10P DUAL BRAKE VALVES User manual

BENDIX PP-7 TRAILER SUPPLY VALVE User manual

BENDIX

BENDIX PP-7 TRAILER SUPPLY VALVE User manual

BENDIX PP-DC PARK CONTROL VALVE User manual

BENDIX

BENDIX PP-DC PARK CONTROL VALVE User manual

BENDIX TC-4 MODULATING CONTROL VALVE User manual

BENDIX

BENDIX TC-4 MODULATING CONTROL VALVE User manual

BENDIX SR-5 TRAILER SPRING BRK VALVE User manual

BENDIX

BENDIX SR-5 TRAILER SPRING BRK VALVE User manual

BENDIX SR-2 TRAILER SPRING BRAKE VALVE User manual

BENDIX

BENDIX SR-2 TRAILER SPRING BRAKE VALVE User manual

BENDIX LQ-2 QUICK RELEASE VALVES User manual

BENDIX

BENDIX LQ-2 QUICK RELEASE VALVES User manual

BENDIX E-10 Mounting instructions

BENDIX

BENDIX E-10 Mounting instructions

BENDIX TABS-6 TRAILER ABS MODULE Mounting instructions

BENDIX

BENDIX TABS-6 TRAILER ABS MODULE Mounting instructions

BENDIX E-12-E-15 BRAKE VALVE User manual

BENDIX

BENDIX E-12-E-15 BRAKE VALVE User manual

BENDIX E-10PR RETARDER CTRL BRAKEVALVE User manual

BENDIX

BENDIX E-10PR RETARDER CTRL BRAKEVALVE User manual

Popular Control Unit manuals by other brands

Lutron Electronics AYFSQ-F manual

Lutron Electronics

Lutron Electronics AYFSQ-F manual

SSS Siedle BSM 650-02 Product information

SSS Siedle

SSS Siedle BSM 650-02 Product information

Edwards 3-24R Installation sheet

Edwards

Edwards 3-24R Installation sheet

Magnum MN-101 Quick reference guide

Magnum

Magnum MN-101 Quick reference guide

Emerson Sempell PSRV VS99 manual

Emerson

Emerson Sempell PSRV VS99 manual

tams elektronik S88-4 manual

tams elektronik

tams elektronik S88-4 manual

EOS EmoTec LSG 09R Assembly and operating instruction

EOS

EOS EmoTec LSG 09R Assembly and operating instruction

Moog D765/9 Series user manual

Moog

Moog D765/9 Series user manual

Werner GRANUDOS S5 operating instructions

Werner

Werner GRANUDOS S5 operating instructions

Danfoss AK-SM 800A Quick reference guide

Danfoss

Danfoss AK-SM 800A Quick reference guide

Emerson Fisher D3 instruction manual

Emerson

Emerson Fisher D3 instruction manual

National Instruments NI PXIe-7961R manual

National Instruments

National Instruments NI PXIe-7961R manual

Fluidmaster 200AM133 installation instructions

Fluidmaster

Fluidmaster 200AM133 installation instructions

TQ Ma8XxS user manual

TQ

TQ Ma8XxS user manual

Pepperl+Fuchs VBA-4E4A-G20-ZEJ/M48L-P12 manual

Pepperl+Fuchs

Pepperl+Fuchs VBA-4E4A-G20-ZEJ/M48L-P12 manual

Sandpiper SA1 Service & operating manual

Sandpiper

Sandpiper SA1 Service & operating manual

Schmidt RTM-400 instruction manual

Schmidt

Schmidt RTM-400 instruction manual

Fisher 128-PQC instruction manual

Fisher

Fisher 128-PQC instruction manual

manuals.online logo
manuals.online logoBrands
  • About & Mission
  • Contact us
  • Privacy Policy
  • Terms and Conditions

Copyright 2025 Manuals.Online. All Rights Reserved.