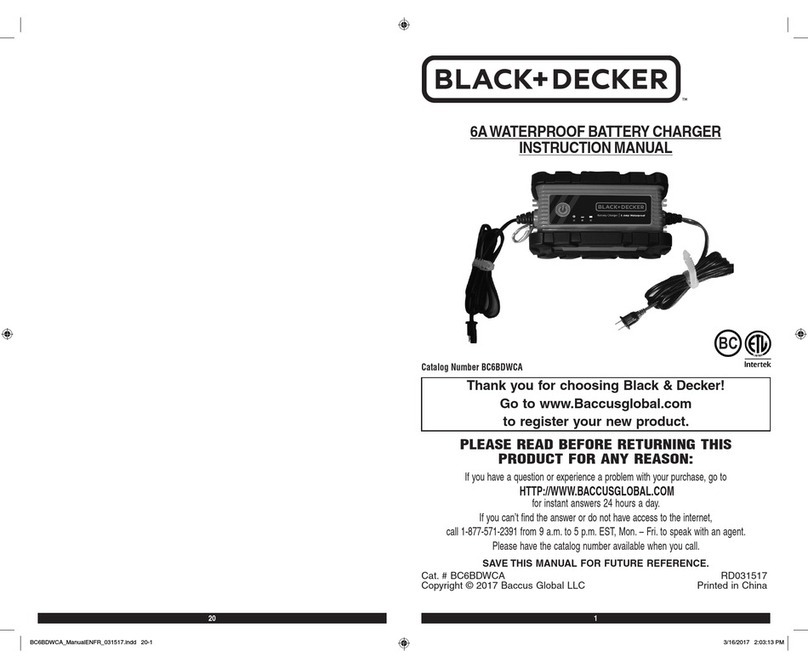
BLACK DECKER BC2WBDCA User manual

124
2A WATERPROOF BATTERY CHARGER
INSTRUCTION MANUAL
Catalog Number BC2WBDCA
SAVE THIS MANUAL FOR FUTURE REFERENCE.
Cat. # BC2WBDCA January 2016
Copyright © 2016 Baccus Global LLC Printed in China
Thank you for choosing Black & Decker!
Go to www.Baccusglobal.com to register your new product.
PLEASE READ BEFORE RETURNING THIS
PRODUCT FOR ANY REASON:
If you have a question or experience a problem with your purchase, go to
HTTP://WWW.BACCUSGLOBAL.COM
for instant answers 24 hours a day.
If you can’t find the answer or do not have access to the internet,
call 1-877-571-2391 from 9 a.m. to 5 p.m. EST, Mon. – Fri. to speak with an agent.
Please have the catalog number available when you call.
BC
BC2WBDCA_ManualENFR_012016.indd 24-1 1/20/2016 10:43:22 AM

2 3
•
Ground Fault Circuit Interrupter
(GFCI)protectionshouldbeprovidedonthecircuitsoroutletstobeused.
ReceptaclesareavailablehavingbuiltinGFCIprotectionandmaybeusedforthismeasureofsafety.
Extension cords
•
An extension cord should not be used unless absolutely necessary.
Useofimproperextensioncord
couldresultinariskoffireandelectricshock.Ifanextensioncordisused,makesurethatthepinsofthe
extensioncordarethesamenumber,sizeandshapeasthoseinthecharger.
•
Make sure your extension cord is in good condition.
Whenusinganextensioncord,besuretouseone
heavyenoughtocarrythecurrentyourproductwilldraw.Anundersizedcordwillcauseadropinlinevoltage
resultinginlossofpowerandoverheating.Thefollowingtableshowsthecorrectsizetousedependingon
cordlengthandnameplateampererating.Ifindoubt,usethenextheaviergage.Thesmallerthegagenumber,
theheavierthecord.
Recommended Minimum AWG Size for Extension Cords for Battery Chargers
AC Input Rating American Wire Gage (AWG) Size of Cord
Amperes Length of Cord, feet (m)
Equal to or But less 25 (7.6) 50 (15.2) 100 (30.5) 150 (45.6)
greater than than
0 2 18 18 18 16
2 3 18 18 16 14
3 4 18 18 16 14
4 5 18 18 14 12
5 6 18 16 14 12
6 8 18 16 12 10
8 10 18 14 12 10
10 12 16 14 10 8
12 14 16 12 10 8
14 16 16 12 10 8
16 18 14 12 8 8
18 20 14 12 8 6
•
Power Cord Safety:
Thisappliancehasapolarizedplug(onebladeiswiderthantheother)asasafety
feature.Thisplugwillfitintoapolarizedoutletonlyoneway.Iftheplugdoesnotfitfullyintotheoutlet,
reversetheplug.Ifitstilldoesnotfit,contactaqualifiedelectrician.Donotattempttodefeatthissafety
feature.
SPECIFIC SAFETY INSTRUCTIONS FOR BATTERY CHARGERS
IMPORTANT SPECIFICATION NOTE:
Batterycapacity:leadacidtype,maximum12VDC,80Ah.
The following symbols are marked on the appliance:
Thistoolisdoubleinsulated;thereforenoearthwireisrequired.Alwayscheckthatthepower
supplycorrespondstothevoltageontheratingplate.
Readallofthisinstructionmanualcarefully.
•
This unit was designed for household use only.
•
Use of accessories and attachments:
Theuseofanyaccessoryorattachmentnotrecommendedby
manufacturerforusewiththisbatterychargercouldbehazardous.
•
Stay alert.
Usecommonsense.Donotoperatethisequipmentwhenyouaretiredorimpaired.
•
Check for damaged parts.
Apartthatisdamagedshouldbeproperlyrepairedorreplacedbymanufacturer
beforefurtheruseunlessotherwiseindicatedelsewhereinthisinstructionmanual.
•
Do not operate
thebatterychargernearflammableliquidsoringaseousorexplosiveatmospheres.Motors
mayspark,andthesparksmightignitefumes.
•
Do not operate the battery charger
ifithasreceivedasharpblow,beendropped,orhasbeenotherwise
damagedinanyway.Returnittothemanufacturerforrepair.
WARNING – BURST HAZARD:
This device complies with part 15 of the FCC rules. Operation is subject to the following two conditions: (1) this device may not
cause harmful interference, and (2) this device must accept any interference received, including interference that may cause
undesired operation.
This equipment has been tested and found to comply with the limits for a Class B digital device, pursuant to part 15 of the
FCC Rules. These limits are designed to provide reasonable protection against harmful interference in a residential installation.
This equipment generates, uses and can radiate radio frequency energy and, if not installed and used in accordance with the
instructions, may cause harmful interference to radio communications. However, there is no guarantee that interference will
not occur in a particular installation. If equipment does cause harmful interference to radio or television reception, which can
be determined by turning the equipment off and on, the user is encouraged to try to correct the interference by one or more of
the following measures:
•Reorient or relocate the receiving antenna.
•Increase the separation between equipment and receiver.
•Connect the equipment into an outlet on a circuit different from that to which the receiver is connected.
•Consult the dealer or an experienced radio/TV technician for help.
Changes or modifications not approved by the party responsible for compliance could void user’s authority to operate the
equipment.
This Class B digital apparatus complies with Canadian ICES-003.
SAFETY GUIDELINES / DEFINITIONS
DANGER:
Indicatesanimminentlyhazardoussituationwhich,ifnotavoided,willresultindeathorserious
injury.
WARNING:
Indicatesapotentiallyhazardoussituationwhich,ifnotavoided,couldresultindeathorserious
injury.
CAUTION:
Indicatesapotentiallyhazardoussituationwhich,ifnotavoided,mayresultinminorormoderate
injury.
CAUTION:
Usedwithoutthesafetyalertsymbolindicatespotentiallyhazardoussituationwhich,ifnotavoided,
mayresultinpropertydamage.
RISK OF UNSAFE OPERATION.
Whenusingtoolsorequipment,basicsafetyprecautionsshouldalwaysbe
followedtoreducetheriskofpersonalinjury.Improperoperation,maintenanceormodificationoftoolsor
equipmentcouldresultinseriousinjuryandpropertydamage.Therearecertainapplicationsforwhichtools
andequipmentaredesigned.Black&DeckerstronglyrecommendsthatthisproductNOTbemodifiedand/or
usedforanyapplicationotherthanforwhichitwasdesigned.Readandunderstandallwarningsandoperating
instructionsbeforeusinganytoolorequipment.
IMPORTANT SAFETY INSTRUCTIONS
WARNING:
Thisproductoritspowercordcontainslead,achemicalknowntotheStateofCaliforniatocause
cancerandbirthdefectorotherreproductiveharm.Washhandsafterhandling.
READ ALL INSTRUCTIONS
WARNING:
Readallinstructionsbeforeoperatingproduct.Failuretofollowallinstructionslistedbelowmay
resultinelectricshock,fireand/orseriousinjury.
GENERAL SAFETY WARNINGS AND INSTRUCTIONS
•
Avoid dangerous environments.
Don’tusethebatterychargerindamporwetlocations.Donotexposethe
clampsorcordstorainorsnow.
•
Keep children away.
Keepawayfromchildren.Thisisnotatoy!
•
Store indoors.
Whennotinuse,batterychargersshouldbestoredindoorsindry,andhighorlocked-up
places–outofreachofchildren.
•
Unplug the battery charger
whennotinuse.
SPECIFIC SAFETY INSTRUCTIONS FOR POWER CORDS
•
Don’t abuse cord.
Nevercarryappliancebycordoryankittodisconnectfromreceptacle.Keepcordfrom
heat,oil,andsharpedges.Pullbyplugratherthancordwhenunpluggingtheunit.
BC2WBDCA_ManualENFR_012016.indd 2-3 1/20/2016 10:43:23 AM

4 5
– Donotreplacethevehicleaccessoryoutletfusewithoneofahigheramperagerating.
– Neverattempttopatchthefusewithtinfoilorwire.
Any of these actions may cause serious electrical damage and/or a fire.
SPECIFIC SAFETY INSTRUCTIONS FOR USING THE UNIT IN WET
ENVIRONMENTS
The housing of this unit is rated to IP67 dust-proof and waterproof standards. However, it is
recommended that you observe the following:
•Neversubmergetheunitinwaterdeeperthan1meter,fortimelongerthan30minutesand/orintemperatures
otherthanbetween41ºFand104ºF(5ºCand40ºC),ortheunitcouldsustainpermanentdamage.
•Neversubmergetheunitinwaterunlessthebushing(insulation)oftheACorDCcordisintact.
•Donotallowplugorclampstobeexposedtotheelementsforlongperiodsoftime;andneversubmergethem.
FIRST AID
•
SKIN:
Ifbatteryacidcomesincontactwithskin,rinseimmediatelywithwater,thenwashthoroughlywith
soapandwater.Ifredness,pain,orirritationoccurs,seekimmediatemedicalattention.
EYES:
Ifbatteryacidcomesincontactwitheyes,flusheyesimmediately,foraminimumof15minutesand
seekimmediatemedicalattention.
WARNING: TO REDUCE THE RISK OF INJURY OR PROPERTY DAMAGE:
Followtheseinstructions
andthosepublishedbythemanufacturerofanyengineyouintendtousewiththisbatterycharger.Review
cautionarymarkingsonthebatterychargerandengine.
•ReadandUnderstandThisInstructionManualBeforeUsingThisUnit.
SAVE THESE INSTRUCTIONS
INTRODUCTION
CongratulationsonpurchasingyournewBlack & Decker 2 Amp Waterproof Battery Charger.Read
this Instruction Manual and follow the instructions carefully before using your new battery charger.
FEATURES
AC PLUG
DOUBLE BARREL CHARGER
CONNECTOR (connects to
clamps. ring terminals or
vehicle adapter plug)
•Donotusetheunitforchargingdry-cellbatteriesthatarecommonlyusedwithhomeappliances.These
batteriesmayburstandcauseinjurytopersonsanddamageproperty.Usetheunitforcharging/boostinga
LEAD-ACIDbatteryonly.Itisnotintendedtosupplypowertoalow-voltageelectricalsystemotherthanina
starter-motorapplication.
•Neverattempttochargenon-rechargeablebatteries.
WARNING: RISK OF EXPLOSIVE GASES:
•WORKINGINTHEVICINITYOFALEADACIDBATTERYISDANGEROUS.BATTERIESGENERATEEXPLOSIVE
GASESDURINGNORMALBATTERYOPERATION.FORTHISREASON,ITISOFTHEUTMOSTIMPORTANCE
THATEACHTIMEBEFOREUSINGTHEBATTERYCHARGERYOUREADTHISMANUALANDFOLLOW
INSTRUCTIONSEXACTLY.
•Toreducetheriskofbatteryexplosion,followtheseinstructionsandthosepublishedbythebattery
manufacturerandmanufacturerofanyequipmentyouintendtouseinthevicinityofthebattery.Review
cautionarymarkingsontheseproductsandontheengine.
•Thisequipmentemploysparts(switches,relays,etc.)thatproducearcsorsparks.Therefore,ifusedina
garageorenclosedarea,theunitMUSTbeplacednotlessthan18inchesabovethefloor.
•THISUNITISNOTFORUSEBYCHILDRENANDSHOULDONLYBEOPERATEDBYADULTS.
WARNING: TO REDUCE THE RISK OF FIRE:
•Donotoperatenearflammablematerials,fumesorgases.
•Donotexposetoextremeheatorflames.
CAUTION: TO REDUCE THE RISK OF INJURY OR PROPERTY DAMAGE:
•Thischargerisnotdesignedforusewitheverymake,manufactureormodelofengine.
Use only with 12 volt
systems.
•NEVERATTEMPTCHARGEAFROZENBATTERY.
•Donotchargethebatterywhiletheengineisoperating.
•Stayclearoffanblades,belts,pulleys,andotherpartsthatcancauseinjurytopersons.
•Vehiclesthathaveon-boardcomputerizedsystemsmaybedamagedifvehiclebatteryisjump-started.Before
jump-starting,readthevehicle’sowner’smanualtoconfirmthatexternal-startingassistanceissuitable.
•Whenworkingwithleadacidbatteries,alwaysmakesuresomeoneiscloseenoughtoprovideimmediate
assistanceincaseofaccidentoremergency.
•Alwayshaveprotectiveeyewearwhenusingthisproduct:contactwithbatteryacidmaycauseblindnessand/or
severeburns.Beawareoffirstaidproceduresincaseofaccidentalcontactwithbatteryacid.
•Haveplentyoffreshwaterandsoapnearbyincasebatteryacidcontactsskin.
•Ifbatteryacidcontactsskinorclothing,washimmediatelywithsoapandwaterforatleast10minutesandget
medicalattentionimmediately.
•Neversmokeorallowasparkorflameinvicinityofvehiclebattery,engineorbatterymaintainer.
•Removepersonalmetalitemssuchasrings,bracelets,necklacesandwatcheswhenworkingwithaleadacid
battery.Aleadacidbatterycanproduceashortcircuitcurrenthighenoughtoweldaring,orsimilarmetal
object,toskincausingasevereburn.
•Beextracautioustoavoiddroppingametaltoolontothebattery.Itmightsparkorshort-circuitthebatteryor
anotherelectricalpart,andthatmaycauseanexplosion.
•Neverallowbatteryacidtocomeincontactwiththisunit.
•Donotoperatethisunitinaclosedareaorrestrictventilationinanyway.
•Alwaysturnthebatterychargeroffbyunpluggingitwhennotinuse.
•DONOTOPENTHEBATTERYCHARGER—therearenouser-serviceablepartsinside.Openingthebattery
chargerwillvoidmanufacturer’swarranty.
•OperatebatterychargeronlyasdescribedinthisInstructionManual.
•Checkbatterychargerandcomponentsperiodicallyforwearandtear.Returntomanufacturerforreplacement
ofwornordefectivepartsimmediately.
DC ACCESSORY PLUG SAFETY
•
WARNING!
NEVERconnectthisunittoapositivegroundedvehiclebythedcaccessoryplug.
•Makesurethatthevehicle’saccessorysocketiscleanandfreeofdebrisbeforeconnectingtheunit.
•
WARNING – risk of fire!
Ifthevehicleaccessoryoutletfuseopens(blows)whenplugginginthisbattery
charger,donotusethisbatterychargerwiththisvehicleaccessoryoutlet:
– Donotrepeatedlyreplacethefuse.
BC2WBDCA_ManualENFR_012016.indd 4-5 1/20/2016 10:43:23 AM

6 7
Mounting the Unit Using the Hanging Hook
Thehanginghookallowsyoutopositionthebatterychargerforconvenient,hands-freeoperation.
CAUTION: TO REDUCE THE RISK OF PRODUCT DAMAGE:
•Whenthechargerishungbythehanginghookorattachedusingthemagneticdiscs,donotshakethecharger
orobjectthatitishangingfromorattachedto.Donothangthechargerfromorattachthechargertoany
electricalwiresoranythingthatitisnotsecure.
•Only use the hanging hook or magnet discs for hanging or positioning the charger. The hanging hook and
magneticdiscsarenotintendedtosupportadditionalweight.Donotattachorhanganythingadditionaltothe
chargerorriskofbreakagemayoccur.
PREPARING TO CHARGE
1.Besureareaaroundbatteryiswellventilatedwhilebatteryisbeingcharged.
2.Removebatterycompletelyfromboat/airplaneoranyconfinedareabeforecharging.
3.Ifitisnecessarytoremovebatteryfromvehicletocharge,ortocleanterminals,alwaysremovegrounded
terminalfrombatteryfirst.Makesureallaccessoriesinthevehicleareoff,soasnottocauseanarc.
4.Cleanbatteryterminals,takingcaretoavoidgettingcorrosivematerialineyes.
5.Adddistilledwaterineachcelluntilbatteryacidreacheslevelspecifiedbybatterymanufacturer.Thishelps
purgeexcessivegasfromcells.Donotoverfill.Forabatterywithoutcellcaps(maintenancefree),carefully
followmanufacturer’scharginginstructions.
6.Studyallbatterymanufacturer’sspecificprecautions,suchasremovingornotremovingcellcapswhile
charging,andrecommendedratesofcharge.
7.Determinevoltageofbatterytobechargedbyreferringtothevehiclemanual.Theunitisforcharginga12
voltbatteryonly.
Charger Location
•Locatechargerasfarawayfrombatteryascablespermit.
•Neverplacechargerdirectlyabovebatterybeingcharged;gasesfrombatterywillcorrodeanddamagecharger.
•Donotsetabatteryontopofcharger.
•Neverallowbatteryacidtodriponcharger.
•Chargeabovefreezingtemperatureandbelow40°C(104°F).
•Neveroperatechargerinaclosed-inareaorrestrictventilationinanyway.
•Marinebatteriesmustberemovedandchargedonshore.
Connection Precautions
•Neverallowclampsorringterminalstotoucheachother.
•Attachclampstobatteryandchassisasindicatedintheappropriatesection(“Chargingabatteryinstalledina
vehicle”or“Chargingabatterythathasbeenremovedfromavehicle”).
Charging a battery installed in a vehicle
•
WARNING: A spark near the battery may cause an explosion. To reduce risk of a spark near the
battery:
1.PositionACandclampcordstoreduceriskofdamagebyhood,door,ormovingenginepart.
2.Stayclearoffanblades,belts,pulleys,andotherpartsthatcancauseinjurytopersons.
3.Checkpolarityofbatteryposts.POSITIVE(POS,P,+)batterypostusuallyhaslargerdiameterthan
NEGATIVE(NEG,N,–)post.
4.Determine which post of battery is grounded (connected) to the chassis. If negative post is grounded to
chassis(asinmostvehicles),see5.Ifpositivepostisgroundedtothechassis,see6.
5.Fornegative-groundedvehicle,connectPOSITIVE(RED)clampfrombatterychargertoPOSITIVE(POS,P,
+)ungroundedpostofbattery.ConnectNEGATIVE(BLACK)clamptovehiclechassisorengineblockaway
frombattery.Donotconnectcliptocarburetor,fuellines,orsheet-metalbodyparts.Connecttoheavy
gaugemetalpartoftheframeorengineblock.
6.Forpositive-groundedvehicle,connectNEGATIVE(BLACK)clampfrombatterychargertoNEGATIVE(NEG,
N,–)ungroundedpostofbattery.ConnectPOSITIVE(RED)clamptovehiclechassisorengineblockaway
frombattery.Donotconnectcliptocarburetor,fuellinesorsheet-metalbodyparts.Connecttoaheavy
gaugemetalpartoftheframeorengineblock.
7.Donotchargethebatterywhiletheengineisoperating.
8.Seeoperatinginstructionsforlengthofchargeinformation.
POWER LED
REVERSE
POLARITY/FAULT
LED
CHARGING
COMPLETE LED BATTERY
CHARGING LED
BATTERY
CLIPS
DC ACCESSORY
PLUG
BATTERY TERMINAL
RINGS
HANGING HOOK
MAGNETIC DISCS
(exposed to show
detail)
BACK OF UNIT
SETTING UP THE UNIT
Ensurethatallinstallationandoperatinginstructionsandsafetyprecautionsareunderstoodandcarefully
followedbyanyoneinstallingorusingthebatterycharger.Followthestepsoutlinedinthe“ImportantSafety
Instructions”sectionofthismanual.
Mounting the Unit Using the Magnetic Discs
Themagneticdiscsinthebottomoftheunitallowyoutopositionthebatterychargeronanyflat,
securemetallicsurface.
BC2WBDCA_ManualENFR_012016.indd 6-7 1/20/2016 10:43:23 AM

8 9
Whendisconnectingcharger,disconnectACcord,andthenremovethe12voltDCaccessoryplugfromthe
vehicleaccessoryoutlet.
Connecting and Charging the Battery with the Terminal Rings
CONNECTINGTHECHARGERWITHTERMINALRINGS
Thecharger’soutputleadshavecrimped,color-codedterminalrings(RED-POSITIVEandBLACK-
NEGATIVE).Theseringsconnectdirectlytothecorrespondingconnectorsonthebatteryposts.
NUT
CONNECTOR TERMINAL RING
BOLT
1.Removethenutsfromtheboltsofthebatterypost’sconnectors.
2.PositiontheREDterminalontheboltofthePOSITIVEbatterypostconnector.
3.PositiontheBLACKterminalontheNEGATIVEpostconnector;thenreplacethenuts.
IMPORTANT:
Ifthereisanyproblemconnectingtheoutputleads,checkwithareputableautosupplystoreor
contacttheCustomerServiceDepartmenttoll-freeat1-877-571-2391forassistanceinfindinganappropriate
connectiondeviceforyourparticularapplication.
CHARGINGWITHTHETERMINALRINGS
1.Withtheringterminalsconnectedtothebatteryandwithringterminalconnectorheldasfarawayfromthe
batteryaspractical,insertthedoublebarreltipoftheterminalringcableintothedoublebarreltipofthe
batterychargercable(male-to-femaleandfemale-to-male).Thenplugthebatterycharger’spowercordinto
anACoutlet.ThepowerLEDwilllightbluetoindicatethatthechargerispluggedinandready.
Notes:
If the Power LED does not come on, check connection with the AC outlet. Make sure the AC outlet is functional.
2.Whentheunitisproperlyconnectedandcharging,thebatterychargingLED( )willlightyellowtoindicate
thebatteryischarging.
Notes:
If the terminal rings are incorrectly connected with regard to polarity, the Reverse Polarity/Fault LED ( ) will light. Unplug the
charger; then remove the terminal rings. Reconnect the terminal rings properly.
If the Charging LED did not come on, check the connection to the battery. If the terminal rings are properly connected, the battery
may be in fault condition. Manufacturer suggests to have the battery tested by a qualified battery service technician.
3.WhenthechargingcompleteLED( )lightsgreen,thebatteryisfullycharged.
Whendisconnectingcharger,disconnectACcord,andthenremovetheterminalringsfrombatteryterminals.
TROUBLESHOOTING
Unit Not Charging •CheckthatthechargerisproperlyconnectedtoaliveACoutlet.
•Ifthebatterytobechargedhasfallenbelow2volts,thebattery
cannotberechargedwiththisunit.
CARE AND MAINTENANCE
Cleaning and Storage
Toreducetheriskofelectricshock,unplugthebatterychargerfromtheoutletbeforeattemptingany
maintenanceorcleaning.Turningoffthecontrolswillnotreducethisrisk.
•Storetheunitinaclean,dry,coolplacewhennotinuse.
•Cleantheunitcasingandcords(asnecessary)withadry(orslightlydamp)cloth.Ensurethatunitis
completelydisconnectedfrombatteryandpowersourcebeforecleaning.
•Tomaintaintheoperatingconditionandmaximizethelifeofthechargercords,alwayscoilthemlooselyfor
storage.Donotwrapthemaroundtheunitorcrimpthemwithatightband.
Charging a battery that has been removed from a vehicle
•
WARNING: A spark near the battery may cause an explosion. To reduce risk of a spark near the
battery:
1.Checkpolarityofbatteryposts.ThePOSITIVEpost(markedPOS,P,+)usuallyhasalargerdiameterthanthe
NEGATIVEbatterypost(markedNEG,N,–).
2.Attacha24-inch(minimumlength)AWG#6insulatedbatterycabletotheNEGATIVEbatterypost(marked
NEG,N,–).
3.ConnectthePOSITIVE(RED)batteryclamptothePOSITIVEbatterypost(markedPOS,P,+orred).
4.Standasfarbackfromthebatteryaspossible,anddonotfacebatterywhenmakingfinalconnection.
5.CarefullyconnecttheNEGATIVE(BLACK)chargerclamptothefreeendofthebatterycableconnectedtothe
NEGATIVEterminal.
Note:
A marine (boat) battery must be removed and charged on shore. To charge it on board requires equipment specifically designed for
marine use. This unit is NOT designed for such use.
OPERATING INSTRUCTIONS
Charging Using the Supplied Battery Clips
WARNING: TO REDUCE THE RISK OF INJURY OR PROPERTY DAMAGE:
•
Always disconnect the AC plug from the AC outlet first before disconnecting the charger from the
battery to be charged.
•
Ensure that all installation, operating instructions and safety precautions are understood and
observed; then follow the steps outlined in the appropriate section (“Charging a battery installed in a
vehicle” or “Charging a battery that has been removed from a vehicle”).
1.Insertthedoublebarreltipofthebatteryclampcableintothedoublebarreltipofthebatterychargercable
(male-to-femaleandfemale-to-male).Thenplugthebatterycharger’spowercordintoanACoutlet.The
powerLEDwilllightbluetoindicatethatthechargerispluggedinandready.
Note:
If the Power LED does not come on, check connection with the AC outlet. Make sure the AC outlet is functional.
2.Connectthebatterychargertothebatteryusingthebatteryclamps,followingtheappropriatedirectionsin
the“PreparingtoCharge”sectionatthefrontofthismanual.
3.Whentheunitisproperlyconnectedandcharging,thebatterychargingLED( )willlightyellowtoindicate
thebatteryischarging.
Notes:
If the Charging LED did not come on, check the connection to the battery. If the clamps are properly connected, the battery may
be in fault condition. Manufacturer suggests to have the battery tested by a qualified battery service technician.
If the clamps are incorrectly connected with regard to polarity, the reverse polarity/fault LED ( ) will light. Unplug the charger;
then remove the clamps. Reconnect the clamps properly.
4.WhenthechargingcompleteLED( )lightsgreen,thebatteryisfullycharged.
Whendisconnectingcharger,disconnectACcord,removeclampfromvehiclechassis,andthenremoveclamp
frombatteryterminal.
Charging Using the 12 Volt DC Accessory Plug
CAUTION: TO REDUCE THE RISK OF PROPERTY DAMAGE:Makesurethatthevehicle’saccessory
outletiscleanandfreeofdebrisbeforeconnectingtheunit.
1.Insertthedoublebarreltipofthe12voltDCaccessoryplugcableintothedoublebarreltipofthebattery
chargercable(male-to-femaleandfemale-to-male).Thenplugthebatterycharger’spowercordintoanAC
outlet.ThepowerLEDwilllightbluetoindicatethatthechargerispluggedinandready.
Note:
If the Power LED does not come on, check connection with the AC outlet. Make sure the AC outlet is functional.
2.Insertthegroovedtipofthe12voltDCaccessoryplugintothevehicle’s12voltDCaccessoryoutlet.Rotate
theadapterslightlytomakesurethereisgoodcontact.
3.Whentheunitisproperlyconnectedandcharging,thebatterychargingLED( )willlightyellowtoindicate
thebatteryischarging.
Notes:
If the Charging LED did not come on, check the connection to the vehicle’s DC accessory outlet. Rotate the adapter slightly to
make sure there is good contact. If it is properly connected, the battery may be in fault condition. Manufacturer suggests to have
the battery tested by a qualified battery service technician.
Some vehicles require that the ignition be turned to the ACC (accessory) position to activate the DC accessory outlet. If your
vehicle ignition is required to be turned to the ACC position, be sure all the vehicle accessories (i.e. heater, fan, radio, TV,
lights... etc) are turned off. If not turned off, the charger might not be able to charge the battery.
4.WhenthechargingcompleteLED( )lights,thebatteryisfullycharged.
BC2WBDCA_ManualENFR_012016.indd 8-9 1/20/2016 10:43:24 AM
Table of contents
Languages:
Other BLACK DECKER Batteries Charger manuals

BLACK DECKER
BLACK DECKER BDCA202 User manual

BLACK DECKER
BLACK DECKER BC15BDCA User manual

BLACK DECKER
BLACK DECKER BM3BCA User manual

BLACK DECKER
BLACK DECKER BDC2A User manual

BLACK DECKER
BLACK DECKER BXAE00021 User manual

BLACK DECKER
BLACK DECKER BC12 User manual

BLACK DECKER
BLACK DECKER BC15BD User manual

BLACK DECKER
BLACK DECKER BDC1A15 User manual

BLACK DECKER
BLACK DECKER BC6BDWCA User manual