BQS BNFIX 123 HB-10 User manual

MANUAL DE USO
INSTRUCTION FOR USE
BNFIX 123
HB-10
Apto para
Suitable for
9-36 kg

Rev001
2 3
www.babyqs.com
BN FIX 123
IMPORTANTE:
Conservar para futuras consultas.
WARNING:
Keep for future reference.
BNFIX 123
Instrucciones de uso - Sistema de retención infantil
Grupo 1/2/3. De 9 a 36 kg (de 9 meses a 12 años aprox.)
Instruction manual - Child safety seat
Group 1/2/3. From 9 to 36 kg (from 9 moth to 12 years approx)

Rev001
4 5
www.babyqs.com
BN FIX 123
1
2
A
C
G
E
I
H
B
F
D
J
E
L
L
K
2
3.3 3.4
3.1 3.2
Rev001
6 7
www.babyqs.com
BN FIX 123
2
Click!
1
4.1 4.2
4.3 4.4
4.5 4.6
Instalación del Top Tether
5.1 5.2
5.3 5.4
5.5 5.6

Rev001
8 9
www.babyqs.com
BN FIX 123
A
B
C
5.7 5.8
5.9 5.10
Click!
6.1 6.2
6.3 6.4
6.5

Rev001
10 11
www.babyqs.com
BN FIX 123
7.1 7.2
7.3 7.4
7.5 7.6
7.7 7.8
7.9

Rev001
12 13
www.babyqs.com
BN FIX 123
IMPORTANTE
•Leacuidadosamente ANTES de instalar la silla infantil en el vehículo.
•Leadetenidamenteestemanualdeinstrucciones.
• La correcta colocación del sistema ISOFIX, del sistema de
anclaje Top Tether o del cinturón de seguridad de 3 puntos son
de vital importancia para la seguridad del niño.
•Conservarparafuturasconsultas.Procurequelasinstrucciones
puedan conservarse en el sistema de retención infantil durante
su ciclo vital.
•Nuncadejealniñodesatendidoenlasilladeseguridad.
AVISO
1. Este es un SISTEMA DE RETENCIÓN INFANTIL ISOFIX. Ha
sido homologado con arreglo a la normativa europea ECE
44/04, para su utilización general en vehículos equipados
con sistemas de anclaje ISOFIX y Top Tether y cinturón de
seguridad de 3 puntos acorde al Reglamento ECE 16.
2. Esta silla puede instalarse tanto en el asiento delantero
(copiloto) como en los traseros del vehículo. La posición más
segura para esta silla de seguridad es en los asientos traseros
del coche.
3. Este producto ha sido aprobado con arreglo a la normativa
europea ECE R44/04. El grupo de peso y la clase de tamaño
para los que está destinado el dispositivo son: Grupo 1 (9-18
kg) con sistema de anclaje ISOFIX y Top Tether, Grupo 2 (15-
25 kg) y Grupo 3 (22-36 kg) con el cinturón de seguridad de 3
puntos del vehículo y el sistema de anclaje FIX.
4. El dispositivo de la silla debe cambiarse después de sufrir las
tensiones violentas de un accidente.
5. El fabricante garantiza la calidad de sus productos, pero no la
calidad de los productos de segunda mano u otras marcas.
6. El equipaje o demás objetos que puedan causar lesiones en
caso de colisión deben estar correctamente asegurados.
7. No engrase ni lubrique ninguna de las partes móviles de la
silla.
8. Esta silla de seguridad para niños no debe utilizarse sin la
funda. No debe reemplazar la funda por ninguna otra que no
sea la recomendada por el fabricante, ya que la funda forma
parte integral del funcionamiento de la silla de seguridad.
9. La silla de seguridad debe permanecer instalada al vehículo
mediante el cinturón de seguridad o el sistema ISOFIX y el
Top Tether , aunque el niño no está sentado en la silla. El niño
nunca debe ser desatendido mientras está sentado en la silla
de seguridad, tampoco cuando esté fuera del vehículo.
10.
Los artículos rígidos y las piezas de plástico de la silla de seguridad
deben colocarse e instalarse de forma que no puedan, durante el
uso diario del vehículo, quedar atrapados en un asiento móvil o
en una puerta del coche.
11.
Inspeccione periódicamente las correas de seguridad por si
estuvieran desgastadas, prestando especial atención a los
puntos de anclaje, las costuras y los dispositivos de ajuste.
12.
Es peligroso realizar cualquier tipo de alteración o incorporación a
la silla de seguridad sin la aprobación de la autoridad competente.
Es peligroso no seguir estrictamente las instrucciones de
instalación proporcionadas por el fabricante de la silla de
seguridad para niños.
13.
Proteja la silla de seguridad infantil del contacto directo con la luz
solar, porque la silla podría calentarse y lastimar al niño.
14.
Con el fin de prevenir daños en la funda, no la altere ni elimine
elementos de ella.
15.
Utilice siempre la silla de seguridad aunque el trayecto del viaje sea
corto ya que la mayoría de los accidentes se producen en estos
casos.
Rev001
14 15
www.babyqs.com
BN FIX 123
16.
Antes de adquirir esta silla, asegúrese que se adapta perfectamente
a su vehículo.
17.
Realice pequeños descansos durante el viaje con el fin de que el
niño tenga un tiempo de esparcimiento.
18.
Dé ejemplo y utilice siempre el cinturón de seguridad del vehículo.
19.
Enseñe a su hijo que nunca debe de jugar con la hebilla de
seguridad del arnés de la silla.
20.
Las ilustraciones de las instrucciones son meramente informativas.
El sistema de retención infantil puede presentar pequeñas
diferencias respecto a las fotografías o imágenes del manual de
instrucciones. Estas variaciones no afectan a su homologación por
el Reglamento ECE 44/04.
Homologación
Este silla de seguridad infantil
ha sido diseñada, testada y
homologada con arreglo a la normativa europea ECE R44/04.
El sello de homologación E (dentro de un círculo) y el número de
homologación se encuentran recogidos dentro de la etiqueta de
homologación (etiqueta adherida a la silla de seguridad).
Esta conformidad quedará anulada en caso de que se realicen
cambios o alteraciones en la silla de seguridad. Solamente el
fabricante tiene derecho a realizar cambios en la silla de seguridad.
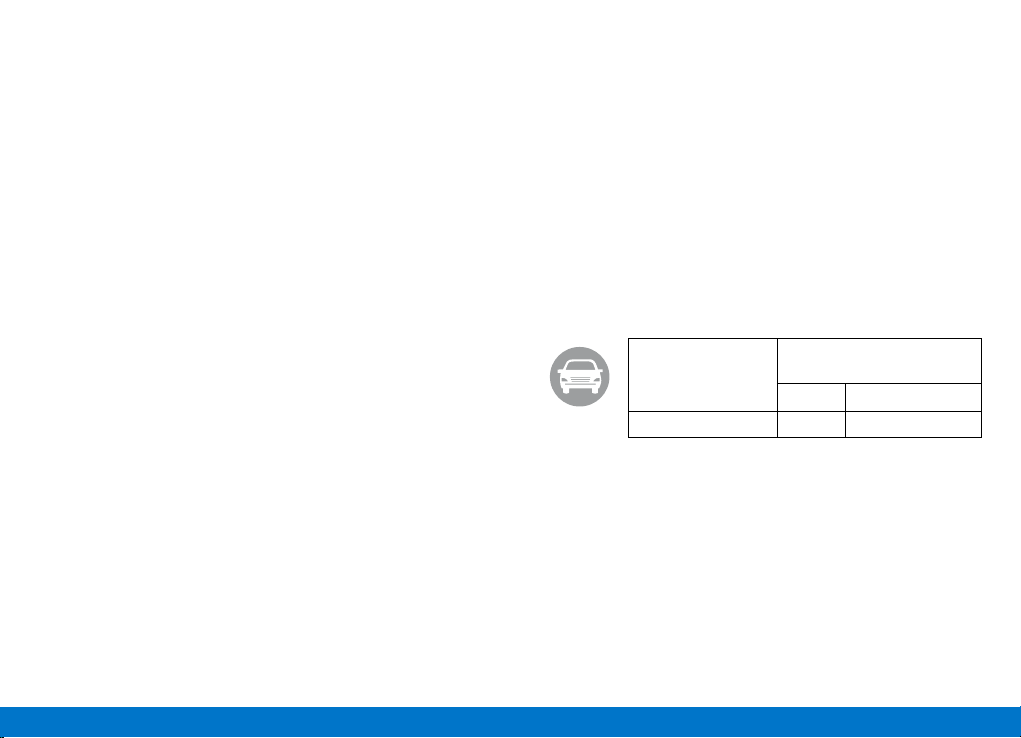
Silla de seguridad
infantil:
HB-10
Ensayada y homologada según
R 44/04 ECE
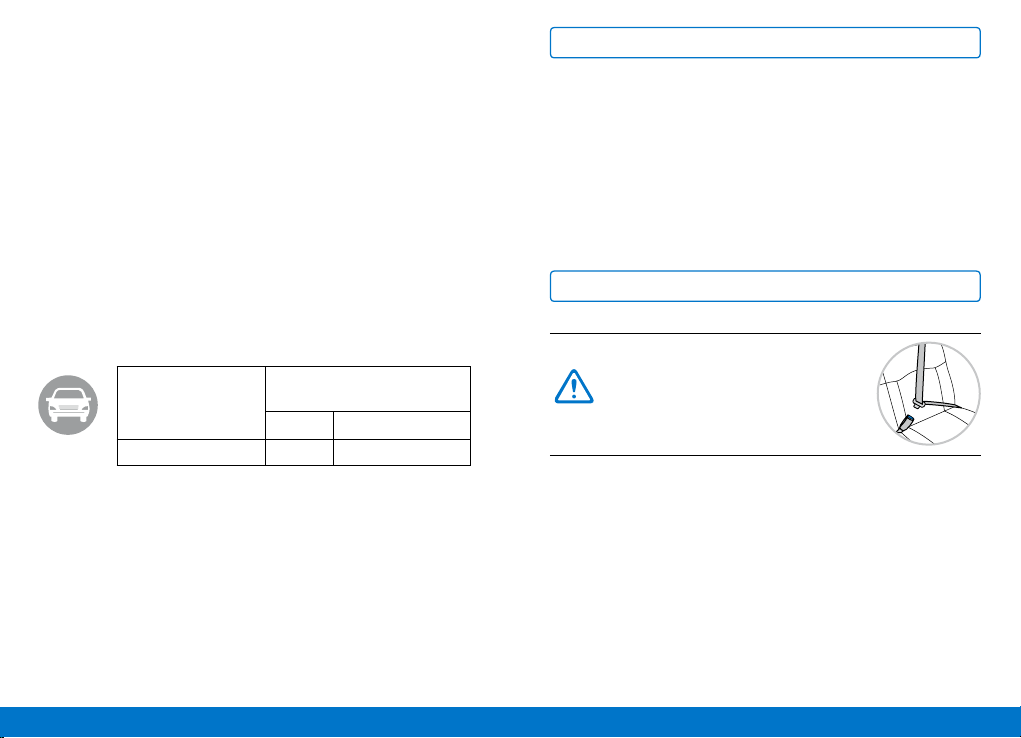
Grupo Peso
HB-10 I+II+III 9-36 kg
1. VISTA GENERAL
A. Protectores del arnés.
B. Cinta del arnés.
C. Cojín reductor Grupo 1.
D. Hebilla de seguridad.
E. Guía cinturón abdominal.
F. Botón de ajuste del arnés.
G. Cinta ajustadora del arnés.
H. Top Tether.
I. Freno de seguridad del
Top Tether.
J. Ranuras para las cintas
del arnés.
K. Conector del arnés.
L. Sistema ISOFIX.
2. PUESTOS DE INSTALACIÓN EN EL vEHíCULO
Instalar solamente en
asientosquedispongan
de cinturón de 3 puntos.
2.1 Por favor, ciñase a las normas de la legislación vigente sobre
sistemas de retención infantil de su país.
2.2 El cinturón de seguridad de su vehículo debe estar aprobado
con arreglo a la norma ECE R16 o similares.
2.3 No utilizar con cinturones de seguridad de 2 puntos.
2.4 Para el Grupo 1 solamente puede ser utilizado con plazas de
asiento que disponga de anclajes ISOFIX y Top Tether. Ver
manual del vehículo.
2.5 Solamente puede ser utilizado con cinturones de seguridad
de 3 puntos para el Grupo 2/3
AVISO

Rev001
16 17
www.babyqs.com
BN FIX 123
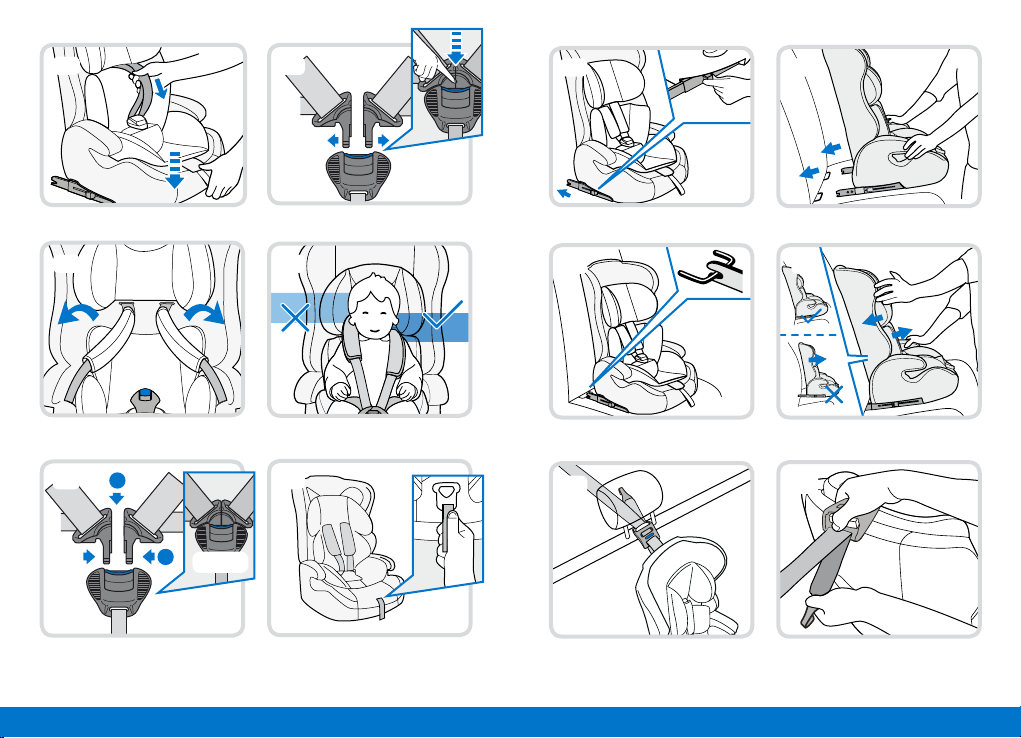
3. AJUSTES DEL ARNÉS
AVISO
3.1. Ajuste en altura de las correas del arnés y posiciones de
la silla
El ajuste a la altura óptima del arnés garantiza la correcta instalación
del niño en la silla. Debe de ajustarse de modo que el arnés de
la silla quede al nivel de los hombros del niño o ligeramente por
encima, nunca por detrás de la espalda o a la altura de las orejas.
3.1.1.
Destense las cintas del arnés tirando de la parte pectoral
de este a la vez que presiona el botón de ajuste de arnés.
Atención: no tire de las correas de los protectores de hombro
(fig. 3.1).
3.1.2.
Regule la altura de las correas de hombro. Para ello, siga
los pasos descritos en el punto 7.1.2 de este manual.
Tire de las cintas del arnés desde la parte delantera de
la silla hasta extraerlas por completo (fig. 3.2). Segun la
altura del niño, inserte (fig. 3.3) y conecte tanto las cintas
del arnés como las de los protectores de arnés en sus
respectivos conectores, a través del hueco correspondiente
en el respaldo, de forma que se respete la altura deseable
(fig. 3.4).
Por favor, utilice el cojín reductor que
acompaña a esta silla mientras el niño
no supere los 15 kg.
El cojín reductor ofrece un confort extra
al bebé proporcionando un apoyo al
cuerpo necesario mientras siga siendo
pequeño.
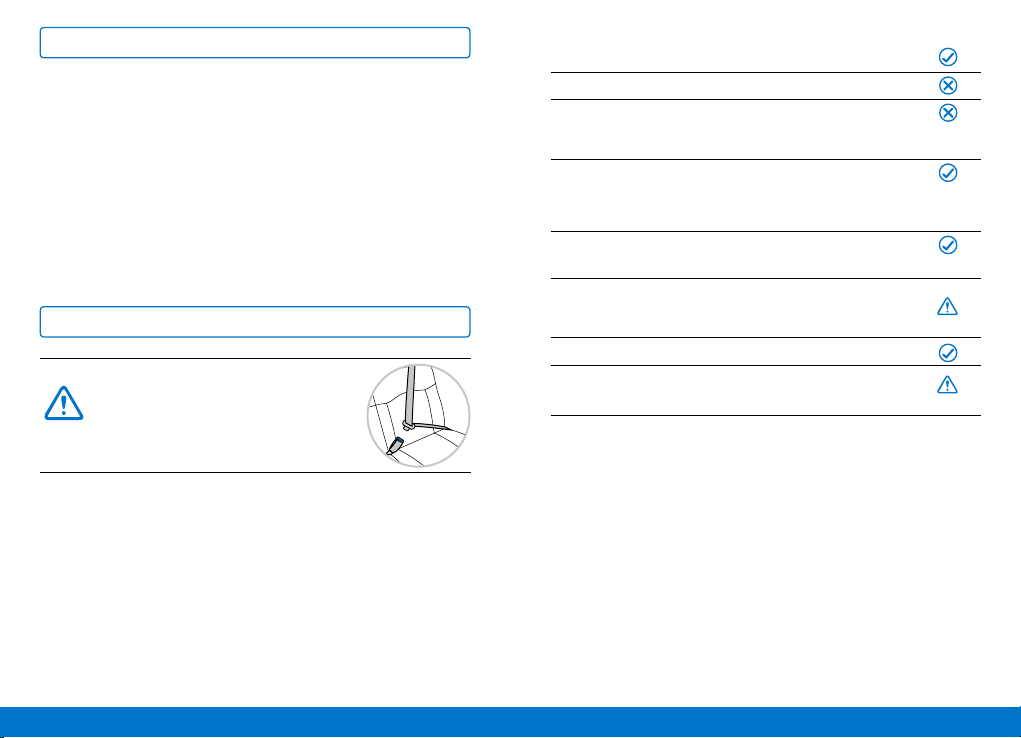
En dirección a la marcha
En dirección contraria a la marcha
Con cinturón de 2 puntos del vehículo
• Elusodeuncinturónde2puntosaumentasustancialmente
el riesgo de lesiones en el niño en caso de accidente.
Con cinturón de 3 puntos del vehículo
• Elcinturóndeseguridaddelvehículodebeestaraprobado
con arreglo a la norma ECE R16 o similares (observe la
etiqueta del cinturón con una "E" o "e" dentro de un círculo).
Con sistemas de anclaje ISOFIX y Top Tether
• Enlosasientostraserosdelvehículo.
En el asiento delantero (copiloto)
• Puedeinstalarseenelasiendodelanterodelcopiloto.Eneste
caso, retrase el asiento lo máximo posible. En cualquier caso
siempre prevalecerán las instrucciones que a este respecto
consten en el manual de usuario de su vehículo
En los asientos laterales de la bancada trasera del
vehículo
En el asiento central de la bancada trasera del vehículo
• Solamentesielasientoposeeuncinturóndeseguridadde3
puntos.
Nota: Siga las observaciones recogidas al respecto sobre sistemas de
retención infantil en la legislación vigente en su país.
Rev001
18 19
www.babyqs.com
BN FIX 123
4. GRUPO 1. INSTALACIÓN DEL NIÑO EN LA SILLA USANDO EL
ARNÉS DE CINCO PUNTOS.
Solamente para uso de Grupo 1 desde
aprox. 9 meses a 4 años (9-18 Kg.)
AVISO
¡CUIDADO! No tire de las cintas de los protectores de hombro.
4.1. Afloje las cintas del arnés. Para ello, pulse el botón de
ajuste del arnés y sin dejar de presionar tire de las cintas
del arnés hacia usted para aflojar el arnés lo máximo
posible (fig. 4.1).
4.2. Pulse el botón de la hebilla de seguridad y abra el arnés
(fig. 4.2). Para instalar al niño cómodamente, coloque la
cintas del arnés a ambos lados de la silla (fig. 4.3).
4.3. El ajuste correcto del arnés garantiza la correcta sujeción
del niño en la silla. Debe de ajustarse de modo que el
arnés de la silla quede al nivel de los hombros del niño o
ligeramente por encima, nunca por detrás de la espalda
o a la altura de las orejas. Asegúrese que arnés quedan
correctamente ceñido sobre los hombros del niño (fig.
4.4). Vea ajuste en el punto 3.1 (fig. 4.5. 1).
4.4. Junte los dos cierres del broche e introdúzcalos dentro de
la hebilla. Oirá un clic que indica el cierre correcto de la
hebilla (fig. 4.5. 2).
4.5. Compruebe que las cintas no quedan dobladas ni
torcidas.
4.6. Tire de la cinta de ajuste del arnés para tensarlo. Asegúrese
que el arnés queda bien ceñido al cuerpo del niño pero sin
oprimirlo (fig. 4.6).
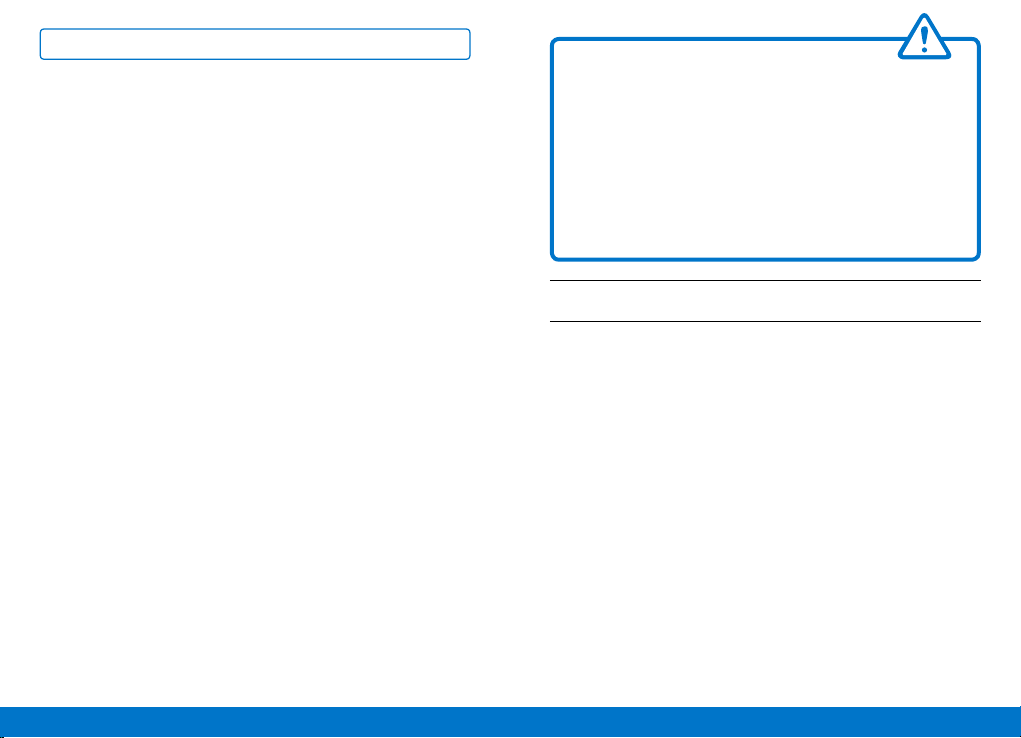
Tensar el arnés
Tire de la parte superior de la correas del
arnés hacia usted, nunca hacia arriba o
hacia abajo.
Presteatenciónqueelextremodelacinta
deajustedelarnésnoquedeatrapadapor
la puerta (asomando por exterior del coche)
y quede siempre junto con la funda textil
de la silla.
AVISO
Comprobarquelahebilladeseguridadestácorrectamente
abrochada
Por la seguridad del niño compruebe que:
• Lascorreasdelarnésquedanceñidasalcuerpodelniño
pero sin llegar a oprimirlo.
• Lascorreasdelarnésestáncorrectamenteajustadasala
altura correspondiente al niño.
• Lascorreasdelarnésnoestándobladasnitorcidas.
• Losbrochesdelahebillaestáncorrectamenteinsertados
en la hebilla del arnés.
• Elarnéssujetaalniñoporlapelvisynoporelabdomen.
IMPORTANTE
Rev001
20 21
www.babyqs.com
BN FIX 123
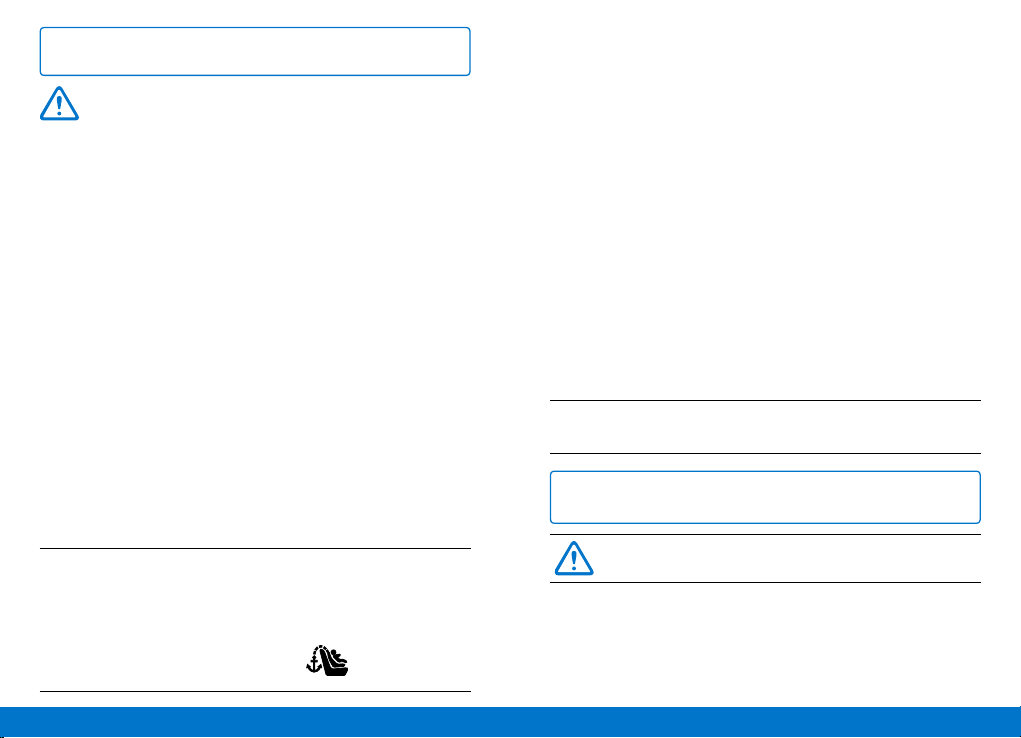
5. INSTALACIÓN DE LA SILLA GRUPO 1. CON ISOfIx y
TOP TETHER.
IMPORTANTE
•
Nunca deje al niño solo en la silla de seguridad.
•
Por la seguridad de todos los ocupantes del vehículo:
En caso de parada de emergencia o accidente aquellas
personas u objetos que no estén correctamente asegurados
pueden causar graves daños al resto de los ocupantes del
vehículo.
•Compruebe siempre que:
- Los respaldos de los asientos del vehículo están correcta-
mente anclados ( o que los posibles asientos plegables
estén correctamente cerrados y sujetos).
- Todos los objetos pesados o con aristas dentro del vehículo
están correctamente asegurados.
- La silla de seguridad infantil está correctamente asegurada
aunque no la esté utilizando.
•Protección de los asientos del vehículo
Algunas tapicerías de asiento son especialmente frágiles (velur,
cuero) por lo que la silla infantil puede producir marcas o dañar
la superficie. Esto puede evitarse colocando una manta o una
toalla que lo proteja.
Localice los anclajes Isofix del vehículo situados entre el respaldo
y la base del asiento. Localice el anclaje Top Tether situado en la
parte trasera del respaldo del asiento, en la bandeja trasera o en
el suelo del maletero del vehículo.
5.1. Pulse el botón, haciendo pinza con los dedos, que libera los
brazos ISOFIX y tirando de ellos, extraigalos por completo
(fig. 5.1).
5.2. Sujete la silla de seguridad con ambas manos e introduzca los
dos anclajes ISOFIX firmemente en los puntos Isofix del vehículo
hasta que los brazos de bloqueo queden acoplados con un clic
en ambos lados. Empuje la silla hasta que quede lo más pegada
posible al respaldo del asiento del vehículo (fig. 5.2, 5.3).
5.3. Sacuda la silla para comprobar que está correctamente
anclada a los puntos ISOFIX del vehículo (fig. 5.4).
5.4.
Tome el Top Tether y presione el regulador del Top Tether
para
estirar la correa hasta conseguir la longitud necesaria para su
instalación.
(fig. 5.5, 5.6)
5.5.
Enganche el mosquetón de seguridad en el punto de anclaje
del Top Tether recomendado en el manual del vehículo (fig.
5.7, 5.8).
5.6.
Para tensar el Top Tether, tire del extremo libre del cinturón a
través del regulador del Top Tether
(fig. 5.9, 5.10)
.
¡ATENCIÓN! ElTopTetherestarácorrectamentetensadocuando
el indicador de tensión rojo pase a color verde.
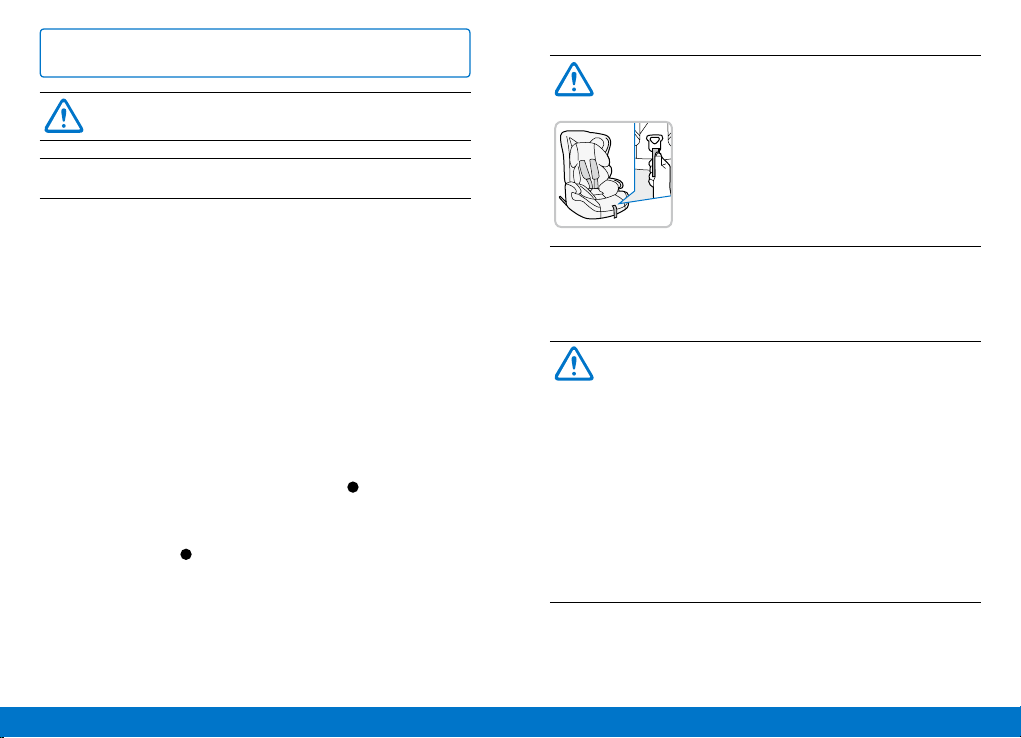
6. INSTALACIÓN DE LA SILLA GRUPO 2/3. CON fIx y
CINTURÓN DE 3 PUNTOS
Solamente para uso de Grupo 2/3
desde aprox. 4 a 12 años (15-36 Kg.)
AVISO
6.1.
Coloque la silla sobre el asiento del vehículo. Para liberar
y extraer los brazos Fix pulse el botón haciendo pinza con
los dedos. Sujete la silla de seguridad con ambas manos
e introduzca los dos anclajes FIX firmemente en los puntos
Isofix del vehículo hasta que los brazos de bloqueo queden
Busque este símbolo en su vehículo.
Lea el manual del vehículo.
Rev001
22 23
www.babyqs.com
BN FIX 123
7.2 Recolocar el arnés de 5 puntos del arnés y la funda textil
7.2.1. Para instalar el arnés de 5 puntos y la hebilla de seguridad
siga los pasos anteriores en orden inverso (fig. 7.9 a 7.1).
8. LIMPIEZA y MANTENIMIENTO
8.1. Desmontar la funda y correas (fig. 7.1 a 7.9)
8.2. Para el lavado de las cintas y partes de plástico enjabonar
con detergente neutro y agua templada.
8.3. Asegúrese que no entra jabón dentro de la hebilla o
piezas metálicas.
8.4. No utilice productos químicos o lejía en ninguna parte de
la silla.
8.5. El arnés se puede quitar y lavar con agua tibia y jabón.
¡CUIDADO!
Nuncaquitelaslengüetasdemetaldelascintasdelarnés.
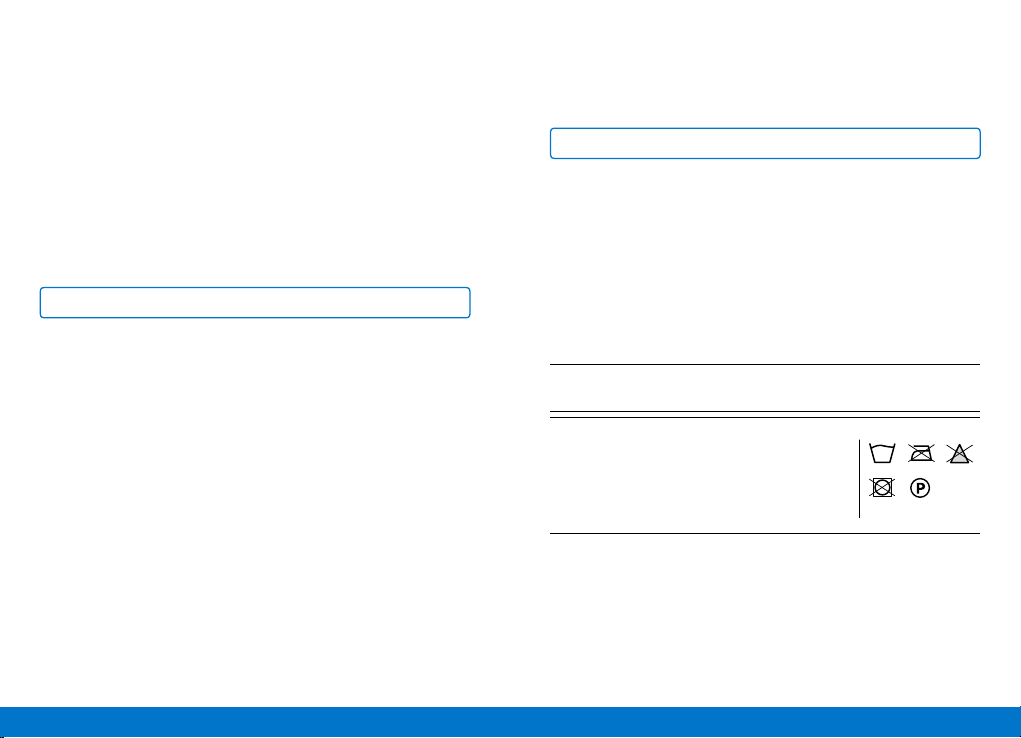
INSTRUCCIONES DE LAVADO:
· La funda es desmontable y
lavable a 30°, sólo se debe
secar al aire libre.
· Lavar en máquina, en frio.
· No usar lejía.
· Limpieza en seco,
cualquier disolvente
excepto tricloroetileno.
· No usar secadora.
· No planchar.
30°C
Si tiene alguna duda sobre el uso o colocación de este producto o
necesita cualquier pieza de repuesto, por favor póngase en contacto
con nuestro servicio de atención al cliente.
acoplados con un clic en ambos lados. Empuje la silla hasta
que quede lo más pegada posible al respaldo del asiento del
vehículo (fig. 6.1, 6.2, 6.3).
6.2. Siente al niño en la silla.
Tome el cinturón de seguridad del
vehículo y pasándolo por encima del niño, conéctelo en su
punto de anclaje.
Asegúrese de que la parte abdominal del
cinturón pasa por ambas guías del cinturón de la base de la
silla (fig. 6.5).
6.3 Asegúrese que el cinturón no queda torcido.
6.4 Asegúrese que el cinturón queda tenso.
6.5 Asegúrese que la parte del cinturón abdominal retiene al
niño por la pelvis y no por el abdomen.
7. CUIDADO y MANTENIMIENTO DE LA SILLA
7.1 Retirar el arnés de 5 puntos y la funda textil
7.1.1. Pulse el botón de ajuste del arnés y sin dejar de presionar,
tire de las cintas del arnés hacia usted para aflojarlo. Abra el
velcro de la solapa de la tapicería en la parte trasera de la silla
para descubrir el conector de las cintas del arnés (fig. 7.1).
7.1.2. Suelte las cintas de los protectores del arnés de su conector
(fig. 7.2). Suelte las cintas del arnés de su conector (fig. 7.3).
7.1.3. Desde la parte delantera, tire de las cintas del arnés para
sacarlas. Retire los broches de cierre de la hebilla fuera de
las cintas (fig. 7.4, 7.5).
7.1.4. Seguidamente, voltee la silla y desde la parte de abajo tire de
la cinta del arnés para retirarla por completo de la silla (fig. 7.6).
Tome la placa de retención de la hebilla del arnés y rotándola,
pásela a traves de la ranura de la base de la silla para liberar la
hebilla (fig. 7.7). Retire la hebilla del arnés (fig. 7.8).
7.1.5. Una vez retirado el arnés de 5 puntos y la hebilla de
seguridad podrá retirar la tapicería de la silla (fig. 7.9).
Rev001
24 25
www.babyqs.com
BN FIX 123
9. GARANTÍA
Este producto está cubierto por la garantía legal, en los términos y
condiciones establecidos en el RDL 1/2007, de 16 de noviembre.
Durante un periodo de 2 años tras la fecha de compra queda cubierta
cualquier falta de conformidad existente en el momento de entrega
del producto. Es imprescindible conservar el ticket de compra o
factura acreditativa de la adquisición del producto dentro del periodo
de garantía. Deben seguirse cuidadosamente las instrucciones de uso
facilitadas en el manual del producto para su puesta en marcha, así
como para el posterior y adecuado funcionamiento del mismo. Esta
garantía no cubre los defectos derivados de un deterioro accidental, a
un uso indebido o maltrato del producto, así como los derivados de un
mantenimiento inadecuado, o a una reparación efectuada por personal
o servicio técnico no autorizado, en cuyo caso el usuario correrá con
los gastos derivados del transporte, y en su caso, de la reparación.
La garantía no cubre los componentes consumibles, como baterías o
revestimientos expuestos a desgaste, derivados de un uso normal del
producto.
WARNING
•Readthisinstructionmanualcarefully.
•The correct tting of the ISOFIX and Top Tether anchoring
systems or 3-point belt is of vital importance for the
safety of your child.
•Forthefutureuseoftheseat,itisimportantthatyoukeepthe
instruction manual carefully. There is a pocket on the side of
the base Where the instruction can be retained with the child
restraint.
•Neverleaveyourchildunattendedinthecar.
•Donotuseachildsafetyseatifthevehicleseatisequippedwith
a front airbags. This can be dangerous. This does not apply to
so-called side airbags.
NOTIFICATION
1. This is an ISOFIX CHILD RESTRAINT SYSTEM. It is approved
to Regulation No. 44,04 series of amendments for general
use in vehicles fitted with ISOFIX and Top Tether archorages
systems and 3 point seat belts approve acc to R-16 ECE.
2. The product must only be used on a forward facing seat that
is fitted with the ISOFIX and Top Tether anchoring systems or
3-point belt which is approved according to ECE R16 or an
equivalent standard. The product may be used on either the
front or the back seat. However, we recommend that it is fitted
on the back seat.
3. The product has been approved according to the strictest
European safety standards (ECE R44/04) and is suitable for
Group I (9-18kg) with the ISOFIX and Top Tether anchoring
systems, Group II (15-25kg) and Group III (22-36kg) with
3-point belt and the FIX system.
4. After an accident the seat may become unsafe due to damage
that is not be noticeable immediately. It should therefore be
replaced.
Rev001
26 27
www.babyqs.com
BN FIX 123
5. The safety of the seat can only be guaranteed by the
manufacturer if it issued by the original owner.
6. Ensure that all luggage and objects likely to cause injury in the
event of an accident are properly secured.
7. The moving parts of the car seat should not be lubricated in
any way.
8. The baby car seat must not be used without the cover. Please
use an original cover, as the cover contributes to the safety of
the seat.
9. The seat must be secured with a seat belt or ISOFIX and Top
tether, even when it not on use. An unsecured seat may injure
other passengers in the car in an urgent stop.
10.
The rigid items and plastic parts of a child restraint must be so
located and installed that they are not liable, during everyday
use of the vehicle, to become trapped by a movable seat or in
a door of the vehicle.
11.
Ensure that the seat is not damaged by the webbing between or
underneath heavy luggage, adjustable seats or slamming the car
door etc.
12.
No alterations may be made to the product as this could affect
part or the overall safety of the seat.
Please, follow carefully the
installation instructios supplied by the child seat manufacturer
otherwise it could be dangerous for the child.
13.
In hot weather the plastic and metal parts of the product will be
hot. You should cover the seat when the car parked under the
sun.
14.
In order to prevent damage to the cover, do not remove the
product’s logo.
15.
Use the seat even in a short journey, as this is when most accidents
occur.
16.
Before the purchase, please check that the seat is properly in your
car.
17.
Take a short break in long journey. So that your child has some time
for the relaxation.
18.
Set a good example yourself and always wear your seat belt.
19.
Tell your child that he/she should be never play with the harness
buckle
20.
The figures on this manual are made to illustrate the text. The child
seat may differ from figures. Those differences will not affect neither
safety nor installation procedure.
Certification
The child safety seat has been designed, tested and certified
according to the requirements of the European Standard for Child
Safety Equipment (ECE R 44/04). The seal of approval E (in a circle)
and the approval number are located on the approval label (sticker
on the child safety seat).
This approval will be invalidated if you make any modifications to
the child safety seat. Only the manufacturer is permitted to make
modifications to the child safety seat.
Child Safety Seat:
HB-10
Tested and certified according
to ECE* R 44/04
Group Body Weight
HB-10 I+II+III 9-36 kg
Rev001
28 29
www.babyqs.com
BN FIX 123
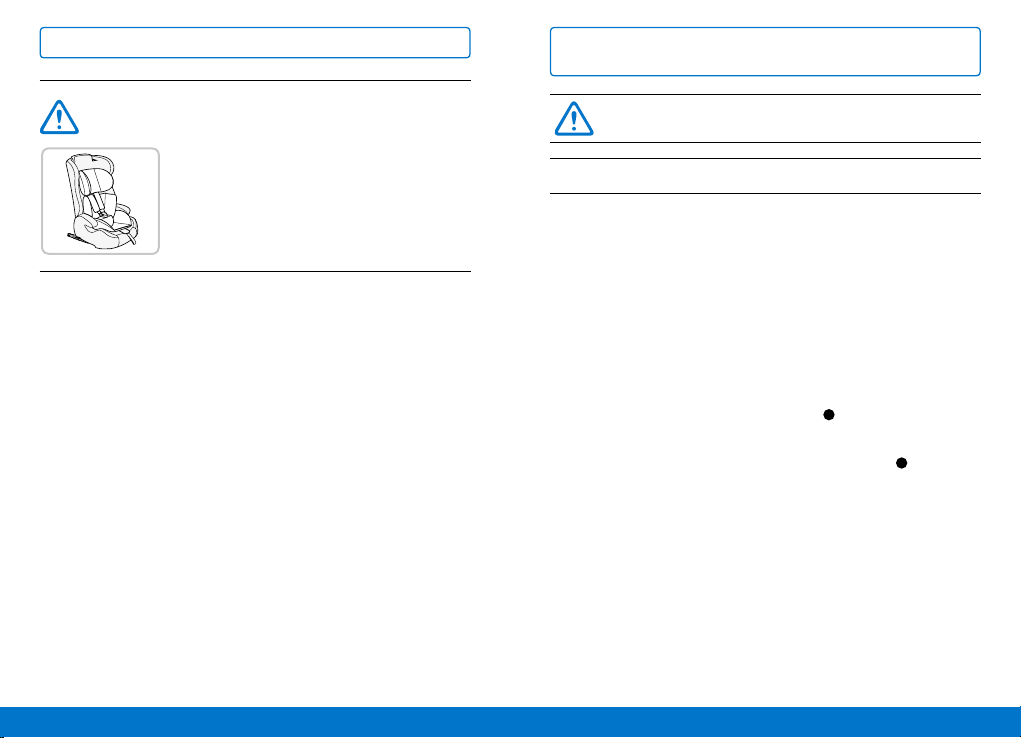
1. OVERVIEW
A. Harness pads.
B. Harness straps.
C. Group 1 Ergo seat cushion.
D. Locking buckle.
E. Abdominal belt hook.
F. Harness adjustment button.
G. Harness adjustment strap.
H. Top Tether.
I. Top Tether safety brake.
J. Slot for regulating the height
of harness straps.
K. Harness connector.
L. ISOFIX system
2. INSTALLATION POINTS WITHIN THE VEHICLE
Please install with
the 3-point belt.
2.1 Please observe the regulations applicable to your particular
country.
2.2 The safety belt must be approved to ECE R16 or a comparable
standrad.
2.3 Do not use with 2-point belt.
2.4 Group 1 can only be used in vehicle seats equiped with ISOFIX and
Top Tether anchorages. See vehicle owners manual.
2.5 Can only be used if the vehicle seat is equipped with a 3-point belt.
NOTICE
Facing the direction of travel
Facing away from the direction of travel
With the 2-point belt (car seatbelt)
• 2pointseatbeltincreaseschildinjuryriskincaseof
accident.
With the 3-point belt (car seatbelt)
• AdultsafetybeltmustbeapprovedtoReg.16ECEor
equivalent stardard (see belt label with "E" inside a circle or
"e" inside a square)
With ISOFIX and Top Tether
• Rearpassengerseats.
Front passenger seat
• Inthiscase,adjustthefrontpassengerseattotherearmost
possible position. See vehicle owners manual.
Rear outer passenger seats
Rear central passenger seat
• Onlyif3pointadultbeltisprovided.
Nota: Please observe the regulations applicable to your particular country.
Rev001
30 31
www.babyqs.com
BN FIX 123
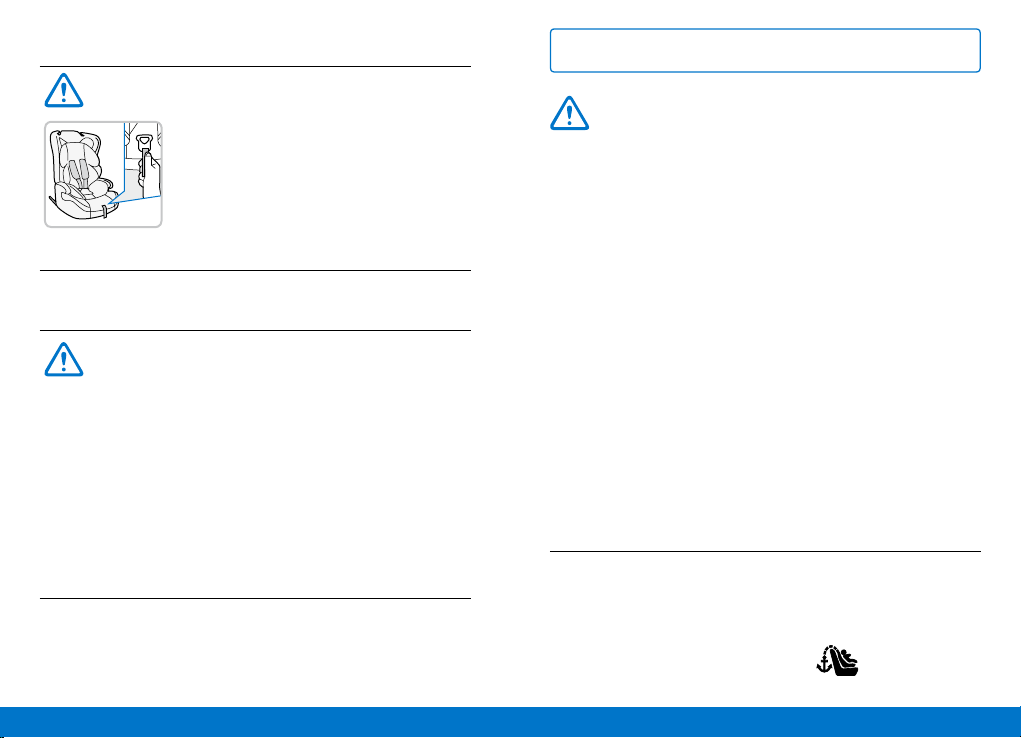
3. HARNESS ADJUSTMENT
NOTICE
3.1. Harness height adjustment and child seat positions.
The correct installation of the child on the seat depends on the
harness height adjustment. The correct belt height of the shoulder
belts is attained when the belt disappears into the shell slightly
above the shoulder of the child. Make sure that the shoulder belts
fit properly over the shoulders of the child.
3.1.1.
Loosen the harness straps by pressing the release button and
pulling the harness straps as far as you can. Atention: do not
pull the shoulder pads straps (fig. 3.1).
3.1.2.
Loosen the shoulder pad straps from the back of the seat,
freeing them from the shoulder pad straps connector. Pull
the harness straps from the front to free them from the seat
back. Reinsert the harness straps at the desired height.
Reinsert the harness straps in the connector on the back of
the seat
(fig. 3.2, 3.3, 3.4).
Please use the baby insert attached to this
car seat whenyour baby ‘s weight is less
than 15kg.
The baby insert is used to provide extra
comfort for very small babies, and it gives
your baby the necessary support while he or
she is still small.
4. FASTENING THE CHILD INTO THE SEAT USING THE
5 POINT HARNESS. GROUP 1.
Only for use with Group 1 from approx.
9 months to 4 years of age (9-18 kg)
NOTICE
NOTE! Do not pull the shoulder pads.
4.1. Loosen the harness straps by pressing the release button
and pulling the harness straps as far as you can. (fig. 4.1).
4.2. Open the harness buckle, (fig. 4.2) then place the harness
straps to the sides of the car seat. (fig. 4.3). Put the baby
into the car seat.
4.3. The correct belt height of the shoulder pads is attained
when the strap disappears into the shell slightly above the
shoulder of the child. Make sure that the harness straps
fit properly over the shoulders of the child (fig. 4.4). See
adjustment in section 3.1 (fig. 4.5. 1).
4.4. Slide buckle tongues together and insert them in the
buckle with an audible sound “click” (fig. 4.5. 2).
4.5. Do not twist or interchange the harness straps..
4.6. Pull the straps tight by the harness adjustment strap, and
make sure the tightness is comfortable to your kid (fig. 4.6).
Rev001
32 33
www.babyqs.com
BN FIX 123
Tightening the harness
Pull the straps end straight towards
you,notupwardsordownwards.
Please pay attention to the strap end.
Whilst traveling (especially outside the
car) it should always be attached to the
cover.
NOTICE
Make sure the buckle is correctly fastened.
For child safety check that:
• Theharnessbeltsaretighten.
• Harnessbeltsarecorrectlyadjustedtothechildheight.
• Harnessbeltsareneitherfoldednortwisted.
• Buckleiscorrectlyfastened.
• Harnessretainsthechildbythepelvisandnotbythe
abdomen.
NOTICE
5. INSTALLATION IN THE vEHICLE GROUP 1. WITH ISOfIx
AND TOP TETHER.
NOTICE
•
Please do not leave your child unattended in the child
safety seat in the vehicle.
•
For the protection of all vehicle occupants:
In the case of an emergency stop or an accident unsecured
persons or objects may cause injury to other vehicle occupants.
•Always check that:
- The backrests of the vehicle seats are locked (i.e. that a
foldable rear seat bench latch is engaged).
- All heavy or sharp-edged objects in the vehicle (e.g. on the
parcel shelf) are secured.
- All persons in the vehicle have their seats belts fastened.
- The child safety seat is always secured when it is in the
vehicle, even if no child is being transported.
•To protect your vehicle seats
Some vehicle seat covers of sensitive materials (e.g. velour,
leather, etc.) may develop wear marks when child seats are
used. This can be avoided by placing a blanket or towel under
the child seat.
First please check if there are 2 ISOFIX anchorages in the
perpendicular intersection of the vehicle seat back and seat
cushion, and the user-ready tether anchorage behind the vehicle
seat.
Look for this symbol in your vehicle.
Rev001
34 35
www.babyqs.com
BN FIX 123
5.1. Press the ISOFIX release button and push the ISOFIX
connectors forward as far as possible (fig. 5.1).
5.2. Push the ISOFIX connectors firectly into the anchorages until
heard an audible sound “click”. (fig. 5.2, 5.3).
5.3. Grasp the seat body to check the seat if it is fastened tightly
or shakes. If the seat shakes and the ISOFIXconnectors
are pulled out, please repeat the above steps and install it
again. Push the child seat against the vehicle seat back until
the maximum possible extent (fig. 5.4).
5.4.
Pull out the Top Tether and press the tether strap release
button to extend the strap until it is logn enough to hook the
user-ready tether anchorage behind.
(fig. 5.5, 5.6)
5.5.
Hook the tether strap hook onto the user-ready anchorages.
See vehicle owned manual (fig. 5.7, 5.8).
5.6.
Pull the tether strap end to tighten the Top Tether
(fig. 5.9, 5.10)
.
NOTE! The Top Tether will be correctly tightened when the
green mark is displayed.
6. GROUP 2 AND 3. INSTALATION fOR CAR BELT (3 POINTS)
Only GROUP 2/3. From approx. 4 to
12 years of age (15Kg-36Kg)
NOTICE
AND ISOfIx SySTEM
6.1.
Press the ISOFIX release button and push the ISOFIX
connectors forward as far as possible. Push the ISOFIX
connectors firectly into the anchorages until heard an audible
sound “click”. Grasp the seat body to check the seat if it
is fastened tightly or shakes. If the seat shakes and the
ISOFIXconnectors are pulled out, please repeat the above
steps and install it again. Push the child seat against the
vehicle seat back until the maximum possible extent. (fig.
6.1, 6.2, 6.3).
6.2. With the child sit on the child seat, take the adult belt and
secure the child by passing the lap portion of the belt
through the red waist belt guides (G). Fasten the belt buckle
and make sure the diagonal portion of the belt pass midway
in between the child showlder and neck. (fig. 6.5).
6.3 Make sure the belt is neither folded nor twisted.
6.4 Make sure the belt is tighten.
6.5 Make sure the lap portion of the belt retains the child by the
pelvis not by the abdomen.
7. MANTENANCE HARNESS SySTEM
7.1 Removing the 5-point harness system and cover
7.1.1. Press adjusting device and pull harness strap towards as far
as you can. Open the cover snap button at the bottom of
seat back as shown right picture (fig. 7.1).
7.1.2. Loose the harness strap and pull strap out off the strap yoke
(fig. 7.2).
7.1.3. Pull two harness straps out off cover slot, then separate
strap with buckle metal connector (fig. 7.4, 7.5).
7.1.4. After above steps, draw whole strap out from the bottom of
seat. (fig. 7.6). Rotate buckle clip to the shown position, (fig.
7.7) then take it out from seat base. (fig. 7.8).
7.1.5. Remove the 5-point harness system then remove the
headrest cover and the shell cover (fig. 7.9).
7.1.6. To install 5-point harness system follow the previous fixes in
reverse order (fig. 7.9).

Rev001
36 37
www.babyqs.com
BN FIX 123
7.2Rettingthe5-pointharnesssystemandcover
7.2.1. To install the 5-point harness and the safety buckle, follow
the previous steps in reverse order (fig. 7.9 a 7.1).
8. CLEANING AND MAINTENANCE
1. To wash belts and plastic parts, use neutral detergent and
warm water.
2.
Ensure that soap does not enter inside the buckle or metal
pieces.
3. Do not use chemical products or bleach on any part
of the child seat.
WASHING INSTRUCTIONS:
- The cover can be removed
and washed at 30°C. It
should only be air-dried.
- Machine wash, cold.
- Do not use bleach.
- Dry clean, any solvent
except trichlorethylene.
- Do not use a dryer.
- Do not iron.
30°C
If you have any doubts about using or installing this product, or you
need a replacement part, please get in touch with our customer
service team.
9. GUARANTEE
This product is covered by a legal warranty under the terms and
conditions in Royal Legislative Decree 1/2007, from the 16th of
November. For a period of 2 years after the date of purchase, any
lack of conformity existing at the time of delivery of the product
is covered. It is essential to keep the purchase ticket or invoice
proving the purchase of the product within the warranty period.
The instructions for use given in the product manual must be
followed carefully for its start-up, as well as for the subsequent
and proper operation of the product. This warranty does not
cover defects arising from accidental deterioration, misuse, abuse
of the product, improper maintenance, or repair by unauthorised
technical personnel or service, in which case the user shall bear the
costs of delivery and, where applicable, the repair. The warranty
does not cover consumable components, such as batteries or
coatings exposed to wear and tear, that are the result of normal
use of the product.

39
www.babyqs.com
Table of contents
Languages:
Other BQS Car Seat manuals


