manuals.online logo
Brands
  1. Home
  2. •
  3. Brands
  4. •
  5. Breg
  6. •
  7. Medical Equipment
  8. •
  9. Breg Pin Cam Walker User manual

Breg Pin Cam Walker User manual

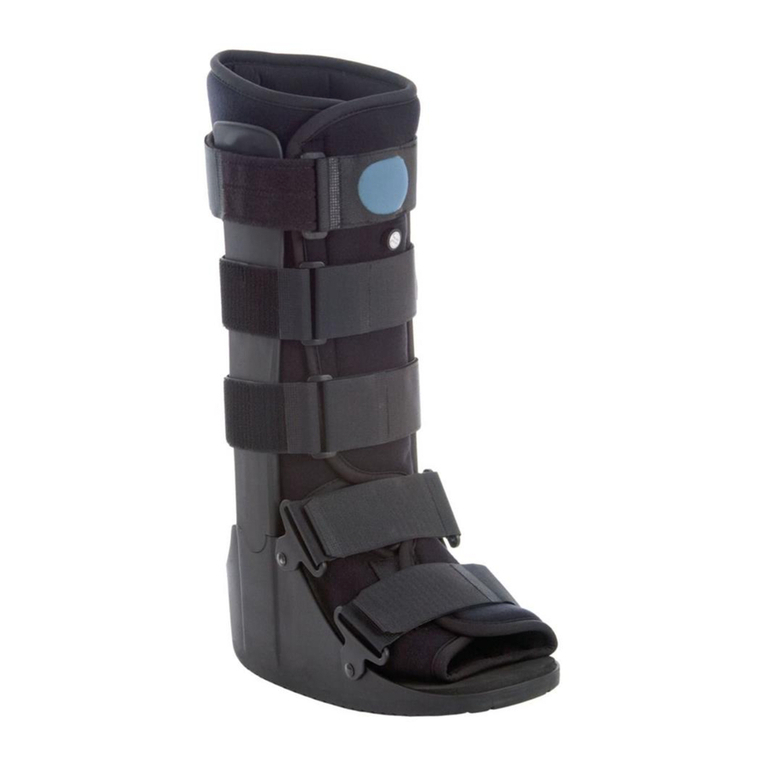
Pin Cam Walker
1Enfilez le pied et la jambe dans le revêtement souple et calez bien le talon contre la partie
postérieure ; il est recommandé de porter une chaussette.
2On peut insérer des coussinets pour remplir l’excès d’espace sur les côtés de la cheville ou au
talon. Positionnez la plus grande languette rembourrée sur le dessus du pied avant d’attacher le
revêtement.
3Fermez le revêtement en le serrant au moyen des fermetures Velcro.
4Positionnez le talon du pied contre la botte à bascule. Les montants de l’orthèse doivent être
positionnés de chaque côté de la cheville.
5Appuyez les montants contre le revêtement. En cas de superposition, positionnez le montant en
dessous. (Cette position permet le retrait ultérieur de l’orthèse sans changer la position du montant.)
6Appliquez les sangles tibiales en alternant leur direction et serrez-les.
7Déterminez l’angle de dorsiflexion et/ou de flexion plantaire requis et procédez aux réglages
conformément aux instructions suivantes. Remarque : les réglages doivent être effectués par le
médecin traitant.
8Si nécessaire, les montants peuvent s’adapter aux contours anatomiques spécifiques du patient.
On peut les courber sur le bord d’une table ou d’une chaise.
CHEVILLE FIXE
L’orthèse Pin Cam est fournie par l’usine en position neutre (0°). Si l’on doit avoir recours à une autre
position fixe, observez les étapes suivantes:
1Retirez la vis de blocage inférieure et faites pivoter la protection à 180°, exposant ainsi la vis de
blocage supérieure. Desserrez cette dernière mais laissez-la en place.
2Faites pivoter la protection pour permettre le retrait des deux butées d’ergots. Les ergots peuvent
être facilement poussés par derrière.
3Remarquez les indicateurs d’angle du disque de l’articulation de la cheville et remettez les ergots
dans les trous correspondants, par exemple 15—15 pour une flexion plantaire de 15°.
4Resserrez la vis de blocage supérieure.
5Faites pivoter la protection en plastique jusqu’à ce que l’ouverture soit dirigée vers le bas.
Remettez la vis de blocage inférieure en place.
MOUVEMENT LIBRE OU LIMITE
1 Retirez la vis hexsocket supérieure pour faire tourner le couvercle de l'articulation.
2Faites pivoter la protection pour permettre le retrait des deux butées d’ergots. Les ergots peuvent
être facilement poussés par derrière.
3Repérez les trous correspondant aux butées de mouvement limité et remettez les ergots en place.
Pour obtenir un mouvement libre, ne remettez pas les ergots en place.
4Ne resserrez pas la vis de blocage supérieure si vous désirez obtenir un réglage de mouvement
libre ou limité.
5 Faites pivoter la protection en plastique jusqu'à ce que l'ouverture soit dirigée vers le haut.
Remettez la vis hexsocket en place.
APPLICATION DE L’ORTHESE PIN CAM
1Coloque el pie y la pierna dentro del forro blando, con el talón firmemente hacia atrás. Se
recomienda el uso de calcetines.
2Se pueden meter acolchados para acomodar espacio adicional a cada lado del tobillo o en el
talón. El acolchado grande en forma de lengüeta debe ser colocado por encima del pie antes de
atar el forro.
3Ajuste el forro con las tiras de Velcro.
3Coloque el talón del pie contra la parte de atrás de la bota. Los postes deben estar colocados a
media-línea sobre el tobillo.
5Apriete los postes firmemente contra el forro. Si hay superposición, coloque el poste por debajo de
la misma. (Esto le permitirá quitar el aparato en el futuro sin tener que cambiar la posición del poste.)
6Coloque las tiras de la tibia, alternándolas, y ajuste todas las tiras.
7Determine el ángulo requerido de dorsiflexión y/o flexión plantar y ajústelo de acuerdo con las
instrucciones que encontrará más adelante. Nota: Los ajustes deberán ser realizados por el
personal clínico que esté tratando al paciente.
8De ser necesario, los postes pueden ser contorneados a las medidas del paciente. Para ello, se
puede utilizar el borde de una mesa o una silla.
TOBILLO FIJO
El Pin Cam Walker, (Andador Pin Cam), viene de fábrica en posición neutra (0°), Si se desea otra
posición fija diferente, observe lo siguiente:
1Quite el tornillo de la funda inferior y gire la cubierta 180°, exponiendo el tornillo de la funda
superior. Afloje este tornillo, pero no lo quite.
2Gire la cubierta para poder quitar los dos topes de aguja. Las agujas pueden ser empujadas
fácilmente de atrás hacia delante.
3Note las marcas angulares del disco de la junta del tobillo y vuelva a poner las agujas en los
agujeros adecuados, (ej:15-15 para 15° de flexión plantar).
4Vuelva a apretar el tornillo de la funda superior.
5Gire la cubierta de plástico hasta que la abertura esté hacia abajo. Recoloque el tornillo de la
funda inferior.
MOVIMIENTO LIBRE O LIMITADO
1 Quite el tornillo hexsocket superior para girar la cubierta de la bisagra.
2Gire la cubierta para poder quitar los dos topes de aguja. Las agujas pueden ser empujadas
fácilmente de atrás hacia delante.
3Seleccione los agujeros adecuados para los topes de movimiento limitado y vuelva a colocar las
agujas. Para movimiento libre no tiene que volver a colocar las agujas.
4No vuelva a apretar el tornillo de la funda superior en ningún caso, (ya sea para movimiento
libre o limitado).
5 Gire la cubierta de plástico hasta que la abertura esté hacia arriba. Vuelva a colocar el tornillo
hexsocket.
APLICACIÓN DEL PIN CAM
PIN CAM WALKER
DEAMBULATORE PIN CAM
ORTHÈSE PIN CAM
ANDADOR PIN CAM
ADVERTENCIA: LEA DETENIDAMENTE LAS INSTRUCCIONES DE USO/CUIDADO Y LAS ADVERTENCIAS ANTES DE USAR ESTE PRODUCTO.
ADVERTENCIA: NO SE QUITE LA BOTA WALKER A MENOS QUE LO INDIQUE EL PROFESIONAL MÉDICO QUE LE PROPORCIONA
TRATAMIENTO.
ADVERTENCIA: ESTE APARATO NO PREVIENE NI REDUCE TODAS LAS LESIONES. LA ADECUADA REHABILITACIÓN Y MODIFICACIÓN DE LA
ACTIVIDAD SON TAMBIÉN PARTE ESENCIAL DE UN PROGRAMA SEGURO DE TRATAMIENTO.
ADVERTENCIA: SI EXPERIMENTA AUMENTO DEL DOLOR, HINCHAZÓN O CUALQUIER REACCIÓN ADVERSA AL USAR ESTE PRODUCTO,
CONSULTE A SU PROFESIONAL MÉDICO INMEDIATAMENTE.
ADVERTENCIA: TOME LAS MEDIDAS NECESARIAS DE PRECAUCIÓN AL CAMINAR SOBRE SUPERFICIES RESBALADIZAS, TERRENO DESNIVELADO
O SOBRE CUALQUIER OTRA CONDICIÓN DEL SUELO EN DONDE PAREZCA SER NECESARIO EJERCER CIERTA PRECAUCIÓN.
ADVERTENCIA: NO OPERE VEHÍCULOS DE MOTOR NI VEHÍCULOS IMPULSADOS POR PERSONAS MIENTRAS USA ESTA BOTA WALKER.
PRECAUCIÓN: PARA USO ÚNICO EN UN PACIENTE SOLAMENTE. LA SUELA EXTERIOR PUEDE DETERIORARSE DESPUÉS DE VARIOS USOS.
PRECAUCIÓN: ESTE DISPOSITIVO CONTIENE COMPONENTES DE LÁTEX QUE NO ENTRAN EN CONTACTO CON LA PIEL.
AVERTISSEMENT : VEUILLEZ LIRE ATTENTIVEMENT LE MODE D'EMPLOI ET LES MISES EN GARDE AVANT USAGE.
AVERTISSEMENT : NE RETIREZ PAS L'ORTHESE DE MARCHE, SAUF SUR RECOMMANDATION SPECIFIQUE DE VOTRE PRATICIEN.
AVERTISSEMENT : CE DISPOSITIF N'EST PAS DESTINE A PREVENIR OU A REDUIRE TOUTES LES LESIONS. UNE REEDUCATION APPROPRIEE
ET UN CHANGEMENT D'ACTIVITE FONT EGALEMENT PARTIE DES ELEMENTS ESSENTIELS A UN PROGRAMME DE
TRAITEMENT REUSSI.
AVERTISSEMENT : EN CAS D'AUGMENTATION DE LA DOULEUR, D'ENFLURE OU D'AUTRES REACTIONS INDESIRABLES LORS DE L'USAGE DE CE
PRODUIT, CONSULTEZ IMMEDIATEMENT VOTRE PRATICIEN.
AVERTISSEMENT : PRENEZ LES PRECAUTIONS NECESSAIRES LORSQUE VOUS MARCHEZ SUR DES SURFACES GLISSANTES, UN TERRAIN A
NIVEAU INEGAL OU SUR TOUTE AUTRE SURFACE OU IL EST INDIQUE DE PROCEDER AVEC PRUDENCE.
AVERTISSEMENT : N'ACTIONNEZ PAS DE VEHICULE MOTORISE OU UN VEHICULE A PROPULSION HUMAINE LORS DE L'EMPLOI DE CETTE
ORTHESE DE MARCHE.
ATTENTION : USAGE RESERVE A UN SEUL PATIENT. LA SEMELLE EXTERNE PEUT SE DETERIORER EN CAS D'USAGES MULTIPLES.
ATTENTION : CE DISPOSITIF EST COMPOSE D'ELEMENTS AU LATEX QUI NE SONT PAS EN CONTACT AVEC LA PEAU.
Breg, Inc.
2885 Loker Ave. East
Carlsbad, CA 92010 U.S.A.
P: 800-321-0607
F: 800-329-2734
www.breg.com
AW-1.07860 Rev D 1012
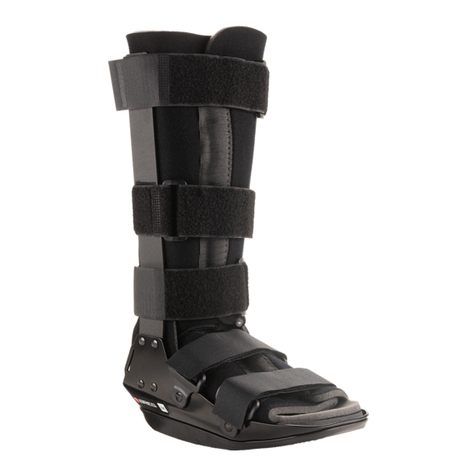
1Place foot and leg inside soft liner with heel firmly back; wearing a sock is recommended.
2Pads may be inserted to accommodate extra space at either side of ankle or at the heel. The
larger tongue pad should be positioned over the top of the foot before securing the liner.
3Close the liner snugly securing the Velcro® closures.
4Position the heel of the foot against the back of the rocker boot. Brace uprights should be
positioned midline over the ankle.
5Press the uprights securely against the liner. If there is a slight overlap, position the upright under
the overlap. (This will allow later removal of the brace without changing the position of the
upright.)
6Position the tibial straps in alternating fashion and secure all straps.
7Determine the required angle of dorsiflexion and/or plantar flexion and adjust according to the
instructions below. Note: Adjustments should be managed by the clinician directly involved with
the patient.
8Uprights may be contoured to the individual patient if required. The edge of a table or chair may
be used to aid in contouring.
FIXED ANKLE
The Pin Cam Walker is shipped from the factory in the neutral position (0°). If a fixed position other
than neutral is desired, observe the following:
1Remove the lower cap screw and rotate the cover 180°, exposing the upper cap screw. Loosen
but do not remove the upper cap screw.
2Rotate the cover to allow removal of the two pin stops. The pins may be easily pushed out from
behind.
3Note the angular markings of the disc part of the ankle joint and replace the pins in the
appropriate holes, e.g. 15-15 for 15° plantar flexion.
4Retighten the upper cap screw.
5Rotate the plastic cover until the opening faces down. Replace the lower cap screw.
FREE OR LIMITED MOTION
1Remove the upper hexsocket screw to rotate the hinge cover.
2Rotate the cover to allow removal of the two pin stops. The pins may be easily pushed out from
behind.
3Select the appropriate holes for limited motion stops and replace the pins. For free motion, the
pins are not replaced.
4Do not retighten the upper cap screw for either free or limited motion settings.
5Rotate the plastic cover until the opening faces up. Replace the hexsocket screw.
Pin Cam Application
1Den Fuß und das Bein so in die weiche Schale stellen, daß die Ferse fest hinten anliegt; das
Tragen eines Strumpfs wird empfohlen.
2Um den Platz auf beiden Knöchelseiten oder an der Ferse auszufüllen, können Polster eingelegt
werden. Das größere Zungenpolster sollte auf dem Fuß aufgelegt werden, bevor die Schale
befestigt wird.
3Schale mit dem Klettverschluß so schließen, daß sie gut anliegt.
4Da die Unterseite des Walker-Stiefels rund und kufenförmig konstruiert ist, muß die Ferse hinten
fest gegen den Stiefel gedrückt werden. Die vertikalen Stützen sollten dabei über der
Knöchelmitte angelegt werden.
5Vertikale Stützen fest gegen die Schale drücken. Sollte die vertikale Stütze über die Schale
hinausragen, muß sie so angelegt werden, daß sie unter der Überlappung liegt. (Dadurch kann die
Schiene später entfernt werden, ohne daß die Position der vertikalen Stütze geändert werden muß.)
6Schienbeingurte abwechselnd anbringen und festziehen, damit sie sicher sitzen.
7Den erforderlichen Winkel der Dorsiflexion und/oder Plantarflexion bestimmen und gemäß der
untenstehenden Anleitungen anpassen. Hinweis: Die Anpassung sollte von demjenigen Kliniker
vorgenommen werden, der direkt mit dem Patienten arbeitet.
8Falls erforderlich, können die vertikalen Stützen der Beinform des individuellen Patienten
angepaßt werden. Dazu kann eine Tisch- oder Stuhlkante verwendet werden.
FIXIERTER KNÖCHEL
Der Pin-Cam-Stiefel wird ab Werk in der neutralen Position (0°) geliefert. Wenn eine andere Position
als neutral erwünscht ist, bitte wie folgt vorgehen:
1Untere Kopfschraube entfernen und Abdeckung um 180 Grad drehen, wodurch die obere
Kopfschraube freigelegt wird. Obere Kopfschraube lockern, ohne sie jedoch zu entfernen.
2Abdeckung drehen, um die zwei Stoppstifte zu entfernen. Die Stifte können leicht von hinten
herausgeschoben werden.
3Sehen Sie sich die Winkelmarkierungen des runden Teils des Knöchelgelenks an und stecken Sie
die Stifte in die entsprechenden Löcher, z.B. 15 - 15 für eine Plantarflexion von 15 Grad.
4Obere Kopfschraube wieder anziehen.
5Plastikabdeckung drehen, bis die Öffnung nach unten zeigt. Untere Kopfschraube wieder einsetzen.
FREIE ODER EINGESCHRÄNKTE BEWEGUNG
1 Obere hexsocket Schraube entfernen, um die Gelenkabdeckung zu drehen.
2Abdeckung drehen, um die zwei Stoppstifte zu entfernen. Die Stifte können leicht von hinten
herausgeschoben werden.
3Die entsprechenden Löcher für eine eingeschränkte Bewegung wählen, und die Stifte wieder
einsetzen. Für eine freie Bewegung werden die Stifte nicht eingesetzt.
4Bei der Einstellung für die freie oder eingeschränkte Bewegung die obere Kopfschraube nicht
wieder anziehen.
5 Die Plastikabdeckung drehen, bis die Öffnung nach oben zeigt. Die Schraube wieder einschrauben.
STIFT-NOCKEN-ANWENDUNG
1Collocare il piede e la gamba all’interno della fodera morbida tenendo il tallone saldamente
all’indietro; si raccomanda di indossare una calza.
2Si possono inserire delle imbottiture per riempire lo spazio in più ai due lati della caviglia o in
corrispondenza del tallone. La linguetta più grande imbottita deve venire posizionata sopra la
parte superiore del piede prima di fissare la fodera.
3Chiudere la fodera con le chiusure di Velcro in modo che sia ben aderente.
4Posizionare il tallone contro la parte posteriore dello stivaletto amovibile. I rinforzi verticali del
supporto devono venire posizionati sulla linea mediana sopra la caviglia.
5Premere i rinforzi verticali contro la fodera. Se ci fosse una leggera sovrapposizione, collocare il
rinforzo verticale sotto la parte sovrapposta. (Questo permetterà la successiva rimozione del
supporto senza cambiare la posizione del rinforzo verticale).
6Posizionare le cinghie per la tibia alternandole e fissarle.
7Determinare l’angolo necessario di flessione dorsale e/o di flessione plantare e regolarlo
secondo le istruzioni che seguono. Nota: le regolazioni devono essere eseguite dall’operatore
sanitario che assiste direttamente il paziente.
8Se necessario i rinforzi verticali possono essere curvati secondo le esigenze di ciascun paziente.
Si può usare il bordo di un tavolo o una sedia per curvarli.
CAVIGLIA FISSA
Il deambulatore Pin Cam viene spedito dalla fabbrica in posizione neutra (0°).
Se si preferisse una posizione diversa da quella neutra, eseguire quanto segue:
1Rimuovere la vite inferiore della copertura e ruotare la copertura di 180° esponendo così la vite
superiore della copertura. Allentare tale vite superiore senza estrarla.
2Ruotare la copertura in modo da consentire l’estrazione dei due fermi del perno. I perni possono
essere facilmente estratti spingendoli dal retro.
3Notare i contrassegni angolari della parte a disco della giuntura per la caviglia e rimettere i
perni nei fori appropriati, per es.,15—15 per 15° di flessione plantare.
4Serrare di nuovo la vite superiore della copertura.
5Ruotare la copertura di plastica finché l’apertura non è rivolta verso il basso. Rimettere la vite
inferiore del coperchio.
MOVIMENTO LIBERO O LIMITATO
1 Rimuovere la vite hexsocket superiore per ruotare la copertura della cerniera.
2Ruotare la copertura in modo da consentire l’estrazione dei due fermi del perno. I perni possono
essere facilmente estratti spingendoli dal retro.
3Selezionare i fori appropriati dei fermi per il movimento limitato e rimettere i fermi. Per il
movimento libero, i fermi non vanno rimessi.
4Non fissare di nuovo la vite superiore del coperchio per le regolazioni per il movimento libero o
limitato.
5 Ruotare la copertura di plastica finché l'apertura non è rivolta verso l'alto. Rimettere a posto la
vite hexsocket.
APPLICAZIONE DI PIN CAM
WARNING: CAREFULLY READ USE/CARE INSTRUCTIONS AND WARNINGS PRIOR TO USE.
WARNING: DO NOT REMOVE WALKER BOOT UNLESS INSTRUCTED BY YOUR MEDICAL TREATMENT PROFESSIONAL.
WARNING: THIS DEVICE WILL NOT PREVENT OR REDUCE ALL INJURIES. PROPER REHABILITATION AND ACTIVITY MODIFICATION ARE
ALSO AN ESSENTIAL PART OF A SAFE TREATMENT PROGRAM.
WARNING: IF YOU EXPERIENCE INCREASED PAIN, SWELLING, OR ANY ADVERSE REACTIONS WHILE USING THIS PRODUCT, IMMEDIATELY
CONSULT YOUR MEDICAL PROFESSIONAL.
WARNING: TAKE APPROPRIATE PRECAUTIONS WHEN WALKING ON SLIPPERY SURFACES, UNEVEN TERRAIN, OR ANY OTHER PROPERTY
CONDITION WHERE THE EXERCISE OF CAUTION APPEARS NECESSARY.
WARNING: DO NOT OPERATE A MOTOR VEHICLE OR HUMAN POWERED VEHICLE WHILE WEARING THIS WALKER BOOT.
CAUTION: FOR SINGLE PATIENT USE ONLY. OUTER SOLE MAY DETERIORATE WITH MULTIPLE USES.
CAUTION: DEVICE CONTAINS LATEX—NON SKIN CONTACTING COMPONENTS.
WARNUNG: VOR GEBRAUCH BITTE SORGFÄLTIG ALLE ANLEITUNGEN ZUM GEBRAUCH UND ZUR PFLEGE SOWIE DIE WARNUNGEN LESEN.
WARNUNG: DEN WALKER-STIEFEL NICHT ENTFERNEN, AUSSER AUF ANWEISUNG DES ARZTES / QUALIFIZIERTEN PFLEGEPERSONALS.
WARNUNG: DIESES GERÄT KANN NICHT ALLE VERLETZUNGEN VERHINDERN ODER LINDERN. ANGEMESSENE REHABILITATION UND
MODIFIZIERUNG DER AKTIVITÄTEN SIND UNERLÄSSLICHER BESTANDTEIL EINES SICHEREN BEHANDLUNGSPROGRAMMS.
WARNUNG: WENN BEI DER VERWENDUNG STÄRKERE SCHMERZEN, SCHWELLUNGEN ODER ANDERE NEBENWIRKUNGEN AUFTRETEN,
KONSULTIEREN SIE BITTE SOFORT IHREN ARZT.
WARNUNG: BESONDERE VORSICHT IST BEIM GEHEN AUF RUTSCHIGEM, GLATTEM ODER UNEBENEM BODEN GEBOTEN, ODER WENN ANDERE
BEDINGUNGEN ZUTREFFEN SOLLTEN, DIE EINE ERHÖHTE VORSICHT RATSAM ERSCHEINEN LASSEN.
WARNUNG: WÄHREND DES TRAGENS DES WALKER-STIEFELS KEIN KRAFTFAHRZEUG ODER EIN DURCH MENSCHENKRAFT ANGETRIEBENES
FAHRZEUG BETREIBEN.
ACHTUNG: NUR FÜR EINEN EINZELNEN PATIENTEN VERWENDEN. DIE DECKSOHLE KANN SICH NACH MEHRFACHEM TRAGEN ABNUTZEN.
ACHTUNG: PRODUKT ENTHÄLT LATEX – DIESE TEILE KOMMEN NICHT MIT DER HAUT IN BERÜHRUNG.
AVVERTENZA:PRIMA DI UTILIZZARE IL DISPOSITIVO, LEGGERE ATTENTAMENTE LE ISTRUZIONI E LE AVVERTENZE RELATIVE ALL'USO E
ALLA MANUTENZIONE.
AVVERTENZA:NON TOGLIERSI LO STIVALETTO PER DEAMBULAZIONE SE NON DIETRO ORDINE DELL'OPERATORE SANITARIO.
AVVERTENZA:QUESTO DISPOSITIVO NON PREVIENE NÉ RIDUCE ALCUNA LESIONE. PARTE ESSENZIALE DI UN PROGRAMMA TERAPEUTICO
COMPLETO SONO ANCHE UNA RIABILITAZIONE ADEGUATA E LA MODIFICA DELLE ATTIVITÀ SVOLTE.
AVVERTENZA: SE DURANTE L'USO SI ACCUSANO UN AUMENTO DI DOLORE, GONFIORE O QUALUNQUE ALTRA REAZIONE AVVERSA,
CONSULTARE IMMEDIATAMENTE IL PROPRIO OPERATORE SANITARIO.
AVVERTENZA: ADOTTARE PRECAUZIONI ADEGUATE QUANDO SI CAMMINA SU SUPERFICI SCIVOLOSE, TERRENO ACCIDENTATO O SE LE
CONDIZIONI DEL PERCORSO SONO TALI DA RICHIEDERE PARTICOLARE ATTENZIONE.
AVVERTENZA: NON GUIDARE AUTOMOBILI O ALTRI VEICOLI CHE NECESSITANO DEL COMANDO DI UNA PERSONA QUANDO SI PORTA
QUESTO STIVALETTO PER DEAMBULAZIONE.
ATTENZIONE: ESCLUSIVAMENTE PER UN SINGOLO PAZIENTE. LA SUOLA ESTERNA POTREBBE DETERIORARSI SE USATA RIPETUTAMENTE.
ATTENZIONE: IL DISPOSITIVO CONTIENE COMPONENTI IN LATTICE CHE NON VENGONO A CONTATTO CON LA PELLE.

This manual suits for next models

3

Other Breg Medical Equipment manuals

Breg Freestyle OA Brace User manual

Breg

Breg Freestyle OA Brace User manual

Breg SP40180-000 User manual

Breg

Breg SP40180-000 User manual

Breg AFO Attachment User manual

Breg

Breg AFO Attachment User manual

Breg Wrist Brace User manual

Breg

Breg Wrist Brace User manual

Breg Quantum OA User manual

Breg

Breg Quantum OA User manual

Breg Softgait Air User manual

Breg

Breg Softgait Air User manual

Breg polar care cube User manual

Breg

Breg polar care cube User manual

Breg 100628-020 User manual

Breg

Breg 100628-020 User manual

Breg OA IMPULSE User manual

Breg

Breg OA IMPULSE User manual

Breg Softgait Walker User manual

Breg

Breg Softgait Walker User manual

Breg EPIC LP TLSO 456 User manual

Breg

Breg EPIC LP TLSO 456 User manual

Breg K.T.K. User manual

Breg

Breg K.T.K. User manual

Breg Softgait Walker Short User manual

Breg

Breg Softgait Walker Short User manual

Breg Polar Care 500 User manual

Breg

Breg Polar Care 500 User manual

Breg Polar Care Glacier User manual

Breg

Breg Polar Care Glacier User manual

Breg NINJA User manual

Breg

Breg NINJA User manual

Breg Deluxe Shoulder Slings and Immobilizers User manual

Breg

Breg Deluxe Shoulder Slings and Immobilizers User manual

Breg VPULSE User manual

Breg

Breg VPULSE User manual

Breg Polar Care 500 User manual

Breg

Breg Polar Care 500 User manual

Breg S.T.K. Shoulder Therapy Kit User manual

Breg

Breg S.T.K. Shoulder Therapy Kit User manual

Breg Dorsal Night Splint User manual

Breg

Breg Dorsal Night Splint User manual

Breg T Scope Premier User manual

Breg

Breg T Scope Premier User manual

Breg PostOp User manual

Breg

Breg PostOp User manual

Breg OA IMPULSE PUSH User manual

Breg

Breg OA IMPULSE PUSH User manual

Popular Medical Equipment manuals by other brands

Huntleigh Nimbus II Service manual

Huntleigh

Huntleigh Nimbus II Service manual

Drager Babylog VN500 Pocket guide

Drager

Drager Babylog VN500 Pocket guide

Coltene PerFect TCS II owner's guide

Coltene

Coltene PerFect TCS II owner's guide

Organ recovery systems LifePort Kidney Transporter LKT201 Instructions for use

Organ recovery systems

Organ recovery systems LifePort Kidney Transporter LKT201 Instructions for use

NuSight Medical NuLids user manual

NuSight Medical

NuSight Medical NuLids user manual

Medicap Precise 1100 S Instructions for use

Medicap

Medicap Precise 1100 S Instructions for use

Mac Medical IVS-3002 instruction manual

Mac Medical

Mac Medical IVS-3002 instruction manual

Rigel Medical UniPulse 400 quick start guide

Rigel Medical

Rigel Medical UniPulse 400 quick start guide

Beurer FM 250 Instructions for use

Beurer

Beurer FM 250 Instructions for use

Numa NumaLink-3.0 User's guide and service manual

Numa

Numa NumaLink-3.0 User's guide and service manual

SOMNOmedics SOMNOtouch NIBP Flow instruction manual

SOMNOmedics

SOMNOmedics SOMNOtouch NIBP Flow instruction manual

Norma Face Shield instructions

Norma

Norma Face Shield instructions

DeVilbiss Healthcare SLEEPCUBE DV57BR manual

DeVilbiss Healthcare

DeVilbiss Healthcare SLEEPCUBE DV57BR manual

DJO Donjoy IceMan CLEAR3 quick start guide

DJO

DJO Donjoy IceMan CLEAR3 quick start guide

Orpyx SURROSENSE RX Instructions for use

Orpyx

Orpyx SURROSENSE RX Instructions for use

laerdal Resusci Baby QCPR user guide

laerdal

laerdal Resusci Baby QCPR user guide

BLACK & BLACK SURGICAL VITRUVIAN B89025 Instructions for use manual

BLACK & BLACK SURGICAL

BLACK & BLACK SURGICAL VITRUVIAN B89025 Instructions for use manual

ECOPOSTURAL C3542 instructions

ECOPOSTURAL

ECOPOSTURAL C3542 instructions

manuals.online logo
manuals.online logoBrands
  • About & Mission
  • Contact us
  • Privacy Policy
  • Terms and Conditions

Copyright 2025 Manuals.Online. All Rights Reserved.